
How to Connect Two Horizontal Drain Pipes: Step-by-Step Guide for a Leak-Free Joint
To connect two horizontal drain pipes effectively and ensure a leak-free joint, first assess the material, diameter, slope, and any applicable code requirements. Begin by shutting off and draining the line. Clean and deburr the pipe ends, then select a compatible coupling—use solvent-weld for PVC/ABS or a rubber coupling with stainless clamps for cast iron. Apply primer and adhesive or a gasket according to the manufacturer’s instructions. Align the pipes, insert them fully into the coupling, and secure them to maintain the slope. Finally, allow the joint to cure and test for leaks. For detailed guidance, troubleshooting tips, product recommendations, and advice on when to hire a professional, continue reading.
What This Guide Helps You Achieve
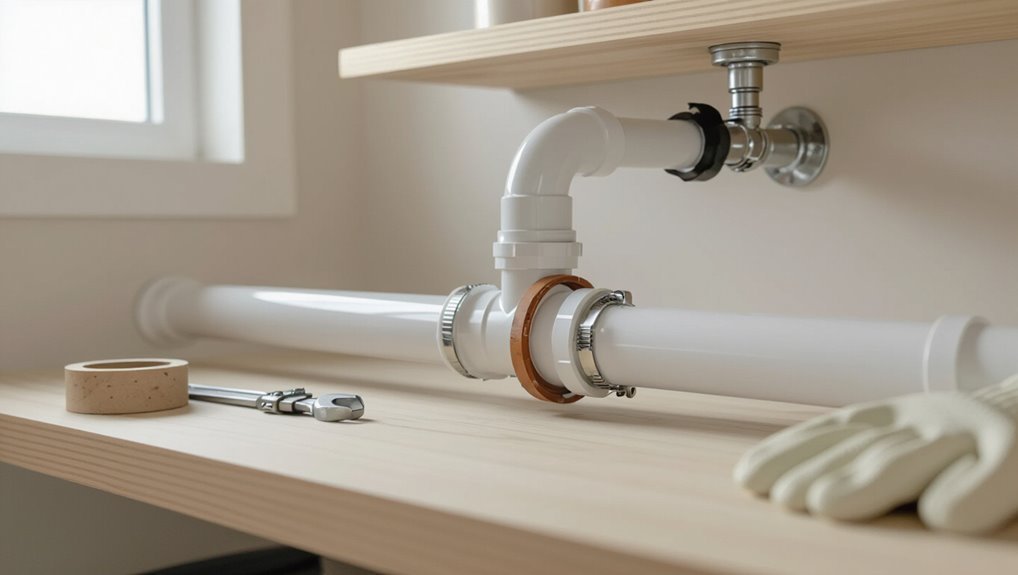
This guide explains when it is appropriate to join two horizontal drain pipes and the conditions that warrant connection.
It outlines the typical results to expect after a proper joint is made.
It also describes clear indicators to confirm a joint is leak-free.
When to connect two horizontal drain pipes
Determine the right moment to join two horizontal drain pipes by evaluating flow capacity, alignment, and code compliance. The guide clarifies when to connect two horizontal drain pipes: after capacity checks, proper slope confirmation, and permit review. Timing depends on system load, existing connections, and accessibility for sealing. Choose moments minimizing service disruption and meeting local regulations.
| Factor | Action |
|---|---|
| Capacity | Verify |
| Alignment | Adjust |
Typical outcomes and how to know a joint is leak-free
When two horizontal drain pipes are joined correctly, the expected outcomes include uninterrupted flow, stable alignment under normal loads, and a reliable seal that resists seepage and odor migration.
Confirmation of a leak-free joint is achieved through visual inspection, pressure or water testing, and monitoring for stains or dampness over time.
Documented success also includes audible silence (no gurgling), no corrosion at the joint, and consistent test results.
Quick Overview: Method Summary and Tools Needed
The safest approach is to join matching-diameter pipes with a compatible coupling and proper seals, ensuring slope and support meet code.
Required tools and materials typically include a measuring tape, pipe cutter or saw, deburring tool, adjustable wrench, coupling or solvent-weld fitting, primer and solvent (for PVC), or rubber sleeve and clamps (for cast iron), plus sealant and safety gear.
The following sections outline the step-by-step method and specific tool choices for common pipe types.
Direct-answer summary of the safest approach
Start by gathering the required tools and materials—PVC or ABS couplings, a short length of matching pipe, primer and solvent cement for plastic, rubber coupling with stainless clamps for cast-iron or mixed materials, a hacksaw or pipe cutter, measuring tape, and safety gloves and eye protection—and inspect both drains to confirm pipe type, diameter, alignment, and condition.
Use matching-material couplings, cut squarely, deburr, dry-fit, then permanently join per manufacturer instructions.
Required tools and materials
A compact kit of the right fittings, a short matching pipe, and a few hand tools is all that’s needed to connect two drain pipes safely and effectively.
Essentials include compatible couplings, a stub pipe, sealing material, and basic tools.
Recommended items:
- Coupling or slip connector
- Short matching pipe section
- Rubber gaskets or solvent cement
- Pipe cutter, wrench, and cleaning brush
Understand the Pipe Types and Measurements
Different horizontal drain pipe materials—PVC, ABS, cast iron, and copper—have distinct appearances and connection requirements.
Pipe diameter and schedule should be measured or marked to guarantee compatible joins.
Fittings vary by both material and size, so matching type and dimension is essential for a reliable connection.
Common horizontal drain pipe materials (PVC, ABS, cast iron, copper)
When selecting horizontal drain piping, homeowners and professionals must recognize the distinct materials—PVC, ABS, cast iron, and copper—because each offers different strength, corrosion resistance, joint types, and code limitations that affect installation and long-term performance.
PVC is lightweight and solvent-welded; ABS is impact-resistant with similar fittings.
Cast iron provides durability and sound control but needs heavier support.
Copper resists heat and corrosion yet costs more.
How to identify pipe diameter and schedule
Selecting the correct material is only part of proper drain installation; accurately identifying pipe diameter and schedule determines fit, flow capacity, and wall strength.
Measure outside diameter and, for plastic, check printed nominal size. Use calipers for precision and compare to manufacturer charts to convert OD to nominal diameter.
Determine schedule (e.g., 40, 80) by wall thickness markings or spec sheets to guarantee pressure and stiffness requirements.
How fittings differ by material and size
Although pipes may appear interchangeable, fittings vary considerably by material and size, affecting connection methods, chemical compatibility, and mechanical strength.
PVC, ABS, cast iron, copper and PEX require specific fittings and joining techniques—solvent weld, threaded, soldered, crimped or rubber-sleeve couplings.
Size refers to nominal diameter and wall thickness (schedule); mismatched types or schedules cause leaks or premature failure.
Safety and Preparation Steps
Before beginning, the system should be turned off, isolated, and fully drained to prevent leaks or contamination.
The technician should don appropriate personal protective equipment and arrange a clear, well-lit workspace.
Pipes and fittings must be inspected for damage, corrosion, and proper alignment before proceeding.
Turn-off, isolate, and drain the system
Shut off the water supply and electrical power to the affected fixtures, then isolate the drain section to prevent accidental flow while work proceeds.
Close nearby valves, cap or plug both pipe ends, and open upstream fixtures to relieve pressure.
Drain trapped water into a bucket and flush with a small hose if needed.
Verify dryness before cutting or joining pipes.
Personal protective equipment and workspace setup
Several essential pieces of personal protective equipment (PPE) and a clear workspace are required to minimize injury and contamination when working on drain connections.
The worker guarantees ventilation, lighting, and organized tools before starting.
Recommended items include:
- Safety goggles and face shield
- Chemical-resistant gloves
- Protective clothing and knee pads
- Slip-resistant footwear and dust mask
Inspecting pipes for damage and alignment
Inspect the pipes visually and by touch for cracks, corrosion, deformities, or loose fittings that could compromise a watertight joint; pay particular attention to the ends, threads, and any areas that show discoloration or pitting.
Confirm straightness and matching diameter, measure for proper overlap, and verify alignment with supports.
Replace or repair damaged sections before proceeding to guarantee a reliable, leak-free connection.
Step-by-Step: How to Join Two Horizontal Drain Pipes
The procedure for joining two horizontal drain pipes begins with measuring and marking the cut locations, then cutting squarely and deburring the edges to guarantee a clean fit.
Next the installer dry-fits all components to verify alignment and selects the appropriate connector or coupling for the pipe material and diameter.
Finally, the connector is prepared and the proper primer, adhesive, or sealant is applied according to the material’s instructions before final assembly.
Step 1 Measure and mark cut locations
Measure the existing pipes and mark cut points clearly before any cutting begins.
The person verifies pipe diameters, alignment, and overlap required for the chosen coupling. Using a straightedge and pencil or tape, they mark both pipes, allowing for coupling insertion depth and any gasket or sleeve.
Measurements are double-checked and photographed or noted to guarantee symmetric, accurate cuts later.
Step 2 Cut pipes squarely and deburr edges
With cut lines marked and confirmed, the person prepares to cut the pipes squarely to verify a proper fit.
Using a fine-toothed saw or tubing cutter, straight, controlled strokes produce perpendicular ends.
After cutting, a deburring tool or file removes burrs and sharp edges inside and out.
Clean the surfaces of chips and dust to confirm secure, leak-free connections in subsequent steps.
Step 3 Dry-fit components and check alignment
Place the cleaned pipe ends and fittings together without adhesive to confirm fit and alignment before committing to a joint.
The installer visually inspects gaps, rotation, and axial alignment, ensuring proper slope for drainage. Components should sit fully engaged with no stress or forced angles.
If misalignment exists, adjust pipe positions, re-measure cuts, or reposition supports until a straight, stable dry fit is achieved.
Step 4 Select and prepare the correct connector or coupling
Choose a connector that matches the pipe material, diameter, and joint type, then prepare it and the pipe ends for a secure seal.
Inspect coupling for damage, confirm gasket or sleeve compatibility, and select appropriate clamps or fasteners.
Clean and deburr pipe ends, measure insertion depth, mark alignment, and slip the connector on to verify fit before final bonding or mechanical fastening.
Step 5 Apply primer/adhesive or sealant per material
Apply the appropriate primer, adhesive, or sealant according to the pipe materials and connector type, following manufacturer instructions for compatibility and cure times.
Use solvent cement for PVC/CPVC, primer then cement for schedule 40 joints, silicone or butyl for rubber couplings, and epoxy or recommended adhesives for metal.
Apply evenly, avoid excess, observe recommended open and cure times, and guarantee a clean, dry surface.
Step 6 Assemble joint and ensure proper engagement
With primer, adhesive, or sealant set as specified, the pipes and connector are brought together for final assembly.
The installer aligns markings, inserts pipe ends fully into the coupling or hub, and rotates slightly if recommended to distribute adhesive.
Visual and tactile checks confirm uniform engagement and gasket seating. Excess sealant is wiped away.
Allow manufacturer-recommended cure time before testing.
Step 7 Support, slope, and secure the joined run
Once the joint has cured, the installer must support the connected run to maintain the correct slope and prevent joint stress. Supports are placed at regular intervals, checked for level, and adjusted so the pipe maintains the required fall toward the drain.
Clips, hangers, or saddles are secured to structure, isolating vibration, avoiding point loads, and allowing thermal movement while keeping alignment and preventing sagging or uplift.
Step 8 Cure time, pressure test, and final inspection
Several key actions finalize the joint: allowing the adhesive or solvent to cure fully for the manufacturer-specified period, conducting a pressure or water-tightness test to verify integrity, and performing a thorough visual and functional inspection to confirm alignment, supports, and clean finishes.
The inspector documents test results, checks for leaks, verifies slope and anchor points, and rechecks fittings; corrective steps are taken if defects appear.
Material-Specific Procedures and Notes
The following section outlines practical procedures and cautions for common material pairings encountered when joining drains.
It covers PVC-to-PVC methods (solvent welding and rubber couplings), ABS-to-ABS and PVC-to-ABS connection techniques, and the appropriate fittings and seals for connecting cast iron, copper, or other metal drains to plastic.
Specific joint preparation, approved adapters, and corrosion or code considerations are highlighted for each material combination.
PVC-to-PVC connections (solvent weld and rubber couplings)
For PVC-to-PVC drain connections, two reliable methods prevail: solvent welding for permanent, watertight joints and rubber (no-hub or flexible) couplings for quick, serviceable links. The installer selects solvent cement for smooth, clean fittings; rubber couplings suit misaligned or replaceable runs. Cure times and clamp torque must follow manufacturer specs.
| Method | Use | Notes |
|---|---|---|
| Solvent weld | Permanent | Clean, primer, cure |
| Rubber coupling | Serviceable | Tighten clamps |
ABS-to-ABS and PVC-to-ABS transitions
Moving from PVC-only joints to connections involving ABS requires attention to material compatibility and correct adhesives.
ABS-to-ABS uses ABS cement and properly cleaned, chamfered ends; primer is not used.
PVC-to-ABS changes require a listed transition solvent cement or a mechanical coupling rated for both materials.
Confirm surfaces are dry, follow manufacturer cure times, and test for leaks before burying or insulating.
Connecting cast iron to plastic
When joining cast iron to plastic, select a conversion method that accommodates differences in rigidity, diameter tolerances, and thermal expansion.
Use a rubber gasketed adaptor or Fernco sleeve sized to the cast iron hub; cut and deburr both ends, guarantee proper seating, and tighten stainless clamps evenly.
Apply approved primer/solvent or sealant per plastic type and test for leaks under normal flow and slight pressure.
Copper or metal drain adaptations
After addressing cast iron-to-plastic connections, attention turns to adapting copper or other metal drain lines, which require different fittings and techniques due to soldering, brazing, or compression joints and differing thermal behavior.
Use flux and proper heat control for soldered joints, select compatible connection fittings or dielectric unions for dissimilar metals, and test for leaks under pressure before final insulation and support.
Common Problems and How to Fix Them
Common issues include leaks at the joint, misalignment or sagging, and failures from chemical incompatibilities or adhesive breakdown.
For each, causes are identified and stepwise corrective actions are provided, such as reseating and re-sealing joints, realigning and supporting pipes, and selecting compatible solvents and adhesives.
The following sections outline diagnostic checks and precise fixes to restore a reliable, code-compliant connection.
Leaks at the joint causes and stepwise fixes
Leaks at pipe joints typically result from poor fit, degraded seals, incorrect alignment, or corrosion that compromises the connection.
Inspect joint, drain water, and disassemble coupling. Clean mating surfaces, remove corrosion or old sealant, and replace worn gaskets or O-rings.
Reapply appropriate lubricant or sealant, reseat pipes with proper spacing, tighten clamps evenly, and test under pressure to confirm leak-free performance.
Misalignment and sagging corrective actions
Several factors can cause drain lines to become misaligned or sag, including inadequate support, thermal expansion, improper slope, or shifting foundations.
Inspect runs, locate low spots, and add or adjust pipe hangers and saddles to restore proper slope.
Replace damaged sections, use flexible couplings for slight offsets, and re-secure connections.
Verify alignment with a level and test for drainage before finishing.
Chemical incompatibilities and adhesive failures
After correcting misalignment and sagging, attention should shift to material compatibility and joint adhesives, which are frequent sources of failure in drain systems.
Identify pipe materials, select adhesives rated for those plastics or metals, and avoid solvents that degrade seals.
Clean surfaces, follow manufacturer cure times, and test joints under pressure.
Replace incompatible components rather than forcing mismatched adhesive bonds.
Recommended Products, Connectors, and Alternatives
For reliable connections, the article outlines recommended products and alternatives tailored to common materials and situations.
Key considerations include:
- Coupling types (slip, rubber, Fernco, compression) and their ideal uses
- Sealants/adhesives matched to PVC, ABS, cast iron, and metal
- Criteria for choosing flexible versus rigid connections
- Alternative methods like mechanical joints and changeover fittings
Practical examples and selection tips follow to help readers pick the right connector and seal.
Types of couplings and when to use each
Selecting the right coupling guarantees a secure, leak-free connection between drain pipes and varies with material, pipe size, alignment, and whether the joint must be permanent or removable.
Options include rubber sleeve with hose clamps for misaligned or temporary joins, PVC solvent-weld couplings for permanent plastic runs, compression couplings for easy maintenance, and stainless steel band couplers for metal pipes or high-strength repairs.
Sealants and adhesives recommended by material
When pipe material and joint type dictate the sealing approach, matching sealant chemistry and application method guarantees durability and leak resistance.
For PVC use PVC solvent cement and primer; ABS requires ABS cement.
Cast iron benefits from OSI or silicone mastics and lead-free pipe dope on threaded fittings.
Rubber gaskets and silicone sealants suit flexible couplings.
Always follow manufacturer cure times and compatibility charts.
When to use flexible vs. rigid connections
A clear choice between flexible and rigid connections depends on movement, alignment, and service conditions.
Flexible couplings suit thermal expansion, vibration, slight misalignment, and access for maintenance; choose stainless clamps and EPDM sleeves for durability.
Rigid couplings suit permanent, well-aligned runs requiring maximum flow and structural support; use solvent-weld, gasketed mechanical, or threaded fittings per material and code.
Select based on expected movement.
Testing, Maintenance, and Long-Term Prevention
The section outlines how to perform a basic water or air pressure test to confirm joint integrity after installation.
It then describes routine inspections for leaks, odors, or slow drainage and how to clear common blockages.
Finally, it offers practical steps to reduce future joint failures, including proper support, correct sealant use, and periodic retightening checks.
How to perform a water/air pressure test
Begin by isolating the drain run and sealing all cleanouts and openings.
Then choose either a water or air method based on pipe material and site conditions; water tests detect leaks visually and are gentler on plastic, while air tests are faster but require caution to avoid overpressurizing brittle piping.
For water: fill, stabilize, inspect joints for seepage.
For air: pressurize to recommended psi, monitor gauge, listen for leaks.
Routine checks for leak signs and blockages
Following a successful water or air pressure test, regular inspections help guarantee small issues are caught before they become failures. Inspect joints, seals, and surrounding areas monthly for dampness, stains, or odor. Flush and run water to reveal slow drains. Clear visible debris and record findings.
| Item | Action |
|---|---|
| Joints | Visual check |
| Seals | Tighten/replace |
| Flow | Flush test |
| Debris | Remove |
| Record | Log results |
Tips to prevent future joint failures
When preventive measures are prioritized, joint longevity improves markedly through consistent testing, timely maintenance, and targeted long-term strategies.
Inspect seals regularly, perform pressure or water tests after installation, and replace worn gaskets promptly.
Maintain proper slope and support to reduce stress, clear debris to prevent clogs, and use corrosion-resistant materials.
Schedule periodic inspections and document findings to spot trends early.
When to Call a Professional
If the repair involves persistent leaks, damaged sewer lines, unusual odors, or requires cutting into structural elements, the task likely exceeds typical DIY scope and a professional should be called.
Homeowners should be ready to provide the plumber with the pipe materials and sizes, a clear description of symptoms, photos or videos of the area, and any recent work or tests already performed.
This information speeds diagnosis and helps the contractor bring appropriate tools and replacement parts.
Signs the job exceeds DIY scope
Several clear warning signs indicate that connecting two drain pipes has moved beyond typical DIY limits and requires a professional’s assessment.
Persistent leaks after multiple repairs, extensive corrosion or crumbling pipe material, complex fittings or offsets, sewer gas odors, repeated backups, visible structural damage, or inaccessibility behind walls/floors signal the need for licensed plumbers to diagnose, use specialized equipment, and guarantee code-compliant, durable solutions.
What information to provide a plumber for faster resolution
Prepare clear, concise details to help a plumber diagnose and resolve drain-connection issues more quickly:
- Include the exact location of the problem (which fixtures and where in the building).
- A short history of symptoms and when they began.
- Any repairs or materials previously used.
- Visible signs such as leaks, odors, or corrosion.
- Relevant photos or short videos.
- Pipe materials and approximate sizes if known.
- Access limitations (behind walls, under floors, etc.).
- The building’s age and any recent work that could affect plumbing.
- Location
- Timeline
- Evidence
- Constraints
Conclusion
With the steps complete, the joint should sit like a well-tied shoelace—secure, unseen, and ready to bear daily strain. The installer can expect a leak-free connection when pipe types match, measurements are accurate, seals are tight, and pressure-tested checks pass. Routine inspections and mindful maintenance keep the line reliable; persistent problems or complex configurations signal the prudent moment to summon a professional for durable, code-compliant repairs and peace of mind.
