How to Connect a Toilet to a Waste Pipe: Step-by-Step Guide for DIY and Pros
To connect a toilet to a waste pipe, start by inspecting the flange and rough-in, then shut off the water supply and remove the old toilet. Install a matching flange and select a wax ring or rubber gasket suitable for the outlet and floor height. Position the toilet bowl over the aligned bolts, tighten them evenly, reconnect the water supply, open the valve, and check for leaks and proper flushing. If you encounter complex setups or ongoing leaks, it’s best to consult a professional. Follow the detailed step-by-step guide for more specific instructions.
Overview of Connecting a Toilet to a Waste Pipe
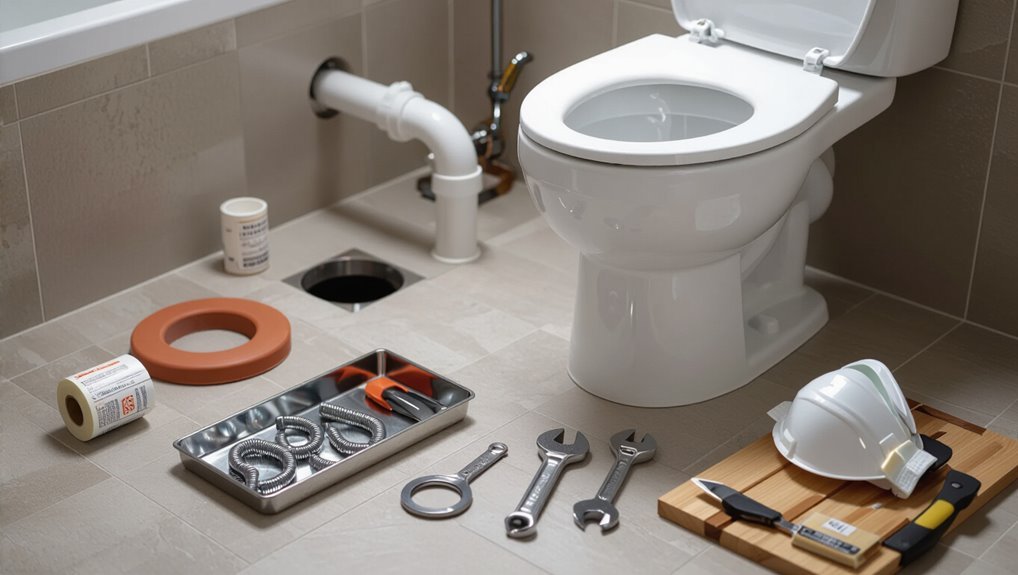
The overview distinguishes situations suited to a do-it-yourself installation from those that require a licensed plumber, noting common warning signs and permit considerations.
It summarizes the practical skill level, estimated time, and key safety precautions needed to complete the job reliably.
A concise tools-and-materials checklist follows so readers can confirm they have the necessary parts and equipment before starting.
When to connect a toilet yourself vs. hire a plumber
When is a homeowner best served by tackling a toilet-to-waste-pipe connection themselves versus calling a plumber?
A homeowner may attempt how to connect a toilet to a waste pipe for straightforward replacements, accessible fittings, and limited scope jobs to save cost.
Hire a plumber for complex layouts, mains tie-ins, persistent leaks, code compliance, or when unexpected issues arise beyond basic procedures and tools.
Required skill level, time, and safety considerations
Moving from the decision of DIY versus pro, evaluating required skill level, time, and safety helps determine whether a homeowner should proceed.
Basic plumbing familiarity, steady hands, and ability to follow instructions suit simple flange or wax-ring installs.
Complex soil-stack work or intermittent leaks requires advanced skills and permits.
Allocate 1–4 hours for typical installs; prioritize ventilation, protective gear, and shutoff knowledge.
Tools and materials checklist
Essential tools and materials for connecting a toilet to a waste pipe fall into clear categories: wrenches and screwdrivers for fastening, a wax ring or rubber gasket for the seal, closet bolts and flange (or flange repair kit), a supply line and shutoff valve, appropriate PVC or ABS fittings and couplings for the waste connection, sealant or plumber’s putty, caulk for finishing, and safety gear such as gloves and eye protection.
- Wax ring or rubber gasket
- Closet bolts and flange
- Wrenches, screwdrivers, supply line
- PVC/ABS fittings and couplings
- Sealant, caulk, protective gloves
Understanding Toilet and Waste Pipe Basics
A clear grasp of common toilet types and outlet configurations—such as floor-mount and wall-hung models—is essential before any connection work begins.
Equally important are the characteristics of waste pipes and materials (PVC, ABS, cast iron), appropriate drain sizes, required pitch and trap arrangements, and how the flange, wax ring, and connectors interface.
This section outlines those basic elements so readers can match fixture and pipe requirements accurately.
Common toilet types and outlet configurations (floor-mount, wall-hung)
Toilet installations generally fall into two main categories—floor-mount and wall-hung—each defined by how the outlet aligns with the waste pipe and how the fixture is supported.
Floor-mount toilets connect to a flange on the finished floor, offering gravity drainage and easier retrofit.
Wall-hung units mount to a carrier frame, with outlets recessed into the wall for concealed plumbing and space-saving aesthetics.
Waste pipe types and materials (PVC, ABS, cast iron)
Floor-mounted and wall-hung designs dictate different outlet placements and connection methods, which makes matching the toilet to compatible waste pipe materials important. Common materials include PVC, ABS, and cast iron; each offers corrosion resistance, sound dampening, and joining methods. Choose by code compatibility, durability, and noise control.
| Material | Notes |
|---|---|
| PVC | Lightweight, glue joints |
| Cast iron | Durable, quiet |
Drain sizes, pitch, and trap requirements
Drainage performance depends on correctly sized pipes, proper pitch, and a compliant trap configuration.
Standard toilet outlets typically require a 3- or 4-inch trap and waste line; local codes dictate minimum diameters.
A 1/4-inch per foot pitch prevents standing water while avoiding excessive slope that impedes siphoning.
Trap placement must guarantee airtight seals and accessible cleanouts for maintenance.
Flange, wax ring, and connector components explained
A secure connection between the fixture and the waste line depends on three basic parts: the flange, the wax ring, and the connector.
The flange anchors the toilet to the floor and aligns with the drain. The wax ring seals against sewer gas and prevents leaks.
The connector (closet flange extension or flexible tube) bridges misalignment and varying heights for a watertight joint.
Preparing the Installation Site
Before installing the toilet, the installer should inspect the existing waste pipe and flange for damage or corrosion and measure and mark the correct toilet placement.
The water supply must be shut off and the area cleared to provide safe, unobstructed access.
Any uneven floors or flange-height discrepancies should be identified and addressed with shims, flange extenders, or repairs before proceeding.
Inspecting existing waste pipe and flange condition
When preparing to connect a toilet, inspect the existing waste pipe and flange for cracks, corrosion, misalignment, and debris that could compromise a seal or obstruct flow.
Verify flange is securely anchored, level, and free of warped metal or missing bolts.
Check pipe interior for silt, roots, or hard deposits.
Note damage requiring repair or replacement before installing the toilet.
Measuring and marking for correct toilet placement
Several precise measurements guarantee the toilet aligns with the waste outlet and surrounding clearances: measure the rough-in distance from the finished wall to the center of the waste pipe, confirm side-to-side centering, and verify clearance from nearby fixtures or cabinetry.
Mark the flange center on the floor, outline the toilet base, note bolt locations, and record distances to walls, cabinets, and shower edges for final positioning.
Shutting off water and clearing the area
Shut off the toilet’s water supply at the shutoff valve and drain the tank and bowl by flushing to minimize residual water.
Empty remaining water with a sponge or small pump.
Remove nearby rugs, obstacles, and toiletries.
Lay down protective drop cloths and cardboard to protect flooring.
Keep tools, bolts, wax ring, and a bucket nearby.
Confirm adequate lighting and ventilation.
Dealing with uneven floors and flange height issues
Because floor level and flange height determine a reliable seal and stable toilet placement, the installer should assess both before fitting the bowl.
Leveling options include shimming the base, using a thicker wax ring or wax-free gasket, and raising or lowering the flange with extenders or ring adapters.
Confirm flange rests on solid substrate; repair or reinforce subflooring to prevent rocking and seal failure.
Step-by-Step: Connecting a Floor-Mount Toilet to a Waste Pipe
The process begins with safely removing the old fixture and inspecting the flange area for damage or debris.
Next, the appropriate flange or repair ring is selected and secured, followed by placement of the correct wax ring, rubber seal, or flange gasket.
Finally, the toilet bowl is set onto the outlet and aligned to guarantee a tight, level connection.
Removing an old toilet safely
Begin by turning off the toilet’s water supply and flushing to drain the tank and bowl.
Then sponge out any remaining water to prevent spills.
Disconnect the supply line, remove tank-to-bowl bolts if present, and lift the tank off.
Unscrew floor bolts, rock the bowl gently to break the seal, then lift the bowl straight up.
Plug the waste pipe temporarily with a rag or cap.
Cleaning and assessing the flange
Inspect the flange closely for cracks, corrosion, or warped metal once the toilet is removed and the waste pipe temporarily plugged.
Remove debris, old wax, and mineral buildup with a scraper and stiff brush.
Dry the area and check bolt holes for damage or elongation.
Verify flange sits flush with finished floor and confirm no hidden leaks or compromised substrate before proceeding.
Choosing and installing the correct flange or repair ring
Once the flange condition is confirmed, select a replacement or repair ring sized to match the waste pipe diameter and floor height, ensuring material compatibility with local plumbing codes.
Position the flange or ring flush with finished floor, align bolt slots to toilet horn, and secure to substrate using appropriate screws or anchors.
Verify level and rotation before final tightening to prevent leaks or stress.
Installing the wax ring, rubber seal, or flange gasket
Prepare the sealing component that matches the flange and toilet horn—wax ring, wax-free rubber seal, or flange gasket—confirming correct size, thickness, and any built-in spacer for recessed flanges.
Center the seal on the flange or press it onto the toilet horn per manufacturer instructions.
Verify flange surface is clean and dry, bolts are accessible, and the seal sits flat without twisting or gaps before lowering the bowl.
Setting the toilet bowl and aligning to waste outlet
Lower the toilet bowl carefully over the flange, keeping it level and centered so the trapway aligns with the waste outlet; small side-to-side or rotational adjustments can be made while the seal contacts the flange to assure an even, gap-free fit.
Once seated, verify alignment visually and by gently rocking to confirm full contact.
Confirm the bowl sits flat without shifting before proceeding.
Securing the toilet to the floor and torquing bolts
Secure the bowl to the floor using the flange bolts and washers, tightening by hand until snug to hold position.
With a wrench, alternately tighten each bolt in small increments to seat the base evenly.
Do not overtighten; stop when bolts are firm and base no longer rocks.
Trim and cap exposed bolt threads for a neat finish and to prevent corrosion.
Reconnecting the water supply and testing for leaks
With the bowl fastened and bolts trimmed, attention turns to restoring the water supply and checking for leaks.
The supply line is reattached to the tank inlet, hand-tightened then snugged with a wrench.
The shutoff valve opens slowly while observing connections and the tank fill.
Flushes and visual inspection confirm no drips; any leak prompts tightening or replacing fittings and washers.
Final caulking and finishing touches
Finish the installation by applying a neat bead of caulk around the toilet base and completing any remaining trim and cleanup tasks.
Allow caulk to cure per manufacturer instructions. Remove excess sealant and wipe surrounding surfaces.
Reinstall or adjust trim, bolt covers, and toilet seat.
Verify floor is dry, inspect for gaps, and confirm silicone joints are smooth and continuous for a tidy, watertight finish.
Step-by-Step: Connecting a Wall-Hung Toilet to a Waste Pipe
The procedure begins with verifying that the carrier frame and in-wall waste outlet are correctly aligned and at the proper height for the selected bowl.
Next, the carrier and flange are installed or adjusted, the bowl is mounted and the waste connection sealed, and the frame covers and access panels are secured.
Finally, the flush mechanism is tested for proper performance and the installation checked for leaks before closing access panels.
Verifying carrier frame and in-wall waste alignment
Before securing the wall-hung toilet, the installer must confirm that the carrier frame sits square and that the in-wall waste outlet aligns precisely with the fixture’s discharge; misalignment causes leaks, stress on fittings, and improper mounting.
The installer verifies horizontal and vertical alignment with a level and straightedge, checks flange orientation and clearance, and marks reference points before final attachment.
Installing or adjusting the in-wall carrier and flange
Having confirmed the carrier frame is square and the waste outlet aligns with the fixture, attention turns to installing or adjusting the in-wall carrier and flange to guarantee a watertight, load-bearing connection.
Secure flange height to match finished wall, set proper slope and seal with gasket or waxless seal, tighten mounting bolts evenly, and verify carrier anchors and fasteners meet manufacturer load and alignment specifications before closing the wall.
Mounting the bowl and sealing the connection
Proceed to mount the bowl once the in-wall carrier and flange are verified secure and level.
Align the waste outlet and hang the bowl on carrier bolts, ensuring gaskets seat correctly.
Tighten mounting nuts evenly to manufacturer torque specifications, avoiding over-tightening.
Connect and secure the pan-to-wall seals, apply recommended sealant around the flange perimeter, and trim excess for a neat, watertight joint.
Testing flush performance and sealing access panels
With the bowl secured and seals trimmed, the next step is to verify flush performance and properly seal any access panels.
Inspect for leaks, run multiple flushes, check trap seal and inlet flow, and confirm rapid evacuation without gurgling. Tighten connections if needed.
Finish by installing access panel covers, applying a continuous bead of silicone or gasket, and ensuring neat, removable sealing for future maintenance.
Alternative Connections and Adaptations
When pipes do not align, installers may use offset or flexible connectors to bridge small misalignments without major rework.
Connections to older cast iron systems commonly employ rubber couplings and specially sized adapters to guarantee a sealed joint.
Options for shortening or extending waste pipes should be chosen with code-compliant fittings, distinguishing temporary fixes from permanent solutions.
Using offset or flexible connectors for misaligned pipes
Several common installations require offset or flexible connectors to bridge misaligned toilet outlets and soil pipes; these fittings provide controlled adjustment without major rearrangement of the waste line.
Installers select rigid offset connectors for small horizontal shifts and flexible pan-to-hub or accordion-style connectors for vertical or angular misalignment.
Guarantee proper seal, correct length, and manufacturer torque limits; trim or replace if stressed or leaking.
Connecting to cast iron with rubber couplings and adapters
Connect rubber couplings and adapters to cast iron by matching diameters, seating the rubber evenly, and tightening clamps to the manufacturer’s torque specifications.
Verify mating surfaces are clean and free of rust or old sealant. Use connector adapters rated for soil pipe pressure, align without twisting the cast iron, and trim coupling sleeves if needed.
Test for leaks under water and inspect clamps after initial use.
Shortening or extending waste pipes safely
Although altering a waste pipe requires careful planning and proper tools, shortening or extending a toilet waste line can be done safely by following code, using compatible materials, and maintaining proper slope and seal integrity.
Measured cuts, deburring, and approved solvent-weld, compression, or mechanical couplings prevent leaks.
Preserve venting, observe minimum slope (1/4″ per foot), and test with water; consult code or a pro for complex runs.
Temporary vs. permanent connection options
Temporary and permanent toilet waste connections serve different needs: temporary setups prioritize speed and reversibility for testing, renovation, or interim use, while permanent connections emphasize durability, code compliance, and long-term leak resistance.
Temporary options use flexible couplings, compression fittings, or rubber boots; permanent methods employ solvent-welded PVC, glued ABS, or threaded and flanged cast-iron assemblies installed per local codes and manufacturer instructions.
Common Problems and How to Fix Them
Common installation faults include leaks at the flange or base, slow or siphoning drains linked to venting problems, and damaged flanges or broken bolts that compromise the seal.
Simple diagnostic steps—visual inspection, water tests, and checking bolt tightness—usually identify the source.
Persistent issues can cause odors after installation, which are typically resolved by repairing seals, replacing hardware, or correcting venting.
Leaks at the flange or base and diagnosis steps
Several issues can cause leaks at the toilet flange or base, and accurate diagnosis depends on observing symptoms, isolating the source, and testing seals and connections.
Inspect flange condition, wax ring integrity, and closet bolts for corrosion or looseness.
Check for cracked porcelain, uneven floor or flange height, and test with paper towels and dye to locate seepage before replacing seals, tightening bolts, or shimming the toilet.
Siphoning, slow drain, and venting issues
Diagnose siphoning, slow drains, and venting faults by observing bowl behavior during and after flushes, noting gurgling sounds, slow water evacuation, or a drop in bowl water level; these symptoms often indicate a blocked vent, partial trap obstruction, incorrect trap seal, or improper installation height that disrupts air balance and flow.
Clear vents, snake or hydro-jet blockages, verify trap weir height, and confirm proper vent connection and slope.
Dealing with cracked flanges or broken bolts
Inspect the flange and mounting bolts for cracks, corrosion, or movement before proceeding with repairs, since a damaged flange or broken bolts can cause leaks, wobbling, and seal failure.
Replace cracked plastic flanges with reinforced or cast-iron flange adapters, swap corroded bolts and use stainless steel or brass, shim or epoxy-fill gaps, and reseat the wax ring to guarantee a stable, watertight connection.
Odor problems after installation and remedies
Detecting persistent sewage smells after installing a toilet signals a compromised seal, trapped waste, or venting issues that require prompt correction.
Inspect the wax ring or flange for leaks; replace if damaged.
Check trap for debris and clean.
Verify vent stack for blockages; clear or call a pro.
Confirm wax ring compression and secure bolts to restore an airtight connection and eliminate odors.
Safety, Building Codes, and Permit Considerations
The article next addresses safety and regulatory matters that affect toilet installation, summarizing common code requirements such as trap size, flange height, and clearances.
It explains when permits and inspections are typically required, highlights backflow prevention and venting compliance, and notes potential penalties for noncompliance.
Practical tips for documenting work—photographs, receipts, and as-built notes—are also recommended to support inspections and approvals.
Typical code requirements for toilet installation
Although seemingly straightforward, toilet installation is governed by clear safety standards and local building codes that dictate sizing, venting, fixture positioning, waste-line slope, and proper connections to prevent leaks and sewer gas entry.
Typical requirements include minimum trapway size, required clearances from walls and other fixtures, correct flange height and anchoring, approved materials and joint methods, and compliant venting and cleanout access.
When a permit or inspection is needed
Building codes that define clearances, flange heights, and venting often also specify when permits and inspections are required for toilet installations.
Permits are typically required for new rough‑ins, relocating fixtures, major drainage alterations, or when work affects structural elements.
Inspections verify correct soil stack connection, trap seal, and water supply shutoffs.
Local jurisdictions determine thresholds and fees; always check before beginning.
Backflow and venting compliance
Frequently, plumbers and inspectors emphasize that proper backflow prevention and venting are critical to both health and code compliance when connecting a toilet to a waste pipe.
Install required traps, check valves, and air gaps to prevent sewage reversal.
Confirm vent stacks meet slope, size, and termination rules to maintain trap seals and neutralize pressure.
Compliance avoids odors, contamination, and inspection failures.
Tips for documenting work for inspections
Document the installation methodically to streamline inspections and guarantee safety and code adherence.
Record permits, plans, and product specs; note pipe sizes, slope, joint types, and vent connections.
Photograph each stage with timestamps and label locations.
Log pressure or water tests and inspector communications.
Keep copies of receipts and manufacturer instructions.
Store files accessibly for contractors, inspectors, and future owners.
Maintenance and Longevity Tips
Routine inspections for leaks, slow drains, and seal integrity help prevent small issues from becoming costly repairs.
Using durable materials—such as high-quality wax or rubber seals and corrosion-resistant bolts—extends service life and maintains reliable connections.
Seasonal precautions, including insulating pipes and keeping the bathroom heated during freezes, reduce risk of burst lines and seal failures.
Routine checks to prevent leaks and clogs
Inspecting the toilet and its connections on a regular schedule helps catch small issues before they become leaks or clogs.
Technicians recommend checking seals, bolts, and supply lines monthly, observing water level and tank refill, and listening for continuous running.
Clear visible debris from the trap and test flush performance.
Promptly address slow drainage, minor drips, or loose fittings to prevent escalation.
Best materials and parts for long-lasting seals
After regular checks reveal wear or minor leaks, attention should turn to selecting materials that provide durable, watertight seals.
Recommended components include high-quality wax or wax-free seals with neoprene or foam gaskets, stainless steel bolts, and silicone bedding for base joints.
Use corrosion-resistant clamps and flexible braided water supply lines.
Choose parts rated for toilet use and compatible flange heights to guarantee long-term reliability.
Seasonal and freeze-prevention measures
Prepare for seasonal temperature swings by focusing on measures that prevent freezing and moisture damage to the toilet, flange, and exposed waste lines.
Insulate exposed pipes and the closet flange with foam or heat tape where allowed. Seal gaps in exterior walls and ventilate crawlspaces.
During cold spells, maintain slight heat, drain unused fixtures, and inspect for condensation or warping to prevent long-term deterioration.
Cost Estimates and Time Expectations
A concise breakdown of likely material costs for a DIY toilet-to-waste-pipe connection helps readers budget accurately.
Estimated labor time for a competent DIYer versus hiring a professional clarifies project planning.
Guidance on when paying a pro is more cost-effective than DIY will help determine the best route for complex or time-sensitive cases.
DIY material cost breakdown
Several common parts and tools determine the bulk of a DIY toilet-to-waste-pipe project cost: the wax ring or rubber gasket, flange (or repair insert), closet bolts, flexible supply line, PVC or ABS trap adapter and short pipe, solvent or primer and cement (if used), and basic hand tools. Typical price ranges:
| Item | Estimated cost |
|---|---|
| Basic kit | $10–$40 |
| Flange/repair | $8–$60 |
| Misc. fittings | $5–$30 |
Estimated labor time for DIY vs. professional
After listing parts and prices, the next consideration is time: estimating how long a DIY toilet connection will take compared with hiring a professional.
A competent DIYer should allocate 3–8 hours depending on experience, access, and complications.
A licensed plumber typically completes the job in 1–3 hours.
Time differences reflect troubleshooting, sealing, trap alignment, and code inspections rather than basic fixture installation.
When paying for a pro is cost-effective
When unexpected complications arise—corroded flange bolts, misaligned waste lines, or concealed leaks—hiring a professional becomes cost-effective because the plumber’s experience, tools, and warranty mitigate the risk of repeated repairs and code violations.
Professionals reduce time spent, prevent water damage, source parts efficiently, and provide permits and inspections when required; upfront higher fees often offset potential repair, insurance, and compliance costs.
Troubleshooting Checklist Before Calling a Plumber
Before contacting a plumber, a brief troubleshooting checklist helps isolate simple issues and save time and cost.
Try quick tests and measurements, and gather clear details a technician will need to diagnose the problem faster:
- Check that the shutoff valve is fully open
- Measure distance from toilet flange to wall and note flange height
- Flush to observe water level and listen for unusual sounds
- Inspect wax ring area for visible leaks or stains
- Record model of toilet and any recent work or clogs
If these steps don’t resolve or identify the issue, provide the gathered information when calling for service.
Quick tests and measurements to perform
If basic visual checks haven’t revealed the source of a toilet problem, a short series of targeted tests and measurements can quickly narrow the likely causes and rule out simple fixes before a service call.
Measure water level in the tank, check fill valve shutoff and float operation, test flush volume and bowl refill, listen for leaks, and use a plunger or simple auger to confirm partial blockages.
Information to provide a plumber for faster service
Having completed quick tests and basic measurements, gather key information to streamline a plumber’s diagnosis and repair.
Provide toilet model and age, visible symptoms (leaks, gurgling, slow drain), recent changes or repairs, exact measurements (floor-to-flange height, waste pipe diameter, distance to wall), water supply details, photos or short video, and access constraints.
Note any odors, noises, or intermittent behavior.
Useful Resources and Further Reading
For further guidance on connecting a toilet to a waste pipe, the reader can consult authoritative materials that explain parts, measurements, and installation steps.
Recommended references include manufacturer guides, part specifications, and practical video walkthroughs that illustrate common techniques.
Suggested starting points are:
- Official toilet and flange manufacturer installation manuals
- Specification sheets for wax rings, bolts, and seals
- Step-by-step video tutorials from reputable plumbing channels
- Online how-to articles with photos and tool lists
- Local plumbing codes and supplier technical documents
Manufacturer guides and part specifications
Many manufacturers publish concise installation guides, parts diagrams, and specification sheets that are essential when connecting a toilet to a waste pipe. These documents clarify required fittings, flange types, trapway sizes, bolt patterns, and recommended clearances.
Technicians and DIYers should consult model-specific manuals for bolt torque, wax ring type, flange height tolerances, outlet orientation, rough-in dimensions, and approved replacement parts to guarantee compatibility and warranty compliance.
Video tutorials and how-to references
Where can one find reliable step-by-step demonstrations for connecting a toilet to a waste pipe? Trusted sources include manufacturer channels, professional plumbing organizations, and reputable home-improvement platforms.
Look for videos with clear tools lists, measurements, and safety notes. Prioritize content by licensed plumbers, verified credentials, high viewer ratings, and recent upload dates.
Cross-check techniques with written guides and local codes before proceeding.
Conclusion
Like a mason laying the final stone on a bridge, the installer connects toilet to waste pipe to complete a small but essential crossing. Each seal and bolt becomes a plank that bears daily journeys, unseen yet indispensable. With steady tools, clear plans, and occasional care, the passage remains watertight and true. Whether novice or seasoned, tending these links keeps the household river flowing—quiet, reliable, and faithfully carried away.