How to Remove a Bathtub: Step-by-Step DIY Guide for Safe, Clean Removal
To safely and cleanly remove a bathtub, start by shutting off the water supply and draining the tub completely. Next, remove the drain and overflow plates. Score and remove any caulk, and detach tiles or surrounds as necessary. Unfasten any clips or screws securing the tub in place. Protect your floors during the process, and use proper lifting techniques with a partner. For stubborn adhesive or nails, a reciprocating saw can be helpful. After removing the tub, inspect the plumbing and framing, clear any debris, and seal exposed lines. For more detailed steps, tools, safety tips, and alternative methods, continue reading.
Overview of Removing a Bathtub Safely
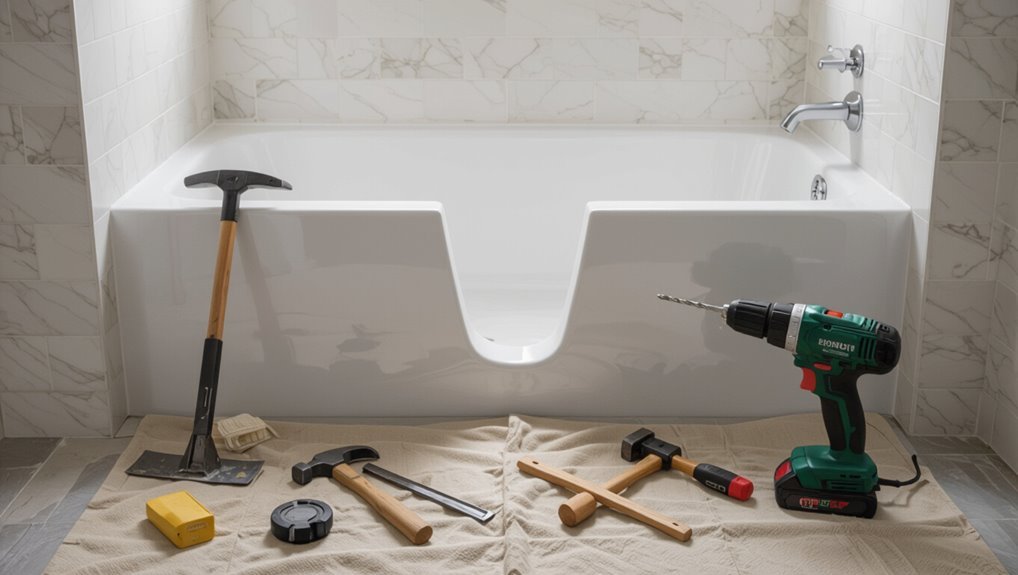
A homeowner or contractor should assess the need for bathtub removal by considering factors like damage, remodeling goals, or plumbing access.
The process typically involves disconnecting plumbing, removing fixtures and surrounding trim, and extracting the tub while protecting floors and walls.
A clear checklist of materials, tools, and personal protective equipment guarantees the job proceeds safely and efficiently.
When and why to remove a bathtub
One common trigger for removing a bathtub is the need to address persistent leaks, severe surface damage, or structural issues that simple repairs cannot fix.
Removal is also warranted for accessibility upgrades, outdated fixtures, mold contamination, or layout changes.
Homeowners weigh cost, disruption, and resale value when deciding how to remove a bathtub, often consulting professionals for complex plumbing or framing concerns.
Quick summary of the removal process
When deciding to remove a bathtub for leaks, accessibility, or mold, homeowners should understand the basic steps and safety measures before beginning work.
The process typically involves shutting off water, disconnecting plumbing, removing trim and caulk, detaching fixtures, breaking or unfastening the tub, and extracting it safely while protecting surrounding surfaces.
Final steps include cleanup and evaluating the area for repairs.
Materials, tools, and safety gear checklist
Several essential items and protective gear are required before beginning a bathtub removal to guarantee the job proceeds safely and efficiently.
A concise checklist prevents delays and reduces injury risk. Necessary materials, tools, and PPE are listed for preparedness and orderly workflow.
- Pry bar, claw hammer
- Reciprocating saw with blades
- Adjustable wrench, pliers
- Heavy-duty trash bags, drop cloths
- Gloves, safety glasses, N95 mask
Assessing Your Bathroom Before You Start
Before beginning removal, the type and construction of the tub (alcove, freestanding, drop-in, clawfoot; acrylic, cast iron, fiberglass, etc.) should be identified to determine removal method and weight.
The location of plumbing, the drain, and any structural supports must be mapped out to avoid accidental damage.
The space should be inspected for hidden hazards such as mold, asbestos, lead, or water damage, and a professional contacted for plumbing, structural, or hazardous-material issues.
Identifying tub type (alcove, freestanding, drop-in, clawfoot) and materials
A clear identification of the bathtub’s type and construction is the essential first step in planning removal.
Determine whether the tub is alcove, freestanding, drop-in, or clawfoot.
Note material: acrylic, fiberglass, cast iron, steel, or enameled porcelain.
Each type and material dictates attachment points, weight, demolition method, and disposal needs; document dimensions and visible fastenings before proceeding.
Locating plumbing, drain, and structural supports
With the tub type and material documented, attention shifts to locating the plumbing, drain, and structural supports that will determine safe removal methods.
Inspect visible supply lines, shutoff valves, and drain location; trace pipes into walls or floor.
Identify mounting flanges, ledger boards, and studs.
Note access panels and joist orientation to plan safe disconnects, temporary support, and removal sequencing.
Checking for hidden issues: mold, asbestos, lead, water damage
If signs of deterioration or discoloration appear around the tub, the area should be inspected for hidden hazards such as mold, asbestos-containing materials, lead paint, and water damage that could affect removal methods and safety.
Examine grout, caulk, flooring, and behind access panels. Note soft subfloor, staining, musty odor, or friable materials.
Document findings for containment, cleanup, and disposal planning.
When to call a professional (plumbing, structural, hazardous materials)
Signs of mold, deteriorated subflooring, suspect asbestos or lead, or unclear plumbing configurations indicate when professional help should be sought.
A licensed plumber should handle complex drain or supply rerouting; a structural engineer or contractor must assess joists, supports, or significant rot.
Certified abatement technicians are required for asbestos or lead.
Prioritize safety, permits, and documented assessments before proceeding.
Preparing the Work Area
Before any demolition begins, water should be shut off and fixtures disconnected to prevent leaks and flooding.
Flooring, walls, and nearby fixtures must be protected with drop cloths, cardboard, or plywood while ventilation and dust-control measures are put in place to limit airborne debris.
Electrical circuits serving the bathroom should be turned off and temporary lighting installed if needed for safe work conditions.
How to turn off water and disconnect fixtures
Shut off the home’s main water supply and drain any remaining pressure by opening the lowest faucets and a hot-water tap; this prevents leaks and water damage when fixtures are disconnected.
Verify shutoff with a faucet test. Cap or plug supply lines, then detach faucet handles, spouts, and shower components.
Label and store small parts. Use a bucket and towels to catch residual water during disconnection.
Protecting flooring, walls, and nearby fixtures
Protect the surrounding area to prevent damage from tools, debris, and accidental water: cover the floor with a thick, waterproof drop cloth or contractor-grade plastic, place plywood sheets over fragile flooring for tool traffic, and tape seams and edges with waterproof tape.
Shield nearby walls and fixtures with cardboard or rigid panels, secure loose trim, remove or mask outlets and switch plates, and protect plumbing exposed during removal.
Ventilation and dust control setup
With the floor and nearby surfaces secured, attention turns to controlling dust and ensuring adequate ventilation to protect occupants and cleanup crews.
Open windows and use box or window fans to direct airflow outward. Seal doorways with plastic sheeting and zip strips.
Place a HEPA-rated vacuum or air scrubber in the work zone. Wet methods minimize airborne particles during demolition.
Electrical safety and lighting
Several basic precautions guarantee electrical safety and reliable lighting before demolition begins.
Circuits serving bathroom fixtures and nearby outlets should be shut off and locked out; confirm with a non-contact tester.
Remove or protect exposed wiring and cover junction boxes.
Use battery or generator-powered work lights with GFCI protection and rugged cords routed to avoid trip hazards.
Maintain dry conditions around power sources.
Step-by-Step Bathtub Removal Process
The removal process begins with dismantling visible fixtures—trim, faucet, showerhead, and escutcheons—then disconnecting the drain and overflow assembly to free the tub.
Next, the installer cuts through caulk and breaks the tub-to-wall seal, removing any tile or surround when required to access attachment points.
Finally, the tub is unfastened from framing or mounting clips and lifted out for disposal or replacement.
Removing trim, faucet, showerhead, and escutcheons
Begin by shutting off water to the tub at the main valve or local shutoff, then open the taps to relieve residual pressure.
Using appropriate screwdrivers and an adjustable wrench, remove trim plates, escutcheons and faucet handles.
Unscrew and carefully extract faucet cartridges or stems, label parts for reuse.
Remove the showerhead by turning counterclockwise; protect finished surfaces and store hardware in a sealed container.
Detaching the drain and overflow assembly
To detach the drain and overflow assembly, first guarantee the water supply remains off and any residual water has been drained from the tub.
Remove the drain cover, use a tub wrench or screwdriver to unscrew the drain flange, and unthread the overflow plate and connecting tube.
Inspect gaskets and clean threaded areas; cap or plug waste lines to prevent debris ingress.
Cutting caulk and breaking the tub-to-wall seal
Carefully score the caulk line where the tub meets the wall using a utility knife or oscillating tool to sever the seal without damaging adjacent tile or drywall.
Work along seams, pulling softened caulk with a putty knife or caulk remover tool. Clear residual material to expose the gap.
Test separation by gently prying the flange; repeat scoring where resistance remains until the tub-to-wall bond is broken.
Removing tile or surround if necessary (when and how)
If the tub is set against tile or a molded surround that must remain intact for the new installation, remove only what is necessary; otherwise, plan to take down the entire surround or tile back to a stable substrate.
Score and chip grout along seams, protect adjacent finishes, and use a hammer and chisel or oscillating tool to pry tiles.
Remove backer board as needed, exposing studs and ensuring a flat, sound surface.
Unfastening the tub from the framing or mounting clips
With tile or surround removed back to the studs where necessary, the next step is to unfasten the tub from its framing or mounting clips so it can be lifted out.
Inspect clip locations along flange and studs. Remove screws or nails with a screwdriver or pry bar, cutting caulk or adhesive as needed.
Detach any blocking or ledger boards securing the tub to framing.
Lifting and extracting the tub safely (single-person vs. two-person method)
Lift the bathtub using a planned method that matches the tub’s size, weight, and the remover’s available help and equipment.
For single-person removal, tilt, roll, and pivot the tub slowly, using straps, knee pads, and short controlled lifts.
For two-person removal, coordinate grips, count lifts, and maintain straight backs.
Clear the path, protect floors, and set the tub down gently.
Dealing with heavy cast-iron tubs and specialized removal techniques
Begin by evaluating the cast-iron tub’s dimensions, condition, and surrounding structure to determine the safest removal strategy. These tubs are extremely heavy, brittle at the porcelain surface, and often bolted or mortared into place, so specialized tools, additional manpower, and a clear plan are essential before any cutting, unseating, or lifting begins.
Use pneumatic chisels, reciprocating saws with metal blades, lifting straps, and a furniture dolly. Consider sectioning the tub and hiring pros for tight spaces or stair removals.
Post-Removal Tasks
After the tub is removed, the area should be inspected for subfloor rot and damaged wall studs that require repair or replacement.
Debris must be cleared and the old tub disposed of responsibly while exposed plumbing is temporarily sealed and secured to prevent leaks.
Once the space is clean and sound, the alcove can be measured and prepared for a replacement tub or shower.
Inspecting subfloor and wall studs for damage
With the bathtub removed, inspect the exposed subfloor and wall studs for water damage, rot, mold, and structural compromise.
Look for soft spots, discolored or brittle wood, and mold colonies.
Probe suspect areas with a screwdriver, measure moisture with a meter, and note framing misalignment or weakened joists.
Document findings for repair planning and prioritize structural and mold remediation before reinstalling fixtures.
Cleaning debris and disposing of the old tub responsibly
Clear and methodical cleanup follows removal: all loose mortar, caulk, tile fragments, and fasteners should be swept or vacuumed from the work area and bagged for disposal, while larger pieces are staged for transport.
Remaining debris is segregated, recyclable materials identified, and hazardous wastes handled per local regulations. Proper disposal limits liability and speeds restoration.
- Separate metal, porcelain, and mixed debris
- Label hazardous or sharp items
- Contact recycling or scrap yards
- Arrange bulk pickup or drop-off
- Document disposal receipts
Temporary water-sealing and securing exposed plumbing
Seal and secure exposed plumbing immediately to prevent water intrusion, contamination, and accidental damage while the bathtub space remains open.
Caps or threaded plugs are fitted to supply lines; temporary end caps and internal stoppers seal drains.
Apply plumber’s tape or appropriate sealant to threaded connections.
Label shutoffs and support loose pipes with brackets or straps.
Verify dry, leak-free status before leaving the site.
Preparing the alcove for a replacement tub or shower
Inspect the alcove for structural soundness, plumbing alignment, and surface readiness before proceeding with a replacement tub or shower.
Verify studs, subfloor, and header integrity; repair rot or water damage.
Confirm drain and supply locations match the new unit or note necessary relocations.
Ascertain walls are plumb and sheathed with appropriate backer, install waterproofing, and fasten blocking for fixtures and grab bars.
Common Problems and How to Solve Them
Common removal obstacles include stubborn adhesive or mortar, corroded drains and stuck fittings, and rotted subfloor or framing that may require repair.
The guide outlines practical methods for scraping or softening adhesives, safely disconnecting or replacing compromised plumbing, and repairing or reinforcing structural members.
It also explains immediate steps and professional referral options if unexpected mold or asbestos is found.
Stubborn adhesive or mortar removal strategies
When a bathtub is freed from its frame, remnants of hardened adhesive or mortar can cling stubbornly to the floor and flange; removing them requires a mix of proper tools, safe techniques, and patience.
Begin with mechanical removal—chisels, floor scrapers, oscillating tools—working at low angles to protect substrates.
Follow with solvent softeners or matrix removers, apply dwell time, then scrape and vacuum debris thoroughly.
Handling corroded drain pipes and stuck fittings
Corroded drain pipes and seized fittings often present the toughest surprise during bathtub removal, and addressing them promptly prevents damage to surrounding flooring and plumbing.
Use penetrating oil, heat, and gentle impact to free threaded joints; cut and remove irreparable metal sections with a reciprocating saw.
Protect nearby fixtures, cap open lines, and inspect connections for replacement or professional plumbing service if leaks or severe corrosion are found.
Repairing rotted subfloor and framing repairs
Loosened or cut drain piping can reveal water-damaged joists and subflooring that will not support a replacement tub; addressing rot promptly prevents further structural failure and mold spread.
Assess extent by probing and removing compromised decking. Replace sections with pressure-treated plywood and sister damaged joists with matching lumber, using structural screws and construction adhesive.
Confirm level, allow drying, then install proper underlayment before tub placement.
Unexpected mold or asbestos discovery response
Any unexpected discovery of mold or suspected asbestos during bathtub removal demands immediate cessation of work and containment of the area to prevent spread.
Professionals must be contacted for testing and abatement. Do not disturb materials further; seal openings, shut HVAC, and evacuate nonessential occupants.
Document findings with photos.
Follow all local regulations and obtain clearance before resuming demolition to guarantee safety and legal compliance.
Timeframe and Cost Considerations
Typical DIY bathtub removal can take a weekend for a simple alcove tub but may require several days if plumbing, tile, or structural repairs are needed.
Costs should be broken down into tools and materials, disposal fees, any repair or finishing work, and the alternative of professional labor.
Hiring a contractor can sometimes reduce overall expense and time by combining removal, disposal, and repairs under one warranty and schedule.
Typical DIY removal time estimates
Most homeowners can expect bathtub removal to take between a half-day and two full days, depending on factors like tub type, bathroom layout, and skill level.
Simple alcove acrylic tubs often require four to eight hours; cast-iron or built-in surrounds can extend to a full day or longer.
Allow extra time for demolition, debris staging, and unexpected obstacles. Plan conservatively.
Cost breakdown: tools, disposal, repairs, and professional help
Several factors influence the overall cost of removing a bathtub, including required tools, disposal fees, repairs to surrounding finishes, and whether a professional is hired. Typical DIY tool totals range $50–200; disposal $30–150; minor repairs $50–400. Compare itemized estimates before deciding.
| Item | DIY Range | Notes |
|---|---|---|
| Tools | $50–200 | Reusable |
| Disposal | $30–150 | Depends on local fees |
| Repairs | $50–400 | Tile, drywall fixes |
When hiring a contractor saves time and money
After comparing DIY tool, disposal, and repair costs, homeowners often weigh whether hiring a contractor can shorten the schedule and limit unexpected expenses.
Contractors bring expertise, insured labor, and access to disposal channels that reduce delays and liability. For complex demolitions, plumbing or tile removal, or tight timelines, professional bids frequently save money by preventing rework, code issues, and costly mistakes.
Tips to Make Removal Easier and Safer
Practical preparation streamlines bathtub removal: a list of recommended hand tools, power tools, and rental equipment helps guarantee the right gear is on hand.
Attention to ergonomic lifting, coordinated teamwork, and basic injury-prevention measures reduces strain and accidents, while dust-control methods, noise mitigation, and courteous scheduling limit disruption to neighbors.
A concise pre-start checklist covering permits, utilities shutoff, protective gear, and debris disposal completes the safety and efficiency plan.
Recommended tools and rental equipment
Gathering the right tools and rental equipment before starting a bathtub removal reduces time, effort, and injury risk.
Recommended items include pry bars, reciprocating saw with demo blades, adjustable wrenches, utility knife, caulk remover, screwdriver set, and a demolition hammer for stubborn fixtures.
Rent a compact dumpster, wet/dry vacuum, and protective scaffolding or work platform to manage debris and access safely.
Ergonomic lifting, teamwork, and injury prevention
Lift with technique and coordination to protect backs and speed the job: position feet shoulder-width apart, bend at the hips and knees (not the waist), keep the load close to the body, and use team lifts for heavy or awkward pieces.
Communicate clear commands, plan routes, warm up muscles, rotate tasks, and rest frequently.
Wear gloves, sturdy shoes, and back support as needed to reduce strain and slips.
How to minimize dust, noise, and neighbor disturbance
Contain dust, limit noise, and respect neighbors by planning removals to minimize airborne particles and disruptive sounds.
Use plastic sheeting, zipper doors, and HEPA-rated vacuums to capture debris. Choose quieter tools, work during reasonable hours, and communicate schedules with neighbors.
Damp cutting reduces dust; slow, controlled demolition reduces noise. Dispose of waste promptly to prevent lingering disturbance.
Checklist for final walkthrough before starting replacement
Before beginning the replacement, perform a concise final walkthrough to confirm safety, access, and readiness: verify water and power shutoffs, guarantee permits and notifications are in place, remove fragile items, protect floors and adjacent rooms, confirm ventilation and lighting, test tools and PPE, clear debris path, and locate disposal plan.
Document measurements and photos for reference before demolition begins.
Alternatives to Full Tub Removal
The article outlines several less invasive options such as tub liners, reglazing, and targeted partial replacements that preserve existing plumbing and structure.
It also highlights converting a bathtub into a walk-in shower as a practical alternative that often avoids full demolition.
Each option is presented with trade-offs in cost, durability, and installation complexity to guide homeowner decisions.
Tub liners, reglazing, and partial replacements
Consideration of alternatives to complete tub removal often makes sense when the existing fixture is structurally sound but cosmetically worn.
Tub liners, reglazing, and partial replacements offer less invasive, faster, and usually more affordable options that restore appearance and function without gutting the bathroom.
Liners fit over the tub, reglazing renews surfaces, and targeted part replacements address damaged areas—each preserves plumbing and reduces debris, cost, and downtime.
Converting tub to shower without full demolition
Converting a bathtub into a shower without full demolition lets homeowners update accessibility and style while minimizing mess, cost, and downtime.
Options include installing a walk-in conversion kit, partial wall removal, or using prefab shower bases.
Plumbers can adjust drains and fixtures; contractors can refinish surrounding surfaces for cohesion.
- Walk-in conversion kits
- Prefab shower base
- Partial wall removal
- Drain and fixture relocation
- Surface refinishing
Final Checklist Before Installing a New Tub or Shower
Before installing the new tub or shower, the installer confirms plumbing alignment and exact measurements to guarantee drains and fixtures will fit properly.
The structural integrity of the subfloor and the flatness and soundness of surrounding walls are inspected and corrected as needed.
Finally, required materials are gathered and any local permits or inspections are arranged to prevent delays during installation.
Verifying plumbing alignment and measurements
A thorough final check of plumbing alignment and measurements guarantees the new tub or shower will fit and function without costly adjustments; verify drain and waste locations, supply line positions and heights, flange clearances, and floor-leveling before setting the unit.
Measure center-to-center distances, confirm trap orientation and fall, check valve rough-in depths, and mock-fit connections.
Record deviations and plan corrective shims or relocations.
Ensuring subfloor and walls are level and sound
Confirm that the subfloor and surrounding walls are level, plumb, and structurally sound before setting the replacement tub or shower.
Inspect for rot, mold, loose or soft spots, and damaged studs. Use a straightedge and level to check flatness and plumb; shim or sister joists where required.
Repair or reinforce framing, replace compromised sheathing, and guarantee a stable, even plane for the new fixture.
Materials and permit considerations for the next phase
Gather all necessary materials and verify permit requirements before proceeding to install the new tub or shower.
The installer should confirm local codes, secure permits, and assemble fixtures, adhesives, drains, fasteners, and safety gear.
Verify plumbing hookups match new unit specifications and order replacement trim or waterproofing materials to avoid delays.
- Fixtures and trim
- Drain assembly and fittings
- Waterproofing membrane and sealant
- Fasteners and adhesives
- Permits and inspection documents
Conclusion
Dust settles where the old tub once lay, a pale crescent in a room now quiet and ready. Tools lean like patient sentries; tile edges and plumbing stubs glint against the soft light. The work, measured and careful, leaves behind more than cleared space—an invitation. With surfaces prepped and hazards addressed, the bathroom waits, poised between past and possibility, ready for the next shape to be fitted, sealed, and finally made whole.