How a Sump Pump Works in a Crawl Space: Simple Explanation, Benefits, and Maintenance Tips
A sump pump in a crawl space effectively manages groundwater by collecting it in a pit and pumping it away from the foundation. This prevents moisture buildup, mold growth, and potential structural damage. The system consists of a basin, either a submersible or pedestal pump, a float switch, a check valve, and discharge piping. Enhancements like battery backups and alarms can further improve reliability. To ensure optimal performance, regular testing, clearing clogs, and insulating discharge lines during winter are essential. For more insights on selection, installation, and maintenance, continue reading.
What a Sump Pump in a Crawl Space Does and Why It Matters
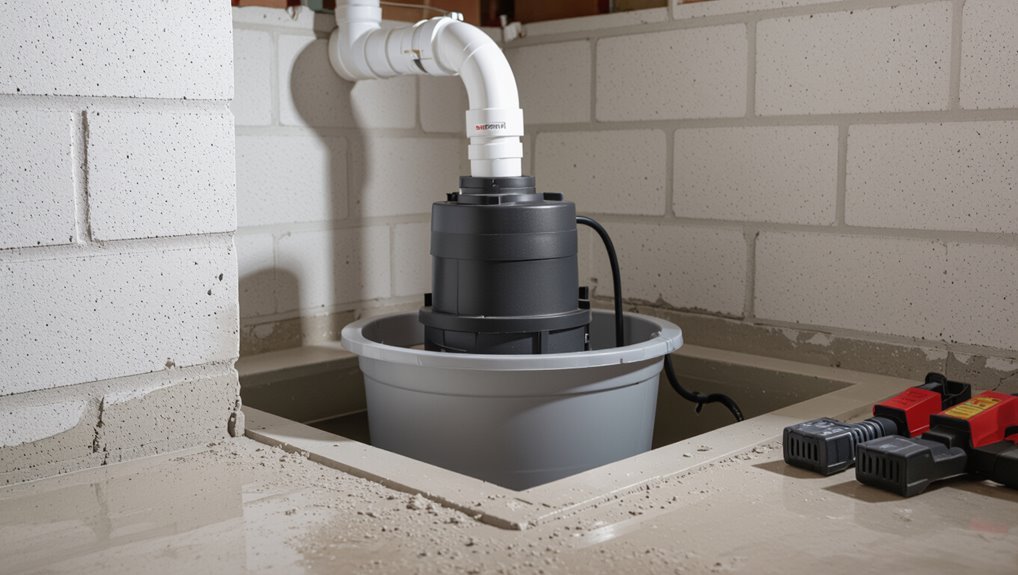
A sump pump in a crawl space removes accumulated water to prevent moisture buildup and foundation damage.
It addresses common crawl space problems such as standing water, high humidity, and soil erosion that can lead to mold and structural issues.
Visible signs that a sump pump is needed include persistent dampness, musty odors, or water pooling after storms.
How a sump pump protects your home from moisture and flooding
Several inches of standing water or a slow seep after heavy rain can quickly compromise a home’s crawl space. A properly installed sump pump prevents such damage by actively removing groundwater before it reaches structural elements.
It answers how does a sump pump work in a crawl space by collecting water in a basin, activating a pump, and discharging moisture away. This process reduces rot, mold, and foundation risk.
Typical problems in crawl spaces that a sump pump solves
When groundwater intrusion, condensation, or plumbing leaks occur beneath a home, a sump pump addresses standing water, persistent dampness, and slow seepage that otherwise foster rot, mold growth, insect infestations, and foundation deterioration.
It removes pooled water, lowers humidity, prevents soil saturation and hydrostatic pressure, and protects insulation, wooden supports, and mechanical systems—reducing structural damage, health risks, and costly repairs.
Signs you need a sump pump in your crawl space
Persistent dampness and recurring water issues in a crawl space often indicate that passive measures are insufficient and mechanical intervention is warranted.
Signs prompting a sump pump include visible standing water, mold or musty odors, efflorescence on foundation walls, warped floors above, frequent basement flooding after storms, and high humidity readings.
Timely installation prevents structural damage, mildew growth, and indoor air quality problems.
Basic Components of a Crawl Space Sump Pump System
A crawl space sump pump system consists of several key parts that work together to collect and remove groundwater.
Core components include the sump basin and pit, a primary pump (submersible or pedestal), a check valve and discharge pipe with proper venting, and power options such as hardwiring, a plug-in connection, or a battery backup.
Optional items like alarms, different float switch types, and secondary backup systems can improve reliability and monitoring.
Sump basin and pit
The sump basin and pit form the containment chamber where groundwater and seepage collect before being expelled by the pump. Sized and positioned to match soil conditions and expected inflow, the basin prevents surrounding soil from collapsing into the pump and provides a stable sump environment.
It houses the pump, accommodates float switches, allows debris to settle, and facilitates inspection, maintenance, and proper discharge connections.
Primary pump types: submersible vs. pedestal
Two main designs—submersible and pedestal—dominate crawl space sump pump installations, each offering distinct trade-offs in space, noise, durability, and maintenance.
Submersible units sit inside the basin, run quieter, and handle solids but are pricier and harder to access.
Pedestal pumps have motors above the pit for easier servicing and lower cost but are louder, bulkier, and less protected from moisture.
Check valve, discharge pipe, and venting
Several essential components guarantee a crawl space sump pump moves water out reliably: the check valve, the discharge pipe, and proper venting.
The check valve prevents backflow into the pit after pumping. A correctly sized, routed discharge pipe directs water away from the foundation.
Venting prevents airlocks and allows smooth pump operation while reducing freeze risk and moisture buildup in the line.
Power supply options: hardwired, plug-in, and battery backup
Following proper check valve installation, discharge routing, and venting, attention shifts to how the sump pump receives reliable power.
Options include hardwired connections for permanent, code-compliant installations; plug-in models for simpler retrofit or portable units; and battery backup systems that provide temporary operation during outages.
Selection depends on local electrical codes, reliability needs, and homeowner preference, balancing cost and continuity.
Optional accessories: alarm, float switch types, and backup systems
While the core pump and basin manage normal water removal, optional accessories—such as audible/visual alarms, various float switch types, and auxiliary backup systems—significantly enhance reliability and early warning capabilities in a crawl space sump setup.
Four key considerations guide selection and maintenance:
- Alarm: alerts high water or pump failure.
- Float types: tethered, vertical, and electronic.
- Backup pumps: battery or water-powered.
- Regular testing and power checks.
How a Sump Pump Works Step by Step in a Crawl Space
Water entering the crawl space drains into a sump basin through footing drains or surface runoff and fills until a float or electronic sensor signals the system.
The pump then expels water through discharge piping past a check valve that prevents return flow, while a secondary battery or water-powered backup can engage during power loss.
The sequence and reliability of these components determine how effectively the crawl space stays dry.
How water collects and enters the sump basin
Moisture migrates through soil and foundation materials toward the lowest point in a crawl space, where it collects in a shallow basin installed beneath the floor.
Groundwater, rainwater seepage, and condensate follow grading, cracks, and drainage channels into the basin.
Perimeter drains, interior French drains, and small surface pooling funnel water through gravel and perforated pipe into the sump basin for removal.
How the float switch or sensor activates the pump
After collecting in the basin, the rising water level engages a float switch or electronic sensor that tells the pump when to run.
The device monitors level; a mechanical float pivots or a sensor senses conductivity/pressure, closing a circuit to the pump motor.
When the level drops, the switch opens, stopping power.
Proper placement and testing guarantee reliable activation without short cycling.
How the pump removes water and where it discharges
When the float switch signals the motor, the pump pulls collected liquid from the basin through an intake and forces it out via a discharge pipe, using an impeller or diaphragm to convert motor torque into flow.
The discharge line routes water away from the foundation—typically to a storm drain, dry well, or safe grading area—maintaining crawl space dryness and preventing ground saturation.
How the check valve prevents backflow
A check valve installed in the discharge line stops water from flowing back into the basin once the pump shuts off, ensuring previously pumped water does not return to the crawl space.
It permits one-way flow, preventing reverse pressure that would force the pump to restart unnecessarily.
Proper sizing, orientation, and periodic inspection keep the valve reliable and prevent leaks or clogging.
What happens during a power outage and how backups operate
Though the check valve prevents backflow into the basin, loss of grid power creates a different threat: the electric sump pump will stop operating and water can quickly accumulate in the crawl space.
Battery backups engage automatically, running the pump for hours depending on charge; generator systems power the primary pump continuously.
Regular testing and battery replacement guarantee reliable operation during outages.
Choosing the Right Sump Pump for a Crawl Space
Choosing the right sump pump for a crawl space begins with calculating required capacity and head lift to guarantee the unit can move expected water volumes from the lowest point.
Selection then weighs submersible versus pedestal models against limited crawl space access, material durability and corrosion resistance, and whether a battery or water-powered backup is warranted.
Finally, budget ranges and long-term operating and maintenance costs should guide the balance between upfront price and expected service life.
Calculating required pump capacity and head lift
Several key measurements determine the pump capacity and required head lift for a crawl space sump system: expected inflow rate, vertical lift to discharge, and friction loss from piping and fittings.
Calculate peak inflow (gallons per minute), add safety margin, then convert to required flow at the total dynamic head (vertical plus friction).
Select a pump curve matching that flow at or above the calculated head.
Comparing submersible vs. pedestal for crawl space constraints
When evaluating sump pumps for crawl spaces, the choice between submersible and pedestal models hinges on available space, debris exposure, noise tolerance, and maintenance access. Submersible units save vertical space and quiet operation but require sump integrity; pedestal models offer easier motor access and cooler operation but need clearance. Consider access, debris, and vibration when selecting.
| Feature | Submersible | Pedestal |
|---|---|---|
| Space | Low vertical | Requires height |
| Noise | Low | Higher |
| Maintenance | In-pit | Easier access |
| Debris tolerance | Better | Worse |
| Installation cost | Higher | Lower |
Materials, durability, and corrosion resistance to consider
Durability and material selection are critical factors for a crawl space sump pump because constant exposure to moisture, soil, and potentially corrosive runoff determines lifespan and maintenance needs.
Prefer stainless steel or thermoplastic housings, sealed bearings, and corrosion-resistant fasteners. Look for epoxy-coated motors and cast-iron impellers with protective coatings.
UV and chemical resistance for piping and seals reduces failure risk and service frequency.
When to choose a battery backup or water-powered backup
A backup system becomes essential whenever mains power loss or primary-pump failure could allow crawl space flooding that damages structure or contents.
Battery backups suit frequent outages and remote sites: they provide portable, automatic operation and require charging and periodic battery replacement.
Water-powered backups work where reliable municipal water pressure exists, offering continuous operation without electricity but needing proper check valves and fittings.
Budget ranges and long-term cost considerations
Choosing between battery and water-powered backups influences initial outlay but is only one component of overall cost.
The piece price for a basic pedestal pump ranges lower, while submersible and smart models cost more.
Include installation, discharge piping, check valves, routine maintenance, electricity, battery replacements, and occasional repairs when estimating lifecycle expenses.
Warranty length and energy efficiency affect long-term value.
Installation Overview and Placement Best Practices
The section outlines where to position a sump basin in a typical crawl space and how to prepare the pit with proper excavation, a gravel bed, and level setting.
It also covers discharge routing and erosion control, electrical and code requirements specific to crawl-space installs, and guidance on when a professional is recommended versus a DIY approach.
Emphasis is on practical placement choices that minimize water intrusion, meet safety codes, and guarantee reliable pump operation.
Ideal sump basin location in typical crawl spaces
Where should the sump basin be placed for ideal performance and minimal disruption?
The basin is best located at the lowest crawl-space point where water naturally collects, near main perimeter drains or downspout discharge lines.
Position away from structural supports and HVAC equipment, allow clear access for maintenance, and guarantee routing to an approved discharge.
Consider proximity to electrical supply for secure pump power.
Preparing the pit: excavation, gravel bed, and level setting
Excavate a pit large enough to fully seat the sump basin plus a 2–3 inch peripheral clearance for gravel and backfill; depth should allow the basin rim to sit slightly below surrounding crawl-space grade so incoming water flows in, while keeping the top accessible for service.
Compact a 2–4 inch layer of clean washed gravel beneath the basin for drainage, level the basin with a spirit level, and backfill evenly with gravel.
Proper discharge routing and erosion control
Properly routed discharge and erosion control prevent water from undermining crawl-space foundations and direct sump output to safe dispersal points.
Discharge piping should slope away, use rigid or heavy-duty flexible pipe, and terminate at an approved away-from-house location.
Incorporate splash blocks, gravel trenches, or rock aprons to dissipate flow and prevent soil loss.
Regularly inspect routing and erosion measures for clogs or washouts.
Electrical and code considerations for crawl space installations
After routing and stabilizing discharge lines, attention turns to the electrical and code requirements that govern sump pump installations in crawl spaces.
Local codes dictate GFCI protection, dedicated circuits, conduit or protected wiring, and outlet placement above expected flood levels. Permits and inspections may be required.
Ventilation, access, and clearances must comply with building codes to guarantee safety and long-term functionality.
When to hire a professional vs. DIY installation
When should a homeowner tackle a crawl-space sump pump installation and when is a pro warranted?
Routine installations with straightforward access, basic electrical skills, and standard pumps suit confident DIYers.
Hire a professional for complex layouts, poor access, code compliance, tricky wiring, sewer-backflow setups, or persistent groundwater.
Professionals guarantee correct basin placement, reliable discharge routing, permit handling, and warranty-backed workmanship for long-term protection.
Routine Maintenance and Seasonal Checklist
Routine upkeep keeps a crawl space sump pump reliable through changing seasons.
Monthly visual checks and manual tests, quarterly basin cleaning and valve inspections, and an annual professional performance inspection form the core schedule.
Winterizing steps, storm-prep actions, and a simple maintenance log template help document and guarantee timely tasks.
Monthly visual checks and testing the pump
A brief monthly inspection helps guarantee the sump pump remains ready and can catch early signs of wear or malfunction before they escalate.
Inspect power connections, the discharge line for obstructions, and the basin for debris.
Manually lift the float or activate the test switch to confirm reliable cycling and prompt drainage.
Note unusual noises, slow response, or leaks for timely repair.
Quarterly tasks: cleaning the basin and inspecting valves
Schedule quarterly cleaning of the sump basin and inspection of inlet and check valves to prevent clogs and guarantee reliable operation.
Remove debris, sludge, and sediment from the basin; flush with clean water.
Verify the inlet screen is clear and the float moves freely.
Inspect the check valve for cracks, leaks, or reverse flow.
Replace worn components promptly to maintain dependable pump cycling.
Annual maintenance: professional inspection and performance test
After quarterly basin cleaning and valve checks, an annual professional inspection and performance test confirms the sump pump’s overall condition and readiness for heavy use.
A technician verifies pump amperage, float operation, check valve integrity, and discharge routing, and conducts a controlled activation under load.
Results identify wear, clogged lines, or electrical issues, and prompt necessary repairs or component replacement to guarantee reliable operation.
Winterizing and storm-prep steps
Prepare the sump pump and surrounding crawl space for cold weather and severe storms by following a concise seasonal checklist that prioritizes freeze protection, reliable power, and unobstructed discharge.
Insulate exposed pipes and pit, install a battery backup and test it, secure a cover to prevent debris, clear and extend discharge lines away from the foundation, and verify float switch mobility and backup pump readiness.
Maintenance log template and schedule
How often should inspections and basic tasks be recorded to guarantee a sump pump remains reliable? A concise log captures dates, actions, observations, and tester results.
Use a simple template and follow a seasonal schedule: weekly during heavy rain, monthly otherwise, and before/after winter.
- Date and inspector
- Action performed
- Test result (float/backup)
- Notes and required repairs
Common Problems, Troubleshooting, and Fixes
Common failures are grouped by symptoms: a pump that runs without removing water often signals clogs or impeller damage, while a pump that does not start points to power issues, a faulty float switch, or motor failure.
Frequent cycling usually indicates an incorrect float setup or an undersized basin, and backflow or frozen discharge lines require check valves, insulation, or rerouting to prevent recurrence.
When recurring faults, high repair costs, or obsolete components are present, replacement may be more reliable and cost-effective than further repairs.
Pump runs but doesn’t remove water: clogs, impeller issues
When a sump pump runs but fails to remove water, the likely culprits are mechanical blockages or damaged pumping components—most often debris clogging the inlet or a worn/broken impeller preventing proper flow.
Inspect and clear intake screens, check the impeller for cracks, and remove lodged material.
Test pump performance after cleaning; replace the impeller or pump if flow remains weak despite clearances.
Pump won’t start: power, float switch, or motor failure
Diagnose power, float switch, and motor issues in a stepwise manner to determine why a sump pump fails to start.
First verify outlet power and GFCI/reset; test with another device.
Inspect cord and connections for damage.
Manually lift or free the float to check activation.
If power and float are OK, test motor with professional tools or consult a technician—motor failure often requires replacement.
Frequent cycling: incorrect float setup or improper basin size
If the pump starts but runs in short, repeated bursts rather than normal cycles, the issue often lies with the float mechanism or basin capacity rather than electrical or motor failure addressed earlier.
Misadjusted floats, stuck or tangled switches, or a basin too small for inflow cause rapid on/off cycling.
Adjust float height, free or replace the switch, and install a larger basin or external reservoir to stabilize cycles.
Backflow and frozen discharge lines: prevention and remedies
Any standing water in the discharge line can reverse flow into the crawl space or freeze solid in cold weather, blocking the pump and risking overflow or damage.
Install a check valve to prevent backflow, slope and insulate exposed discharge piping, and route outlets above frost line.
Periodically clear debris, test valve operation, and use heat tape or buried lines in climates prone to freezing.
When replacement is better than repair
Problems like backflow, frozen discharge lines, or recurring debris buildup often indicate broader wear or improper system design rather than isolated faults. When faults recur despite fixes, replacement can be the safer, more cost-effective option.
Replacement is advised when pumps are old, repairs frequent or costly, essential components obsolete, or capacity mismatched. New systems restore reliability, efficiency, and warranty protection, reducing long-term risk.
Benefits Beyond Flood Prevention
Beyond preventing floods, a crawl space sump pump can greatly reduce mold and mildew growth, contributing to better indoor air quality.
It also helps protect the foundation by minimizing moisture-related structural damage, which preserves usable space and can increase property value.
Additionally, a properly maintained system may favorably influence insurance considerations and improve resale prospects.
Mold and mildew reduction and improved indoor air quality
When a sump pump keeps a crawl space dry, it considerably lowers the humidity levels that allow mold and mildew to grow, reducing spore formation and spread throughout the home.
Drier conditions limit allergen proliferation, improving indoor air quality and reducing respiratory irritants. This can decrease musty odors, lower cleaning and remediation needs, and contribute to a healthier living environment for occupants.
Foundation protection and reduced structural damage
Sustaining a dry crawl space helps preserve a home’s foundation by preventing water-related deterioration such as concrete spalling, mortar washout, and soil heave.
A functioning sump pump minimizes hydrostatic pressure, reduces wood rot in sill plates and joists, and limits soil movement that can cause settling.
Consistent moisture control lowers risk of cracks, uneven floors, and costly structural repairs over time.
Increased usable space and property value
Reducing moisture and protecting the foundation also creates practical opportunities for homeowners to reclaim otherwise unusable crawl space.
With dry, stable conditions, areas become suitable for insulated storage, mechanical installations, or improved access for repairs.
Enhanced utility and cleaner appearance can increase perceived living area and curb appeal, making the property more attractive to buyers and potentially supporting higher market value.
Insurance and resale considerations
Insurance and resale considerations extend beyond flood protection to affect premiums, disclosures, and buyer perception.
A professionally installed, documented sump pump can lower insurance costs, satisfy lender requirements, and reduce required disclosures about prior water issues. Buyers often view functioning drainage systems as evidence of proactive maintenance, enhancing marketability.
Conversely, absent or poorly maintained pumps may trigger premium increases, inspection flags, or negotiation concessions.
Cost Estimates, Lifespan, and Return on Investment
A clear breakdown of typical installation and replacement costs—including equipment, labor, and any crawl-space access work—frames homeowner budgeting decisions.
Expected pump lifespan, commonly 5–15 years, depends on run time, water quality, and maintenance frequency, with heavy use and debris shortening service life.
Comparing avoided damage expenses (foundation repairs, mold remediation, ruined belongings) to pump costs illustrates common return-on-investment scenarios.
Typical installation and replacement cost breakdown
When evaluating sump pump options for a crawl space, homeowners should consider initial purchase and installation costs, ongoing maintenance and electricity expenses, expected lifespan, and the likely return on investment regarding avoided water damage. Typical breakdown: equipment $150–$600; installation $300–$1,200; labor vs. DIY trade-offs; emergency replacement premiums; modest annual operating costs.
| Item | Typical Cost/Note |
|---|---|
| Pump | $150–$600 |
| Installation | $300–$1,200 |
| Backup system | $200–$800 |
| Maintenance | $50–$150/yr |
| Emergency replace | Higher labor cost |
Expected pump lifespan and factors that shorten it
Lifespan projections for crawl-space sump pumps typically range from 5 to 15 years depending on unit quality and usage patterns.
Frequent cycling, abrasive debris, hard water mineral buildup, clogged floats, power fluctuations, and prolonged submersion accelerate wear.
Poor installation, inadequate discharge routing, and neglected maintenance shorten service life.
Regular inspections, filter screens, and prompt repairs preserve performance and extend operational lifespan.
ROI examples: avoided damage costs vs. pump expense
Cost-benefit analysis of a crawl-space sump pump commonly shows that a modest upfront purchase and installation—typically $300 to $1,200—can prevent water, mold, and structural damage whose repair costs often range from $2,000 for localized cleanup to $20,000+ for major foundation, insulation, and floor replacement.
Examples: a $800 system averts a $5,000 remediation (net saving $4,200); avoided catastrophic repairs yield far higher ROI.
Real-World Scenarios and Case Examples
The section presents three practical cases to illustrate how sump pump strategies vary with site conditions.
One case examines solutions for a crawl space over a high water table.
Another addresses protections for intermittent heavy rains and surge events.
A third considers approaches for a remote property with unreliable power.
Each example highlights specific equipment choices, installation adjustments, and maintenance priorities.
Scenario: High water table crawl space solution
Persistence of groundwater beneath homes creates a distinct challenge for crawl spaces, requiring solutions that address continuous inflow rather than occasional leaks.
A combined approach often succeeds: perimeter drains, a sealed sump basin with a submersible pump rated for continuous duty, reliable check valve and backup power, plus exterior grading and impermeable barriers.
Regular inspection guarantees sustained performance.
Scenario: Intermittent heavy rains and surge protection
Addressing intermittent heavy rains requires systems that can handle sudden surges of water without relying solely on continuous-duty equipment.
A dual-pump arrangement with primary and high-capacity backup engages during storm-driven inflows. Check valves, larger discharge lines, and a properly sized sump basin reduce cycling.
Regular testing and float adjustment guarantee response to rapid rise, minimizing overflow and motor stress during episodic deluges.
Scenario: Remote property with unreliable power backup approach
Owners of remote properties often face unreliable grid power that undermines reliance on electrically driven sump pumps. After considering dual-pump setups for storm surges, planners should evaluate backup strategies that function independently of steady mains supply.
Practical options include battery-backed DC pumps with solar charging, generator-integrated AC pumps with automatic transfer switches, and gravity-driven basins or siphons where terrain permits. These options should be prioritized by reliability and maintenance needs.
Quick Reference: Checklist for Choosing, Installing, and Maintaining a Crawl Space Sump Pump
A concise checklist helps homeowners choose, install, and maintain a crawl space sump pump by outlining key factors—capacity, power source, float type, backup options, discharge routing, basin placement, and routine testing—so decisions are systematic, installations meet site-specific needs, and maintenance prevents failures.
- Confirm pump capacity and float compatibility.
- Specify primary and backup power.
- Plan discharge routing and basin location.
- Schedule inspection, testing, and debris cleanup.
Conclusion
A crawl space sump pump protects homes by removing seepage and preventing mold, structural damage, and wasted energy. Although some may worry installation and upkeep are costly or disruptive, routine maintenance and proper placement minimize expenses and avoid surprises. With the right pump, battery backup, and periodic checks, most homeowners recover costs through reduced repairs and improved indoor air quality. Ultimately, a well-chosen sump pump is a prudent, long-term investment in home durability.