How to Fix a Clogged Bathtub Fast: Simple DIY Steps That Actually Work
To quickly fix a clogged bathtub, start by removing visible hair and debris from the stopper and strainer. Next, run hot water to help loosen soap scum. If that doesn’t work, use a plunger with a tight seal or a hooked wire to extract hair. For deeper clogs, a drain snake is effective, or you can try a baking soda and vinegar treatment followed by hot water. Always wear gloves and eye protection, and avoid mixing chemicals. More detailed steps and prevention tips are provided below.
How to Unclog a Bathtub Quickly and Safely
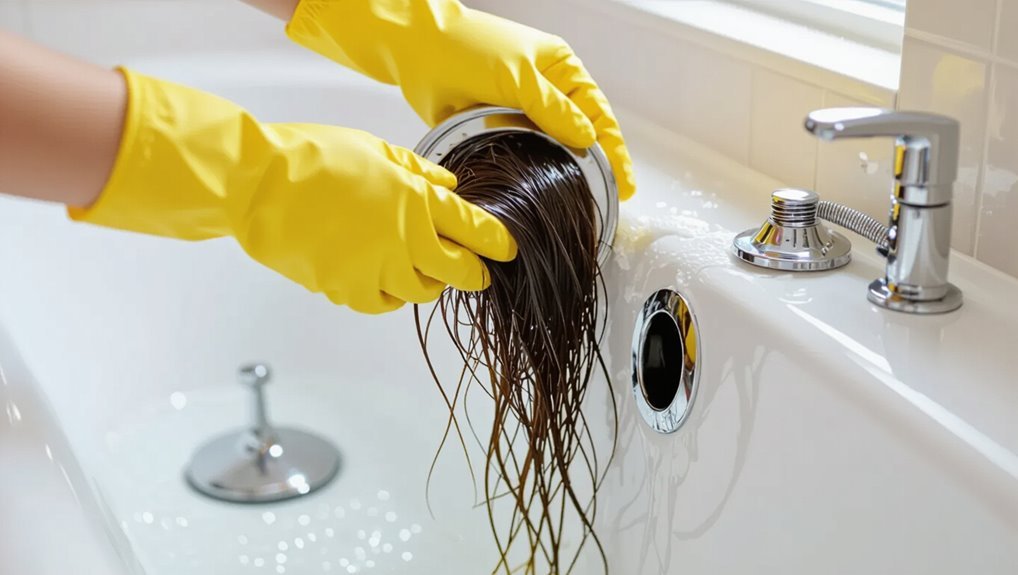
When a bathtub begins to drain slowly, one of the first steps is to remove visible debris from the stopper and strainer to restore flow.
Before attempting any DIY fix, basic safety precautions—such as turning off electrical devices nearby, wearing gloves, and using proper ventilation if chemical cleaners are considered—should be observed.
Proceeding methodically and avoiding excessive force reduces the risk of damaging the drain or causing injury.
Immediate steps to take when the tub starts draining slowly
Noticeable slowdown in the drain signals a developing clog, and immediate action can prevent a full blockage.
Inspect visible debris, remove hair with gloved fingers or a hook, and clear the strainer.
Run hot water to dissolve soap scum, then try a plunger gently.
If needed, use a drain snake briefly.
These steps outline how to fix a clogged bathtub quickly.
Quick safety precautions before attempting any DIY fix
Before attempting any DIY unclogging method, prioritize safety by evaluating chemical, electrical, and structural hazards.
Wear gloves and eye protection, guarantee good ventilation if using cleaners, and unplug nearby electrical devices.
Confirm flooring and fixtures are stable to avoid slips or damage.
Keep a phone nearby and know when to stop and call a professional if risks or uncertainty arise.
Fast DIY Methods That Actually Work
A selection of fast DIY methods can clear most bathtub clogs without calling a plumber.
Practical options include:
- Plunging with a proper seal and technique.
- Manual removal of hair/debris or using a hook.
- A baking soda + vinegar treatment followed by a hot water flush.
- Using a drain snake or auger with the correct type and technique.
Each method is described below with step-by-step guidance and safety notes.
Use a plunger step-by-step
Grip the plunger firmly and position it over the drain to create a tight seal.
Then use controlled, rhythmic thrusts to build pressure and dislodge the obstruction.
Maintain steady cycles of push and pull for about 15–20 seconds, pause to check for drainage, and repeat if needed.
If water begins to flow freely, run hot water to clear residue and confirm the clog is cleared.
Remove hair and visible debris manually or with a hook
Reach into the drain area with gloved hands or a simple bent wire hook to extract hair and visible debris, working methodically to avoid pushing clogs deeper.
Remove collected material into a disposable bag, checking the stopper and overflow for trapped strands.
Repeat until water drains freely, rinsing the hook and gloves.
Dispose of waste properly and wash hands thoroughly afterward.
Homemade drain cleaner mix (baking soda + vinegar) how to apply
If manual removal did not restore full flow, a simple homemade cleaner of baking soda and vinegar offers a quick, chemical-free follow-up.
Pour about 1 cup baking soda down the drain, then slowly add 1 cup white vinegar.
Allow fizzing to work for 15–30 minutes with the drain covered.
Finish by flushing with cold tap water to clear loosened residue.
Hot water flush when and how to use it safely
Flushes with hot water provide a quick, low-effort way to clear minor soap and grease buildup that often causes slow drains.
Use boiling or very hot tap water poured slowly in stages, allowing warm flow to dissolve residues.
Avoid if pipes are PVC and newly installed, if grease hardens, or if chemical cleaners were recently applied.
Wear gloves and pour carefully to prevent splashes.
Use a drain snake or auger types and technique
Employ a drain snake or auger to mechanically remove hair, soap scum, and small obstructions that hot water or plunging can’t clear.
Choose a flexible hand snake for shallow clogs or a closet auger for deeper P-trap issues.
Insert carefully, rotate while advancing, then retract to pull debris.
Sanitize tool and run water to confirm flow restoration.
Wet/dry vacuum method setup and tips
A wet/dry vacuum can rapidly extract water, hair, and gunk from a bathtub drain when other methods fail.
The setup requires a sealed hose adapter, wet mode, and a bucket for expelled debris.
Create a tight seal over the drain with a damp rag, start on low suction, then increase.
Inspect and clean the hose and filters afterward to prevent damage.
Tools and Materials You’ll Need
The section outlines what to have on hand before attempting a quick unclog.
- Plunger, drain snake, adjustable wrench, rubber gloves
- Wet/dry vacuum, basin wrench, plumber’s putty, headlamp
- Baking soda, vinegar, wire coat hanger, dish soap
- Plastic bucket, old towels, screwdriver, flashlight
These items cover essential tools, optional gear for stubborn clogs, and common household substitutes.
Essential tools for fast unclogging
Gather tools that match the clog’s severity to streamline the unclogging process.
Essential items include a plunger suited for tubs, a rubber-gloved hand, a sink or tub drain key, a drain snake (manual auger), a bucket, and rags.
Also include a flashlight to inspect the drain and a pair of pliers for removing screws or stoppers.
Keep cleaning wipes nearby.
Optional tools for stubborn clogs
When basic tools fail, consider a few specialized items that make removing stubborn blockages faster and less messy.
A drain snake or auger reaches deep clogs; a motorized drain cleaner speeds removal in long runs.
Shower clog remover kits include flexible heads for hair.
A small inspection camera locates obstructions precisely.
Heavy-duty rubber gloves and a bucket protect hands and contain debris.
Household items that can substitute for specialized tools
Several common household items can serve as effective stand-ins for specialized plumbing tools during a clog-clearing task.
A wire coat hanger straightened becomes a makeshift drain snake; a plunger can be substituted with a large plastic bottle for pressure plunging; baking soda and vinegar act as a mild chemical cleaner.
Rubber gloves, towels, and a bucket protect surfaces and collect debris.
Identifying the Cause of the Clog
The first step is to inspect the drain and visible trap for common causes such as hair and hardened soap scum, noting slow drainage or gurgling as telltale signs and suggesting basic removal or enzymatic cleaners.
If drainage is blocked by foreign objects or toys, visual inspection and use of a grabber or magnet can recover items without forcing them further down.
Persistent backups, recurring clogs, or mineral crust inside exposed pipes indicate deeper pipe issues or hard-water buildup that may require disassembly or a professional plumber.
Hair and soap scum buildup signs and solutions
Inspecting the drain area and observing water behavior provide clear clues that hair and soap scum are the likely culprits: slow drainage, standing water around the plug, a ropey or oily residue on the surface, and occasional gurgling or foul odors point to accumulated strands and hardened soap binding to residue on the pipes.
Solutions include removing visible hair, using a drain snake or hook, hot water flushes, and enzyme cleaners.
Foreign objects and toys detection and removal
Check the drain and trap for small toys, bath accessories, or other foreign objects, since these items commonly lodge where water flow narrows and cause abrupt blockages.
Remove visible items with needle-nose pliers or a retrieval tool. If unobstructed, detach the overflow plate and clean the U-bend trap.
Inspect with a flashlight, then flush with hot water to confirm clearance.
Pipe issues and mineral buildup when it’s more than a surface clog
When simple clearing methods fail, consider deeper pipe issues or mineral buildup as the underlying cause; hardened scale, corrosion, or collapse further down the line can restrict flow even when the visible drain appears clear.
Inspect accessible trap and clean, then use a plumbing snake or camera inspection for mainlines.
Persistent resistance or metallic flakes indicate mineral deposits or pipe degradation; call a pro if repairs are beyond DIY.
When to Use Chemical Drain Cleaners and How to Do It Safely
Chemical drain cleaners vary from enzyme-based formulas for organic buildup to caustic or oxidizing agents that dissolve hair and grease. Their effectiveness depends on the clog type and age.
Users should follow label instructions, wear protective gear, and confirm compatibility with pipe materials and septic systems to avoid damage.
Consideration of environmental impact and potential health risks is essential when choosing and disposing of these products.
Types of chemical drain cleaners and effectiveness
Several types of drain cleaners exist—alkaline, acidic, and enzymatic/biological—each designed for specific clogs and pipe materials. Alkaline (lye) dissolves hair/grease; acidic targets mineral buildup; enzymatic breaks down organic matter slowly. Choice depends on clog type and pipe material; effectiveness varies.
| Type | Best for |
|---|---|
| Alkaline | Hair, grease |
| Enzymatic | Organic buildup |
Safety precautions and compatibility with plumbing
Although useful for some blockages, drain cleaners pose risks to people and pipes and should be used only after evaluating the clog type, pipe material, and alternative methods.
Wear eye and skin protection, ventilate the area, and follow label instructions precisely. Avoid mixing products.
Do not use on old, corroded, or PVC joints without manufacturer guidance. Rinse thoroughly and consider professional help for persistent clogs.
Environmental and health considerations
After weighing safety precautions and pipe compatibility, the decision to use a chemical drain cleaner should also factor environmental and health impacts.
Chemical formulas can emit toxic fumes, corrode plumbing, and harm wastewater treatment processes and aquatic life.
Prefer mechanical methods first. If chemicals are necessary, choose biodegradable products, follow label instructions, ventilate thoroughly, wear PPE, and avoid mixing substances to minimize risks.
Troubleshooting Stubborn Clogs
If initial snaking, plunging, and chemical treatments fail, the next steps focus on targeted inspection and removal of hidden blockages.
The overflow plate and the P-trap should be checked for trapped hair, soap scum, or debris that simple tools can often dislodge.
If these actions do not restore flow or if plumbing is corroded or inaccessible, a professional plumber should be contacted.
Steps to try when initial methods fail
Persisting with more advanced approaches becomes necessary when plunging and simple drain cleaners fail to clear a bathtub clog.
Use a drain snake to reach and extract hair or debris, applying steady rotation.
Try enzymatic drain treatments overnight to break organic buildup.
If resistance persists, inspect accessible fittings and replace damaged seals or use a handheld auger before considering professional assistance.
How to check the overflow and P-trap for blockages
When plunging, snaking, and enzymatic treatments do not restore proper drainage, attention should turn to the overflow assembly and the P-trap, common hiding places for stubborn clogs.
Remove the overflow cover to inspect and clear hair/debris with a flexible brush.
Place a bucket under the P-trap, loosen its slip nuts, and clean trapped gunk.
Reassemble, test, and repeat if necessary.
When to call a professional plumber
Call a professional plumber when basic remedies—plunging, snaking, enzymatic cleaners, and clearing the overflow and P-trap—fail to restore reliable drainage, when water backs up into other fixtures, or when foul odors persist despite cleaning.
A plumber assesses deeper blockages, damaged pipes, venting issues, or sewer line problems using cameras and hydro-jetting, preventing recurring failures and costly water damage.
Preventing Future Clogs
Preventing future clogs begins with simple daily and weekly habits that minimize soap scum and hair buildup.
Using effective products and installing drain guards can catch debris before it reaches the pipes.
A straightforward routine maintenance schedule—periodic cleaning, product checks, and occasional professional inspections—keeps drains flowing over the long term.
Daily and weekly habits to reduce buildup
A few simple daily and weekly habits can especially reduce hair, soap scum, and grime that lead to bathtub clogs: rinsing the tub after use, removing visible hair from the drain screen, and wiping down surfaces to prevent residue buildup.
- Rinse tub and drain daily.
- Remove collected hair after each shower.
- Wipe walls and rims weekly.
- Flush drain with hot water weekly.
Products and drain guards that help prevent hair clogs
When equipped with the right products, a bathtub drain can block far less hair and require far fewer unclogging efforts.
Mesh strainers, silicone stopper screens, and pop-up covers capture hairs before they enter pipes. Enzyme-based drain cleaners help break down residual organic matter without harsh chemicals.
Magnetic or adhesive hair catchers fit inconspicuously. Choose durable, easy-to-clean guards sized to the drain for best results.
Routine maintenance schedule for long-term prevention
After installing suitable guards and using enzyme cleaners, establishing a routine maintenance schedule keeps hair and residue from accumulating.
A weekly quick-clean removes visible debris; a monthly deep clean with enzyme treatment and a soft brush clears buildup.
Inspect and replace guards every three months.
Log actions to track effectiveness and adjust frequency based on household usage and water quality, preventing future clogs.
Common Mistakes That Make Clogs Worse
Homeowners often make clogs worse by using the wrong tools or applying excessive force, which can damage pipes or push blockages deeper.
Improper use or mixing of chemical cleaners can create dangerous reactions and fail to clear the obstruction.
Ignoring hidden causes like venting problems or main-line issues can lead to recurring backups and wasted effort.
Using the wrong tools or excessive force
Grabbing the nearest tool and applying brute force often turns a minor clog into a bigger problem. Improper implements—screwdrivers, pliers, wire hangers—can damage the drain, bend pipes, or push debris deeper.
Excessive force risks cracks in porcelain or fittings, creating leaks. Proper tools and gentle technique reduce damage risk, preserve plumbing integrity, and make subsequent repairs easier and less costly.
Mixing chemical cleaners or using them improperly
Many people underestimate how dangerous mixing drain cleaners can be: combining products with different active ingredients—like bleach and acids—can produce toxic gases and corrosive byproducts that harm pipes and pose serious health risks.
Users should follow label instructions, avoid sequential treatments, ventilate, wear protection, and prefer mechanical methods first.
Improper use can worsen clogs, damage seals, and require costly repairs.
Neglecting hidden causes like venting or main-line issues
Although surface clogs often get immediate attention, underlying issues such as blocked vents or a compromised main sewer line can mimic or perpetuate bathtub backups and are frequently overlooked.
Ignoring venting or main-line problems leads to recurring slow drains, gurgling noises, sewer odors, and potential health risks.
Proper diagnosis may require inspection tools or a professional plumber to prevent wasted time and ineffective DIY fixes.
Quick Cost and Time Estimates
Typical clogs like hair buildups often clear in 15–30 minutes, while tougher blockages from soap scum or mineral deposits can take an hour or more.
DIY fixes generally cost under $30 for tools and supplies, whereas hiring a plumber commonly ranges from $100 to $300 depending on severity and travel.
Readers should weigh time, skill, and cost when choosing between a quick DIY attempt and professional service.
Typical time to clear different types of clogs
Household bathtub clogs vary widely in severity and required effort; minor hair-and-soap blockages often clear in 10–30 minutes with a plunger or drain snake.
In contrast, deeper or grease- and debris-based obstructions can take 1–3 hours and sometimes require chemical treatments or professional tools.
Slow drains from buildup may need 30–60 minutes of manual removal and flushing.
Roots or collapsed lines can exceed several hours.
Estimated costs for DIY vs. professional service
After estimating time and effort for various clog types, cost becomes the next practical consideration: DIY fixes generally run $0–$50 for tools and supplies (plunger, drain snake, enzymatic cleaner), with minor clogs often resolved within the same 10–60 minute window.
More involved DIY attempts—longer snakes, replacement parts, or multiple chemical treatments—can push materials to $50–$150 and several hours.
Professionals typically charge $75–$300+ depending on location, complexity, and emergency response; inspections or camera diagnostics add $100–$250.
Warranty, safety, and persistent or deep blockages often justify hiring a pro despite higher upfront cost.
Step-by-Step Checklist to Clear a Bathtub Clog Fast
The guide begins with essential pre-checks and safety precautions to protect the user and plumbing.
It then outlines a clear sequence of methods arranged from least to most invasive, allowing escalation only as needed.
The checklist concludes with final verification and cleanup steps to confirm the clog is cleared and the area restored.
Pre-checks and safety
Begin by evaluating the scene and gathering basic information: identify the drain type, check for standing water depth, note any recent activities that might have caused the clog (hair, soap buildup, toys), and locate access points such as removable stoppers or an overflow plate.
Wear gloves and eye protection, turn off water supply if accessible, confirm stable footing, ventilate the room, and keep phone nearby for emergencies.
Sequence of methods from least to most invasive
With safety checks complete and access points identified, proceed through a ranked sequence of clearing methods that minimize disruption and escalate only as needed.
Begin with manual removal of visible debris, then use a plunger.
If ineffective, employ a drain snake or auger for deeper blockages.
As a next step, try enzymatic drain cleaners.
Reserve chemical or pipe disassembly for persistent, stubborn clogs.
Final verification and cleanup steps
Confirm that water now flows freely and inspect surrounding fixtures for leaks before finishing.
Test drain speed with moderate flow, run hot water to clear residues, and operate the stopper to guarantee smooth action.
Wipe surfaces, rinse tools, and dispose of debris and chemicals per local guidelines.
Record any persistent issues for professional follow-up and restore cleaned items to their places.
Conclusion
Like a practiced gardener restoring a tangled path, the homeowner approaches the clogged tub with steady hands and sensible tools. They follow clear steps—inspect, dislodge, plunge, and rinse—avoiding quick fixes that betray patience. Small rituals—screening hair, hot-water flushes, occasional enzyme treatments—keep the drain free. In time the slow trickle returns to song, and the simple care taken now wards off future snarls, saving effort and temper alike.