How to Vent a Shower Drain: Simple Step-by-Step Guide to Fix Gurgling Drains and Prevent Bad Odors
To vent a shower drain effectively, you need to ensure proper airflow to prevent issues like gurgling, slow drainage, and unpleasant odors. Start by inspecting and clearing the trap and drain. Next, test the airflow using water or smoke. You can either connect to the main vent stack or install an air admittance valve (AAV) according to local codes. Use the right tools, seal joints properly, and maintain the correct pitch for drainage. Keep in mind that costs and permit requirements vary by location. The following steps will guide you through installation options, testing methods, and compliance with regulations.
What “venting a shower drain” means and why it matters
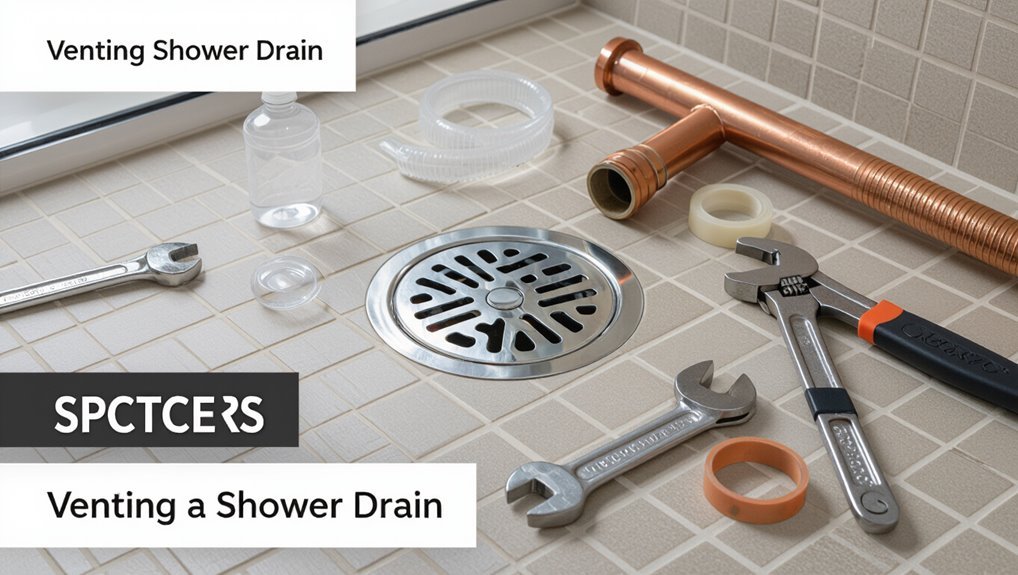
Venting a shower drain means providing an air pathway that allows wastewater to flow smoothly and prevents trap seals from being siphoned.
Signs that a shower needs venting include gurgling noises, slow drainage, and persistent sewer-like odors.
Without proper venting, fixtures can backflow, traps can lose their seal, and the system becomes prone to blockages and health hazards.
How drain vents work in plumbing systems
A properly installed drain vent allows air into the plumbing system to equalize pressure and prevent traps from being siphoned dry.
In plumbing, vents connect fixtures to roof stacks, balancing pressure when water flows and permitting smooth drainage.
Learning how to vent a shower drain involves routing pipe to the vent stack or using an approved mechanical vent, ensuring codes and trap seals remain intact.
Common signs you need to vent a shower drain (gurgling, slow drainage, odors)
Several clear symptoms indicate a shower drain needs a proper vent: persistent gurgling when nearby fixtures run, water that drains slowly or in fits, and recurring sewer-like odors in the bathroom.
Other signs include sputtering air bubbles in the tub, intermittent backflow from traps, and foul smells that dissipate briefly after running water.
These point to inadequate air intake or blocked venting.
Risks of unvented or poorly vented shower drains
When a shower drain lacks proper venting, air cannot flow freely through the plumbing system to balance pressure as water moves. This imbalance undermines trap seals and drainage performance.
Consequences include sewer gas entering living spaces, increased clogging risk from poor flow, frequent gurgling, damaged seals or fixtures from vacuum pressure, and potential code violations requiring corrective venting work.
Quick answer: When and how to vent a shower drain effectively
A concise checklist helps identify common venting problems quickly: gurgling, slow drain, sewer odor, and visible trap siphoning.
Simple remedies such as clearing a vent cap, re-seating a trap primer, or adding an air admittance valve can resolve many issues immediately.
For persistent or code-sensitive problems, a permanent re-pipe or connection to the main vent should be planned and performed by a qualified plumber.
Fast checklist to diagnose venting issues
How can one quickly determine whether a shower drain is properly vented and what corrective steps are needed?
Inspect for gurgling, slow drainage, siphoned traps, and sewer odors.
Check vent access on roof and for visible blockages, ice, or bird nests.
Run a smoke or water test to confirm airflow.
If blocked, clear or replace vent piping and verify trap seal depth.
Quick fixes vs permanent solutions
Distinguish temporary fixes from lasting repairs by evaluating symptoms, cause, and access: short-term measures like adding an air admittance valve, clearing a roof vent, or adjusting trap depth can restore function quickly.
However, persistent gurgling, recurring clogs, or evidence of collapsed or improperly pitched vent piping require rerouting, replacing vent runs, or installing a dedicated vent stack to meet code and prevent trap siphoning.
Long-term fixes guarantee proper slope, pipe size, and code compliance.
Tools, materials, and safety precautions before you start
Before beginning work on venting a shower drain, a clear list of required tools and materials—pipe wrenches, vent piping, fittings, sealant, and proper fasteners—should be assembled.
Appropriate safety gear such as gloves, eye protection, and a mask should be worn, and precautions taken for confined spaces and working above ceilings.
If the job involves complex roof penetrations, unfamiliar local codes, or suspected structural or sewer-line issues, a licensed plumber should be contacted.
Tools and materials required
Several essential tools, materials, and safety items are required to vent a shower drain properly.
A concise kit guarantees efficient work and reduces surprises: pipe wrench, screwdriver set, adjustable pliers, and tubing cutter.
Necessary materials include PVC or ABS vent pipe, fittings, primer and cement, plumber’s tape, and a replacement trap if needed.
- Pipe wrench
- Tubing cutter
- Vent pipe and fittings
- Primer, cement, tape
Safety gear and precautions
Having gathered the necessary tools and materials, attention turns to personal protection and site safety to prevent injury and damage.
Wear gloves, eye protection, and a dust mask; use knee pads and non-slip shoes.
Guarantee proper ventilation, turn off water and electrical circuits nearby, and clear the work area.
Keep a flashlight, first-aid kit, and phone accessible for emergencies.
When to call a licensed plumber
When should a homeowner stop and call a licensed plumber?
A licensed plumber is needed for persistent gurgling after standard vent checks, unknown pipe material, repeated backups, sewage odors, visible leaks or corrosion, roof-penetration work, building-code concerns, or complex vent rerouting.
They guarantee proper permits, diagnostic tools, safe roof access, and durable repairs that prevent recurring problems and health risks.
Step-by-step guide to venting an existing shower drain
The following steps outline a practical approach to venting an existing shower drain, beginning with inspection and any necessary clearing of the trap and drain line.
Methods for evaluating current vent performance—such as water and smoke tests—are described, followed by options to improve venting including rerouting, adding a vent stack, or installing an air admittance valve.
Specific guidance on AAV placement and sealing concludes the procedure.
Step 1 Inspecting the drain and vent access
A visual and tactile inspection of the shower drain and nearby vent access is the essential first step before any venting work begins.
The technician checks the grate, drain flange, and visible trap area for wear, leaks, or improper slope.
Exterior or attic vent access points are examined for obstructions, damage, and secure connections.
Notes and photos document findings for the next action.
Step 2 Clearing blockages in the trap and drain line
Begin by removing the drain cover and using a flashlight to assess the trap and immediate pipe for visible debris or buildup.
Use gloves and a drain snake or plumbing auger to extract hair, soap scum, and solids.
Flush with hot water and a mild enzymatic cleaner.
If obstruction persists, open the trap or call a plumber to avoid damaging pipes.
Step 3 Testing current vent function (water and smoke tests)
Proceed to verify vent performance using two simple tests: a water test to check for proper drainage and air flow, and a smoke test to detect leaks or backflow in the venting system.
For the water test, run multiple gallons and observe siphoning, gurgles, or slow drainage.
For the smoke test, introduce non-toxic smoke at the fixture and watch vent joints and roof terminations for escaping smoke.
Step 4 Options for adding or improving a vent: re-routing, adding a vent stack, or installing an air admittance valve
Evaluate three practical approaches for improving an existing shower vent: rerouting the drain to tie into an accessible vent stack, extending or adding a dedicated vent stack to the fixture, or installing an approved air admittance valve (AAV) where code allows.
Each option’s feasibility depends on pipe routing, structural access, cost, and local plumbing code. Choose based on minimal disruption, long-term reliability, and inspector approval.
Step 5 Installing an air admittance valve (AAV) placement and sealing
When rerouting or adding a vent stack is impractical, installing an approved air admittance valve (AAV) offers a compact, less disruptive way to provide one-way air flow for a shower drain.
Locate the AAV vertically above the trap arm, accessible for inspection.
Cut pipe, fit AAV per manufacturer, use appropriate solvent or mechanical couplings, seal joints, secure support, and test for airtight operation.
Step 6 Connecting to the main vent stack routing and fittings
Begin by identifying the nearest acceptable connection point on the main vent stack and mapping a straight, code-compliant route from the shower’s vent pipe to that stack, keeping fittings to a minimum and maintaining proper slope and clearance requirements.
Use appropriate-sized fittings (wyes, long-sweep elbows), changeover couplers, and approved supports.
Confirm joints follow material-specific standards and maintain required clearances to other services.
Step 7 Pressure/leak testing and final inspection
Pressurize the vent assembly and connected drain lines to verify airtight seals and proper function before closing walls or finishing surfaces.
Apply recommended test pressure using water or air per local code, isolate sections, and watch for steady readings.
Inspect joints, supports, and cleanouts for leaks.
Repair detected defects, retest, document results, and obtain any required inspections or approvals before concealing the work.
How to vent a shower in specific building scenarios
Venting approaches must adapt to the building context, since attic or crawlspace access in single-family homes, shared stacks in condominiums and apartments, closed walls in remodels, and special layouts like walk-in or multi-fixture groups each present distinct constraints.
The article will outline practical options—such as running vents through accessible spaces, tying into common vents with building approvals, using retrofit studs or studor-type vents where walls are closed, and sizing/configuring vents for curbless showers and grouped fixtures.
Code considerations, permit requirements, and coordination with building management or a licensed plumber will guide the chosen method.
Venting in single-family homes with accessible attic or crawlspace
In many single-family homes with accessible attics or crawlspaces, routing a vent for a shower is straightforward because the plumbing can run vertically through the wall cavity up into the attic or horizontally to an existing stack in the crawlspace.
Installers install a vent pipe sized to code, slope it properly, support it, and extend it above the roof with a vent cap.
Permits and code compliance are checked.
Venting in condominiums and apartments with shared plumbing
When units share drainage stacks and horizontal mains, routing a shower vent requires coordination with building plumbing layouts, code restrictions, and often the property manager or homeowners’ association.
Installers must assess whether a direct vent to the roof is possible or whether alternatives—such as re-piping to a common vent, using air admittance valves where permitted, or tying into an existing municipal-approved vent stack—are necessary.
Permits, record drawings, and licensed plumbers guarantee compliance and prevent cross-unit impacts.
Venting in remodels where walls are closed
Although remodels often conceal original plumbing within finished walls and floors, installing or upgrading a shower vent in such conditions requires careful planning to avoid invasive demolition or code violations.
Professionals evaluate access via adjacent rooms, soffits, or attic spaces; consider adding an air admittance valve where permitted; and document modifications to maintain venting integrity while minimizing structural disruption and ensuring compliance with local codes.
Venting for walk-in/curbless showers and multiple fixture groups
Remodel projects that hide original plumbing often leave limited routes for venting, so designers and plumbers must rethink vent strategies for walk-in or curbless showers and for bathrooms that serve multiple fixtures.
Options include remote vents via accessible soffits, combination wet-venting with code-compliant sizing, and dedicated mechanical vents where gravity venting is impossible.
Documentation and trap placement guarantee performance and prevent sewer gas intrusion.
Comparison of venting solutions and when to choose each
Different venting options carry distinct trade-offs in cost, reliability, and code acceptance, and selecting the right approach depends on the building layout and project constraints. The following table summarizes key pros and cons to guide decision-making. Each option will be discussed with attention to practical implications and code considerations.
| Option | Key Advantages | Key Disadvantages |
|---|---|---|
| Connect to existing vent stack | Low material cost; uses proven passive venting | May require long/complex routing; risk of overloading existing stack |
| Add new vent stack | Best performance and future-proofing; minimal impact on other fixtures | Higher cost and invasive installation; requires roof penetration and permits |
| Air admittance valve (AAV) | Quick, inexpensive, minimal roof work | Not allowed in all jurisdictions; mechanical failure risk over time |
Pros and cons of connecting to existing vent stack
When the choice is between tapping into an existing vent stack or installing a dedicated vent, homeowners and plumbers must weigh space, cost, and performance: connecting to an existing stack is often simpler and less expensive where the stack’s capacity and routing permit, but it can introduce flow imbalance, odor risk, and code limitations that make a separate vent preferable in complex layouts or high-demand fixtures.
Advantages: lower cost, fewer penetrations.
Disadvantages: shared load, potential backflow, inspection constraints.
Pros and cons of adding a new vent stack
Although adding a new vent stack requires more materials and roof penetrations than tying into an existing stack, it provides dedicated airflow, greater capacity, and simpler isolation for future maintenance.
It reduces load on shared vents, minimizes retrofit complications, and improves fixture performance.
Downsides include higher cost, structural roof work, permitting, and potential aesthetic or routing constraints; best for large remodels or insufficient existing venting.
Pros and cons of air admittance valves (AAVs)
Air admittance valves (AAVs) are one-way mechanical vents that open to admit air into a drain system when negative pressure develops and close to prevent sewer gases from escaping.
They save on roof penetrations, are easier and cheaper to install, and suit remodels.
Downsides include mechanical failure risk, temperature limits, limited code acceptance in some areas, and reliance on accessible placement for maintenance.
Common mistakes, troubleshooting, and how to fix them
Common errors in shower venting often stem from incorrect AAV placement or sizing and from improper trap slope that permits siphoning.
Persistent gurgling after installing a vent typically indicates a blockage, undersized vent, or failed trap seal and can be diagnosed by isolating fixtures, testing airflow, and inspecting traps.
Freezing signs include reduced airflow or visible ice in vent stacks, preventable by insulation, routing vents through conditioned spaces, or adding heat trace where necessary.
Mistake: Incorrect AAV placement or sizing
A mislocated or improperly sized air admittance valve (AAV) can render a shower vent ineffective, causing slow drainage, gurgling, or siphoned traps.
Common errors include installing the AAV below the flood level rim, inside confined spaces, or choosing a unit with insufficient flow capacity.
Remedy by relocating to a high, accessible position and selecting an AAV rated for the fixture load; test for proper operation.
Mistake: Improper slope or traps causing siphoning
Poor pipe slope or incorrectly configured traps often leads to siphoning, allowing water to be pulled from the trap and permitting sewer gases into the bathroom.
Symptoms include recurring odors and dry trap water after drainage.
Fixes: verify 1/4″ per foot slope, confirm trap arm length and trap weir heights meet code, add a vent or reconfigure trap to prevent negative pressure and maintain seal.
How to troubleshoot persistent gurgling after venting
After addressing slope and trap configuration to stop siphoning, persistent gurgling may still occur and indicates other venting or flow problems.
Inspect main vent for partial blockages, check for shared vents overloaded by fixtures, and verify drain line pitch and cleanouts.
Test airflow with a smoke pencil or simple fan.
Repair obstructions, rework vent connections, or add auxiliary venting as needed.
Signs of vent freezing and how to prevent it
When temperatures drop and moisture-laden air rises through the vent stack, ice can form and restrict airflow, producing slow drains, gurgling, or sewer odors entering the bathroom.
Additional signs include intermittent siphoning, reduced water flow, and visible frost at the roof vent.
Prevent freezing by insulating the stack, improving attic ventilation, adding a larger vent cap, or installing a heat cable where permitted.
Preventive maintenance to keep shower drains vented and odor-free
Routine cleaning schedules and periodic inspection of vent openings and trap seals help prevent blockages and odors.
Harsh chemical cleaners, mechanical snaking without knowing vent routing, and pouring grease or fibrous debris down the drain should be avoided because they can damage vents and traps.
In cold climates or during long vacancies, insulating exposed vent pipes, draining traps, or running water periodically prevents freezing and trap dry-out.
Routine cleaning and when to inspect vents
Regular brushing and periodic checks keep shower vents functioning and odors at bay.
Inspect visible vent terminations, roof stacks, and accessible attic runs twice yearly and after storms. Clear light debris, nests, and leaf buildup; remove hair and soap scum from trap areas monthly.
Note slow drains, gurgling, or sewer smells as triggers for immediate inspection or professional service to prevent bigger venting issues.
Products and methods to avoid (what damages vents/drains)
Avoid abrasive chemical drain cleaners and mechanical forceful methods that can corrode pipes, damage seals, and dislodge vent connections; instead, use gentle enzymatic treatments, a plunger or plumber’s snake, and professional services for stubborn clogs.
Avoid wire brushes, hammering, pipe solvents, and caustic bath additives. Refrain from over-tightening fittings or temporary fixes that mask venting problems—schedule proper repairs to preserve flow and seals.
Seasonal tips (cold climates, long vacancy periods)
Having covered which products and forceful methods to steer clear of when servicing vents and drains, attention shifts to seasonal considerations that affect vent performance and odors.
In cold climates, insulate exposed vent pipes, clear snow/ice from roof vents, and use heat tape if recommended.
For long vacancies, pour water or use biodegradable trap sealant to maintain traps, and inspect vents before reoccupation.
Costs, permits, and code considerations
Costs for venting a shower vary widely, with DIY installs typically costing a few dozen to a few hundred dollars for materials while professional work can run from several hundred to a few thousand depending on complexity.
Local building codes dictate vent sizing, placement, and allowable configurations, so homeowners should verify requirements before starting.
Most jurisdictions require a permit and inspection for new or altered venting, and following the documented permit process helps guarantee code compliance and passing inspection.
Typical cost ranges for DIY vs professional vent installation
Typical projects to add or reroute a shower vent fall into two broad cost bands: a DIY approach generally incurs modest outlays for parts and tools (often $20–$200), while hiring a licensed plumber typically ranges from $300 to $1,200 or more depending on complexity.
DIY saves labor but may require more time and skill; professional work adds warranty, faster completion, and higher labor and inspection costs.
Local building code requirements and vent sizing basics
Because plumbing vents affect trap function, local building codes dictate where vents can run, how they connect to drain lines, and the minimum vent size required for each fixture.
Codes specify pipe diameter, slope, and maximum trap arm lengths; materials and fittings must be approved.
Compliance prevents siphoning, odors, and fines.
Consult the applicable plumbing code and local amendments before modifying vents.
Permit and inspection steps to follow
When undertaking work to vent a shower drain, homeowners and contractors must first verify permit requirements with the local building department and obtain any necessary permits before starting work.
They should budget for permit fees, schedule required inspections at rough‑in and final stages, guarantee compliance with applicable codes, and retain documentation.
Noncompliance can result in fines, forced rework, or denied occupancy approvals.
Real-world examples and short case scenarios
The article presents concise case scenarios to illustrate common venting problems and solutions.
One scenario describes fixing a gurgling shower in an older home.
Another covers installing an air admittance valve during a bathroom remodel.
A third examines resolving persistent odors in a multi-unit building.
Each example highlights diagnostic steps, typical fixes, and code or permit considerations.
Case: Fixing a gurgling shower in an older home
An older homeowner notices a rhythmic gurgle from the shower drain after flushing nearby toilets and calls a plumber to diagnose the problem: partial trap siphoning caused by a clogged or undersized vent in a house with aging plumbing.
The plumber inspects vent stacks, clears blockages, tests airflow, and advises targeted repairs: relining vents, replacing brittle fittings, and ensuring proper pitch and connections to restore vent function and stop siphoning.
Case: Installing an AAV in a bathroom remodel
Following the plumber’s diagnosis of trap siphoning from a restricted vent stack, the remodel team evaluates whether an air admittance valve (AAV) can be installed to restore proper venting without extensive roof work.
They confirm manufacturer placement clearances, accessible mounting above fixture flood level, and compatibility with local code.
After choosing a certified AAV, installers test multiple fixtures for balanced airflow and monitor for recurring gurgling.
Case: Resolving odors in a multi-unit building
When persistent sewer odors began infiltrating hallways and several apartments, building management commissioned a targeted investigation to identify whether dry traps, blocked vents, or a failing shared soil stack were responsible.
Technicians inspected fixtures, measured trap seal depths, rodded common vents, and smoke-tested the stack.
Repairs included trap recharges, vent clearing, and replacing a corroded soil-stack section, eliminating odors and preventing recurrence.
Practical checklist before you finish the job
Before closing up the work, the technician runs a final set of tests to confirm the vent and drain function under normal and peak conditions.
They record results and label the vent and access points for straightforward future maintenance. Clear documentation and verified operation reduce surprises and protect the homeowner.
- Verify water flow and air relief under load — confidence restored.
- Check for leaks and proper trap seal — worry erased.
- Label vent lines and access panels — clarity preserved.
- File test records and notes — security guaranteed.
Final testing steps
Complete a concise series of checks to confirm the vent functions and the drain remains watertight.
Run multiple water tests at normal and peak flow, listen for gurgles, and watch for slow drainage.
Inspect all joints for leaks during and after testing.
Verify vent air movement with a smoke or tissue test.
Recheck trap seal and final connections before declaring the job complete.
Documentation and labeling for future maintenance
A concise documentation packet and clear labels help future maintenance proceed quickly and correctly.
The technician records vent type, pipe sizes, join methods, material brands, and installation date.
Attach a laminated checklist and schematic near the access panel.
Label shutoff valves and cleanout locations with durable tags.
Include warranty info, parts sources, and recommended inspection intervals to simplify future repairs and diagnostics.
Conclusion
Venting a shower drain restores balance to a home’s unseen plumbing, like adding air to a bicycle tire so it rolls smoothly. Following clear steps prevents gurgles and odors while protecting pipes from slow drainage and trap siphonage. With proper tools, safety, and code awareness, most fixes are manageable; complex layouts may need a pro. Regular checks and simple maintenance keep vents functioning, ensuring long-term comfort and predictable plumbing performance.