How to Use Aube Thermostat: Step-by-Step Setup, Programming, and Troubleshooting
To effectively set up and use your Aube thermostat, follow these steps: First, verify your heating system type (electric, hydronic, or forced-air) and ensure power is turned off before installation. Mount the unit, connect the labeled wires, and restore power to check for startup. For programmable models, set the date and time, then create your schedules for weekdays and weekends. Calibrate the temperature offset using a reliable thermometer. If you encounter issues, troubleshoot by checking breakers, wiring, relays, and error codes, and replace batteries if necessary. For detailed configuration, advanced options, and troubleshooting tips, continue reading.
Overview of Aube Thermostats and Typical Use Cases
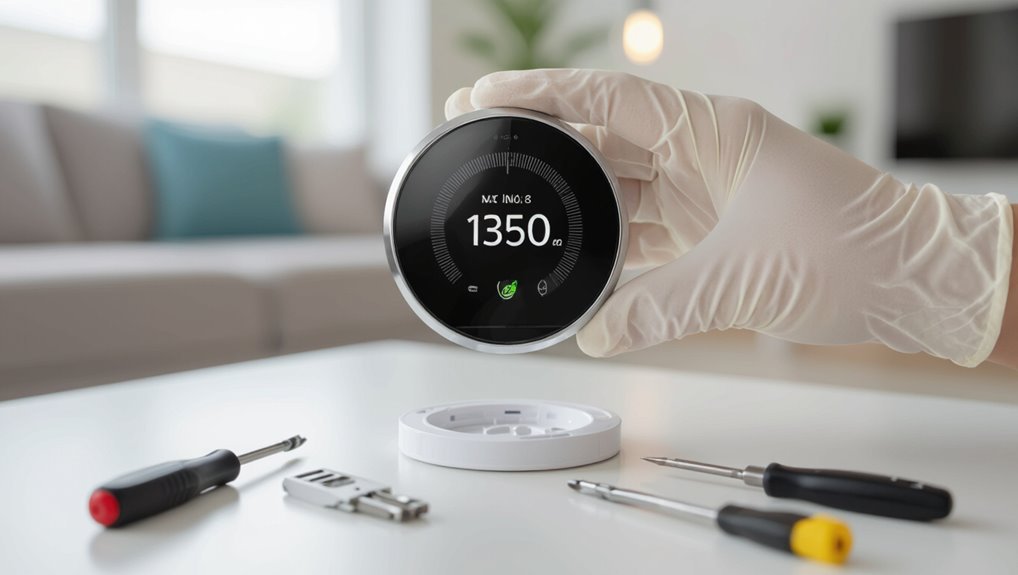
Aube offers several thermostat models that vary by control type, power requirements, and programming capabilities, which helps users choose according to system and feature needs.
These thermostats are commonly compatible with electric baseboard, hydronic, and forced-air heating systems, so verifying system type is essential.
Before setup, users should note required voltage, wiring terminals, and any model-specific features such as setback programming or remote sensors.
Types of Aube thermostats and model differences
Several thermostat families cover the typical needs of electric baseboard, hydronic, and forced-air heating systems, each differing in control features, wiring requirements, and sensing options.
Models range from simple non-programmable line-voltage units to multi-stage programmable and smart controllers. Selection depends on load capacity, sensor type, and installation constraints.
Readers searching how to use aube thermostat should match model capabilities to application.
Common heating systems compatible with Aube thermostats
Thermostats in the Aube lineup are compatible with a broad set of residential and light‑commercial heating systems, including electric baseboard and convector heaters, hydronic (hot‑water) baseboards and in‑floor heating, and forced‑air systems that use zone controls or relay interfaces.
They also support heat pumps with auxiliary heat, wall‑mounted fan coils, and simple radiator circuits when paired with appropriate relays or transformers.
Key features to know before setup
Before beginning installation, users should review the thermostat’s control type (line‑voltage vs. low‑voltage), supported heating loads, wiring terminals, and available modes (manual, programmable, setback, and heat‑pump compatibility) to guarantee correct selection and safe wiring.
Aube models offer adjustable differential, backlight, lockout, and adaptive recovery.
Typical use cases include baseboard, boiler, electric radiant, and retrofit upgrades for energy savings and simpler zoning.
Quick Start: How to Get Your Aube Thermostat Working Immediately
Before beginning, the installer should confirm required tools are on hand, power to the circuit is controlled, and wiring access is available.
For basic Aube models the initial steps are to power on, select the correct operating mode, and set the desired temperature.
For programmable models the quick start focuses on activating today’s schedule and verifying time and program settings.
What to check before you begin (tools, power, wiring access)
A quick checklist helps assure a smooth Aube thermostat installation: confirm required tools (screwdrivers, wire stripper, voltage tester), verify power to the HVAC circuit is off at the breaker, and make certain the existing thermostat wiring and mounting area are accessible and labeled.
Also inspect wire condition, note system type (line-voltage or low-voltage), have mounting hardware ready, and guarantee clear workspace and adequate lighting.
Quick setup for basic models (power-on, mode selection, temperature control)
Powering the unit and selecting basic settings takes only a few steps: turn on the breaker or insert batteries as required, confirm the display is active, choose system mode (heat, off, or auto) using the mode button, and set the desired temperature with the up/down controls.
Verify the thermostat responds to changes, allow a few minutes for the heating system to react, and consult the manual for indicator meanings.
Quick setup for programmable models (today’s schedule activation)
To activate a programmable Aube thermostat quickly, the user should enable power, verify the display is active, then enter the schedule setup mode using the mode or program button.
Select “Today” or current day, set wake, away, return, and sleep periods with desired temperatures, confirm each entry, and save.
Exit to run mode; thermostat will follow today’s schedule immediately.
Step-by-Step Installation Guide
The installation guide opens with essential safety steps, emphasizing power shutdown before any work begins.
It then covers removing the old thermostat, preparing the wall, and identifying and labeling each wire for reference.
Finally, it explains mounting the Aube base and making correct connections to terminals (R, C, W, L, etc.) by common wire color.
Safety precautions and turning off power
Before beginning any work, verify all relevant electrical sources are completely de-energized and that the installer understands basic electrical safety practices, including lockout/tagout, use of insulated tools, and verification with a voltage tester.
Confirm circuit breakers or fuses control the thermostat circuit, label them, and test for absence of voltage.
Wear safety glasses, avoid wet conditions, and follow local codes and manufacturer warnings.
Removing the old thermostat and preparing the wall
With power confirmed off and tools ready, proceed to remove the existing thermostat and prepare the wall for the Aube unit.
Detach the device, unscrew the mounting plate, and gently pull it away.
Inspect the wall for damage, remove loose paint or debris, and clean the surface.
Patch any holes, allow drying, and guarantee a flat, stable mounting area before continuing installation.
Identifying and labeling wires
Begin by visually locating each wire protruding from the wall and tracing it back to its terminal or conductor group. Note color, insulation condition, and any markings.
Use small labels or masking tape to mark function (R, W, C, etc.) and record terminal letters. Photograph the configuration for reference.
Keep wires separated to prevent shorting and secure them safely while proceeding.
Mounting the Aube thermostat base
Mount the Aube thermostat base by first ensuring the power to the HVAC system is off and verifying the labeled wires are accessible; then align the base over the wall box or mounting surface, level it, and mark screw locations.
Drill or pilot holes as needed, secure the base with provided screws, tuck wires neatly into the cavity, confirm the base sits flush, and replace trim or cover.
Wiring connections by common wire color and terminal (R, C, W, L, etc.)
Refer to the thermostat’s wiring diagram and the HVAC control board labels before making any connections, then match each wire by its color and function to the corresponding terminal on the Aube base (for example: R/red to R, C/blue or common to C, W/white to W, L/black or system-specific to L).
| Terminal | Typical wire |
|---|---|
| R | Red |
| C | Blue |
| W | White |
| L | Black |
| AUX | Yellow |
Securing the thermostat and restoring power
Tighten the thermostat base to the wall plate and secure the cover, ensuring all wires remain seated in their terminals and the unit sits flush without gaps.
Restore power at the breaker or switch only after verifying mounting stability and terminal screws.
Document configuration and label wires if needed.
Observe for stray wire contact and clear debris before powering to prevent shorts or damage.
Initial power-on checks and LED/display confirmations
Once power is restored, the installer should immediately verify the thermostat’s startup sequence by observing the LED indicators and display for correct illumination, model identifier, and firmware/version prompts.
Confirm backlight brightness, segment integrity, and absence of error codes. Ascertain relay indicator toggles if applicable.
Record displayed settings, date/time prompt, and initial temperature reading before proceeding to configuration and programming steps.
Programming Your Aube Thermostat: Detailed Walkthrough
The following section explains how to program an Aube thermostat, starting with exploring the menu and basic controls and setting the correct date and time.
It then covers creating daily and weekly schedules plus vacation or temporary holds.
Finally, procedures for adjusting temperature offsets and calibrating the sensor are summarized.
Navigating the menu and basic controls
Begin by familiarizing oneself with the thermostat’s front panel: a clear LCD, a rotary dial or arrow buttons, and a single-menu or multi-menu structure depending on the model.
Use the dial or arrows to navigate menus, press the confirm/key to enter, and Back/Exit to return.
Menu icons indicate modes (Heat/Off/Prog).
Adjust setpoints and view status screens; changes save automatically.
Setting date and time
Set the thermostat’s clock before programming schedules so all timed events run accurately.
The user accesses Date/Time from the main menu, selects day, month, year, then hour and minute using arrow keys. Confirm each entry to save.
If power loss occurs, check backup battery and reverify settings.
Accurate timekeeping guarantees consistent temperature control and reliable automated operations.
Creating a daily schedule
Create a daily schedule by assigning temperature setpoints to specific time blocks for each weekday and weekend so the thermostat follows preferred comfort and energy-saving patterns automatically.
The installer selects morning, daytime, evening and night periods, sets heating or cooling targets, and programs changeover times.
Confirm settings on the display, save the profile, and verify operation through manual overrides and observed runtime to guarantee accuracy.
Creating a weekly schedule and vacation/temporary hold
To program a weekly schedule and configure vacation or temporary hold modes, the user assigns distinct daily profiles across seven days and designates extended setbacks for absences or short-term changes.
This enables the thermostat to follow different weekday/weekend routines while suspending normal schedules during vacations or manual holds.
The process involves copying or customizing days, setting start/end times with target temperatures, and activating hold or vacation mode with duration.
Adjusting temperature offsets and calibration
Adjusting temperature offsets and calibrating the Aube thermostat guarantees displayed temperatures match actual room conditions and that the system responds accurately to setpoints.
The installer or user accesses calibration mode, compares thermostat reading to a reliable thermometer, enters the offset value, and verifies across different locations.
Recalibrate after sensor relocation, seasonal changes, or persistent discrepancies to maintain precise control and consistent comfort.
Energy-saving programming tips
Several simple programming strategies can reduce energy use without sacrificing comfort: setback schedules for unoccupied periods, incremental deadband settings to minimize short cycling, and temperature differentials that align with the home’s thermal response.
The thermostat should use adaptive setbacks, larger night setbacks, staggered recovery times, and minimal heating/cooling swings.
Occupancy sensors and learning modes further optimize runtime while preserving comfort and system longevity.
Advanced Configuration and Integration
The section addresses advanced configuration options and system integration for the Aube thermostat.
Topics include connecting external sensors and remote temperature probes, integrating with compatible home automation platforms, and adjusting differential, cycle rate, and recovery parameters.
Clear instructions and compatibility notes guide safe setup and peak performance.
Connecting to external sensors and remote temperature probes
Install external sensors and remote temperature probes to extend sensing accuracy and place measurement points where the built-in sensor isn’t representative—such as basements, sunlit rooms, or distant HVAC zones.
Follow Aube wiring diagrams, verify sensor type compatibility (NTC, 10K, etc.), and route low-voltage cables away from electrical interference.
Calibrate in settings if available, test readings, and secure probes to fixed locations for reliable control and diagnostics.
Integrating with home automation or smart systems (if supported)
After confirming external sensors are functioning and placed where needed, attention can shift to integrating the Aube thermostat with home automation or smart systems.
Verify model supports protocols (Z-Wave, Wi‑Fi, proprietary). Update firmware, enable API or cloud features, and follow manufacturer pairing steps.
Test basic commands, create automation routines, and monitor logs for connectivity or response issues before deploying complex schedules.
Configuring differential, cycle rate, and recovery settings
Configure differential, cycle rate, and recovery settings to balance comfort, equipment longevity, and energy use.
The installer adjusts temperature differential to reduce short cycling, sets cycle rate limits to protect relays and compressors, and programs recovery behavior so the system reaches setpoints efficiently without overshoot.
Verify settings against manufacturer recommendations and local codes, then monitor performance and refine as needed.
Troubleshooting Common Problems
The troubleshooting section addresses frequent faults such as a thermostat that will not power on, a heating system that ignores thermostat commands, and erratic temperature readings or short cycling.
It also covers issues with the clock or schedule not saving after power loss and explains common error codes shown on the display with their fixes.
Clear diagnostic steps and corrective actions are provided for each problem to guide resolution.
Thermostat won’t power on diagnostic steps
Several basic checks can quickly determine why an Aube thermostat fails to power on: verify the circuit breaker and fuse serving the thermostat, confirm the low-voltage wiring (including a secure C‑wire or compatible power adapter) is intact, and inspect the thermostat and HVAC control board for visible damage or loose connectors.
Next, test voltage at terminals, reseat connectors, replace a blown fuse, and try a spare power adapter.
Heating system not responding to thermostat commands
After checking power and wiring, attention turns to cases where the thermostat appears functional but the heating system does not respond to commands.
Verify mode and setpoint, guarantee temporary hold or program isn’t preventing calls for heat.
Inspect relay or control signal at the furnace/boiler, confirm fuse and safety interlocks.
If unclear, consult installation manual or contact qualified service for boiler/valve diagnosis.
Erratic temperature readings or short cycling
Erratic temperature readings or short cycling often indicate sensor, placement, or control issues rather than thermostat display faults.
The guide advises checking sensor calibration, verifying thermostat placement away from drafts, vents, or direct sunlight, and ensuring tight wiring and correct heat anticipator or cycle settings.
Recommend observing cycle duration, testing with a separate thermometer, and contacting HVAC technician if problems persist.
Clock or schedule not saving after power loss
A lost clock or erased schedule after a power outage typically points to insufficient backup power or a firmware issue within the thermostat.
The guide advises checking battery condition (if applicable), verifying C-wire presence and stable supply, and updating firmware.
If the problem persists, perform a controlled reset and reprogram.
Replace faulty batteries or contact support for board-level faults to prevent recurrence.
Display shows error codes common codes and fixes
Loss of settings after a power event can sometimes be accompanied by error codes on the Aube thermostat display, which offer direct clues to underlying faults.
Common codes: E1 (sensor), E2 (relay), E3 (communication), and E4 (EEPROM). Each requires specific action: reboot, check wiring, replace sensor, or contact support.
Guidance:
- E1: verify sensor
- E2: inspect relay
- E3: reset comms
- E4: seek service
Maintenance and Long-Term Care
Routine cleaning and periodic inspections help maintain sensor accuracy and prevent dust-related issues.
If the model uses batteries, they should be replaced on the manufacturer’s recommended schedule and memory retention procedures followed to avoid losing settings.
Recalibration or replacement is warranted when temperature readings consistently deviate from a reference or the unit shows signs of failure.
Recommended cleaning and inspection routines
When performing maintenance on an Aube thermostat, owners should follow a concise schedule of cleaning and inspection tasks to guarantee reliable operation and extend lifespan.
Periodically dust the unit, clear vents and surrounding area, check mounting and wiring for corrosion or looseness, verify display and button function, inspect sensor and probe connections, and document findings.
Address minor issues promptly and schedule professional service if needed.
Battery replacement (if applicable) and memory retention
Some Aube thermostat models use backup batteries to preserve time, program settings, and clock during power interruptions. Owners should replace these batteries according to the manufacturer’s schedule or when low-battery indicators appear.
Replacement steps involve powering down if instructed, installing correct battery type and orientation, testing functions, and noting retained schedules.
Dispose of used batteries per local regulations to prevent leakage and corrosion.
When to recalibrate or replace the thermostat
How often a thermostat should be recalibrated or replaced depends on its performance, age, and the HVAC system’s responsiveness.
Recalibrate when temperature deviations exceed 1–2°C, programming fails, or following system repairs.
Replace after persistent inaccuracies, repeated malfunctions, loss of features, or typically every 8–12 years.
Consider replacement sooner for digital failure, connectivity issues, or when energy savings justify an upgrade.
Safety, Warranty, and When to Call a Professional
The section addresses key electrical and gas safety precautions required when installing or servicing an Aube thermostat, including power shutoff and gas-valve awareness.
It outlines warranty terms, how to register the product, and what documentation to keep for claims.
It also lists clear signs—such as persistent power faults, unexplained heating failures, or gas odors—that warrant contacting an HVAC technician or licensed electrician.
Electrical and gas safety considerations
Before any work on an Aube thermostat begins, power to the heating system must be fully disconnected and verified with a non-contact voltage tester or multimeter to prevent electric shock or equipment damage.
Additionally, gas valves should be shut off and gas detectors used when applicable.
Only qualified technicians should handle gas line or complex electrical repairs; improper intervention risks leaks, fire, or voided safety compliance.
Warranty coverage and registration steps
Aube thermostats typically include a limited warranty covering manufacturing defects for a specified period from the date of purchase. Users should review the exact terms in the product documentation to confirm duration, coverage limits, and any exclusions.
Registration often requires model, serial number, purchase date, and installer details via online form or mail.
Keep receipts and photos; contact support for warranty claims and return authorization.
Signs you need HVAC or electrician assistance
When should a professional be contacted for thermostat issues?
Persistent power loss, burning smells, tripped breakers, visible wiring damage, or inconsistent heating/cooling indicate immediate electrician or HVAC intervention.
If thermostat resets, displays errors, or controls fail after basic troubleshooting, call a qualified technician.
Warranty concerns, complex replacements, or line-voltage connections also require certified professionals to guarantee safety and preserve coverage.
Comparison and Selection Guide
This section compares Aube thermostat models to help identify the best match for a given heating system.
It outlines criteria for selection—compatibility, control features, and installation requirements—and summarizes the main pros and cons of common models.
Readers will gain a concise basis for choosing the appropriate Aube unit or seeking further specification details.
How to choose the right Aube model for your system
Which features matter most for a heating system depends on the fuel type, control method, and installation constraints; consequently, choosing the right Aube model requires matching thermostat capabilities (line-voltage vs. low-voltage, modulating vs. two-stage, or relay control), compatibility with the heating appliance (boiler, furnace, baseboard, floor heat), and any advanced needs such as remote sensing, setback programming, or load management.
| System type | Control need | Recommended check |
|---|---|---|
| Baseboard | Line-voltage | Relay compatibility |
| Boiler | Modulating | Modulation support |
| Furnace | Low-voltage | Wiring terminals |
Pros and cons of common Aube models
Several Aube thermostat models are commonly compared for residential heating, each balancing features, installation complexity, and cost to suit different systems and user needs.
Benefits include reliability, simple wiring, and affordability; drawbacks involve limited smart features and occasional compatibility caveats.
Numeric list to evoke emotion:
- Confidence
- Frustration
- Relief
- Doubt
Practical Tips and Time-Saving Shortcuts
The section outlines practical energy-saving habits and seasonal thermostat adjustments to reduce bills and maintain comfort.
It then presents user tips for faster programming and common shortcuts that streamline daily use.
Finally, a concise checklist is provided to verify correct operation after setup and during routine checks.
Energy-saving habits and seasonal adjustments
A few straightforward habits can trim heating and cooling costs without sacrificing comfort: set modest setbacks during unoccupied hours, use programmable or smart schedules aligned with weekly routines, and take advantage of the Aube thermostat’s built‑in hold and vacation modes to avoid manual adjustments.
Adjust setpoints seasonally, bleed radiators and insulate ducts, close vents in unused rooms, and review energy reports to refine targets.
User tips for faster programming and common shortcuts
Speed through common tasks by mastering a few shortcuts and menu gestures that cut programming time in half.
Use preset program templates, copy daily schedules across weekdays, and hold buttons to skip confirmations.
Save frequently used temperature scenes and assign quick-access buttons if available.
Keep firmware updated for faster menus, and consult the compact user guide for model-specific keystroke sequences to streamline setup.
Checklist to verify correct operation after setup
Several quick checks confirm the Aube thermostat functions correctly after setup: verify the display shows the programmed schedule, assure the system responds to mode changes (heat/cool/off), and confirm room temperature readings match a reliable thermometer within a few degrees.
Then perform these final checks to guarantee comfort and reliability:
- Test manual temperature change to feel immediate response.
- Inspect wiring and secure connections.
- Confirm time and date for scheduled events.
- Review error codes or indicator lights for issues.
Conclusion
The guide leaves readers ready to install, program, and maintain an Aube thermostat, but a final twist remains: one overlooked wire, one misread icon, or one forgotten schedule can quietly undo hours of careful setup. Vigilance, a quick double-check, and the right tools are the small acts that prevent late-night chills or wasted energy. For those who hesitate, a professional call could reveal a simple fix—or a deeper issue waiting to be discovered.