How to Fix Dripping Faucets Quickly: Step-by-Step Repair Guide for Any Tap
If you’re dealing with a dripping faucet, you can usually fix it in 15–45 minutes. The drip is often due to worn washers, O-rings, cartridges, mineral buildup, or loose parts. Start by shutting off the water supply and relieving any pressure. Next, identify your faucet type—whether it’s compression, cartridge, ball, or ceramic-disk. Replace any faulty washers, seals, or cartridges, and lubricate the seals before reassembling the faucet. Make sure to tighten all fittings and test for leaks. If the drip continues, you may need to conduct further diagnostics or consult a professional. Follow the steps provided for a detailed guide.
Fast overview: Why faucets drip and what to expect from a quick repair
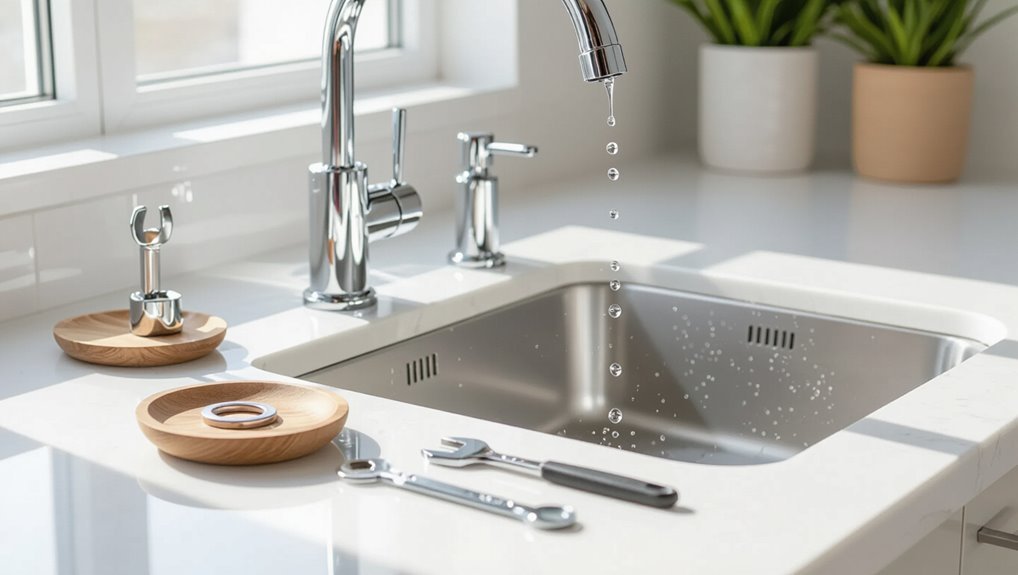
Many drips stem from worn washers, corroded seats, loose components, or mineral buildup.
A straightforward repair—replacing a washer or cartridge and tightening fittings—typically takes 15–45 minutes, while persistent leaks or complex valve issues warrant a professional.
Before starting, the water supply should be shut off, tools and replacement parts gathered, and basic safety precautions observed.
Common causes of a dripping faucet
A steady drip usually signals one of a few predictable issues inside the faucet: worn seals or washers, mineral buildup that prevents proper seating, corroded valve components, or loose connections.
Other causes include damaged O-rings, faulty cartridge seats, high water pressure, or debris in the aerator.
Understanding these issues helps prioritize parts and steps when learning how to fix dripping faucets.
How long a quick repair should take and when to call a pro
Although some drips stem from complex damage, most quick faucet repairs—cleaning an aerator, replacing a worn washer or O-ring, or tightening a loose connection—take 15 to 30 minutes for someone with basic tools and a little experience.
Persistent leaks, corroded valve seats, damaged cartridges, multiple failing parts, or unclear origins signal professional plumbing intervention; call a pro when fixes fail or water damage risk rises.
Safety and preparation checklist before you begin
After attempting a quick fix, homeowners should pause and run a brief safety and preparation checklist before opening the faucet assembly.
Verify water shutoff at main or local valve, drain remaining water, clear workspace, gather tools and replacement parts, wear safety glasses and gloves, protect cabinets and finishes, and place a bucket or towels.
Confirm parts compatibility and have plumber contact ready.
Identify your faucet type and required parts
The reader is instructed to first identify whether the fixture is a cartridge, ball, ceramic-disk, or compression faucet, since each type has distinct internal parts and failure modes.
Common components that cause leaks—washers, O-rings, cartridges, and seals—are listed so the correct replacements can be sourced.
Clear photos and basic measurements of the valve body and removed parts are recommended to guarantee accurate parts matching.
How to recognize cartridge, ball, ceramic-disk, and compression faucets
How can a homeowner quickly determine which faucet type is present in a sink or tub?
Visual cues and handle action reveal type:
- Cartridge faucets have single or double handles that move smoothly and often pull straight up;
- Ball faucets have one rounded handle with visible ball housing;
- Ceramic-disk models feature a wide, flat cylindrical control;
- Compression faucets use separate hot/cold knobs that turn multiple rotations.
Typical parts that fail (washers, O-rings, cartridges, seals)
When a faucet starts to drip, common culprits are small, wearable parts—rubber washers, O-rings, ceramic cartridges, and various seals—that fail under repeated use or mineral buildup.
Identification depends on faucet type: compression faucets use washers and seat rings; cartridge and ceramic-disk faucets rely on replaceable cartridges or disks; ball faucets use seats and springs.
Gather the correct replacement parts matching model and dimensions.
How to take photos and measurements for replacement parts
Begin by documenting the faucet as-is: photograph each visible angle (front, sides, top) and the handle(s) in both on and off positions.
Then capture close-ups of the spout base, escutcheon, and any markings or model numbers.
Measure center-to-center hole spacing, spout diameter, thread sizes, and cartridge dimensions.
Note finish, mounting type, and any corrosion or unique features for accurate replacement matching.
Tools and materials needed for a fast DIY fix
A concise kit speeds up most faucet repairs and prevents repeat trips to the hardware store.
- Essential tools: adjustable wrench, flat and Phillips screwdrivers, Allen keys, slip-joint pliers.
- Replacement parts to keep on hand for rapid repairs.
- Optional tools for a cleaner, longer-lasting repair.
Essential tools (wrench, screwdriver, Allen keys, pliers)
Necessary hand tools—an adjustable wrench, flat- and Phillips-head screwdrivers, a set of Allen keys, and slip-joint or needle-nose pliers—form the core kit for quickly addressing a dripping faucet.
Additional useful items include a basin wrench for tight spaces, a small flashlight, and a rag. Properly sized tools prevent damage, speed disassembly, and allow secure reassembly during routine tap repairs.
Replacement parts to keep on hand for rapid repairs
Several basic replacement parts should be kept on hand to enable quick fixes for most dripping faucets: assorted rubber O-rings and seat washers, cartridge or ceramic disc cartridges matching common brands, replacement valve seats, packing nuts, faucet stems/spindles, and a selection of screws and escutcheon caps.
Kept organized, these items allow rapid on-site swaps and immediate leak stops.
Optional tools for a cleaner, longer-lasting repair
Keeping a small stock of replacement parts is helpful, but a handful of optional tools and materials can make repairs cleaner and extend faucet life.
A silicone plumber’s grease, thread seal tape, basin wrench, small pick, and soft-jaw pliers reduce damage and improve seals.
Cotton rags, toothbrush, and a magnetic tray for fasteners speed work and prevent lost parts, ensuring durable, tidy results.
Step-by-step quick repairs by faucet type (fast method first, full fix after)
The guide now outlines quick, type-specific fixes followed by fuller repairs for lasting results.
For compression faucets it covers washer and O-ring swaps; cartridge faucets get rapid reseating or cartridge replacement; ball faucets receive seal and spring changes; and ceramic-disk models focus on cylinder and seal replacement.
Each set of steps presents the fastest effective method first, then the complete repair procedure.
Compression faucet quick washer/O-ring replacement
The procedure begins by shutting off the water supply and relieving remaining pressure.
The handle and bonnet nut are then removed to access the stem assembly.
A worn washer and O-ring are quickly replaced before reassembling the faucet and testing for leaks.
Shut off water and relieve pressure
Begin by shutting off the water supply to the faucet and relieving built-up pressure before any repair work.
Locate and close the shutoff valves under the sink or the main supply.
Open the faucet handles to drain remaining water and release trapped pressure.
Use a towel to catch drips.
Confirm flow has stopped before proceeding to remove components for washer or O-ring replacement.
Remove handle and bonnet nut
Once water flow is confirmed off, remove the handle and bonnet nut to access the valve stem and internal parts.
Use a screwdriver or hex key to lift the handle cap and loosen the retaining screw.
Gently pull the handle, then fit an adjustable wrench on the bonnet nut.
Turn counterclockwise, protect finishes with tape, and set removed pieces aside in order.
Replace washer and O-ring quickly
With the bonnet nut and handle removed, access to the valve stem allows a quick swap of the worn rubber washer and attendant O-ring on a compression faucet.
Inspect parts for grooves or hardening. Remove retainer screw, lift off washer, and replace with matching-size neoprene washer; slide on a new O-ring.
Lubricate lightly with plumber’s grease to guarantee smooth seating and prevent future leaks.
Reassemble and test
Reassemble the valve components in reverse order, making sure the new washer and O-ring seat correctly on the stem.
Tighten the packing nut and bonnet to specified torque, replace the handle and trim, then restore water supply slowly.
Check for leaks at the stem and spout while operating the tap through full open and closed cycles.
Re-torque if minor seepage appears.
Cartridge faucet fast cartridge reseating or replacement
First, the water supply is shut off and the handle removed to expose the cartridge.
The cartridge is inspected and either reseated or swapped for a replacement, with seals lubricated before reassembly.
Once put back together, the faucet is tested for leaks to confirm the repair.
Turn off water and remove handle
Shut off the water supply at the shutoff valves under the sink (or at the main if none exist) and open the faucet to relieve any remaining pressure.
Remove decorative caps, loosen set screws with an appropriate Allen wrench or screwdriver, and lift the handle straight off.
Use penetrating oil if stuck, and keep small parts organized to prevent loss before accessing the cartridge for the next step.
Inspect and reseat cartridge, or swap cartridge
With the handle removed and water relieved, attention turns to the cartridge—the part most often responsible for drips.
Inspect for mineral buildup, worn O-rings, or damaged seats.
Try reseating by aligning and pressing the cartridge back into its bore; test briefly.
If wear, corrosion, or persistent leakage appears, swap the cartridge for a matched replacement, ensuring correct model and orientation before testing.
Lubricate seals and reassemble
Before reassembling, apply a thin, even coat of plumber’s grease to the cartridge seals and O-rings to restore lubrication and improve sealing; avoid petroleum-based lubricants on rubber parts.
Seat the cartridge squarely, align any tabs or slots, then reinstall retaining clip, bonnet nut, and handle in reverse removal order.
Tighten components snugly without over-torquing and replace decorative caps.
Test for leaks
After reassembly, the faucet should be checked for leaks immediately to confirm the seals and cartridge are seated correctly.
Turn water on slowly, operate handle through full range, and inspect around spout, base, and under sink. Note any drips or dampness.
If leakage persists, tighten mounting hardware or reseat/replace cartridge and retest until dry and functioning properly.
Ball faucet quick seal and spring replacement
The technician first accesses the ball assembly following safety steps and water shutoff.
They replace worn seals and springs with quick-swap parts, then reassemble and adjust the ball for smooth operation.
Finally, they perform a leak test and fine-tune the adjustments until the faucet functions without dripping.
Access ball assembly safely
Begin by shutting off the water and relieving residual pressure.
Then remove any decorative cap and handle set screw to expose the cartridge housing.
Wear safety glasses and gloves.
Place a towel in the sink to catch parts.
Loosen retaining clips or bonnet nut with appropriate tools, then lift the ball assembly straight up.
Inspect seating surfaces visually before proceeding to replace components.
Replace seals and springs with quick-swap parts
Remove old seals and springs and replace them with matching quick-swap kits designed for ball faucets; these kits typically include two springs and two seats plus any O-rings needed, allowing a fast restoration of the seal without disassembling the entire valve.
Seat springs are seated with pliers or a magnetic tool, new O-rings lubricated, and components seated flush to guarantee a reliable, leak-free contact.
Reassemble and adjust for smooth operation
Reassemble the ball faucet by seating the new springs and seals, reinstalling the cam and ball, and tightening components to factory torque so the handle moves smoothly without binding or leaks.
Verify O-rings sit in grooves, rebuild washers and retainer clips in correct orientation, align spout and handle, and hand-tighten bonnet or cap.
Confirm free rotation and correct index before final securement.
Leak test and fine-tuning
With the faucet reassembled, perform a focused leak test and make small adjustments until the ball valve operates smoothly and watertight.
Open hot and cold separately, then together, observing drips and pressure.
Tighten or re-seat the ball, replace worn seals or springs if leakage persists, and retest.
Verify handle centering and smooth rotation.
Confirm no external leaks and restore countertop items.
Ceramic-disk faucet fast cylinder and seal replacement
The procedure begins by removing the handle and cover to expose the ceramic cylinder.
If worn seals are found, they can be replaced or the entire cylinder swapped for a quick repair.
After reassembly the faucet should be tested to confirm the leak has stopped.
Remove handle and cover to access cylinder
Begin by shutting off the water supply and placing a towel or small container under the sink to catch drips; this protects the area and prevents mess while accessing the faucet internals.
Then remove decorative cap, loosen hidden screw with appropriate hex or screwdriver, lift handle straight up, and unsnap or unscrew the escutcheon/cover.
Set parts in order to avoid mixing small fasteners.
Replace seals or swap cylinder
For a quick fix on a ceramic-disk faucet, remove the cylinder and swap worn rubber seals or O-rings before attempting a full rebuild; this restores a reliable seal in most drip cases.
Inspect seals for cuts, hardening, or mineral buildup. Clean mating surfaces, lubricate new O-rings with silicone grease, or replace the entire cylinder if damage or scoring prevents a proper seal.
Reassemble and verify leak-free operation
Reinstall the ceramic disk cylinder and seals in reverse order of disassembly, taking care to seat O-rings and rubber seals squarely and to align any indexing tabs or notches.
Reassemble retaining clips, bonnet, and handle. Restore water, open slowly, and observe for leaks around the stem and spout.
Cycle the handle several times to confirm smooth operation and verify the drip has stopped before finishing.
Troubleshooting common problems during repair
Common repair sessions encounter a few recurring obstacles that require specific strategies.
Techniques for freeing stiff handles, temporary fixes for stripped screws or corroded parts, steps to re-check a persistent drip after part replacement, and methods to isolate and stop water that continues after shutoff will be outlined.
Each issue is addressed with concise, practical actions to keep the repair moving.
Stiff or stuck handles’ techniques to free components
Stubborn faucet handles are often the result of mineral buildup, corroded splines, or seized set screws, and freeing them requires a cautious, systematic approach that prioritizes component preservation.
Begin by shutting water, removing decorative caps, and applying penetrating oil to joints.
Use gentle taps with a rubber mallet, calibrated leverage from a strap wrench, and repeat lubrication before attempting removal to avoid damage.
Stripped screws or corroded parts and temporary fixes
When screws strip or metal parts corrode during faucet repairs, technicians should prioritize securing a temporary, leak-free solution that preserves components until proper replacements are available.
Use penetrating oil, screw extractors, or rubber-band grips for stripped heads; apply anti-seize or epoxy for minor corrosion; fit compression sleeves, silicone tape, or temporary clamps to stop leaks.
Schedule definitive part replacement promptly.
Persistent drip after part replacement’ what to re-check
Recheck the basics: if a faucet continues to drip after parts have been replaced, technicians should systematically verify valve seating, cartridge alignment, and correct sizing of seals and O-rings.
Inspect mating surfaces for debris or damage, confirm tightening torque and retainer positions, and guarantee inlet screens and flow paths are clear.
Re-examine part compatibility with the model and confirm installation orientation.
Water still flowing after shutoff’ how to isolate and stop
After verifying valve seating and part compatibility, a technician may still encounter water flowing even with the shutoff closed. Isolating that supply quickly prevents flooding and simplifies diagnosis.
Check for a secondary supply valve or building main; close both. Use compression fittings or a sleeve clamp to temporarily stop flow.
If flow persists, shut building main, notify occupants, and call a plumber to inspect cross-connections or failed valves.
When a quick fix isn’t enough and professional help is needed
If leaks persist after basic repairs or show signs like low water pressure, rust, bulging supply lines, or water damage, the problem may be a failing valve or broader plumbing issue that requires a professional.
Expect repair or replacement costs to vary by part and labor; homeowners should note symptoms, when they started, and any steps already taken to speed the plumber’s diagnosis.
Photograph the leak, record dates and actions, and keep receipts or service notes for warranty claims or landlord reporting.
Signs of serious valve, supply line, or plumbing system issues
When persistent dripping continues despite cartridge or washer replacement, unusually high water bills, visible corrosion, water staining, bulging or soft spots on walls or ceilings, or sudden pressure loss signal problems beyond a simple DIY repair; these signs indicate valve failure, damaged supply lines, or broader system issues that require a licensed plumber to diagnose and fix.
Prompt professional inspection prevents hidden leaks, structural damage, and mold growth.
Estimated costs and what to tell the plumber for faster service
Recognizing signs that a dripping faucet reflects deeper valve, supply line, or system failure helps homeowners know not to attempt another quick repair. In those cases, cost expectations and clear communication speed resolution.
Provide model/type, age, visible damage, water pressure symptoms, and when leak began. Expect $80–$300 for typical repairs, $300+ for replacements or hidden pipe work; request time estimate and parts list.
How to document the issue for warranty or landlord reporting
Any documented report should concisely record what was observed, when it started, and what steps were already taken.
Include clear photos or short video showing drip rate, affected fixtures, and visible damage. Note model numbers, purchase or installation dates, and receipts if available.
State urgency, water waste estimate, and access instructions.
Keep copies for records and send via traceable method.
Preventive maintenance to avoid future drips
Preventive maintenance can greatly reduce the chance of future drips by scheduling simple checks every 6 to 12 months, such as inspecting seals, aerators, and cartridge condition.
Attention to water quality and keeping pressure within recommended ranges helps extend the life of parts and prevent premature wear.
Upgrading to corrosion-resistant cartridges, pressure-balancing valves, or higher-quality seals are cost-effective measures that minimize future repairs.
Simple routine checks to perform every 6 to 12 months
Every six to twelve months, homeowners should perform a short checklist to catch wear and small faults before they become leaks:
Inspect visible seals and O‑rings for cracking, test handle smoothness and full shutoff, check aerator for buildup and clean, tighten loose mounting nuts, examine supply hoses for bulges or corrosion, and run the faucet to confirm consistent flow and absence of drips.
Best practices for water quality and pressure to extend part life
Good water quality and stable pressure greatly reduce wear on faucet components, slowing deterioration of seals, cartridges, and valves.
Regularly test for hardness, sediment, and corrosive chemistry; install sediment filters or water softeners if needed.
Maintain pressure between 40–60 psi using a regulator and check for spikes.
Flush lines periodically and clean aerators to prevent abrasive particles from accelerating leaks.
Recommended parts and upgrades to reduce future repairs
Upgrade choices and quality replacements can considerably reduce the frequency of faucet repairs by addressing common failure points—seals, cartridges, valves, and aerators.
Recommended preventive parts and upgrades include:
- Ceramic cartridges and precision valves to eliminate wear-related leaks.
- High-grade silicone or EPDM seals and O-rings for longevity.
- Threaded metal aerators and inline filters to reduce sediment and pressure damage.
Quick-reference checklist and part compatibility chart
When diagnosing a dripping faucet, a concise checklist paired with a parts compatibility chart streamlines repairs and reduces wasted trips to the hardware store. The checklist lists tools, common seals, cartridge types, and safety steps. The compatibility chart maps tap brands to replacement parts for quick verification before purchase.
| Part/Tool | Compatible Types |
|---|---|
| O-rings | Compression, Ball |
| Cartridges | Ceramic, Plastic |
| Seats | Brass, Stainless |
| Springs | Single-handle, Mixer |
| Washers | Flat, Bellows |
Conclusion
When the last stubborn drip finally ceases, the homeowner realizes the repair echoed a quiet coincidence: the same spare washer tucked away for months proved the precise fit needed, as if preparation and chance met at the sink. The guide’s quick steps and troubleshooting notes showed that many fixes are simple when matched to the right faucet type. If the leak persists beyond these measures, professional help remains the sensible next choice.