
How to Fix a Surging Well Pump: Step-by-Step Troubleshooting and Repair Guide
To fix a surging well pump, start by identifying the root cause, which may include a failing pressure switch, leaking check valve, waterlogged tank, or electrical issues. Begin by observing the pump’s cycles, checking pressure settings and tank air charge, testing valves, and verifying the electrical supply. Simple solutions involve replacing switches, recharging or replacing tanks, and repairing valves. For more complex issues, a pump rebuild or electrician assistance may be required. Follow the detailed step-by-step diagnostics and repair guide for a thorough resolution.
What Causes a Well Pump to Surge
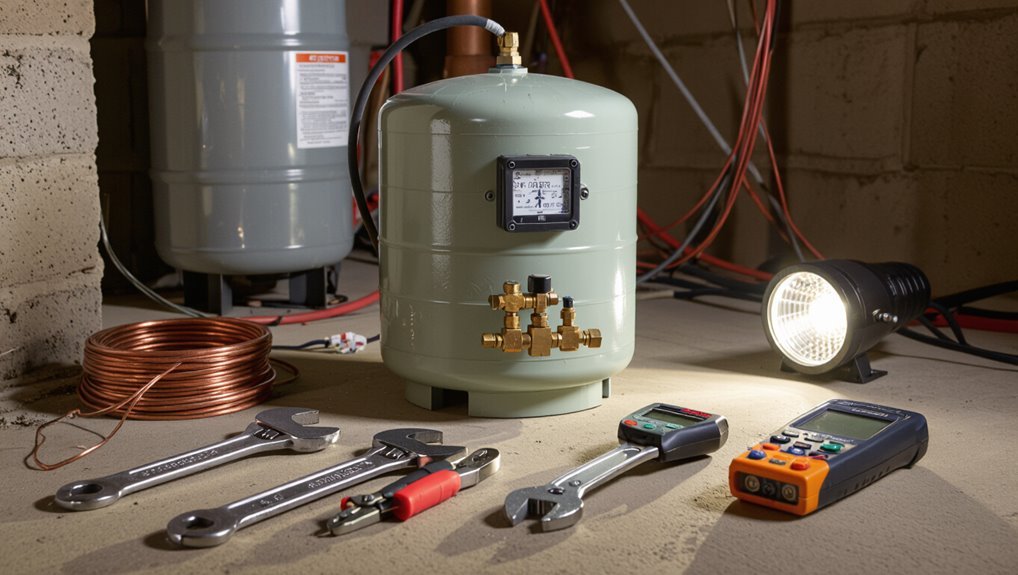
A surging well pump can stem from mechanical faults such as a failing pressure switch, a leaking check valve, or worn pump components.
Electrical problems—voltage fluctuations, a faulty control box, or bad capacitors—can produce irregular motor performance that mimics hydraulic issues.
Plumbing and tank faults like a waterlogged pressure tank, lost air volume, or system leaks must be distinguished from true surging versus short cycling or normal pressure cycles.
Common mechanical causes (pressure switch, check valve, pump wear)
Investigating mechanical components often reveals the root of a surging well pump: worn or misadjusted pressure switches, failing check valves, and internal pump wear each create pressure and flow instability that produces the characteristic cycling.
Diagnosticians inspect switch contacts and spring settings, test and replace check valves, and assess impellers and seals.
Practical guidance on how to fix a surging well pump focuses on targeted replacement and calibration.
Electrical causes (voltage fluctuation, control box, capacitors)
Several electrical faults commonly underlie a surging well pump: unstable supply voltage, failing control boxes, and degraded start or run capacitors can each disrupt motor torque and relay timing, producing rapid on-off cycling.
Voltage drops, spikes, loose connections, or thermal faults in control relays reduce starting torque. Weak capacitors prevent reliable starts.
Testing with a voltmeter, capacitor tester, and inspecting control components isolates electrical causes.
Hydraulics and plumbing causes (waterlogged pressure tank, air volume loss, leaks)
Pressure system problems often produce surging when the pump cycles rapidly in response to inconsistent pressure or air cushion loss.
A waterlogged pressure tank eliminates the air cushion, causing frequent starts. Loss of precharge or faulty air valves reduces cushion effect.
Leaks in plumbing or check valves cause pressure drops that trigger repeated pump starts.
Address tank air charge, valves, and piping integrity.
How to identify true surging vs. short cycling or normal cycling
How can a homeowner distinguish true surging from short cycling or normal pump cycling?
True surging features irregular, varying run durations and pressure swings beyond the typical cut-in/cut-out range.
Short cycling repeats rapid on/off cycles at consistent pressure thresholds.
Normal cycling occurs at steady intervals tied to household demand.
Measuring pressure patterns and timing cycles confirms which condition exists and guides repairs.
Quick Diagnosis Checklist Before You Start
Before beginning any repairs, the technician reviews safety precautions, isolates power at the breaker, and shuts down the pump following recommended lockout steps.
They confirm required tools and replacement parts are gathered and staged for efficient work.
They also document recent symptoms, pressure and cycle patterns, and any audible or visual clues to guide troubleshooting.
Safety precautions and shutdown steps
Several essential safety checks and shutdown steps should be completed before any work on a surging well pump begins.
Confirm power is isolated at the breaker and lockout/tagout applied.
Shut off the well’s main valve and relieve system pressure.
Verify absence of electrical voltage with a tester.
Wear appropriate PPE, guarantee adequate lighting, and keep bystanders distant.
Document shutdown status.
Tools and materials to have on hand
With the system secured and power isolated, gather a concise set of tools and materials to support a quick diagnosis and safe repairs.
Essential items guarantee accurate checks and efficient fixes without unnecessary trips to the store.
- Multimeter, pressure gauge, clamp meter.
- Basic hand tools: screwdrivers, wrenches, pliers, pipe tape.
- Replacement parts: pressure switch, check valve, spare fuses.
How to record symptoms and operating patterns for troubleshooting
When a well pump is surging, note specific symptoms and operating patterns systematically so a technician can isolate the cause quickly.
Record run times, cycle frequency, pressure gauge readings at start/stop, noises, vibration, and water flow variations.
Log dates, times, weather, recent repairs, and any household usage during events.
Include photos or short videos showing gauge behavior and noises for clarity.
Step-by-Step Troubleshooting Process
The troubleshooting process begins with observing pump behavior and pressure readings to establish when and how surges occur.
Next steps include inspecting and testing the pressure switch (contacts, settings, gap), checking the pressure tank for correct air charge and bladder or diaphragm integrity, and verifying that check and foot valves seal properly.
Finally, the electrical supply and control components—voltage, relays, and capacitors—are evaluated to rule out power or control faults.
Observe pump behavior and pressure readings
Before making adjustments, the observer should record the pump’s cycle pattern and pressure gauge readings over several complete on-off cycles to establish a baseline.
Note run times, off intervals, pressure rise and drop rates, and any irregular spikes or rapid cycling.
Compare readings to normal cut-in and cut-out values, documenting transient behavior, audible cues, and any correlation with household water use.
Inspect and test the pressure switch (contacts, settings, gap)
Begin by de-energizing the pump circuit and confirming power is off at the breaker to guarantee safe access to the pressure switch.
Visually inspect contacts for pitting, corrosion, or burning. Clean or replace contacts if damaged.
Verify cut-in and cut-out settings match system requirements and adjust per manufacturer.
Measure contact gap with feeler gauge; restore power and test cycling under load to confirm stable operation.
Check and test the pressure tank (air charge, bladder/diaphragm condition)
Inspect the pressure tank for proper air charge and bladder or diaphragm integrity to determine whether tank issues are causing pump short-cycling or surging.
Measure tank precharge with a tire gauge at the air valve (pump off, tank drained to cut-in pressure). Compare to switch cut-in minus 2 psi.
Listen for waterlogged symptoms; replace or re-pressurize bladder/diaphragm as needed.
Test the check valve and foot valve for proper sealing
If the pressure tank and bladder check out but the pump still surges, the next step is to test the check valve and foot valve for proper sealing.
Leaking valves allow water to return to the well and force the pump to restart frequently. Inspect valves for corrosion, debris, or worn seats.
Isolate and lift the foot valve to observe seal action. Replace or rebuild any valve that fails to hold static pressure.
Evaluate electrical supply and control components (voltage, relays, capacitors)
Next, assess the electrical supply and control components—voltage, relays, and capacitors—to rule out power-related causes of surging.
Measure voltage at the pump under load for proper phase balance and amplitude.
Inspect relay contacts for pitting and proper operation.
Test start and run capacitors for capacitance and leakage.
Replace faulty relays, capacitors, or wiring to restore stable motor performance.
Inspect pump hardware for wear or cavitation (impellers, seals)
Having ruled out electrical causes, the technician moves on to the pump’s mechanical components to identify wear or cavitation as the source of surging.
The inspection focuses on impeller erosion, pitting, and imbalance, plus seal degradation and shaft play. Signs include scoring, unusual vibration, and fluid aeration.
Damaged impellers or seals are replaced; worn components corrected to restore steady flow and prevent recurrence.
Check for plumbing leaks, blocked vents, or pressure relief issues
Begin by isolating the plumbing system and conducting a visual and tactile sweep for leaks, creaky fittings, or wet spots around joints, valves, pressure tanks, and the pump discharge; even small leaks or loose unions can introduce air, reduce system pressure, and produce intermittent surging.
Check vented relief valves for blockage or corrosion, verify proper pressure switch operation, and inspect air volumes and bladder integrity to eliminate cycling caused by plumbing faults.
How to Repair Specific Causes
The following section addresses targeted repairs for the most common causes of pump surging.
It covers adjusting or replacing a faulty pressure switch, recharging or replacing a waterlogged pressure tank, and repairing or replacing failed check or foot valves.
Electrical fixes for wiring, controls, capacitors, and starters are explained, along with guidance on rebuilding or replacing the pump when internal damage is found.
Adjusting or replacing a faulty pressure switch
When a well pump surges because the pressure switch is misreading or failing, adjusting or replacing that switch is often the most direct remedy. This component controls pump cut-in and cut-out pressures and can wear, corrode, or lose calibration over time.
Inspect terminals and diaphragm, clean or tighten connections, verify settings with a pressure gauge, and replace the switch if corrosion, pitting, or inconsistent operation persists.
Recharging or replacing a waterlogged pressure tank
Following inspection or replacement of a faulty pressure switch, attention should turn to the pressure tank, since a waterlogged tank can cause surging by eliminating the air cushion that stabilizes pressure.
Drain the tank, isolate and relieve system pressure, check bladder integrity, and recharge to the manufacturer’s precharge (typically 2 psi below cut-in).
Replace tanks with ruptured bladders or corrosion.
Repairing or replacing a failed check valve or foot valve
Inspecting the check valve or foot valve comes next, since a faulty one can allow backflow that causes the pump to restart frequently and produce surging.
Confirm leakage by isolating the pump, observing pressure drop, and testing flow direction.
Replace corroded, worn, or clogged valves with correct-size, rated units.
Guarantee clean seats, proper installation orientation, and secure fittings to prevent recurrence.
Fixing electrical faults: wiring, controls, capacitors, and starters
Diagnose electrical faults systematically, since wiring, control components, capacitors, and starters are frequent causes of pump surging and can mimic mechanical issues.
Inspect wiring for loose connections, corrosion, or shorts; test voltage under load.
Check pressure switch settings and contacts for wear.
Measure capacitor capacitance and replace if out of tolerance.
Verify starter operation and overloads; replace defective control parts to restore stable pump cycling.
Rebuilding or replacing the pump (when internal damage is found)
When internal damage—worn impellers, corroded pump housings, or failed seals—is confirmed, rebuilding or replacing the pump becomes the practical solution to stop surging and prevent recurring failures.
Technicians assess cost versus longevity, inspect shafts, bearings, and diffusers, and decide on rebuild kits or full replacement. Proper selection, correct reassembly, and testing under load restore stable flow and protect the well system.
Addressing well-level or drawdown issues causing intermittent surges
Several common well-level and drawdown problems can produce intermittent surges, and each requires a targeted repair to restore stable operation.
Inspect static and pumping water levels, measure drawdown, and compare to pump intake depth.
Remedy low yield by deepening the well or lowering the pump, clean or develop the aquifer, and install a larger storage tank or constant-pressure system to buffer fluctuations.
Diagnostic Tests and How to Perform Them
A sequence of targeted diagnostic tests helps isolate the cause of a surging well pump.
Technicians should use a pressure gauge and pressure logger to record cycling, perform an air charge test on the pressure tank, and use a multimeter to check voltage and continuity.
They should also conduct flow rate and drawdown tests to assess well performance.
Using a pressure gauge and pressure logger
Begin by installing a quality pressure gauge and, if available, a pressure logger on the system to collect objective data about pressure swings and cycle timing.
Record continuous pressure traces during typical usage and pump cycles.
Analyze peak, cut-in, and cut-out values, cycle duration, and frequency.
Compare readings to expected settings to identify rapid cycling, leaks, demand spikes, or control failures.
Air charge test for pressure tanks
Pressure trace data often points toward the pressure tank as a potential cause of surging, so the next step is an air charge test to verify the tank’s precharge pressure and bladder integrity.
Depressurize system to cut pump power, drain water to tank cutoff, use a tire gauge at the air valve to measure precharge (typically 2 psi below pump cut-in), and compare to manufacturer spec.
Multimeter tests for voltage and continuity
Use a digital multimeter to verify electrical supply and component continuity before replacing parts.
Measure voltage at the control box, pump motor leads, and pressure switch terminals; compare to expected values.
Check continuity across pressure switch contacts, motor windings, and capacitors (when discharged).
Record readings, identify open circuits or incorrect voltages, and isolate electrical faults prior to mechanical or hydraulic repairs.
Flow rate and drawdown tests for well performance
Flow rate and drawdown tests quantify a well’s capacity and response under pump load to determine whether the aquifer can sustain demand.
Measured by pumping at a steady rate while recording water-level decline and recovery, these tests reveal available yield, specific capacity, and problematic depletion.
Results guide pump sizing, cycle prevention, and remediation decisions like reduced drawdown, storage addition, or well rehabilitation.
When to Call a Professional
When troubleshooting points to electrical hazards, sealed components, or conditions that risk voiding warranties or breaching local regulations, a qualified professional should be consulted.
Persistent signs such as rapid pressure loss, repeated pump cycling despite repairs, or well contamination suggest replacement or well rehabilitation is needed.
Homeowners are advised to select a licensed well pump technician with verifiable references, proper insurance, and familiarity with local codes.
Safety, warranty, and regulatory considerations
A surging well pump can present electrical, mechanical, and contamination hazards that exceed typical homeowner repairs.
If troubleshooting requires entering the pressure tank, handling exposed wiring, bypassing safety controls, or working on a pressurized wellhead, a licensed well contractor or electrician should be engaged to prevent injury, equipment damage, voided warranties, or code violations.
Professionals verify permits, follow local codes, preserve warranty coverage, and document repairs for compliance.
Signs that indicate pump replacement or well rehabilitation is needed
Persistent symptoms beyond simple fixes signal the need for professional assessment for pump replacement or well rehabilitation.
Indicators include recurring surging after repairs, significant flow reduction, brown or sand-laden water, frequent short-cycling, unusual noises or vibrations, and persistent low pressure despite correct tank settings.
Visible well casing damage, contamination test failures, or rapidly rising repair frequency also warrant specialist intervention.
How to choose a qualified well pump technician
How should a homeowner pick a qualified well pump technician? A homeowner should verify licensure, insurance, and specialty in submersible or jet systems; check references and recent job photos; and confirm warranty and written estimates.
Consider local experience and response time for emergencies.
- Verify credentials and insurance
- Review references and past work
- Confirm written estimate and warranty
Preventive Maintenance to Avoid Future Surging
A clear preventive maintenance plan helps minimize the chance of future pump surging by defining routine inspection schedules and specific upkeep tasks.
Seasonal checks and winterizing procedures protect components from temperature- and weather-related failures that can trigger cycling.
Strategic upgrades—such as a larger pressure tank, a variable frequency drive, or improved control systems—further reduce surging risk and extend equipment life.
Routine inspection schedule and maintenance tasks
Establishing a routine inspection schedule and targeted maintenance tasks greatly reduces the risk of recurring pump surging by catching wear, pressure irregularities, and electrical issues early.
Inspections should be documented and intervals adjusted to well conditions and usage.
- Monthly: check pressure tank, gauges, and visible fittings for leaks or fluctuations.
- Quarterly: test control switch, wiring, and clean vents.
- Annually: measure pump performance, replace worn seals and check valves.
Seasonal checks and winterizing tips
Prepare for seasonal changes by scheduling specific checks and winterizing steps that protect pump components and maintain stable pressure through temperature extremes.
Inspect pressure tank insulation, heat tape, and enclosure seals; drain or blow out exposed lines; verify antifreeze-safe fittings where applicable; test pressure switch operation after temperature shifts; clear gutters and drainage to prevent freezing around wellhead; document actions and dates for future reference.
Upgrades that reduce surging risk (larger tank, variable frequency drive, improved controls)
When repeated surging indicates pressure instability, targeted upgrades can provide a durable solution:
Install a larger pressure tank to increase drawdown and reduce short cycling; consider a variable frequency drive (VFD) to maintain steady pump speed and smooth pressure changes; upgrade control switches or install electronic pressure controllers for finer setpoints and diagnostics.
Proper sizing and professional commissioning guarantee effectiveness and longevity.
Cost Estimates and Timeframes for Common Fixes
Typical parts and labor expenses and the expected repair times help owners plan for common surging-pump fixes. The table below summarizes representative cost and time ranges for routine repairs. Actual figures vary by location and pump model.
| Item | Typical Range |
|---|---|
| Pressure switch replacement (parts + labor) | $75–$250 |
| Pressure tank repair/replacement | $200–$800 |
| Check valve replacement | $50–$200 |
| Motor or control box service | $150–$1,200 |
Typical costs for parts and labor
Costs for repairing a surging well pump vary widely based on the underlying cause, parts required, and local labor rates.
Typical part costs:
- pressure switches $20–80
- tanks $100–400
- control valves $30–200
- capacitors or relays $10–60
- pumps $300–1,200+.
Labor commonly ranges $75–150/hour; diagnostic fees $50–150.
Total repairs often fall between $150 and $1,500+, depending on replacements and service complexity.
Expected repair times and downtime
Repair times for surging well pump issues vary by diagnosis and required parts, but many common fixes can be completed within a single service visit.
Simple tasks like pressure switch adjustment or tank recharging often take 30–90 minutes.
Minor component replacements may require 1–3 hours.
Complex pump or deep-well motor work can need multiple days and scheduled downtime while parts are sourced and technicians mobilize.
Troubleshooting Scenarios and Solutions
The troubleshooting section presents four common patterns of pump surging and their likely causes.
It covers rapid on/off cycling after long idle periods, surging that appears only under heavy demand, intermittent surges coinciding with electrical storms, and continuous short cycles that begin after a tank replacement.
For each scenario, practical diagnostic steps and targeted fixes are outlined to help isolate whether the issue is mechanical, hydraulic, or electrical.
Scenario: Rapid on/off cycling after long idle
After a long period of inactivity, a well pump that immediately cycles on and off can indicate issues with pressure control or water supply rather than the motor itself.
Possible causes include a failed pressure switch, air-charged pressure tank loss, check valve leakage, or plumbing leaks allowing rapid drawdown.
Inspect tank air charge, test switch contacts, check for leaks, and verify one-way valve integrity before replacing the pump.
Scenario: Surging only under heavy demand
Several homeowners encounter surging that appears only when multiple fixtures run or heavy-demand equipment operates, which typically points to flow-rate or supply-side problems rather than intermittent electrical faults.
The guide recommends checking pipe size, pressure tank condition, well yield, and intake screen.
Inspect pressure switch settings, measure drawdown, confirm pump capacity vs. peak demand, and repair or upgrade components to restore stable pressure.
Scenario: Intermittent surging with electrical storms
How should a homeowner respond when surging coincides with electrical storms? They should suspect transient voltage spikes or lightning-induced damage.
Advise disconnecting power to the pump during storms, inspecting control box, wiring, and lightning arrestors afterward.
Recommend checking surge protectors, grounding integrity, and the pressure switch for burned contacts.
If unsure, hire a licensed electrician or well technician to assess and repair.
Scenario: Continuous short cycles after tank replacement
If surging persists unrelated to storms, the next likely scenario involves short cycling that begins immediately after replacing the pressure tank.
The writer notes common causes: incorrect air charge, waterlogged or incompatible replacement tank, or improper precharge relative to cut-in pressure.
Recommended actions: verify precharge with a gauge, depressurize and adjust air, confirm tank model matches system, inspect fittings and bladder integrity.
Useful Parts, Tools, and Replacement Specifications
The following section outlines essential replacement parts and the basic tools and specifications needed to address common surging issues.
It identifies recommended pressure switches, tanks, check valves, and the fittings, gauges, and electrical components typically required for reliable repairs.
Readers are given concise guidance on what to buy and what specs to match for a correct, safe installation.
- Recommended pressure switches, tanks, and check valves
- Required fittings, gauges, and plumbing tools
- Necessary electrical components and replacement specifications
Recommended pressure switches, tanks, and check valves
Several reliable components can stop a surging well pump when matched correctly to the system: a quality pressure switch with proper differential settings, an adequately sized pressure tank (or bladder tank) to reduce cycling, and a low‑loss check valve to prevent backflow and waterlogging.
Choose switches rated for pump horsepower and water exposure, tanks sized to expected draw and precharge, and check valves with low cracking pressure and durable seats.
Required fittings, gauges, and electrical components
After selecting the appropriate pressure switch, tank, and check valve, attention turns to the fittings, gauges, and electrical components that complete a reliable well pump installation.
Required items include brass or stainless pipe fittings, pressure gauge (0–100 psi), union joints, pressure relief valve, solid copper wiring, appropriately sized conduit, circuit breaker or fuse, ground rod and clamp, and weatherproof switch box with strain reliefs.
Safety Reminders and Regulatory Notes
Before any work begins, technicians must follow lockout/tagout procedures and verify that power to the pump is isolated to prevent electrical shock or unexpected starts.
Personnel should also observe wellhead protection and local water-quality regulations to avoid contamination during repairs.
Compliance with applicable codes and permitting requirements is essential and may affect allowable methods and materials.
Lockout/tagout and electrical safety around pumps
Any maintenance or diagnostic work on a surging well pump requires strict lockout/tagout procedures and adherence to electrical safety standards to prevent accidental startup and electrocution.
Technicians must de-energize circuits, apply locks and tags, verify zero energy, and use insulated tools and PPE.
Follow local electrical codes, manufacturer instructions, and qualified-person rules.
Document actions and restore power only after safe testing and clearance.
Wellhead and water quality protection requirements
Following lockout/tagout and electrical controls, attention must shift to protecting the wellhead and maintaining water quality during and after service.
- Sanitize tools and fittings; prevent surface contaminants from entering the casing.
- Restore and secure sanitary seals, caps, and vents per local codes.
- Document disinfectant procedures, sampling results, and compliance with health department regulations for traceability and homeowner safety.
Conclusion
The guide closes on quiet certainty and urgent motion, pairing calm diagnosis with sudden repair. Practical steps sit beside technical nuance; quick checks meet slow, methodical testing. Faulty switches contrast with steady replacement parts; simple fixes shadow complex rewires. Readers leave equipped yet aware of limits, carrying tools and caution in equal measure. Confidence balances caution, so a steady hand follows brisk action, and the well’s rhythm returns from erratic surge to reliable flow.
