How to Fix a Failed Septic System: Step-by-Step Guide to Diagnose, Repair, and Prevent Future Problems
A failed septic system can lead to serious health risks and environmental issues. To address this, start by identifying signs such as pooling water, foul odors, slow drains, backups, or excessive vegetation. The first steps involve isolating potential hazards, calling a professional for emergency pumping, and inspecting key components like tank scum and sludge levels, baffles, pipes, and the drainfield using probing and percolation tests. Minor issues like clogs or damaged baffles can often be repaired, while saturated fields or aging systems may require replacement. To prevent future failures, schedule regular pumping, adjust water usage, and ensure all repairs comply with permits. For detailed guidance on diagnostics and maintenance, refer to the full step-by-step guide.
What a Failed Septic System Looks Like: Key Signs and Immediate Risks
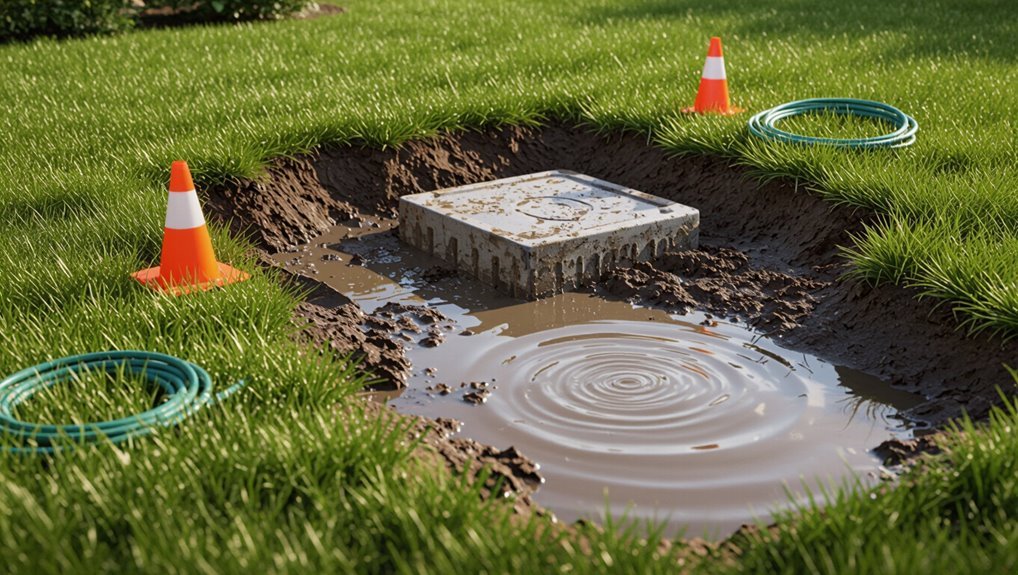
Visible pooling, overly lush or soggy patches in the drainfield, and foul odors in the yard are common external signs of septic failure.
Inside the home, slow drains, sewage backups, and gurgling fixtures signal plumbing distress that often accompanies system problems.
Ignoring these signs risks illness and environmental contamination, and warrants contacting an emergency septic professional when backups, strong odors, or rapid spread of surface effluent occur.
Visible indicators around the yard and drainfield
A failing septic system often announces itself through clear changes in the lawn and drainfield: unusually lush or soggy patches, standing water, persistent foul odors, and unusually slow-draining fixtures inside the home.
Visual cues include saturated soil, surfacing sewage, sinkholes, and stressed vegetation.
Prompt identification supports how to fix a failed septic system by preventing contamination, reducing repair scope, and guiding professional assessment.
Plumbing symptoms inside the home
How can a failing septic system manifest inside the house? Residents may notice slow drains, gurgling toilets, frequent backups, or sewage odor in bathrooms and near drains.
Repeated need to pump toilets or unusual noises from plumbing signal system overload.
Persistent damp spots in basements, unexplained sinkholes under floors, or sudden toilet overflows warrant immediate inspection to prevent escalation.
Health and environmental hazards of ignoring failure
Neglecting a failing septic system allows sewage, pathogens, and toxic nutrients to escape into living spaces and surrounding soils, creating direct health risks and long-term environmental damage.
Contaminated groundwater and surface runoff spread bacteria, viruses, nitrates, and phosphates, endangering drinking water, aquatic life, and crops.
Exposure causes gastrointestinal and skin illnesses; odors and pests reduce habitability and signal urgent remediation needs.
When to call an emergency professional
Recognize the unmistakable signs of a septic emergency—sewage backups, pooling effluent near the drainfield, foul sulfurous odors, or sudden toilet and drain slowdowns that affect multiple fixtures—and call a professional immediately when these occur.
A qualified contractor evaluates risks, isolates contamination, and provides timely pumping, repairs, or system replacement.
Immediate action prevents health hazards, environmental damage, and more extensive, costly repairs.
Quick Checklist to Assess Severity Before Repair
Before attempting repairs, a concise checklist helps determine immediate priorities, including basic tools and safety gear to have on hand.
The checklist also identifies what a homeowner can safely inspect—surface pooling, odors, and access cover condition—versus items requiring a pro.
Finally, it notes key information to record for technicians: system age, maintenance history, and recent household usage patterns.
Tools and safety gear to have on hand
A basic set of tools and safety gear can quickly clarify whether a septic problem is minor or requires professional intervention.
Recommended items: flashlight, inspection mirror, tape measure, probe rod, basic hand tools, gloves, chemical-resistant boots, eye protection, N95 or respirator, disposable coveralls, first-aid kit, and a portable pH test kit.
Keep a charged phone and emergency contact list nearby.
What you can safely inspect yourself
If homeowners can stay clear of exposed piping and maintain safety protocols, they can perform a few basic inspections to gauge whether a septic issue is surface-level or requires a professional.
Check for slow drains, persistent odors near lids, unusually lush vegetation over the drainfield, and standing water above the tank or field.
Note lid integrity and visible cracks; avoid probing or lifting heavy covers.
Information to record for professionals (age, maintenance history, recent usage)
Several key pieces of information should be collected and noted to give a technician an accurate starting point: the system’s installation date or approximate age, the dates and results of past pump-outs or service visits, records of repairs or component replacements, recent changes in household water use (guests, new appliances, irrigation), and any unusual events (sewer backups, heavy rains, chemicals flushed).
Also include tank size, drainfield location, and septic permit.
Step-by-Step Diagnosis: How to Locate the Problem
The next phase outlines a systematic inspection to pinpoint the source of failure, beginning with the septic tank—access points, scum and sludge levels—and the condition of inlet and outlet baffles and pipe connections.
Attention then shifts to the drainfield for signs of saturation and odors and to household fixtures for backups or slow drainage.
If field conditions or symptoms suggest subsurface failure, soil percolation and groundwater tests should be ordered.
Inspecting the septic tank (access, scum and sludge levels)
Begin by locating and accessing the septic tank lid(s) to visually assess scum and sludge levels; a simple probe and a flashlight suffice for an initial inspection.
Record scum depth below the surface and sludge depth above the outlet invert. Note odors, visible solids, or slow drainage signs.
Photograph readings, compare to service intervals, and determine if pumping or further evaluation is required.
Checking inlet and outlet baffles and pipe connections
Inspecting the inlet and outlet baffles and their pipe connections helps pinpoint blockages, broken components, or misalignments that impair flow between the house, tank, and drainfield.
Technicians examine baffle integrity, clear obstructions, verify proper pipe alignment and slope, and check seals for leaks.
Damaged or missing baffles, collapsed pipes, and loose joints are repaired or replaced to restore proper internal flow.
Evaluating the drainfield for saturation and odors
How can one tell if a drainfield is failing? Observers should note persistent wet, spongy ground, pooling wastewater, and unusually lush vegetation.
Foul, sewage-like odors near the field indicate surfacing effluent. Check for slow drainage after rainfall that persists beyond normal saturation.
Record locations, odor intensity, and duration; these facts guide technicians toward failing leach lines or soil saturation problems requiring repair.
Testing toilets, sinks, and fixtures for backups and slow drainage
Test each fixture systematically to determine whether slow drains or backups are isolated or indicate a broader septic or sewer issue.
Observe toilet flush performance, bowl refill, and gurgling; run sinks, tubs, and showers simultaneously to reveal shared-line constraints.
Note basement or lowest fixtures first. Record slow drainage times, backup occurrences, and odors.
Correlate patterns to locate blockages, venting faults, or septic overload.
When to order soil percolation and groundwater tests
After documenting which fixtures show slow drains, backups, or gurgling and noting whether problems are isolated to low-level fixtures or appear across the house, the next step is to decide whether soil percolation and groundwater tests are warranted.
Order tests when standing water, repeated drainfield failures, recent high groundwater, or property changes suggest absorption issues.
Licensed evaluators determine percolation rates and seasonal water table depth.
Common Causes of Septic System Failure and How to Confirm Them
Common septic failures stem from excessive solids due to missed pumping, blocked or broken pipes and baffles, drainfield compaction or root intrusion, overloaded water use, and poor design, age, or installation.
Each suspected cause can be confirmed through inspection: tank scum and sludge measurements, camera or smoke tests for pipe integrity, percolation tests and soil probes for drainfield condition, flow monitoring for hydraulic overload, and review of system plans and installation records.
Identifying the specific failure mode guides targeted repairs and prevents unnecessary work.
Excessive solids buildup and lack of pumping
Excessive solids accumulation in a septic tank—typically caused by infrequent or skipped pumping—reduces effective treatment volume, pushes scum and sludge into the drainfield, and accelerates system clogging.
Regular inspection and measured sludge/scum depth checks confirm overload. Symptoms include slow drains, sewage odors, and saturated patches above the drainfield.
Timely pumping, optimized household water use, and avoiding solids-disposing products restore function and prolong system life.
Clogged or damaged pipes and baffles
Inspecting pipes and baffles reveals another frequent cause of septic failure: blockages, root intrusion, corrosion, or physical damage that restrict flow and disrupt solids settling.
Technicians confirm issues by inspecting access points, using a sewer camera, probing for roots, and testing flow rates.
Damaged or collapsed lines and deteriorated inlet/outlet baffles require targeted repair or replacement to restore proper hydraulic function and prevent backups.
Drainfield compaction, saturation, or root intrusion
Problems in the distribution network often extend beyond baffles and pipes to the drainfield, where compaction, prolonged saturation, or root intrusion can severely impair treatment and drainage.
Signs include surface pooling, slow percolation, sewage odors, and lush vegetation overlines.
Confirm via soil probes, percolation tests, camera inspection, and root mapping.
Remedies: aeration, root removal, soil replacement, or trench reconstruction as indicated.
High water usage and hydraulic overload
High household water use can overwhelm a septic system’s capacity, causing solids to be carried into the drainfield and reducing treatment time in the tank.
Indicators include soggy lawn, slow drains, frequent tank rises after showers, and alarms.
Confirm via water-use audit, meter readings, dye tests, and inspection of tank scum and sludge levels.
Short-term fixes reduce inflow; long-term solutions adjust capacity.
Poor system design, age, or improper installation
When septic systems are poorly designed, have simply worn out, or were installed incorrectly, their components cannot reliably separate, treat, and disperse wastewater. This leads to backups, surface saturation, and accelerated component failure.
Inspection reveals undersized tanks, inadequate drainfields, collapsed pipes, or mismatched soil absorption. Age-related degradation (corroded tanks, failing baffles) and installation errors (improper slope, compaction) confirm root causes requiring redesign or replacement.
DIY Repairs You Can Safely Attempt
The section outlines practical DIY steps homeowners can take after confirming septic issues, starting with scheduling or supervising tank pumping and knowing when a professional is required.
It also covers clearing minor household drain clogs, simple ways to restore aeration in aerobic units, and temporary measures to reduce hydraulic load.
Safety precautions and limits of DIY work are emphasized so readers know when to stop and call a licensed technician.
Pumping the tank: when and how to hire or supervise
If a septic system shows signs of backup, slow drains, or strong odors, pumping the tank is often the first corrective step and should be scheduled promptly to prevent further damage.
Homeowners should hire licensed pumpers, check references, confirm permits and disposal methods, and be present to note access, diagnoses, and recommended frequency.
Obtain written estimates and post-service reports for records.
Clearing minor clogs in household drains
After a pump-out or inspection identifies no major tank issues, attention can shift to simple, in-home fixes for slow sinks and tubs that often originate in household trap or vent blockages.
Homeowners can remove and clean P-traps, use a plunger or plumber’s snake for localized clogs, flush drains with hot water, and avoid chemical drain cleaners that harm pipes and septic biology.
Restoring aeration in aerobic systems
Many aerobic septic systems depend on a single air pump or blower to maintain oxygen levels for effective bacterial treatment.
Homeowners can inspect power, listen for blower operation, and check airline tubing and diffusers for blockages or damage.
Replacing faulty pumps, cleaning or replacing clogged diffusers, and securing connections can restore aeration.
Wear gloves and follow manufacturer instructions; consult a professional if unsure.
Temporary measures to reduce hydraulic load
Restoring aeration can buy time, but reducing the volume of wastewater entering the system helps prevent backups while repairs proceed.
Occupants should limit laundry, stagger dishwashing, use low-flow fixtures, and postpone showers.
Divert rainwater and sump pump discharge away from the drainfield. Collect greywater for outdoor irrigation where allowed.
These measures reduce hydraulic stress, lowering collapse and overflow risk until professional repairs occur.
Professional Repairs and Replacement Options
When problems exceed basic maintenance or present health risks, a licensed septic contractor or inspector should be consulted to assess whether repair or full replacement is warranted.
Options range from targeted fixes—pipe or baffle replacement, lift station repair, or drainfield rehabilitation—to complete tank and system replacement, each with typical cost and timeline implications.
Homeowners should also factor in required permits, local codes, and post-work inspections when planning professional repairs.
When to hire a septic contractor or inspector
How can a homeowner tell if a septic issue exceeds routine maintenance and requires a professional inspection or contractor intervention?
Persistent backups, sewage odors indoors, saturated drainfield, unusually lush vegetation, repeated pumpings with no improvement, or local health-code notices indicate professional involvement.
A licensed inspector or contractor evaluates system condition, diagnoses underlying failures, recommends targeted repairs, and provides accurate cost and compliance guidance.
Repairing vs replacing the tank or drainfield
Evaluating whether to repair or replace a septic tank or drainfield hinges on the extent of structural damage, the system’s age and materials, site constraints, and cost-effectiveness. Minor cracks, component failures, or localized pipe blockages can often be fixed, whereas widespread corrosion, a collapsed tank, chronic drainfield saturation, or systems older than their expected lifespan typically justify full replacement.
Professionals assess soil, permitting, longevity, and total cost, recommending repair when targeted fixes restore reliable function and replacement when long-term performance, safety, or regulatory compliance demand a new system.
Advanced repairs: pipe replacement, baffle repair, lift station fixes
Although advanced repairs often follow a clear diagnosis, they require specialized skills and equipment—pipe replacement, baffle repair, and lift station fixes each address distinct failure modes and demand different techniques, permits, and safety precautions.
Professionals assess access, soils, and system configuration, then isolate flows, replace corroded or collapsed lines, rebuild or install baffles, and repair pumps, controls, and alarms to restore reliable, code-compliant operation.
Costs and timeline estimates for common repairs and full replacement
After completing a diagnosis and any advanced repairs—pipe replacement, baffle work, or lift station fixes—owners and contractors must consider the financial and scheduling implications of remaining work.
Typical spot repairs range $500–$3,000 and take a day to a week.
Drainfield replacement often costs $5,000–$25,000 and requires 1–3 weeks.
Emergency repairs and site restoration can add time and expense.
Permits, codes, and inspection requirements
Many municipalities require permits, adherence to septic codes, and formal inspections before and after professional repairs or full system replacement.
Licensed contractors typically obtain permits, submit plans, and schedule inspections confirming tank integrity, drainfield placement, and backfill compaction.
Homeowners should verify local requirements, retain documentation, and expect final approval before system use.
Noncompliance can result in fines, rework, or denied occupancy permits.
Comparison of Septic System Types and Failure Patterns
Different septic system designs show distinct failure patterns, lifespans, and warning signs that affect repair choices. The following table summarizes typical characteristics for conventional gravity, chamber, mound, and aerobic systems to guide assessment and response. Owners should monitor the listed warning signs and consider system type when planning repairs or replacement.
| System Type | Typical Lifespan | Common Warning Signs |
|---|---|---|
| Conventional gravity | 20–40 years | Slow drains, backups, soggy drainfield |
| Chamber | 20–30 years | Surface pooling, odors, reduced percolation |
| Mound | 15–25 years | Elevated wet areas, frequent backups, odors |
| Aerobic | 15–20 years | Alarms, odors, rapid biomat buildup |
Conventional gravity systems vs. chamber vs. mound vs. aerobic
Compare conventional gravity, chamber, mound, and aerobic septic systems by examining how each is designed, how they treat and disperse effluent, and the typical failure modes associated with soil type, maintenance, and hydraulic or biological overload.
Gravity systems rely on trenches and good soil; chambers improve distribution.
Mounds suit shallow or poor soils.
Aerobic units add treatment, reducing soil demands but needing power and maintenance; failures stem from clogging, saturation, mechanical or biological collapse.
Typical lifespan and warning signs by system type
How long should a septic system be expected to last, and what early signs indicate trouble?
Lifespans vary: gravity systems 20–40 years, chamber systems 20–30, mound systems 15–25, aerobic systems 15–20.
Early signs: slow drains, sewage odors, soggy lawn, backups, increased algae in nearby water.
Regular inspections, pumping, and prompt repairs reduce failures and extend service life.
How to Plan and Execute a Safe Drainfield Replacement
A safe drainfield replacement begins with thorough site preparation and proper decommissioning of the failed system to prevent contamination and allow clear access.
A qualified assessment of soil conditions and hydraulic loading guides the design and siting of the new drainfield.
Installation should follow regulatory and construction best practices, with careful reconnection to the septic tank and prompt restoration of landscaping to stabilize soil and preserve property use.
Site preparation and decommissioning old system
Site preparation and careful decommissioning of the old system set the foundation for a successful drainfield replacement, requiring a clear plan, proper permits, and adherence to local regulations.
Contractors remove tanks, pump and inspect for contamination, cap or crush tanks per code, and isolate utilities.
Excavation follows erosion controls and staging for spoil.
Final grading restores surface drainage and documents decommissioning for authorities.
Soil evaluation and design considerations
Soil evaluation and design decisions determine the drainfield’s longevity and environmental safety, requiring systematic testing of texture, permeability, depth to seasonal high groundwater, and presence of restrictive layers.
Professionals interpret percolation tests, soil borings, and mapping to size trenches, select appropriate dispersal media, and set minimum setbacks from water sources.
Designs must comply with local codes and factor anticipated loading rates and maintenance access.
Steps to install a new drainfield and reconnect systems
After completing soil evaluations and finalizing design parameters, planning and executing a drainfield replacement proceeds through coordinated permitting, careful excavation, proper placement of distribution components, and secure reconnection to the septic tank and building sewer.
Contractors install gravel or aggregate trenches or chambers, lay distribution piping with correct slope, inspect backfill materials, test for watertight connections and proper flow, then obtain final inspections and documentation.
Restoring landscaping after replacement
When a drainfield replacement is complete, homeowners and contractors should restore the landscape to guarantee stability, drainage, and long-term protection of the new system.
Regrade soil to original contours, compact gently, and install erosion control. Use shallow-rooted grasses or native groundcover to prevent compaction and root intrusion.
Reroute surface runoff, replace topsoil, and avoid heavy loads until full settlement occurs.
Preventive Maintenance Schedule and Checklist
A clear preventive maintenance schedule helps preserve a repaired system and prevents future failures.
It should specify pumping intervals by household and tank size, seasonal inspection checkpoints, water‑use and appliance guidelines, and which products to avoid or allow.
The checklist that follows translates those elements into straightforward, actionable tasks.
- Pumping frequency and tank sizing guidelines
- Seasonal inspection items and warning signs
- Water‑use rules, appliance notes, and approved vs. prohibited additives
Recommended pumping frequency by household size and tank size
Household size and tank capacity are the primary factors that determine how often a septic tank should be pumped. Larger families and smaller tanks require more frequent pumping to prevent solids from accumulating and causing system failure.
General guidelines:
- Two-person households with 1,000‑gallon tanks every 3–5 years
- Four-person households every 2–3 years
- Six-plus households or tanks under 750 gallons annually.
Routine inspections and what to look for seasonally
Beyond regular pumping schedules, routine inspections provide an early-warning system that catches developing problems before they require major repairs.
Technicians and homeowners should check effluent levels, sludge depth, alarm operation, surface ponding, odors, soggy patches, and unusual vegetation.
Seasonally verify inlet/outlet baffles, riser seals, and freeze protection in winter; inspect distribution lines and soakaway performance after wet seasons.
Water-use habits and appliance considerations to protect the system
Many small changes in water use and appliance selection substantially extend septic system life by reducing hydraulic and solids load.
Households should stagger laundry and dishwasher cycles, install high-efficiency toilets, low-flow fixtures, and front-loading washers.
Avoid excessive garbage disposal use and reroute roof/downspout drains away from the drainfield.
Monitor sump pumps and water softeners to prevent overloading the system.
Products and treatments to avoid vs. approved additives
Distinguish between harmful products and approved additives to keep a septic system functioning: chemicals that kill beneficial bacteria, harsh drain cleaners, and frequent use of garbage disposals accelerate failure, while vetted biological additives and maintenance-grade enzymes can be useful in limited, documented cases.
Owners should avoid bleach-scented cleaners, pesticides, and oil disposal; document any additive use, consult professionals, and prioritize pumping, inspections, and water conservation.
Cost-Saving Strategies and Financing Options
Cost-saving strategies begin with extending system life through regular maintenance and simple household changes that reduce strain on the septic system.
Financial assistance may be available from grants, low-interest loans, or local programs to help cover repair or replacement costs.
Homeowners should obtain multiple bids and compare contractor proposals by price, scope, warranties, and references before committing.
Extending system life through maintenance and usage changes
Preserve a septic system’s functionality and delay expensive replacements by adopting targeted maintenance routines and modest household habit changes that reduce strain on system components.
Regular pumping, periodic inspections, and prompt repair of leaks prevent solids overload.
Limit water use, stagger appliance cycles, avoid harsh chemicals and non-biodegradables, and route roof drains away from the drainfield.
Keep heavy equipment off the drainfield.
Grants, loans, and local assistance programs for replacements
Many homeowners qualify for financial aid to replace failing septic systems through grants, low-interest loans, and local assistance programs administered by federal, state, or municipal agencies and nonprofit organizations.
Eligibility often depends on income, health risks, and environmental impact.
Applicants should consult state environmental agencies, USDA or EPA programs, and local health departments for application guidance, deadlines, and required documentation to secure funding.
How to get multiple bids and evaluate contractor proposals
Request multiple detailed bids from at least three licensed contractors to compare scope, materials, timelines, and warranty terms.
Evaluate line-item costs, exclusions, and permit responsibilities.
Check references, insurance, licensing, and recent project photos.
Favor proposals with clear inspection, testing, and contingency plans.
Negotiate payment schedule tied to milestones and obtain a written contract.
Use bids to limit scope creep and control total project cost.
Real-World Case Examples and Before/After Scenarios
The section presents concise real-world examples that illustrate different failure modes and practical remedies.
Each case contrasts the problem, the chosen intervention, and measurable outcomes to inform reader decisions.
The following summaries offer quick, applicable lessons:
- Typical minor-failure repair case
- Drainfield replacement case study
- Emergency backup resolved with temporary measures
Typical minor-failure repair case
A homeowner noticed soggy ground and slow drains and called a local septic contractor, who diagnosed a partially clogged drainfield pipe and a failing distribution box.
After targeted excavation, pipe replacement, and installing a new distribution box section, normal flow and dry surface conditions were restored within a single workweek.
Follow-up included system flushing, bacterial reconditioning, minor grading, and scheduled monitoring to guarantee lasting function.
Drainfield replacement case study
Several homeowners faced recurring soggy lawns and sewage odors until a thorough drainfield replacement resolved chronic failures that simple repairs could not.
Technicians excavated, assessed soil percolation, removed saturated trenches, replaced distribution piping and gravel, and installed new drainlines with proper depth and grading.
Post-replacement testing confirmed restored percolation rates, eliminated surface effluent, and returned affected yards to normal use with documented maintenance recommendations.
Emergency backup resolved with temporary measures
Responding quickly, crews implemented temporary measures to stop backups and protect properties while permanent repairs were planned.
Sandbagging, portable pumps, and short-term holding tanks diverted sewage away from homes.
Technicians isolated failing lines and issued homeowner guidance on water use reduction.
Within days odors and surface pooling subsided, allowing prioritized excavation and reliable long-term replacement without further damage or health risks.
Long-Term Monitoring and When to Retest
After repairs are completed, a clear post-repair inspection timeline and sign-off checklist establish when and how the system will be evaluated.
Regular year-round monitoring of effluent levels, drainfield saturation, and effluent quality helps detect developing problems early.
Specific triggers—repeated high effluent, surface pooling, or significant seasonal shifts in the water table—should prompt retesting of soil absorption and groundwater levels.
Post-repair inspection timeline and sign-off checklist
A clear, time-bound post-repair inspection schedule guarantees the repaired septic system performs correctly and complies with permitting requirements.
Inspections at 1 week, 1 month, 3 months, and 1 year are recommended.
Checklist items: drainfield absorption, tank integrity, baffles, effluent levels, alarm function, odor/backup absence, and documentation of repairs.
Final sign-off requires contractor and local authority confirmation of compliance.
How to monitor system performance year-round
With the post-repair inspections complete and paperwork filed, ongoing monitoring keeps the system operating and detects problems before they escalate.
Regular checks include monthly visual inspections, quarterly pump and alarm tests, effluent quality sampling as recommended, and seasonal record reviews of water usage.
Maintain a log of observations, service dates, and maintenance actions.
Schedule professional evaluations annually or per local regulations.
Triggers for retesting soil absorption or water table levels
When should soil absorption fields or groundwater levels be retested to confirm a repaired septic system remains effective?
Retesting is advised after heavy rainfall, seasonal high water tables, nearby construction or landscaping changes, observed soggy patches or odors, increased toilet backups, or two to three years post-repair.
Additional tests follow any permit-required intervals, unusual system performance, or changes in household sewage load to guarantee long-term function.
Resources and Contacts for Further Help
For homeowners facing a septic failure, a concise list of trusted contacts and resources helps turn uncertainty into actionable steps.
The following items point to licensed professionals, regulatory offices, and practical references to support repair, permitting, and maintenance decisions. Consulting these sources can clarify responsibilities, costs, and compliance requirements.
- How to find licensed septic contractors and inspectors
- Relevant local and state regulatory agencies
- Recommended reading and tools for homeowners
How to find licensed septic contractors and inspectors
Where should a homeowner begin when a septic failure demands professional help?
Search state licensing boards and local health department lists for certified septic contractors and inspectors. Verify licenses, insurance, and references.
Request written estimates, scope, and timelines. Prefer professionals with experience in the specific system type.
Check trade associations, online reviews, and ask neighbors for recent referrals before hiring.
Relevant local and state regulatory agencies
After verifying contractors and gathering estimates, homeowners should consult the local and state agencies that oversee septic permitting, inspections, and wastewater regulations to guarantee repairs meet legal and public-health requirements.
Contact county health departments, state environmental or water quality agencies, and municipal permitting offices for permit requirements, inspection schedules, reporting forms, and approved contractor lists.
Document all communications and retain permit records for compliance and resale.
Recommended reading and tools for homeowners
A concise set of resources helps homeowners navigate repairs, maintenance, and regulatory compliance for a failed septic system.
Recommended reading includes EPA septic system guides, state health department manuals, and university extension publications.
Essential tools: probe, soil test kit, effluent filter wrench, pump access key, and basic hand tools.
Contact lists should list licensed contractors, local permitting offices, and emergency plumbing services.
Conclusion
A failed septic system, once examined and treated, can be restored with diligence and informed choices. Homeowners who follow diagnostic steps, confirm causes, and apply appropriate repairs often find long-term reliability returns like sunrise after storm clouds. Emphasizing regular maintenance, prudent financing, and timely professional help reduces recurring failures. Continued monitoring and adherence to best practices serve as a safeguard, preserving property value, public health, and environmental integrity for years to come.