How to Do a Plumbing Smoke Test: Step-by-Step Guide for Detecting Leaks and Blockages
A plumbing smoke test is an effective method for detecting leaks, illegal connections, and blockages in your plumbing system. By introducing controlled, non-toxic smoke into drains and vents, technicians can easily identify where smoke escapes, indicating potential issues. The process involves sealing vents and cleanouts, connecting a smoke generator, and pressurizing the system while monitoring for smoke emergence. This helps guide necessary repairs, from simple seal fixes to complete pipe replacements. Before starting, ensure safety precautions, permits, and notifications are in place. Continue reading for detailed step-by-step procedures, interpretation tips, and reporting templates.
What a Plumbing Smoke Test Is and Why It Matters
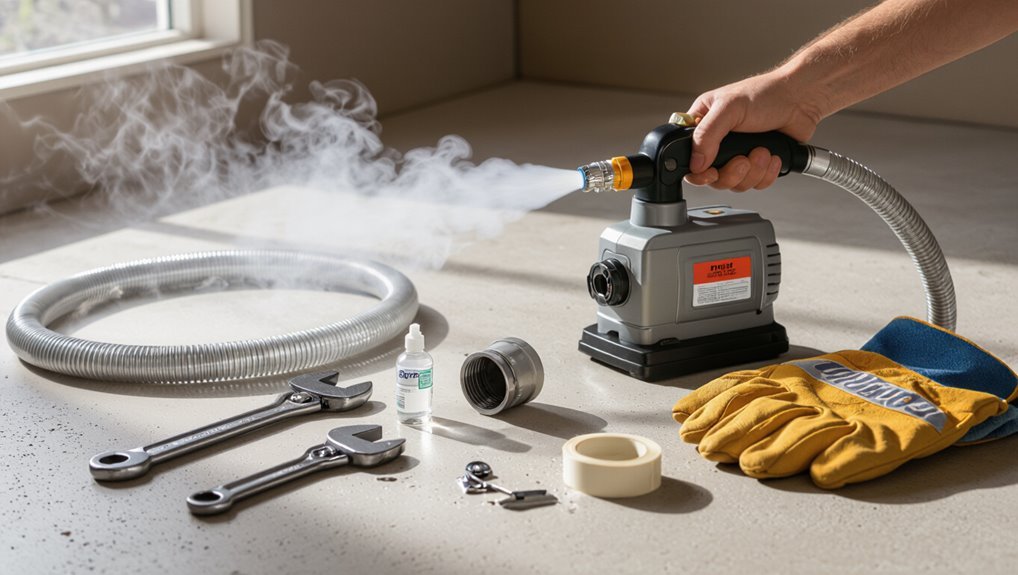
A plumbing smoke test introduces non-toxic smoke into a drainage or sewer system to reveal points of entry and airflow, serving both diagnostic and preventive purposes.
It commonly exposes leaks, illegal connections to storm drains, and partial blockages that allow smoke to escape.
The method is preferred when visual inspection or camera surveys are inconclusive, when a system-wide assessment is needed quickly, or when locating intermittent faults.
Definition and purpose of a smoke test for plumbing
Plumbing smoke testing uses non-toxic smoke introduced into a building’s drain or sewer lines to reveal leaks, illegal connections, and ventilation issues by showing where smoke escapes.
The procedure validates system integrity, confirms proper venting, and guides repairs.
Professionals outline scope, isolate lines, introduce smoke, observe exits, and document findings.
Homeowners learn how to do a smoke test on plumbing safely and efficiently.
Common problems detected by smoke testing (leaks, illegal connections, blockages)
Having outlined how smoke testing is performed and what it confirms, the focus shifts to the specific defects the method typically reveals.
Smoke tests expose leaking joints, cracked pipes, and faulty seals where smoke escapes. They reveal illegal sewer or stormwater cross-connections, roof or yard drain links, and blockages that redirect flow.
Results guide targeted repairs and permit compliance verification.
When to choose a smoke test over other inspection methods
When rapid identification of system-wide leaks, illegal cross-connections, or hidden roof and yard drain links is required, a smoke test often proves the most efficient choice; it reveals escape points across an entire network at once rather than inspecting individual segments.
It is preferred for initial diagnostics, large or aging systems, suspected widespread defects, or when camera access is restricted.
Use other methods for localized issues or pipe interior assessment.
Legal, Safety, and Preparation Requirements
Before beginning a plumbing smoke test, the contractor should confirm required permits, applicable codes, and any notifications to authorities or utility companies.
They must also implement safety measures for occupants, pets, and workers and assemble a concise checklist of tools, materials, and equipment.
Finally, the property and fixtures should be prepared—sealing openings, isolating systems, and documenting baseline conditions—before testing commences.
Permits, codes, and when to notify authorities or utility companies
One or more permits are often required for a plumbing smoke test, and compliance with local building codes and utility rules is essential to avoid fines or forced work stoppage.
Contractors should verify municipal permit needs, follow code-prescribed procedures, and obtain written authorization when testing connected sewer or gas-adjacent systems.
Notify local utilities and public works in advance to prevent false alarms and guarantee proper oversight.
Safety precautions for occupants, pets, and workers
Although smoke testing is a controlled diagnostic tool, strict safety measures must protect occupants, pets, and workers by preventing inhalation risks, false alarms, and accidental access to test areas.
Personnel should ventilate spaces, post clear warning signs, and restrict entry. Evacuate sensitive occupants and secure pets.
Use trained technicians with respirators and communicate schedules to neighbors and building management to minimize disruption.
Tools, materials, and equipment checklist
After securing occupants, pets, and workers, attention shifts to assembling the legal, safety, and preparation items required for a plumbing smoke test.
Personnel should confirm permits, liability waivers, and utility notifications.
Required items include:
- Smoke generator and fuel or smoke cartridges
- Respiratory PPE and fire extinguisher
- Leak detection tools and seals
- Documentation forms and site map
How to prepare the property and plumbing fixtures before testing
Begin by securing and isolating the test area to protect occupants and the public, ensuring all plumbing fixtures, vents, cleanouts, and appliance connections are identified and appropriately sealed or opened per the test plan.
Verify permits, notify occupants and utilities, post warning signs, remove ignition sources, protect sensitive equipment, and confirm drainage traps contain water.
Document conditions and emergency procedures before commencing the smoke test.
Step-by-Step Plumbing Smoke Test Procedure
The procedure begins with a thorough visual inspection and isolating the system to guarantee controllable conditions.
Next, drains, vents, and cleanouts are sealed, the smoke generator and airflow controls are set up, and smoke is introduced while technicians monitor the sequence.
All points where smoke emerges and its behavior are recorded for analysis and repair planning.
Initial visual inspection and system isolation
A systematic visual inspection establishes baseline conditions and identifies obvious defects before any smoke is introduced.
The inspector surveys fixtures, exposed stacks, traps and accessible piping for cracks, loose fittings, and missing caps.
All building occupants are notified; mechanical systems affecting air pressure are turned off.
Isolation valves are closed to segregate the test zone, and temporary labels mark isolated sections for the upcoming procedure.
Sealing drains, vents, and cleanouts correctly
Seal all openings methodically to guarantee smoke travels only through designated leak paths.
Use appropriate plugs, test balls, or inflatable stoppers rated for pipe size and material.
Seal vents with temporary caps or tape that withstands mild pressure.
Close cleanouts with threaded caps or mechanical seals.
Verify tightness visually and by applying low-pressure air; re-seal any suspect connections before proceeding.
Setting up the smoke generator and airflow controls
With all openings secured and verified, attention shifts to positioning the smoke generator and configuring airflow controls for the test.
The generator should sit stable and level near the main stack or designated access point. Connect flexible hose, check seals, and set fan or blower to low initial flow.
Confirm power, safety vents, and clear line-of-sight for subsequent observation.
Introducing smoke and monitoring sequence
Begin introducing smoke by engaging the generator at its low-flow setting and slowly increasing pressure until a steady, visible stream issues into the system. This controlled ramp-up helps reveal leaks without overpressurizing the plumbing.
Observe fixtures, vents, and accessible joints systematically, moving from highest to lowest elevations. Note timing, smoke density changes, and any airflow resistance.
Maintain constant generator settings during monitoring.
Documenting smoke emergence points and behavior
After establishing steady smoke flow and completing a systematic scan of fixtures and vents, the inspector records each visible emergence point and notes smoke behavior characteristics.
Entries include location, time, intensity, color, duration, and whether smoke is intermittent or continuous. Photographs and sketches supplement notes.
Observed patterns are correlated with plumbing layouts to prioritize probable leak or blockage sources for follow-up inspection and repairs.
Steps to safely end the test and ventilate the system
Conclude the smoke test by stopping smoke generation, confirming all observation points are documented, and preparing for controlled ventilation of the plumbing system.
Operators should shut off smoke source, secure access covers, and notify occupants.
Open vents and roof stacks sequentially to disperse residual smoke, monitoring for trapped pockets.
Verify odor clearance, reinspect recorded leak sites, and restore sealed fixtures and safety barriers.
Interpreting Results and Locating Problems
Smoke behavior and exit points help pinpoint common leak locations such as roof vents, cleanouts, and cracked seals.
Observing volume and persistence of smoke allows classification of issues as minor (localized gasket failures) or major (large breaches, blockages, or illegal connections).
Photographs, video, and concise notes should be used to confirm whether smoke indicates a blockage, a cracked pipe, or an illicit tie-in and to form a repair plan.
Identifying common leak locations from smoke patterns
Several distinct smoke patterns reveal the likely locations and types of plumbing leaks during a test.
Thin steady wisps often indicate small cracks in pipes or joints. Strong, continuous plumes suggest large breaches or damaged vents.
Intermittent puffs near fixtures point to trap or wax-ring failures. Ground-level seepage signals buried sewer line faults, while roof vents emit trails indicating vent-stack issues.
Distinguishing between minor and major issues
After recognizing patterns that point to specific leak locations, the inspector must assess whether observed emissions indicate a minor defect or a systemic failure.
Localized, low-volume smoke at fixture seals, vents or cracked grout usually signals repairable defects.
Widespread, continuous emissions from multiple fittings, soil stacks or foundation areas suggest larger system breaches or venting failures, prompting thorough inspection and prioritized remediation.
How to confirm blockages versus cracked pipes or illegal connections
One methodical approach helps distinguish obstructions from structural breaches or illicit connections: correlate the location, intensity, and timing of emissions with fixture use and system layout.
Persistent, pressure-dependent smoke near joints suggests cracks; localized, intermittent plumes tied to specific fixtures indicate illegal cross-connections.
Widespread, diffuse backpressure or trapped smoke points to downstream blockages.
Verify with targeted dye or isolated re-testing before repairing.
Using photos, videos, and notes for a repair plan
With smoke patterns mapped to likely faults, documenting visual and temporal evidence becomes the foundation of a repair plan.
Photographs capture locations and severity; video records flow dynamics and timing.
Annotated notes tie images to fixtures, soil stacks, and weather conditions.
Time-stamped files and simple diagrams prioritize repairs, estimate materials, and guide excavations or camera inspections, ensuring efficient, accountable remediation.
Repair Options Based on Smoke Test Findings
Following a smoke test, the report should guide decisions between temporary fixes and permanent repairs based on location and severity of the leaks.
Accessible issues may be handled with DIY techniques and materials, while deeper defects often require a licensed plumber or excavation contractor.
Rough cost ranges for common repairs help prioritize actions and set expectations before work begins.
Temporary fixes versus permanent repairs
Evaluating smoke test results directs the choice between temporary fixes and permanent repairs based on leak severity, location, and budget constraints.
Temporary measures—patches, sealants, and localized clamping—buy time, reduce odors, and prevent further damage but require monitoring.
Permanent solutions—pipe replacement, sectional rerouting, or fixture replacement—address root causes, restore long-term integrity, and often comply with code, though they demand higher cost and professional work.
DIY repair techniques for accessible issues
After distinguishing between stopgap measures and full replacements, attention can turn to DIY repairs appropriate for accessible, low-risk leaks identified by a smoke test.
Homeowners can seal small joints with silicone or plumber’s epoxy, replace accessible rubber washers, tighten fittings, or patch hairline cracks with repair clamps.
Verify surfaces are clean, follow product cure times, and retest with smoke to confirm remediation.
When to call a professional plumber or excavation contractor
When should a homeowner escalate a plumbing smoke test finding to a professional?
If smoke reveals underground leaks, persistent sewer gas indoors, structural damage, multiple defects, or inaccessible lines, a licensed plumber or excavation contractor should be engaged.
Professionals assess permit needs, perform camera inspections, schedule trenching or repairs, and guarantee code-compliant remediation.
Immediate contact is warranted for health risks or major system failures.
Estimating cost ranges for typical repairs
Repair costs after a plumbing smoke test vary widely depending on the defect’s location, severity, and access requirements.
Typical ranges include:
- Minor trap/vent repairs: $75–$300.
- Local pipe patching or rerouting: $200–$800.
- Sewer line section replacement: $800–$2,500.
- Full excavation and replace: $3,000–$10,000+.
Estimates depend on region, material, and emergency access needs.
Preventive Measures to Avoid Future Leaks and Blockages
A concise preventive strategy addresses routine maintenance of drains, vents, and traps to keep flow paths clear and seals effective.
It also recommends best practices for sewer line care and mindful landscaping to prevent root intrusion and pipe stress.
Finally, measures to detect and avoid illegal connections and cross-contamination are emphasized to protect system integrity and public health.
Maintenance routines for drains, vents, and traps
Regular, scheduled maintenance of drains, vents, and traps reduces the risk of blockages, odors, and slow drainage by addressing buildup and wear before failures occur.
Routine tasks include inspecting vent caps, cleaning trap seals, removing debris from sink and shower drains, and flushing drains with safe enzymatic cleaners.
Documenting service intervals and promptly repairing worn components preserves function and prevents costly emergency repairs.
Best practices for sewer line care and landscaping near pipes
One practical approach to protecting sewer lines is combining routine inspections with mindful landscaping choices that minimize root intrusion, soil shifting, and surface runoff into pipe zones.
Schedule periodic camera inspections, keep large trees and deep-rooted shrubs well away from main lines, use shallow-rooted groundcover, grade soil to direct water away from trenches, and avoid heavy equipment over pipe routes to prevent compression and displacement.
How to prevent illegal connections and cross-contamination
Preventing illegal connections and cross-contamination requires clear policies, routine inspections, and physical safeguards that separate sanitary and storm systems.
Municipal codes, permit controls, and utility marking reduce unauthorized ties.
Regular smoke or dye testing, CCTV inspections, and flow monitoring detect breaches early.
Property owner education, locked access points, backflow preventers, and rapid corrective enforcement minimize recurrence and protect public health.
Comparison of Smoke Testing with Alternative Inspection Methods
A concise comparison highlights where smoke testing fits among other inspection techniques, emphasizing different strengths and limitations. The table below provides a quick visual of smoke testing versus camera, dye, and pressure methods to guide method selection. A brief pros-and-cons summary follows to help determine the most appropriate approach for specific diagnostic needs.
| Method | Key consideration |
|---|---|
| Smoke vs. Camera | Smoke locates leaks quickly; camera pinpoints internal blockages visually |
| Dye/Pressure vs. Smoke | Dye/pressure confirm active flow or leaks under pressure; smoke exposes venting and hidden breaches under normal conditions |
Smoke test vs. camera (video) inspection
When evaluating sewer and drain problems, smoke testing and camera (video) inspection serve complementary but distinct roles:
Smoke testing quickly locates active leaks, illegal connections, and cross‑connections by revealing where smoke exits.
Camera inspection visually documents pipe interior conditions, pinpoints blockages, and measures distances to defects.
Combined use yields faster diagnosis and targeted repairs; choice depends on problem type, access, and budget.
Smoke test vs. dye testing and pressure testing
Contrast smoke testing with dye and pressure testing highlights different strengths: smoke testing quickly reveals open leaks, illicit hookups, and surface exits by tracing air pathways.
Dye testing visually confirms flow or cross‑connections within drains using colored tracers.
Pressure testing quantifies pipe integrity by detecting pressure loss under controlled conditions.
Each method targets specific failure modes and evidence types, so selection depends on inspection goals and system access.
Pros and cons summary to choose the right method
Several factors determine which inspection method is most appropriate for a given plumbing task: the type of defect sought, access to piping, time and cost constraints, and safety or regulatory considerations.
Smoke testing detects vents, illegal connections, and large leaks quickly and cheaply but can miss small cracks and poses respiratory risks.
Dye testing is simple for localized leaks; pressure testing quantifies integrity but requires isolation and equipment.
Common Mistakes and Troubleshooting During Smoke Tests
Common mistakes during smoke testing include setup errors that lead to false positives or false negatives and equipment problems that impair smoke generation or detection.
Technicians should systematically troubleshoot inadequate smoke flow or sensor issues by checking seals, fan operation, and detector placement.
Precautions such as protecting vents, using nonstaining smoke, and notifying occupants minimize the risk of property damage during testing.
Errors that produce false positives or negatives
Mistakes during a plumbing smoke test can produce misleading results, with both false positives (indicating leaks where none exist) and false negatives (failing to reveal actual leaks).
Common causes include improper sealing of test connections, backdrafts from wind or HVAC, residual moisture blocking smoke, excessive dilution from open vents, incorrect smoke density, and misreading transient smoke as persistent leakage.
Troubleshooting inadequate smoke flow or detection issues
When smoke fails to move through the drain system or detectors do not register it, the cause is usually a mechanical or procedural issue that can be isolated and corrected.
Inspect blower seals, hose connections, and fan orientation; confirm sufficient smoke generator output and correct chamber pressurization.
Verify trap plugs, vent openings, and detector placement.
Re-run test after each targeted correction to confirm restored flow and detection.
How to avoid property damage during testing
Prioritize containment and clear procedures to prevent smoke-related or mechanical damage to buildings and contents during a plumbing smoke test.
Use barriers, cover vents, and remove sensitive items. Notify occupants and post signage.
Test small areas first and monitor for backpressure. Maintain fire safety protocols and have ventilation plans.
Document steps and restore spaces promptly after completion to minimize impact.
Case Examples and Real-World Scenarios
The section presents concise case studies: a typical residential leak discovery scenario, a municipal or commercial sewer line example, and a before-and-after documentation template.
Each example illustrates procedure, common findings, and recommended follow-up actions.
Readers are shown how to adapt the template for clear field records and reporting.
Typical residential leak discovery scenario
Many homeowners encounter hidden sewer or vent leaks after noticing persistent odors, unexplained damp spots, or sudden pressure changes in plumbing fixtures.
A smoke test often pinpoints roof vents, cracked cleanouts, or improperly sealed waste stacks. Technicians isolate the zone, introduce non-toxic smoke, observe exits, and document leak locations for targeted repairs, minimizing invasive excavation and preventing recurring odor and moisture problems.
Municipal or commercial sewer line example
Scaling from residential settings, municipal and commercial sewer systems present different challenges for smoke testing due to larger pipe diameters, multiple lateral connections, and regulatory constraints.
Teams coordinate with utilities, obtain permits, and isolate mains. Smoke sources and fans scale up; monitoring covers extensive manhole networks.
Findings prioritize public health risks, structural defects, and inflow/infiltration hotspots for targeted rehabilitation and reporting.
Before-and-after documentation template
One clear before-and-after documentation template organizes case details, photographic evidence, location data, test parameters, observed defects, corrective actions, and follow-up notes into standardized sections to guarantee consistency across projects.
It enables quick comparison, accountability, and client reporting.
Recommended fields include:
- Site and date
- Test setup and parameters
- Findings with images
- Repairs and verification notes
Final Checklist and Reporting Template
The final checklist and reporting template standardize the smoke test process by listing pre-test steps for technicians and homeowners, required post-test fields, and clear follow-up procedures.
Essential reporting fields should capture findings, annotated photos, and recommended repairs or actions.
A scheduled verification plan with dates and responsible parties guarantees closure and documents any retest results.
Pre-test checklist for technicians and homeowners
A concise, itemized final checklist and reporting template guarantees technicians and homeowners confirm all preparatory steps before initiating a plumbing smoke test.
It verifies safety, permits, and access, and documents baseline conditions.
- Verify permits, notifications, and property access.
- Confirm safety gear, blower equipment, and smoke source.
- Seal vents, drains, and potential odor-sensitive openings.
- Record pre-test photos, meter readings, and contact details.
Post-test reporting fields to include (findings, photos, recommendations)
With preparatory steps confirmed and baseline conditions documented, the post-test report captures observable results, supporting media, and action items in a compact, standardized format.
Include: concise findings (locations, leak types, severity), timestamped photos with annotations, test parameters, environmental notes, immediate safety concerns, prioritized recommendations (repairs, access needs), and estimated costs.
Signatures, technician ID, and client acknowledgment complete the record.
Follow-up scheduling and verification steps
Because timely verification guarantees remediation effectiveness, a concise final checklist and standardized reporting template should set clear follow-up milestones, responsible parties, verification methods, and acceptable completion criteria.
This document must list scheduled re-inspection dates, required evidence (annotated photos, pressure readings, signed repair receipts), communication protocols for missed appointments, and escalation steps so that closure is unambiguous and auditable.
A brief verification log records completion status, verifier signature, timestamps, outstanding actions, and final acceptance.
Conclusion
A plumbing smoke test concludes the inspection, confirming vents, traps, and seals integrity while revealing hidden leaks or blockages. Technicians document findings, recommend targeted repairs, and compare alternatives like camera scopes or dye tests for context. Safety, permits, and neighbor notifications remain essential. Like a detective with a pocket watch, the test pairs methodical technique with practical judgment, producing a concise report and remediation plan that guarantees system function, compliance, and long-term reliability.