How to Fix a Propane Heater That Won’t Stay Lit: Quick DIY Troubleshooting and Repair Tips
If your propane heater won’t stay lit, the issue is likely related to the fuel supply, pilot system, or safety controls. Begin troubleshooting by checking the tank pressure and fittings, inspecting the pilot flame and thermocouple, and looking for clogged burner ports or weak airflow. Clean the pilot and burner, tighten any loose fittings, and replace a faulty thermocouple or igniter as necessary. Always ensure the gas is turned off, test for leaks, and adhere to safety precautions. For detailed diagnostics, repair timing, and preventive tips, continue reading.
Why a Propane Heater Won’t Stay Lit Quick Explanation
A propane heater that won’t stay lit usually has simple, immediate causes such as an empty or kinked tank, a faulty thermocouple or pilot, or debris blocking the burner.
Before any troubleshooting, one must shut off the propane supply, allow the unit to cool, and guarantee good ventilation to avoid leaks or buildup.
Safety checks should precede component inspection to prevent accidental ignition or gas exposure.
Common immediate causes of flame failure
Inspecting immediate causes of flame failure reveals several straightforward, fixable issues that make a propane heater fail to stay lit.
Common culprits include clogged burner ports, dirty or misaligned thermocouples, weak pilot flames, kinked or partially closed propane lines, and low tank pressure.
A concise troubleshooting approach explains how to fix a propane heater that won’t stay lit by cleaning, realigning, and checking fuel flow.
Safety considerations before troubleshooting
Before attempting any repairs, the operator must guarantee the heater is de-energized and the propane supply is securely shut off, because even brief fuel or ignition sources can cause fires or explosions.
The technician should ventilate the area, check for leaks with a soap solution, wear protective gloves and eye protection, avoid open flames or sparks, and keep a fire extinguisher nearby before troubleshooting.
Fast checks to get the heater lit again (Quick Fixes)
A few quick checks can often restore a propane heater: confirm the tank has fuel and fittings are tight, and inspect the thermostat and control knob for proper settings and clicks.
If those are fine, follow the manufacturer’s pilot and main burner relight procedure step by step.
If gas odor persists, flames are irregular, or the heater will not ignite after attempts, shut off the unit and call a qualified technician immediately.
Verify propane supply and tank connection
Check the propane supply and tank connection first, since most ignition failures stem from an empty tank, a closed valve, or a loose hose fitting.
Confirm the tank has fuel, open the main valve fully, and tighten the regulator and hose fittings.
Inspect for kinks, damage, or leaks using soapy water.
Replace faulty hoses or regulators before retrying ignition.
Inspect and reset the thermostat and control knob
Inspect the thermostat and control knob for obvious misalignment or wear, since a stuck or incorrectly set control is a common cause of failure to ignite.
Confirm knob moves smoothly through positions and returns to OFF.
Check thermostat wiring and connections for looseness or corrosion.
Reset settings to a mid-range temperature, replace damaged knobs, and test response before proceeding to ignition-related steps.
Relight procedure for pilot and main burner
With the control knob confirmed operational and thermostat settings restored, attention turns to lighting the pilot and main burner.
Follow the manufacturer’s pilot relight: set to PILOT, depress and hold knob, ignite pilot with match or lighter until steady flame shows, continue holding 30–60 seconds, then release.
Turn knob to ON and observe ignition of main burner; repeat if necessary.
When to shut off and call a professional immediately
If flames are irregular, a strong smell of gas is present, or safety devices repeatedly trip despite basic troubleshooting, the heater should be shut off immediately and a qualified technician contacted; these signs indicate leaks, combustion problems, or faulty controls that can pose fire, explosion, or carbon monoxide hazards and are not safe for do‑it‑yourself repair.
Additionally, call a professional when the pilot won’t light after multiple attempts, controls spark abnormally, or visible damage/corrosion exists.
Step-by-step troubleshooting for a pilot light or electronic ignition that won’t stay lit
The technician prepares basic tools and replacement parts before beginning, including a screwdriver, soft brush, multimeter, and a spare thermocouple or igniter as needed.
They inspect and clean the pilot assembly, then test and clean the thermocouple or thermopile for proper millivolt output.
Finally, they examine the electronic igniter and wiring and verify gas pressure and regulator function to isolate the fault.
Tools and materials needed
A compact kit of tools and replacement parts streamlines diagnosis when a pilot light or electronic ignition fails to stay lit.
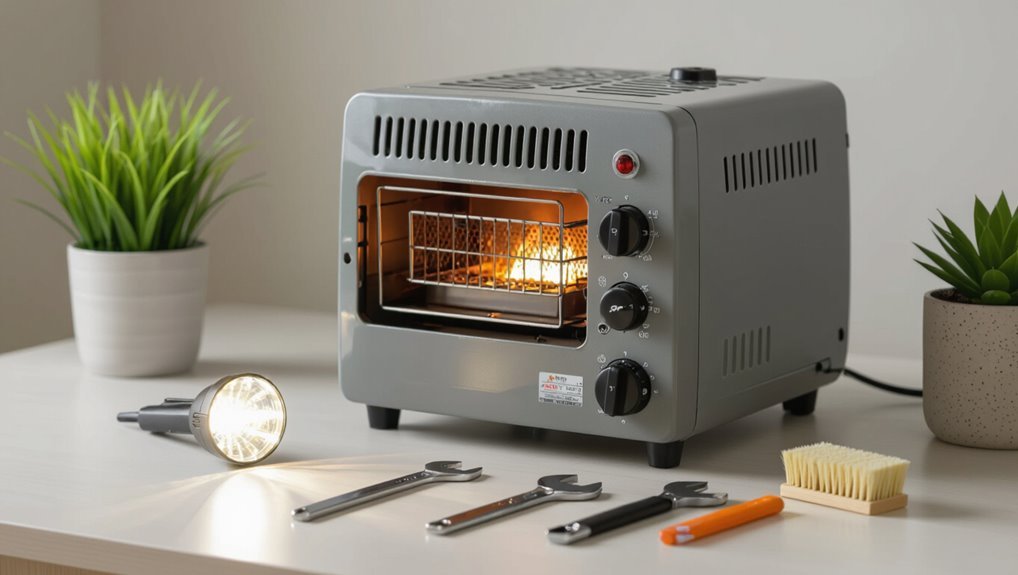
Include adjustable wrench, screwdriver set (flat and Phillips), long-nose pliers, wire brush, compressed air, multimeter, replacement thermocouple/igniter, spark electrode, heat-resistant gloves, small flashlight, and threaded sealant or PTFE tape.
Safety goggles and a propane leak detector complete the kit.
Checking and cleaning the pilot assembly
Begin by turning off the propane supply and allowing the heater to cool completely to prevent burns or gas buildup; then verify the appliance is disconnected from any power source before proceeding.
Inspect the pilot assembly for soot, spider webs, or debris. Use compressed air and a soft brush to clean the pilot jet and tube.
Reassemble, confirm proper alignment, and relight per manufacturer instructions.
Testing and cleaning the thermocouple or thermopile
Next, inspect and test the thermocouple or thermopile to determine whether it’s failing to sense the pilot flame and shut off the gas.
Turn off gas and power, remove protective shields, visually check for soot or bending.
Clean gently with fine steel wool or emery cloth, reconnect, then measure millivolts with a multimeter while heating the pilot; replace if output is below specification.
Inspecting and testing the electronic igniter and wiring
If the thermocouple or thermopile checks out but the pilot or ignition still won’t stay lit, attention shifts to the electronic igniter and its wiring.
Inspect for cracked insulation, loose connectors, corrosion, or melted components.
Test the igniter with a multimeter for continuity and correct voltage during ignition.
Replace damaged wiring or the igniter module; retest until consistent sparks or reliable electronic ignition occurs.
Verifying proper gas pressure and regulator function
Several precise measurements are required to confirm that gas pressure and the regulator are supplying the correct fuel flow to the pilot or electronic ignition system.
Using a manometer or gauge, measure inlet and outlet pressures per manufacturer specs.
Check for regulator diaphragms leaks, clogged vents, or frozen vents.
Verify consistent pressure under load by observing readings while the burner attempts to light.
How to clean and maintain components that affect ignition
Routine cleaning and adjustment of ignition-related parts keeps a propane heater reliable and safe.
Technicians should address clogged burner ports and pilot jets, correct pilot tube alignment, and inspect or replace filters and vents.
A seasonal maintenance checklist helps guarantee these tasks are performed regularly and documented.
Cleaning burner ports and pilot jets safely
Begin by shutting off the propane supply and allowing the heater to cool completely; cleaning burner ports and pilot jets requires a cold, gas-free appliance to prevent fire or injury.
Remove access panels, use compressed air and a soft brush to clear debris, and inspect for corrosion.
Avoid poking with wire that enlarges or distorts orifices.
Reassemble, test for leaks, and relight per manufacturer instructions.
Replacing or adjusting a misaligned pilot tube
A misaligned or damaged pilot tube can prevent reliable ignition and should be inspected and corrected before proceeding with other maintenance.
Technicians should first shut off gas and cool the unit, then inspect tube alignment, snug fittings, and remove debris.
If bent, replace with manufacturer-specified tubing and fittings.
After reassembly, perform a leak and flame-shape check to confirm proper operation.
Cleaning or replacing filters and vents
Inspect the heater’s filters and vents regularly, since clogged or degraded components restrict airflow, alter combustion, and can prevent the pilot from igniting or sustaining a stable flame.
Turn off gas and power, remove and vacuum or wash reusable filters, and clear vent openings of dust, lint, nests, or obstructions.
Replace disposable filters per manufacturer specifications and confirm unobstructed intake and exhaust for reliable ignition.
Seasonal maintenance checklist
Several key tasks should be performed each season to guarantee reliable ignition and safe operation of a propane heater.
Inspect and clean burner ports, igniter, and pilot assembly; remove debris and corrosion.
Check gas connections and regulator for leaks and proper pressure.
Verify venting and air intake are unobstructed; replace damaged components as needed.
- Clean burners and pilot
- Test igniter and wiring
- Inspect gas fittings
Diagnosing less common causes of shutdowns
After checking ignition and routine maintenance, attention should turn to less common shutdown causes that require systematic inspection.
The technician should test safety valves and limit switches, assess airflow and ventilation for backdrafting, and inspect for moisture, corrosion, or animal nests that can obstruct components.
For powered units, the electrical supply and connections must also be verified to rule out intermittent power faults.
Faulty safety valves and limit switches
Faulty safety valves and limit switches can silently interrupt a propane heater’s operation even when burners and pilot appear normal.
Technicians should consider these components when common causes have been ruled out. Inspect electrical connections, test continuity with a multimeter, verify correct voltage and grounding, and confirm the limit switch opens at specified temperatures.
Replace defective valves or switches and retest ignition and run cycles.
Issues with airflow, ventilation, or backdrafting
Why is airflow important to a propane heater’s operation? Proper airflow supplies combustion oxygen and carries exhaust away; restricted vents, blocked intake, or negative pressure from nearby fans can cause incomplete combustion or safety shutdowns.
Inspect venting, guarantee fresh-air intake is clear, check flue and chimney for obstructions, and test for backdrafting during startup.
Correct ventilation or balance building pressure to resolve shutdowns.
Problems from moisture, corrosion, or animal nests
Airflow and ventilation problems are not the only non-routine causes of propane heater shutdowns; moisture, corrosion, and animal nests can also impair operation in subtle ways.
Moisture promotes rust on burners, pilot assemblies, and valves, causing weak flames or blockages.
Small animals build nests in vents or around controls, obstructing flow and damaging components.
Inspect, clean, dry, and replace corroded parts; remove debris safely.
Electrical supply problems for powered heaters
Reliability of the electrical supply is a frequent but often overlooked cause of shutdowns in powered propane heaters.
Inspect power cords, plugs, and breakers for damage or tripped circuits. Test voltage at the heater and continuity of internal wiring.
Check batteries for igniters where applicable. Loose connections, intermittent power, or ground faults can interrupt safety circuits; repair or replace defective components to restore reliable operation.
When to replace parts versus replace the heater
The article next outlines clear indicators that the thermocouple, igniter, or gas valve must be replaced, such as persistent failure to light, intermittent flame loss, or visible corrosion.
It then compares typical costs and expected lifespans of these components against the price of a replacement heater.
Finally, guidance is offered on when part replacement is the economical choice versus when replacing the entire unit is more sensible.
Signs that the thermocouple, igniter, or valve needs replacement
When should a component be replaced rather than the entire propane heater?
Persistent clicking or no spark indicates a failing igniter; intermittent flame loss or visible corrosion at the thermocouple tip signals thermocouple failure; slow gas flow, sticking, or audible hissing from the control suggests valve wear or internal leakage.
If single-part faults exist without structural or burner damage, replace the faulty component.
Cost and lifespan comparisons for common parts
Several common propane-heater components—thermocouples, igniters, and control valves—have distinct price ranges and service lives that determine whether a repair is economical. Typical costs and expected lifespans guide decisions: low-cost thermocouples often justify repair, while expensive valves may not. Consider labor, frequency of failure, and remaining heater life.
| Part | Cost/Lifespan |
|---|---|
| Thermocouple | $10–$30 / 2–5 yrs |
| Igniter | $20–$70 / 1–4 yrs |
| Control valve | $80–$300 / 3–10 yrs |
| Labor | $40–$150 / per job |
When replacement is more cost-effective than repair
Many repairs become uneconomical once replacement costs, remaining service life, and reliability are weighed against part and labor expenses.
The decision favors replacement when parts are costly, multiple components are failing, or the heater is near end-of-life.
Consider warranty, safety, energy efficiency, and future repair likelihood.
Prioritize total cost of ownership; choose replacement when it yields better long-term value and reliability.
DIY repair steps with estimated time and difficulty
The following section outlines concise, step-by-step DIY procedures for common repairs: replacing a thermocouple, swapping an electronic igniter, and changing a gas regulator or hose.
Each procedure includes estimated time and a clear difficulty rating to help readers assess whether to attempt the repair or consult a professional.
Safety reminders and required tools are noted for each task.
Replacing a thermocouple step-by-step
Begin by turning off the propane supply and allowing the heater to cool completely; this prevents gas leaks and burns while providing a safe starting point for replacing the thermocouple.
Remove access panel, disconnect thermocouple at gas valve, unclip or unscrew bracket, swap in matching replacement, secure routing away from burners, reconnect, restore gas, test ignition.
Estimated time: 20–40 minutes.
Difficulty: moderate.
Replacing an electronic igniter step-by-step
After replacing the thermocouple, attention can shift to the electronic igniter, another common failure point that prevents spark and reliable lighting.
Turn off gas and power, remove access panel, disconnect igniter wiring, and swap the module and electrode.
Reassemble, restore power, and test.
Estimated time: 20–45 minutes.
Difficulty: easy–moderate for basic hand tools and safety awareness.
Replacing a gas regulator or hose step-by-step
When a propane heater exhibits leaks, low pressure, or visible hose damage, replacing the regulator or hose can restore safe, reliable performance.
This procedure requires shutting off the gas, ventilating the area, and confirming the appliance is cool before proceeding.
Steps: disconnect cylinder, remove old regulator/hose, fit new parts with correct fittings and thread sealant, leak-test with soapy water.
Time: 30–60 minutes.
Difficulty: moderate.
Safety checks after repair and how to test the heater
After completing repairs, the technician should perform leak testing using soapy water on fittings and a handheld gas detector to confirm there is no propane escaping.
Next, the pilot and main burner should be observed for steady, blue flames and correct ignition behavior under normal operating conditions.
Finally, the heater should be monitored for any lingering gas odor, soot buildup, or other abnormal operation before returning it to regular use.
Leak testing with soapy water and gas detectors
Begin by confirming that all fittings, valves, and connections are closed and the propane supply is turned off before any leak testing begins.
Apply a soapy water solution to joints and watch for bubbles while slowly opening gas; bubbles indicate leaks.
Use a calibrated combustible gas detector for wider-area scanning and to confirm absence of odorless leaks.
Repair detected leaks and retest before normal operation.
Verifying stable pilot and main flame behavior
With leaks repaired and fittings confirmed secure, attention shifts to confirming proper flame behavior before returning the heater to regular use.
Observe pilot ignition: steady blue tip, minimal yellow, consistent size.
Light main burner; flame should ignite promptly, remain even across ports, and not flutter or lift.
Cycle heater several times, noting response and immediate shutdown on control closure to verify safe operation.
Monitoring for odor, soot, or unusual operation
Inspect the heater for any signs of odor, soot, or abnormal behavior before resuming regular use.
Observe for persistent gas smell, yellow or flickering flames, soot buildup, or rattling.
Run the unit briefly under supervision, checking connections and ventilation.
If odor, excessive soot, soot-streaked surfaces, or unusual sounds persist, shut off the unit, ventilate the area, and contact a qualified technician immediately.
Preventive tips to keep a propane heater reliably lit
A concise preventive routine keeps a propane heater reliably lit and reduces the need for repairs.
This includes a regular inspection schedule, proper storage and seasonal startup procedures, and selecting correct replacement parts when components show wear.
When uncertainty arises, a qualified technician should be consulted to guarantee safe, lasting operation.
Regular inspection schedule
Because routine checks catch small issues before they become hazards, a regular inspection schedule is essential for keeping a propane heater reliably lit.
Recommended monthly to seasonal tasks include:
- Inspect burner, pilot, and igniter for soot, corrosion, and secure connections.
- Check propane lines, fittings, and regulator for leaks or damage.
- Clean vents, remove debris, and verify proper airflow and flame stability.
Best practices for storage and seasonal startup
Store propane heaters in a cool, dry, well-ventilated area with the fuel supply disconnected and valves closed to prevent leaks and corrosion during inactivity.
Before seasonal startup, inspect hoses, regulators, fittings, and pilot assemblies for damage, debris, or insect nests.
Clean vents and burners, replace degraded seals, leak-test connections with soapy water, and perform a controlled ignition to confirm reliable operation.
Choosing the right replacement parts and professional help
When selecting replacement parts or deciding whether to call a professional, prioritize components that match the heater’s make, model, and safety specifications to guarantee proper fit and reliable ignition.
Genuine manufacturer parts or certified equivalents reduce the risk of leaks, improper pressure, or premature failure. Inspect valves, thermocouples, regulators, and hoses for certification marks.
Hire licensed HVAC or gas technicians for complex repairs, pressure testing, or unclear diagnostics.
Typical DIY mistakes to avoid and troubleshooting shortcuts to try last
The section outlines common DIY errors that increase fire, carbon monoxide, or leak risks, such as bypassing safety valves or using damaged hoses.
It also lists simple diagnostic shortcuts—pressure check, hose swap, and spark/igniter tests—that can save time and money before ordering replacement parts.
Readers are urged to try these last and stop immediately if anything smells of gas or components overheat.
Common errors that create safety risks
Recognize that many common propane-heater mishaps stem from shortcuts and misplaced confidence: using improvised parts, skipping leak tests, or attempting complex repairs without proper tools can turn a fix into a fire or carbon-monoxide hazard.
Other risky errors include forcing fittings, ignoring ventilation, bypassing safety valves, and neglecting regulator condition.
If unsure, stop and consult a qualified technician to prevent injury or property damage.
Quick diagnostic shortcuts before buying parts
How can one quickly rule out simple causes before ordering parts? A focused checklist prevents unnecessary purchases and unsafe DIY.
Try these last-step shortcuts:
- Cycle power and gas, listen for clicks; confirm regulator and valve function.
- Clean and inspect pilot/orifice with compressed air; remove soot or spider webs.
- Swap a known-good thermocouple or battery to isolate sensor versus control board failure.
Conclusion
A faint winter wind slips through a cracked window as the owner, already late for work, discovers the heater won’t stay lit—by coincidence the neighbor emerges with a match and a smile. After checking fuel, valves, thermocouple, and vents, the small ritual becomes routine: clean, tighten, test. Coincidentally, each minor fix restores warmth and confidence; the heater’s steady glow rewards patience, safety checks, and the quiet satisfaction of having solved a stubborn, household puzzle.