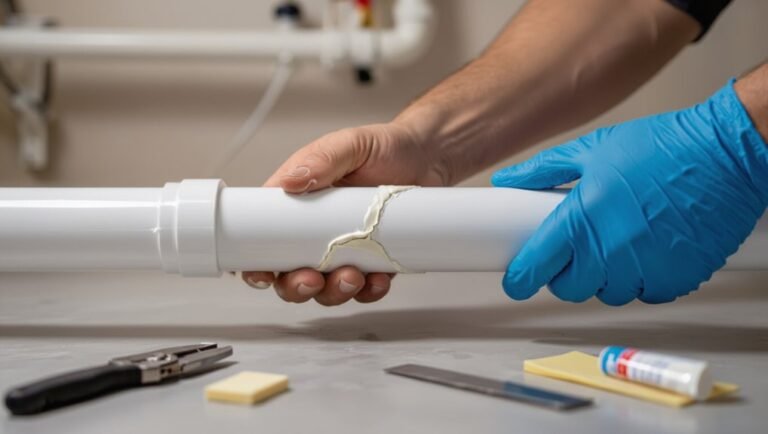
How to Fix a Hole in PEX Pipe: Quick, Permanent DIY Repair Guide
To fix a hole in PEX pipe, first shut off the water supply and relieve pressure. For a quick, temporary solution, you can use rubber strips, hose clamps, or repair tape. For a permanent repair, cut out the damaged section and replace it with matching PEX using crimp, clamp, or push-to-connect fittings. After the repair, test the joints for leaks and ensure everything is secure. Continue reading for detailed step-by-step instructions, necessary tools, and preventative tips.
What to do immediately when you discover a hole in a PEX pipe
Upon discovering a hole in a PEX pipe, the first priority is to shut off the water supply at the nearest valve or the main shutoff to stop further loss.
Next, relieve pressure and drain the affected line by opening nearby faucets and any drain valves before attempting any repair.
If the leak is large, inaccessible, or involves structural damage, a qualified plumber should be contacted immediately rather than attempting a DIY fix.
How to shut off water quickly and safely
Locate the main shutoff and turn it off immediately to stop flow through the damaged PEX; if the main valve is inaccessible, close the nearest branch or fixture shutoff to isolate the leak.
A homeowner should notify occupants, cut power to nearby electricals, grab towels and a bucket, and use a temporary clamp or rubber patch only after flow stops.
This is essential when learning how to fix pex pipe hole.
How to relieve pressure and drain the line before repair
After shutting off the appropriate valve and stabilizing the area, the next step is to relieve residual pressure and drain the affected run before any repairs.
Open the nearest downstream faucets and a high-point fixture to vent air.
Place a bucket under the leak and loosen a coupling or use a drain valve to collect remaining water.
Confirm flow has stopped before proceeding.
When to call a professional instead of DIY
When a hole in a PEX pipe is discovered, the immediate priority is safety and limiting water damage: shut off the main or local shutoff, move valuables and electronics away from the area, and contain escaping water with buckets, towels, or a wet/dry vacuum.
Call a professional if leaks are large, inaccessible, near electrical systems, require cutting structural components, or if mould, compromised pressure regulation, or repeated failures occur despite attempted repairs.
Quick, temporary fixes to stop leaking now
For an immediate stopgap, a strip of rubber secured with hose clamps can compress a PEX hole and slow or stop the leak.
Quick-apply sealants and specially formulated repair tapes offer alternative temporary seals that can be faster or easier in tight spaces.
Each option has trade-offs — ease and speed versus longevity and reliability — so choose based on access, water pressure, and how soon a permanent repair can be made.
Using rubber and hose clamps for an emergency patch
Cut a strip of sturdy rubber—an inner tube or a piece of silicone hose works well—and wrap it tightly around the damaged section of PEX to cover the hole completely.
Place one or two stainless steel hose clamps over the rubber, spacing them to compress the patch uniformly.
Tighten clamps until leakage stops.
This is a temporary emergency measure; replace or permanently repair the pipe soon.
Applying specialized leak sealants and repair tapes
After a rubber-and-clamp patch stops immediate leakage, specialized leak sealants and repair tapes offer a quicker, less bulky alternative for short-term fixes on PEX.
Clean and dry the area, apply tape or a cure-in-place sealant per instructions, and allow proper set time.
These methods temporarily halt drips, buy time for planned replacement, and require inspection after pressure cycling.
Pros and cons of temporary solutions
While temporary fixes can halt leaks quickly and prevent immediate water damage, they trade permanence and reliability for speed and convenience. They suit emergencies but require follow-up.
Consider pros and cons:
- Fast containment — limits damage immediately but may not bond long-term.
- Low cost — inexpensive materials, yet possibly wasteful if repeated.
- Ease of use — minimal skill needed, but may mask underlying issues.
Permanent DIY repair options for a hole in PEX
Permanent DIY repairs focus on replacing the damaged run with a short PEX section and appropriate couplings.
The discussion compares repair couplings to push-to-connect options (John Guest/SharkBite) and the merits of crimp/ring versus clamp systems for secure joints.
Clear step-by-step instructions cover cutting out the damaged pipe and installing either a crimped coupling or a push-fit coupling for a reliable, long-term fix.
Replacing a short section with PEX fittings and a coupling
Cut out the damaged section and replace it with a short length of new PEX plus appropriate fittings and a coupling to restore a durable, code-compliant connection.
Measure, deburr, and insert new tubing; secure with crimp, clamp, or expansion fittings per system type.
Use compatible coupling and fittings, support the run, test under pressure, and inspect joints for leaks before restoring normal service.
Using a repair coupling vs. a push-to-connect (John Guest/SharkBite) fitting
When repairing a punctured PEX line, homeowners can choose between a traditional repair coupling—installed with the same crimp, clamp, or expansion method used on the original tubing—or a push-to-connect fitting such as SharkBite or John Guest that grips and seals without tools. Couplings match original system style; push-to-connects offer speed and tool-free installation; both provide permanent repairs when installed correctly.
| Option | Speed | Tooling |
|---|---|---|
| Repair coupling | Moderate | Specific crimp/expansion tools |
| Push-to-connect | Fast | None |
| Reliability | High | High |
Crimp/ring vs. clamp systems for PEX connections
After deciding between a traditional repair coupling and a push-to-connect fitting, the homeowner must choose the fastening method for a permanent PEX repair: crimp (ring) or clamp (cinch) systems.
Crimp rings require a crimping tool and give a low-profile, reliable seal on copper or stainless rings.
Clamp systems use a cinch tool and are quicker to adjust; both require proper sizing and inspection for leak-free results.
Step-by-step: cutting out damaged PEX and installing a new section
Begin by isolating the damaged section: shut off the water supply, drain the line, and relieve pressure before any cutting or fitting begins.
Measure and mark a straight cut beyond visible damage. Use a PEX cutter to remove the bad segment. Deburr if needed.
Insert matching PEX tubing and secure using crimp or clamp fittings with proper rings and a calibrated tool.
Test for leaks.
Step-by-step: using a push-fit coupling for fast permanent repair
Following removal of the damaged segment and preparation of clean, square pipe ends, a push-fit coupling offers a quick, permanent repair option that eliminates crimping or soldering.
Insert each pipe end fully into the coupling until the stop clicks. Verify alignment and mark insertion depth.
Turn on water slowly and inspect for leaks. If dry, restore insulation and wall coverings.
Tools and materials required for PEX hole repair
A concise list of essential tools—pipe cutter, PEX crimp or clamp tool, deburring tool, and measuring tape—prepares the reader for repair work.
Recommended materials and part specifications, including PEX type (A, B, or C), nominal size, and compatible fittings, determine which components to buy.
Clear guidance on selecting fittings and rings guarantees compatibility with the pipe type and the chosen connection method.
Essential tools list
Gathering the right tools and materials before starting a PEX pipe repair reduces mistakes and speeds the job. A concise toolkit prevents delays and guarantees safe, lasting fixes.
Essential items focus on cutting, securing, and testing the repair without specifying fittings or sizes.
- PEX cutter and deburring tool
- Crimp/expansion tool and rings
- Leak detector cloth and pressure gauge
Recommended materials and part specifications (PEX type, size, fittings)
Select materials that match the existing PEX system’s type, diameter, and connection method to guarantee a reliable repair.
Recommended materials include the same PEX grade (A, B, or C), exact nominal size (e.g., 1/2″, 3/4″), and compatible fittings.
Use corrosion-resistant brass or plastic fittings, manufacturer-approved clamps or crimp rings, and replacement tubing of identical oxygen-barrier specification if present.
How to choose compatible fittings and rings for your PEX type
Several essential tools and materials are required before repairing a PEX pipe hole: the correct fitting and ring type matched to the PEX system, a proper crimp or clamp tool, cutter, deburring tool, and cleaning supplies.
Select fittings labeled for the PEX material (PEX-A, -B, -C) and matching diameter.
Use manufacturer-approved crimp rings or stainless steel clamps and compatible tools to guarantee leak-free, code-compliant joints.
Safety and quality checks after repair
After the repair is complete, the repaired section should be pressure-tested to verify integrity and confirm no loss of pressure.
The area must be inspected for visible leaks and common failure points such as fittings, crimps, and sharp bends.
A plan for periodic monitoring and simple maintenance—including routine checks and prompt attention to any changes—helps guarantee long-term reliability.
How to pressure-test the repaired section
A single, controlled pressure test verifies the integrity of the repaired PEX section before restoring full system service.
The technician isolates the repaired run, attaches a calibrated pressure gauge and pump, and raises pressure to the system’s working level plus a modest safety margin.
Maintain pressure for the recommended dwell time, monitor gauge stability, and check fittings for rise in pressure or audible leaks before reintroducing normal supply.
Inspecting for leaks and common failure points
Begin by visually and tactilely inspecting the repaired section and adjacent fittings for signs of leakage, deformation, or improper seating; pay special attention to joints, crimps, clamps, and connections to other materials where stress concentrations or mismatched diameters often cause failures.
Verify tightness, look for micro-drips, corrosion, abrasion, or kinks, and confirm alignment.
Document any anomalies, isolate faults, and rework or replace defective components before returning system to service.
Long-term monitoring and maintenance tips
Once repaired sections and fittings have been verified for immediate integrity, long-term monitoring becomes the next priority to confirm ongoing safety and performance.
Periodic checks every 3–6 months should include visual inspection, moisture detection, and pressure testing.
Record readings and photos, watch for discoloration or soft spots, verify proper insulation and support, and address any anomalies promptly to prevent recurrence and extend system life.
Common causes of holes in PEX and how to prevent them
Common causes of holes in PEX include mechanical damage from nails or tools, pipe rupture from freezing, degradation from UV exposure, and chemical attack from incompatible substances.
Preventive measures during installation and retrofit—such as using protective sleeves, heat tracing in freeze-prone areas, and selecting compatible fittings and materials—significantly reduce risk.
Routing PEX away from high-traffic zones, securing it properly, and following manufacturer best practices for bends and supports further protect the piping.
Mechanical damage, freezing, UV exposure, and chemical degradation
Inspecting PEX failures reveals four frequent culprits: mechanical damage from abrasion or accidental puncture, expansion and rupture from freezing, degradation from prolonged UV exposure, and chemical attack by incompatible solvents or cleaners.
Mechanical harm often occurs near fasteners or sharp edges. Freezing splits occur where insulation or heat is inadequate.
UV embrittlement and solvent-induced swelling weaken tubing, leading to leaks and holes.
Preventive measures during installation and retrofit
Having identified mechanical, freeze, UV, and chemical causes of PEX failure, attention shifts to installation and retrofit practices that prevent holes from forming.
Installers should avoid sharp edges, secure fittings properly, and replace compromised sections promptly.
Recommended steps:
- Deburr and shield contact points.
- Maintain proper clearance from heat and chemicals.
- Use compatible fittings and test before concealment.
Best practices for routing and protecting PEX pipe
Route PEX with attention to secure, clear runs and protective barriers to reduce punctures, abrasion, UV exposure, and heat-related damage.
Install clamps and straps every 32–48 inches, avoid sharp edges and tight bends, maintain separation from electrical and HVAC lines, and use foam insulation or conduit where pipes pass through framing.
Label lines and protect exposed sections with metal guards in high-traffic areas.
Troubleshooting repairs that still leak
After a DIY fix, common causes of continued leakage should be identified by inspecting fittings, crimps, and the surrounding pipe for damage or improper installation.
If a repair coupling fails, the next steps are to shut off water, cut back to sound pipe, and install a correctly sized coupling or a push-fit replacement.
When leaks persist or multiple failures are present, replacing the entire run of pipe is the more reliable long-term solution.
Diagnosing the most common problems after a DIY repair
When a DIY PEX repair continues to leak, systematic diagnosis narrows the cause quickly: inspect the repair site for loose fittings, cut edges, or improperly seated clamps.
Verify that the pipe was deburred and reamed, check that the correct fittings and tools were used for the PEX type, and confirm system pressure and temperature conditions that can reveal marginal seals.
Then test sections progressively, isolate branches, and replace suspect components.
When a repair coupling fails and how to fix it
Identify the failed coupling and its mode of failure before replacing parts: inspect for visible cracks, corrosion, misalignment, or deformation of the fitting and look for signs that the crimp, clamp, or push-fit connection did not fully engage.
Replace the defective coupling, cut back to undamaged pipe, deburr and clean, remeasure and install a correctly sized coupling with proper crimp or clamp technique, then pressure test.
When to replace an entire run of pipe
If multiple repairs along a single line continue to fail or leaks recur despite correct fittings and pressure tests, the likelihood that the tubing itself is compromised—by age-related embrittlement, chemical degradation, or extended mechanical fatigue—increases.
Replacement of the entire run should be considered. Inspect for discoloration, stiffness, bulging, or multiple stress fractures; frequent patching raises labor and material costs, making full replacement more reliable and cost-effective.
Cost and time estimates for DIY vs professional repair
Typical DIY repairs use a handful of fittings, clamps, and a replacement PEX section, usually totaling $10–$50 in materials and one to three hours of labor for someone with basic tools.
Professional service calls commonly run $150–$400 or more, but they can resolve complex issues in an hour and include diagnostics, parts, and warranty.
Hiring a pro becomes more cost-effective when the leak is hard to access, when multiple fittings or pipe sections must be replaced, or when a homeowner lacks confidence or tools.
Typical material costs and required time for each repair method
Costs and time vary by repair method, materials, and whether a homeowner tackles the job or hires a pro. Typical DIY patch kits run $10–25 and take 15–45 minutes; crimp or clamp fittings cost $5–30 plus tools, 30–90 minutes; replacement sections with fittings cost $20–80, 1–3 hours. Pros add labor and travel, increasing total.
| Method | Cost & Time |
|---|---|
| Patch kit | $10–25, 15–45 min |
| Clamp/crimp | $5–30 + tools, 30–90 min |
| Replace section | $20–80, 1–3 hrs |
| Professional service | Higher, varies by job |
When hiring a pro is more cost-effective
When does hiring a professional make more financial sense than a DIY fix?
A pro is cost-effective when complexity, inaccessible piping, or permit requirements extend DIY time beyond a few hours.
Typical technician rates plus parts often match or undercut cumulative DIY mistakes, emergency water damage, and lost time.
For major leaks, multi-story work, or unclear diagnostics, hiring a licensed plumber minimizes total expense and risk.
Useful visuals and diagrams for PEX repair
Clear, labeled diagrams can guide users through measuring and cutting a replacement PEX section to the correct length and orientation.
A separate illustration comparing a correct crimp to common incorrect crimps highlights tightness, ring position, and visible defects to check.
Together, these visuals reduce mistakes and clarify procedural steps.
Diagram: cutting and measuring for a replacement section
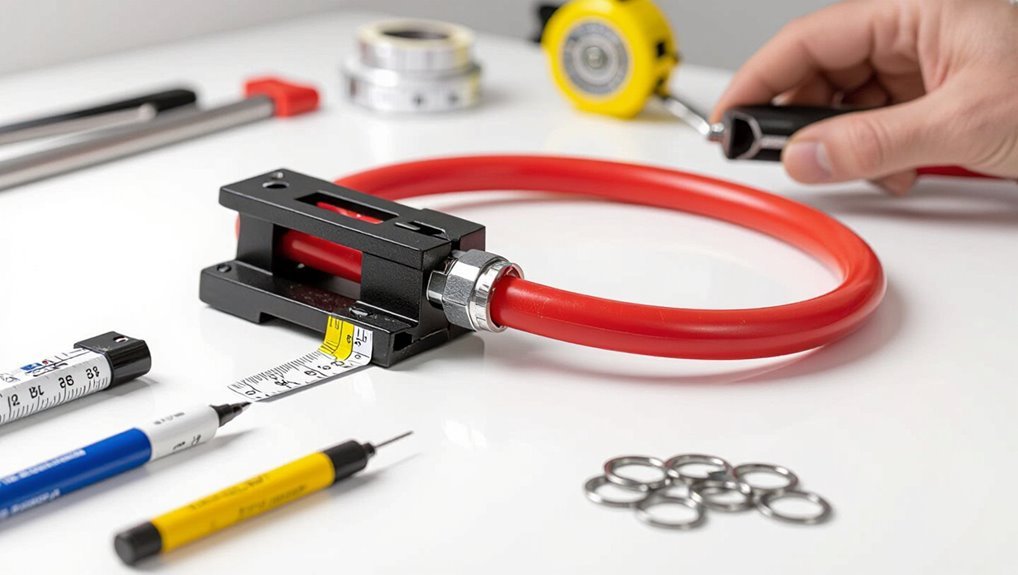
A diagram illustrating where to cut and how to measure for a PEX replacement section clarifies each step of the repair: it marks the damaged area to remove, shows recommended cut locations beyond fittings or clamps, and notes the exact lengths including allowance for couplings or expansion.
The visual labels pipe orientation, measurement method (from cut to cut), coupling lengths, and recommended clearances for access and strap placement.
Diagram: correct crimp vs incorrect crimp installation
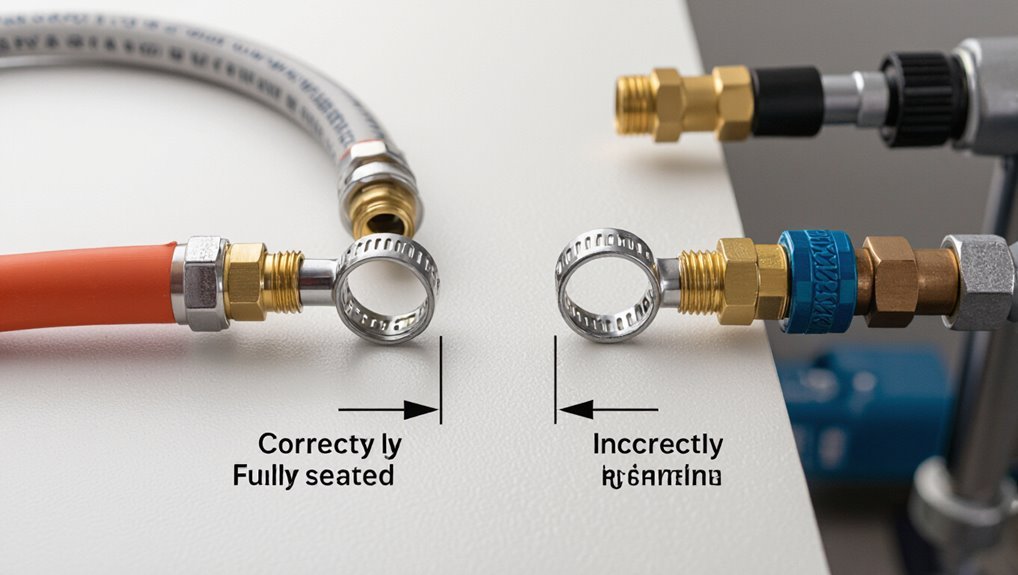
Shows side-by-side visuals comparing a properly crimped PEX connection with common errors to make inspection quick and reliable.
The correct crimp displays even compression, ring flush with fitting, and no visible tool marks.
Incorrect examples highlight under-crimping, over-crimping, tilted rings, and gaps that permit leaks.
Labels indicate acceptable dimensions, tool positioning, and testing steps for reliable verification.
Conclusion
When a homeowner found a dime-sized hole in a PEX line, a single zip-tie wrapped over plumber’s tape stopped a basement flood long enough to reach tools — a reminder that quick fixes buy time, not forever solutions. With temporary measures applied immediately, the homeowner then completed a compression coupling replacement in under an hour. Prompt action, correct parts, and a follow-up leak test turn emergency patches into permanent, reliable repairs.