How to Take a Faucet Off: Step-by-Step Guide for Easy Removal and Replacement
To remove a faucet easily, start by shutting off the water supply and draining any residual pressure. Next, disconnect the supply lines and remove the decorative caps and handles. Use a basin wrench to loosen the mounting nuts located beneath the sink. If you encounter corroded or seized fasteners, apply penetrating oil, gently tap them, or use heat before attempting to back them out carefully. Once the faucet body is lifted, clean the area and check seals for replacement. Follow these specific steps, use the right tools, and troubleshoot as needed to ensure a safe and efficient removal process.
What Removing a Faucet Involves and When to Do It
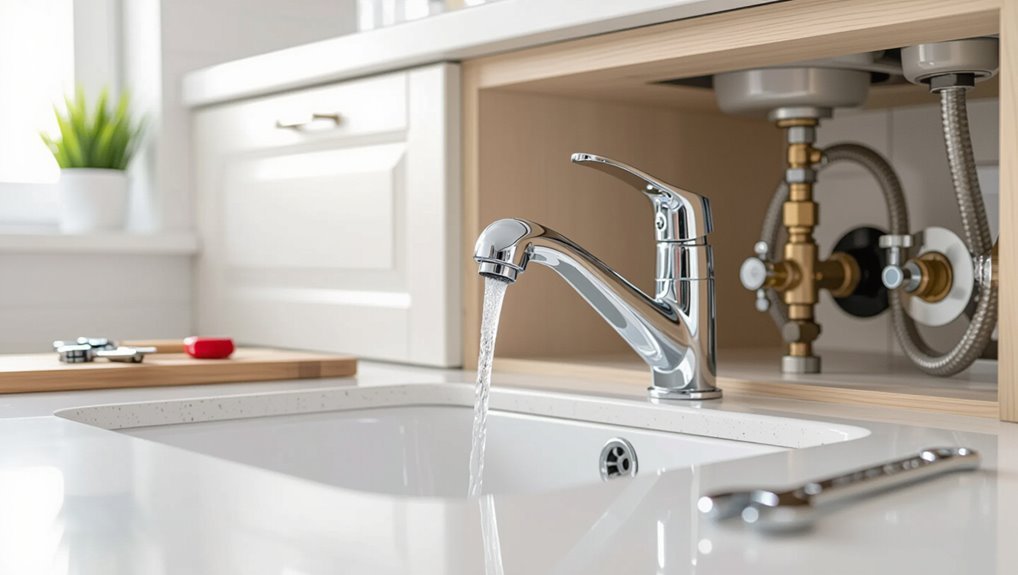
Removing a faucet typically involves shutting off water, disconnecting supply lines, loosening mounting hardware, and addressing any sealant or corrosion.
The procedure and difficulty vary by type—single‑handle, double‑handle, vessel, and wall‑mounted faucets each require different access and disassembly steps.
Essential tools and materials generally include adjustable wrenches, basin wrenches, plumber’s tape, replacement gaskets, and a small supply of sealant or plumber’s putty.
Reasons to remove a faucet (repair, replacement, upgrade, leak)
Deciding to take a faucet off usually stems from practical needs—repairing worn parts, replacing a failing fixture, upgrading for style or efficiency, or stopping persistent leaks.
Homeowners consult guides on how to take a faucet off when seals fail, cartridges wear, corrosion appears, or water damage occurs.
Scheduled upgrades improve function and aesthetics; urgent removal prevents further damage and higher repair costs.
Types of faucets and how removal differs (single-handle, double-handle, vessel, wall-mounted)
After determining that a faucet must be taken off—whether for repair, replacement, or to stop a leak—recognizing the type of fixture guides the approach and tools required.
Single-handle units usually unfasten from one mounting nut; double-handle sets require two valve connections and a spout pop-up.
Vessel faucets sit above counter depth and need access beneath; wall-mounted faucets demand in-wall plumbing clearance and careful support.
Tools and materials you’ll need
A clear checklist helps guarantee the job proceeds smoothly.
Essential tools include an adjustable wrench, basin wrench, plumber’s putty or silicone, screwdriver set, channel-lock pliers, bucket, and towels.
Materials include replacement faucet or parts, new supply lines, shutoff valve washers, and plumber’s tape.
Optional items: penetrating oil, flashlight, and protective gloves.
Verify parts match existing fittings before starting.
Safety and Preparation Steps Before You Start
The first step is to shut off the water supply—either at the local shutoff valves under the sink or at the main, if necessary—and open the faucet handles to drain any remaining water.
The work area should be protected with towels or a sink mat to prevent scratches and catch spills.
A small tray and labeled containers for removed parts help keep hardware organized and speed reassembly.
Shutting off water supply (main vs. local shutoff)
Begin by identifying and closing the correct shutoff valve to prevent water flow before any faucet work begins.
Locate local shutoff valves under the sink and turn clockwise; if absent or nonfunctional, shut off the home’s main water valve.
Confirm closure by checking other fixtures.
Note valve types (gate, ball) and have basic tools ready to operate stuck valves safely before proceeding.
Turning on handles to drain residual water
Turn both hot and cold handles fully open to relieve pressure and drain remaining water from the lines and faucet before disassembly.
After opening, wait until flow stops and check aerator and spout for residual drops.
Close handles once drained. This prevents surprises during removal, reduces leakage under the sink, and guarantees a drier working area for disconnecting supply lines and removing mounting hardware.
Protecting sink/countertop and surrounding area
One should cover the sink basin and surrounding countertop with a thick towel or foam pad and place a waterproof tray under the cabinet to catch drips.
Protective tape should edge counters to prevent scratches. Lay down drop cloths on the floor.
Remove fragile items from nearby surfaces. Guarantee adequate lighting and clear workspace to prevent accidental tool slips or surface damage during faucet removal.
Gathering parts tray and labeling hardware
A small, shallow tray or magnetic parts dish should be placed within easy reach to collect nuts, screws, and washers as they are removed, preventing loss and cross-contamination.
Each component is sorted and labeled—tape, small bags, or a marked tray compartment—indicating origin and orientation.
Clear labeling simplifies reassembly, reduces mistakes, and speeds repairs, especially for multi-hole or complex faucet assemblies.
Step-by-Step Removal Process (Universal Workflow)
The removal process follows a clear, repeatable sequence that begins with inspecting the faucet and mounting configuration.
Next, the technician disconnects the water supply lines, removes decorative caps and handles, and loosens mounting nuts and fasteners from underneath.
Finally, the faucet body is detached and the mounting surface cleaned for reinstall or repair.
Step 1 Inspect the faucet and mounting configuration
Before any tools are used, the person should visually and physically inspect the faucet and how it is mounted to the sink or countertop.
Note fastener types, number of mounting holes, presence of escutcheons or mounting plates, and accessibility from beneath.
Identify corrosion, sealant, or trim that may complicate removal, and confirm clearances for tool access and replacement part fitment before proceeding.
Step 2 Disconnect water supply lines
Shut off the water at the supply valves and relieve pressure by opening the faucet handles until flow stops.
Using an adjustable wrench, loosen the nut securing each supply line at the shutoff valve, then at the faucet tailpiece if present.
Catch residual water with a pan and towels.
Inspect flexible lines for corrosion or damage and remove them fully for faucet removal.
Step 3 Remove decorative caps and handle(s)
With the supply lines disconnected and remaining water drained, attention moves to the faucet’s visible components.
Protective caps over screws or setscrews are pried off with a flat tool. Exposed screws are loosened and removed.
Handles are lifted or pulled straight off; some require a retainer or spring clip to be released. Components are organized to prevent loss and to simplify reassembly.
Step 4 Loosen mounting nuts and fasteners from underneath
Turn to the underside of the sink to access the faucet’s mounting hardware; work space may be tight, so good lighting and a mirror or inspection camera can help.
Identify retaining nuts, lock washers, and mounting brackets.
Use appropriate tools—basin wrench, socket, or adjustable wrench—to break them loose.
Stabilize the faucet body above while loosening to prevent twisting supply lines or damaging seals.
Step 5 Detach the faucet body and clean mounting surface
Gently lift the faucet body away from the sink once all mounting nuts and supply lines are free, supporting it to avoid scraping the finish or stressing remaining connectors.
Set the fixture on a protected surface.
Inspect the sink deck for mineral deposits, adhesive residue, and loose debris.
Use a soft scraper and mild cleaner to remove buildup, then dry and inspect mounting holes for corrosion or damage.
Step 6 Remove old gasket, putty, or sealant
Remove any remaining gasket, plumber’s putty, or sealant before installing the replacement faucet to confirm a tight, leak-free fit.
Using a plastic scraper or putty knife, gently lift material without gouging the sink or countertop.
For stubborn residue, apply a mild solvent or warm soapy water, allow it to soften, then scrape and wipe clean.
Verify the surface is dry before proceeding.
Specific Removal Procedures by Faucet Type
The following section outlines removal techniques tailored to common faucet configurations, including single-handle and double-handle sink models.
It also covers vessel and widespread faucets, wall-mounted units, and pull-down/pull-out kitchen sprayers, highlighting key differences in mounting and supply connections.
Readers will find concise, type-specific steps and tips to streamline each removal.
Single-handle kitchen faucet removal
Begin by identifying the specific single-handle faucet configuration—deck-mounted, pull-out, or ball/ceramic-disk type—as each requires distinct fastener access and cartridge handling; then confirm water is shut off and supply lines are drained before proceeding.
Remove handle set screw, lift handle, detach spout assembly or pull-out hose, disconnect supply lines and mounting nut(s), extract cartridge or ball assembly, and inspect seals for replacement.
Double-handle sink faucet removal
After handling a single-handle faucet and confirming shutoff and drained lines, attention shifts to double-handle sink faucets, which present different fastener locations and valve mechanisms.
Remove decorative caps, unscrew handles, then detach trim and escutcheon.
Disconnect supply lines, loosen mounting nuts beneath the sink, and lift the spout assembly.
Inspect and remove separate hot and cold valve bodies as needed for replacement or repair.
Vessel and widespread faucet removal
For vessel and widespread faucets, removal procedures differ from standard sink units because of taller spouts, separate deck-mount components, and varied mounting hardware; plan to work both above and below the deck, support heavy spouts, and label or photograph each part before disassembly to simplify reinstallation.
Disconnect water lines, remove escutcheons and mounting nuts, support and lift spouts straight up, and clear remaining gaskets and sealant.
Wall-mounted faucet removal
Wall-mounted faucets require different techniques than deck-mounted units because their mounting, water supply connections, and access points are located behind the wall rather than beneath the sink.
To remove one, shut off water, open valve access panel, disconnect supply lines at wall fittings, unthread mounting nuts or flange screws, extract valve body carefully, and patch or replace wall escutcheon before installing the new fixture.
Pull-down and pull-out kitchen sprayer removal
Removing a pull-down or pull-out kitchen sprayer requires attention to hose routing, quick-connect fittings, and the spray head’s weight or retention clip.
The procedure: disconnect water supply, depressurize, unclip or unscrew the spray head, detach quick-connect or threaded hose from valve, feed hose up through spout, remove retaining nut under sink, and lift out faucet assembly, noting any weight or counterbalance for reinstallation.
Common Problems During Removal and How to Solve Them
Removal often encounters seized or corroded nuts, stripped fasteners, awkwardly placed mounting hardware, and damaged supply lines that complicate extraction.
Practical responses include safe loosening techniques and penetrating lubricants, extraction tools for rounded bolts, specialized wrenches and extension tools for tight spaces, and a quick assessment to decide between repairing or replacing compromised fittings.
Clear, stepwise troubleshooting minimizes damage and speeds completion.
Corroded or stuck nuts safe loosening techniques
Corroded or seized nuts are a common obstacle when detaching faucets, and addressing them safely requires the right combination of penetrating lubricant, appropriate tools, and controlled force.
Apply penetrating oil, allow dwell time, tap gently to break corrosion, then use correctly sized wrenches or pliers with steady pressure.
Heat applied briefly can help; protect surrounding seals and avoid excessive force to prevent damage.
Stripped fasteners extraction methods
When a screw or bolt head is rounded, chewed, or otherwise damaged so tools no longer grip, extracting it requires methods that prioritize control and preserve surrounding parts.
Common solutions include using extractor kits, left‑hand drill bits, cutting a new slot for a flathead, welding a nut for grip, or gripping with locking pliers.
Apply penetrating oil, work slowly, and protect nearby finishes.
Hard-to-reach mounting hardware tools and tricks
After addressing stripped fasteners with extractors or weld‑on nuts, attention often turns to mounting hardware tucked into tight cavities or behind trim where standard tools cannot reach.
Use flexible shaft screwdrivers, right‑angle adapters, and socket extensions with universal joints. Magnetic bit holders, long‑nose pliers, and basin wrenches provide leverage.
Apply penetrating oil, protect finishes with tape, and work methodically to avoid damage.
Damaged supply lines or fittings when to replace vs. repair
If exposed to repeated stress, chemicals, or years of neglect, supply lines and fittings can present leaks, kinks, or visible deterioration that demand a clear decision between repair and replacement.
Minor pinhole leaks, loose compression nuts, or intact braided hoses often merit repair or tighten-and-seal.
Corrosion, fraying, bulging, or frequent failures indicate full replacement for safety, code compliance, and long-term reliability.
Post-Removal Tasks
After the faucet is removed, the area should be inspected and prepared for the replacement, checking the sink, countertop, and mounting holes for damage.
Mounting surfaces and holes must be cleaned and any corrosion or jagged edges repaired to guarantee a proper seal.
Exposed plumbing should be protected and openings covered to prevent debris from entering the lines.
Inspecting and preparing sink/counter for new faucet
Begin by examining the sink and countertop where the old faucet rested to identify any damage, mineral buildup, or remaining sealant that could interfere with the new installation.
Verify that mounting holes align with the new faucet’s configuration, check for soft spots or delamination around the basin, confirm sufficient clearance for handles and spout, and guarantee supply lines and shutoffs are accessible and functional.
Cleaning and repairing mounting holes and surfaces
With the old faucet removed and the sink area inspected for alignment and damage, attention turns to cleaning and repairing the mounting holes and surrounding surfaces to secure a watertight, stable installation.
Remove old sealant and debris, de-lime and sanitize holes, sand uneven edges, and fill minor chips with plumber’s epoxy or waterproof filler.
Confirm surfaces are dry and smooth before applying new gaskets or sealant.
Protecting exposed plumbing and preventing debris entry
Seal exposed fittings immediately to prevent debris, pests, and standing water from entering the open supply lines or drain during subsequent work.
Cap or plug water lines with threaded plugs or silicone caps, and cover the drain with a stopper or rag secured with tape.
Wrap exposed threads with plumber’s tape and protect nearby fixtures and finishes with drop cloths to minimize damage and contamination.
Tips to Make Removal Easier and Faster
The section outlines practical tips to streamline faucet removal, contrasting essential homeowner tools with professional-grade equipment.
It covers safe use of lubricants and penetrating oils to free corroded fittings without damaging finishes or seals.
Guidance is provided on recognizing situations where an extra pair of hands or a licensed plumber is the safest and most efficient option.
Best tools to have for homeowner vs. professional
A few basic tools and a handful of clever shortcuts will let most homeowners remove a faucet quickly, while professionals rely on a broader set of specialty wrenches and diagnostic gear to handle tight spaces and stubborn fittings.
Distinguishing between essential homeowner tools (adjustable wrench, basin wrench, plumber’s putty or silicone, and channel-lock pliers) and pro-grade items (offset basin wrenches, swivel socket sets, tubing cutters, and a portable inspection camera) helps decide what to buy or rent before starting the job.
Professionals also carry torque wrenches, flare nut wrenches, and compact work lights for efficiency.
Lubricants and penetrating oils: safe use
Spray a penetrating oil directly onto corroded threads and fittings, allowing it several minutes to wick into rust and mineral deposits before attempting loosening; this reduces the force needed and lowers the risk of damaging valves or connections.
Use lubricant-safe products for plumbing, avoid silicone on rubber seals unless specified, protect nearby finishes, ventilate the area, wipe excess, and reapply sparingly if resistance remains.
When to use help or call a plumber
After applying penetrating oil and allowing it to work, homeowners should assess whether the job remains manageable or requires assistance.
Stubborn corrosion, seized valves, visible piping damage, or uncertain shutoff reliability are signs to seek help.
If leaking worsens, tools or access are inadequate, or electrical/heating components are involved, contacting a licensed plumber prevents further damage and guarantees safe, code-compliant repairs.
Cost, Time Estimates, and When Replacement Is Recommended
Typical removal time varies by faucet type—single‑handle faucets often take 30–60 minutes, while widespread or wall‑mount models can require an hour or more.
DIY removal generally costs only basic tools and replacement parts, whereas hiring a professional adds labor charges that can range widely depending on complexity.
If a faucet shows extensive corrosion, repeated leaks, or internal damage, replacement is usually more cost‑effective than repair.
Typical time required by faucet type
Time estimates for removing a faucet vary considerably by design and installation complexity. Typical single-handle sinks take 15–30 minutes; widespread or wall-mounted units often require 45–90 minutes; farmhouse or heavy-duty fixtures can demand 1.5–3 hours, especially if corroded or access is limited. Plumbing shutoff and cleanup add time.
| Faucet Type | Typical Time | Notes |
|---|---|---|
| Single-handle | 15–30 min | Easiest |
| Centerset | 20–40 min | Moderate |
| Wall-mounted | 45–90 min | Access issues |
| Heavy/farmhouse | 90–180 min | Corrosion possible |
Estimated costs for DIY removal vs. professional service
Many homeowners can remove a faucet themselves for minimal outlay, but costs vary based on tools, parts, and unforeseen complications. DIY typically costs $10–$60 for tools and parts and 30–120 minutes; professionals charge $100–$300+ and include warranty. Choose pro if access is tight, corrosion severe, or time limited.
| Option | Typical Cost | Time |
|---|---|---|
| DIY basic | $10–$60 | 30–120 min |
| Professional | $100–$300+ | 30–90 min |
Signs that replacement is better than repair
After weighing DIY versus professional costs and time, homeowners should next recognize the situations where replacement makes more sense than repair.
Replacement is advised when corrosion, multiple leaks, failing cartridge, obsolete parts, or persistent low water pressure exist.
If repair time exceeds a few hours or parts cost approaches replacement price, replacing the faucet often saves money, reduces downtime, and guarantees updated functionality.
Checklist for Reinstallation or Replacement
A concise checklist helps guarantee reinstallation or replacement proceeds without surprises.
It should list required parts and accessories to buy beforehand, plus sealants, gaskets, and mounting hardware matched to the new faucet.
The final items on the list are testing steps—pressure checks, leak inspections, and cartridge operation—to confirm a proper installation.
Parts and accessories to buy before installing a new faucet
Before beginning reinstallation or replacement, assemble a concise checklist of parts and accessories to guarantee the project proceeds without pauses:
- Replacement faucet with matching finish and hole configuration.
- Flexible supply lines sized to existing shutoff valves.
- New mounting hardware kit (if not included) for secure seating.
- Basin wrench and adjustable pliers for tight spaces and confident installation.
Sealants, gaskets, and mounting hardware checklist
Several essential sealants, gaskets, and mounting components should be gathered to confirm a watertight, stable faucet installation.
A concise checklist prevents leaks and frustration; each item assures proper seating and long-term reliability.
- Plumber’s silicone sealant — flexible, waterproof protection.
- Rubber and neoprene gaskets — precise fit for base and tailpieces.
- Mounting nuts and washers — corrosion-resistant.
- Thread tape — secure thread seals.
Final testing steps after installing a new faucet
Begin the final testing sequence by restoring water supply lines and checking all connections under the sink for visible leaks while the faucet is off.
Then perform these steps to confirm proper function and peace of mind:
- Open cold, listen for noise and watch for drips.
- Open hot, verify temperature response.
- Cycle handle fully, guarantee smooth motion.
- Check aerator flow and drain operation.
Conclusion
Removing a faucet, when approached methodically, becomes as straightforward as following a recipe: gather tools, shut off water, disconnect lines, and unbolt mounting hardware. The guide equips users to handle various faucet types, anticipate common problems, and complete post-removal tasks safely. With patience and the right tips, most can finish within expected time and budget; professionals remain an option for complex situations or when replacement is advisable.