How to Replace a Hose Bib: Step-by-Step DIY Guide for Outdoor Faucets
To replace a hose bib, start by selecting the right type—wall-mounted, sillcock, or frost-free—based on your needs. This guide will walk you through the steps to remove your old faucet and install a new one, ensuring a proper fit and preventing leaks. You’ll need to shut off and drain the water supply, detach the old bib, install the new one with the right sealant or solder, and test for leaks. Follow the detailed steps below for a successful DIY replacement.
What a hose bib is and when to replace it
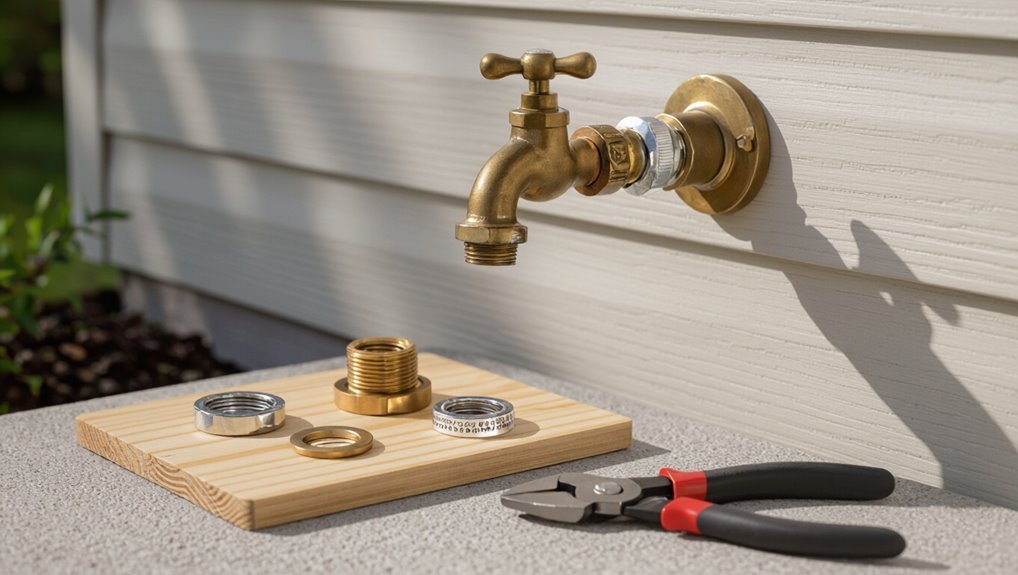
A hose bib—also called a spigot or outdoor faucet—is the exterior valve that connects a garden hose to a home’s plumbing.
It should be considered for replacement if it leaks, shows corrosion, delivers low flow, or is frozen/cracked.
Delaying replacement can lead to water damage, higher water bills, and the risk of burst pipes.
Definition and common names (hose bib, spigot, outdoor faucet)
Outdoor water outlets—commonly called hose bibs, spigots, or outdoor faucets—are wall-mounted valves that deliver potable or irrigation water outside a building.
They connect to supply piping, control flow, and accept garden hoses.
In a DIY context, knowing component types, materials, and shutoff locations is essential for how to replace hose bib safely and efficiently while minimizing water damage and ensuring proper fittings.
Signs the hose bib needs replacement (leaks, corrosion, low flow, frozen/cracked)
Visible signs such as dripping, mineral buildup, or greenish corrosion around the spout indicate that a hose bib may need attention.
Persistent leaks, loosened packing or handle wobble, reduced water flow, internal valve failure, visible cracks from freezing, and seized or stiff operation all signal replacement.
Regular inspection catches deterioration early; discoloration, bulging, or softened material merit prompt evaluation.
Risks of delaying replacement (water damage, higher water bills, burst pipes)
Neglecting a failing hose bib can quickly escalate from a minor annoyance to significant property harm: slow drips waste water and raise bills.
Leaking joints or cracks allow moisture into walls and foundations, causing mold and structural damage.
Frozen or corroded fittings can rupture under pressure, producing sudden bursts.
Prompt replacement prevents escalating repair costs, preserves insulation and finishes, and reduces liability from water-related failures.
Types of hose bibs and how to choose the right one
The choice of hose bib hinges on type and installation: wall-mounted, sillcock, and frost‑free models each suit different locations and climate concerns.
Material and thread selection—brass, stainless steel, or plastic, plus MIP/FIP versus hose thread and proper measurement—affect durability and compatibility.
Essential features to weigh include integrated vacuum breakers or backflow preventers, frost protection, and the unit’s pressure rating.
Wall-mounted vs sillcock vs frost-free hose bibs
When selecting an exterior valve for a home, homeowners should weigh the distinct designs and installation needs of wall-mounted, sillcock, and frost-free hose bibs to match climate, wall thickness, and freeze-risk.
Wall-mounted units sit near exterior sheathing for easy access; sillcocks penetrate interior framing and require shutoff in cold climates.
Frost-free models extend valve mechanism inward to prevent freezing while needing proper slope and clearance.
Materials comparison: brass, stainless steel, plastic
Selecting the appropriate hose bib material follows from choosing the right style—wall-mounted, sillcock, or frost-free—because climate, freeze risk, and installation constraints also affect material performance. Brass offers corrosion resistance and durability; stainless steel excels in strength and longevity; plastic is lightweight and affordable but less durable.
| Material | Strength | Best use |
|---|---|---|
| Brass | High | General outdoor |
| Stainless | Very high | Coastal/harsh |
| Plastic | Moderate | Temporary/light use |
Thread types and sizes (MIP/FIP, hose thread) and how to measure
Because hose bib compatibility depends on thread type and size, identifying MIP (male iron pipe), FIP (female iron pipe), and garden hose thread is the first step in choosing the right fitting.
Measure pipe thread diameter with calipers and count threads per inch (TPI) or use a thread gauge.
Confirm NPT taper for pipe threads; garden hose typically uses 3/4″ GHT.
Key features to consider (vacuum breaker/backflow preventer, frost protection, pressure rating)
A hose bib’s suitability hinges on a few key features: an integrated vacuum breaker or backflow preventer to protect potable water, frost-proof construction for cold climates, and a pressure rating that matches the system.
Additional considerations include durable materials (brass/stainless), tamper-resistant or keyed shutoff options, and hose thread compatibility.
Choose models rated above expected water pressure and local code requirements.
Tools and materials required for replacement
A concise inventory of the necessary tools and materials prepares the reader to complete a hose bib replacement efficiently.
Include wrenches, pipe cutters, soldering or compression tools, a replacement hose bib, pipe dope or Teflon tape, adapters as needed, and any solder or fittings required for the pipe type.
Also note required PPE—gloves, eye protection, and precautions for working with water, heat, and pressurized lines.
Tools list
Several essential tools and a handful of materials are required to replace a hose bib safely and effectively. A concise toolset speeds work and reduces mistakes.
Typical tools include wrenches, cutters, sealant tools, and safety gear. Essentials:
- Adjustable wrench and channel-lock pliers
- Pipe cutter or hacksaw
- Screwdrivers and hex keys
- Safety glasses and work gloves
Materials and parts list (replacement hose bib, pipe dope/Teflon tape, adapters, solder or compression fittings)
With the wrench and cutter prepared, attention turns to the specific materials and replacement parts required to complete the hose bib swap.
Necessary items are listed concisely for a reliable, watertight repair:
- Replacement hose bib sized to existing pipe
- Pipe dope or Teflon tape for threaded seals
- Adapters or fittings to match pipe types
- Solder and flux or compression fittings for joints
PPE and safety considerations
Proper personal protective equipment and basic safety measures reduce the risk of injury and property damage during a hose bib replacement.
Wear safety glasses, gloves, and sturdy footwear. Use hearing protection if power tools are involved.
Shut off water and drain lines before work. Confirm electrical hazards are absent.
Keep a fire extinguisher nearby when soldering and guarantee stable ladder placement if working at height.
Preparing for the job
Before beginning work, the water supply must be shut off and the line drained to prevent leaks and water damage.
The technician locates the nearest shutoff valve or plans alternative isolation methods if a local valve is unavailable.
A quick assessment of the pipe material and access—copper, PEX, CPVC, or galvanized—determines the fittings and techniques required.
Shutting off the water supply and draining the line
Shut off the water at the main valve or the nearest shutoff to isolate the hose bib, then open the outdoor spigot and any nearby faucets to relieve pressure and drain remaining water from the line.
After flow stops, close those faucets and leave the spigot open.
Verify no runoff from the hose connection before proceeding with hose bib removal to prevent spills.
Locating the shutoff valve and alternative isolation methods
With the outdoor spigot left open and the line drained, the next step is locating the shutoff valve that isolates the hose bib.
Inspect nearby crawlspaces, basements, garage walls, and exterior service boxes for individual isolation valves.
If no dedicated valve exists, consider shutting off the main water supply or using a sectional clamp or compression isolation tool as temporary alternatives before beginning replacement.
Assessing pipe material and access (copper, PEX, CPVC, galvanized)
When preparing to replace a hose bib, the technician should identify the pipe material and evaluate access points to determine the correct fittings, tools, and techniques.
Copper, PEX, CPVC, and galvanized steel each require different cutters, connectors, and corrosion or soldering considerations.
Tight or obscured access may necessitate cutting back drywall or using flexible connectors.
Measure pipe diameter, note fittings, inspect corrosion, and plan tool staging.
Step-by-step replacement for threaded (screwed) hose bibs
The technician begins by removing the old threaded hose bib using appropriate wrenches and techniques to avoid damaging the stub pipe.
Next, the pipe threads are cleaned and inspected, old sealant or debris is removed, and any damaged threads are addressed.
Finally, thread sealant is applied, the new hose bib is installed and tightened, and the connection is tested under pressure for leaks.
Removing the old hose bib (tools and techniques)
Begin by shutting off the water supply and confirming the line is depressurized before attempting removal.
Use penetrating oil on the joint, allow time to soak, then grip the hose bib with a pipe wrench while stabilizing the supply pipe with a second wrench.
Apply steady torque, turning counterclockwise. If seized, alternate heat and penetrating oil; cut and remove corroded sections if necessary.
Cleaning and preparing the existing pipe threads
Prepare to restore the connection by thoroughly cleaning and inspecting the exposed male threads on the supply pipe to confirm a tight, leak-free seal for the replacement hose bib.
Remove debris, corrosion, and old sealant with a wire brush and solvent.
Verify thread integrity and straightness; chase damaged threads gently with a die or file.
Ascertain pipe is dry and free of particles before proceeding.
Applying sealant and installing the new threaded hose bib
Apply an appropriate thread sealant evenly to the cleaned male threads, then screw the new hose bib on hand-tight before final tightening with a wrench.
Guarantee the bib seats squarely, align the outlet for proper drainage, and avoid over-torquing to prevent thread damage.
Reposition any mounting flange, secure with fasteners, and confirm the packing gland or bonnet nut is properly adjusted for smooth operation.
Testing and checking for leaks
Once the water is restored and the new hose bib is tightened, inspect the connection and surrounding joints for leaks by observing for drips, dampness, or water stains while gradually operating the valve through full open and closed positions.
Check under pressure, feel fittings for moisture, and monitor for several minutes. If leakage appears, gently tighten fittings or reapply sealant; replace parts if persistent.
Step-by-step replacement for soldered (sweat) hose bibs on copper
The procedure begins with cutting out the old fitting and preparing the copper pipe to guarantee a clean, square end.
Next, the installer fluxes the joint, solders on the sweat-style hose bib, and secures it to the building.
If soldering cannot be performed, compression or push-fit adapters provide alternatives, followed by a thorough leak test and final checks.
Cutting out the old fitting and preparing copper pipe
Begin by shutting off the water supply and draining the line to prevent leaks.
Then remove any escutcheon or wall plate to access the hose bib connection.
Cut the old fitting from the copper pipe using a tubing cutter or hacksaw, leaving a clean, square end.
Deburr and clean the pipe with emery cloth or a wire brush, ensuring bright, oxide-free copper for the new connection.
Fluxing, soldering, and installing a sweat-on hose bib
After preparing the copper pipe, flux is applied to guarantee a strong bond. The sweat-on hose bib is fitted and soldered, and the joint is cooled and cleaned before testing.
Apply flux evenly, assemble fitting, heat evenly until solder flows, then remove heat and allow cooling. Wipe excess flux, inspect for gaps, pressure-test for leaks, and secure bib to wall or siding.
Alternatives when soldering is not possible (use of compression or push-fit adapters)
When soldering is impractical or prohibited, a repairer can replace a sweat-style hose bib on copper by using compression or push-fit adapters that create a reliable mechanical seal without heat.
Select an adapter sized to the pipe, deburr and clean the tube, insert fully or tighten the compression nut per manufacturer instructions, and secure the new hose bib.
These methods suit confined spaces or where open flame is unsafe.
Leak test and final checks
If compression or push-fit adapters were used where soldering wasn’t possible, the same care in pressure-checking applies to sweat-style replacements on copper.
Close downstream valves, slowly pressurize supply, inspect joints for drips or hairline weeps.
Operate the faucet, cycle cold and shut off, recheck.
Tighten fittings if needed, confirm no leaks under pressure and during temperature changes before backfilling or insulation.
Replacing a frost-free hose bib
Frost-free hose bibs differ from standard bibs by placing the shutoff mechanism inside the warmer wall cavity, so length and alignment matter more during replacement.
The installer must measure the wall thickness and match the new unit’s installation depth, then follow removal and installation steps specific to through-wall frost-free designs.
After fitting, proper insulation and winterization—including slope, sealing, and occasional draining—ensure reliable freeze protection.
What makes frost-free different
Installers should note that a frost-free hose bib differs from a standard bib by locating the shutoff valve several inches inside the heated wall so water drains out of the exposed spout when closed.
Frost-free models use a long stem, internal slope, and valve placement to prevent standing water and freezing.
Proper orientation, secure backflow prevention, and corrosion-resistant materials guarantee reliable winter performance.
Measuring and matching installation depth
Measuring the wall thickness and the distance from the interior shutoff location to the exterior finish is the critical first step when replacing a frost-free hose bib.
The installer records overall depth, accounts for insulation, and selects a frost-free stem length that positions the valve seat well inside the heated wall.
Accurate measurement prevents leaks, misalignment, and freezing issues.
Removal and installation steps specific to frost-free models
Begin by shutting off the interior supply and opening the existing bib to drain any remaining water.
Remove mounting screws and backer plate, then loosen the packing nut and unscrew the valve stem assembly.
Extract the frost-proof spud from the wall, noting depth.
Insert the new frost-free unit, align to existing shank depth, secure with screws, reconnect supply, test for proper operation and leaks.
Insulation and winterization tips after installation
With the new frost-free bib seated and tested, attention turns to insulating and winterizing the assembly to prevent freeze damage and maintain performance.
Apply foam insulation around exposed pipe and bib body, seal wall penetrations with caulk, and install an insulated cover for added protection.
Drain and shut off interior supply, open the spigot slightly for any residual runoff, and inspect annually before cold season.
Replacing a hose bib on different pipe materials
When replacing a hose bib, the required fittings and connection methods depend on the pipe material.
Copper commonly accepts soldered, compression, or push-fit connections.
PEX is typically joined with crimp, clamp, or push-fit fittings.
CPVC/PVC use primer/solvent welds or threaded adapters.
Galvanized steel poses corrosion and threading challenges, so recommend careful inspection and use of appropriate adapters or replacement with a compatible section.
Copper pipe: solder, compression, and push-fit options
Copper pipe repairs for a hose bib can be completed using soldered joints, compression fittings, or push-fit connectors, each offering distinct trade-offs in durability, skill required, and leak resistance.
Soldered joints provide permanent, high-strength seals but require flux, torch skills, and drying.
Compression fittings are removable with basic tools.
Push-fit connectors offer fastest installation and reliable seals without heat, suitable for confined spaces.
PEX pipe: crimp, clamp, and push-fit methods
Installers tackle PEX hose-bib connections using three common methods: crimp rings, stainless-steel clamps (also called cinch or crimp-style), and push-fit fittings.
Crimp and clamp require correct tool, ring placement, and gauge verification; over- or under-crimping risks leaks.
Push-fit offers quick, tool-free installation and easy removal.
All methods require clean pipe ends, proper insertion depth, and pressure testing before burial or insulation.
CPVC and PVC: primer/solvent weld and threaded adapter methods
Work on CPVC and PVC hose-bib connections centers on two reliable approaches: solvent-weld joints using primer and cement for a permanent bond, or threaded adapters that provide a removable connection.
For solvent welds, clean, prime, apply cement, seat fittings, and allow cure time.
For threaded adapters, use appropriate male/female fittings with PTFE tape or thread sealant and tighten to avoid leaks.
Galvanized steel: challenges and recommended approaches
Galvanized steel presents distinct challenges when replacing a hose bib due to internal corrosion, brittle threads, and larger-diameter fittings that may be welded or mechanically coupled.
These factors increase the risk of leaks or pipe damage during removal and installation. Use penetrating oil, proper pipe wrenches, and heat only if necessary.
Consider cutting and replacing a short section, converting to copper or CPVC with adapters, or hiring a pro.
Common problems and how to troubleshoot them
Common problems after replacing a hose bib include persistent leaks at the connection, stripped or damaged threads, and corroded or seized fittings that complicate removal.
The guide outlines practical troubleshooting steps for each issue and methods to restore proper sealing and operation.
It also covers causes and fixes for low water flow following replacement.
Persistent leaks at the connection
Persistent leaks at the connection often stem from a handful of predictable issues—worn or improperly seated washers, damaged threads, or corrosion where the hose meets the bib.
The homeowner should first replace the washer, clean mating surfaces, and apply plumber’s tape to male fittings if appropriate.
If leakage persists, inspect the hose coupling and bib outlet for pitting or uneven surfaces before replacing components.
Stripped or damaged threads
Inspecting the threads on both the hose bib outlet and the hose coupling reveals most cases of stripped or damaged threads: cross-threading, worn crests, or corrosion can prevent a tight seal and cause leaks.
Examine threads visually and by feel; replace or rethread the coupling, use a thread file for minor damage, apply appropriate PTFE tape, and test under low pressure before regular use.
Corroded or seized hose bib removal techniques
When a hose bib is corroded or seized, removal often requires a combination of penetrating oil, heat, and careful mechanical leverage to break the bond without damaging the surrounding pipe or wall.
Apply penetrating oil, let it soak, then tap gently to work it in.
Use a heat gun briefly if safe, secure the pipe with a backup wrench, and turn with steady force; cut and replace if irretrievable.
Low water flow after replacement
After removing a stubborn, corroded bib and installing a new one, reduced water flow is a common follow-up issue that requires systematic checks.
Inspect supply shutoff fully open, confirm valve and packing nut not constricting flow, and flush debris from the line.
Verify correct pipe size and new bib bore.
Check for upstream blockages, frozen sections, or pressure changes before concluding installation fault.
When to call a professional
If corrosion is extensive, the piping is hard to access, or multiple fixtures need work, professional help is advisable.
A licensed plumber can assess scope, explain cost factors, permits, timelines, and any warranty on parts and labor.
Homeowners should have pipe material, measurements, and photos ready to speed diagnosis and estimates.
Signs the job is beyond DIY (extensive corrosion, inaccessible piping, multiple repairs)
Several clear indicators show the hose-bib replacement has crossed into professional territory: severe corrosion that compromises pipe integrity, fittings hidden behind finished walls or concrete, or a cluster of failures suggesting systemic plumbing issues.
Additional signs include widespread leaks, brittle or crumbling piping, repeated past repairs, and inability to isolate water without shutting down major lines.
These conditions warrant licensed expertise and proper equipment.
What to expect from a professional plumber (cost factors, permits, warranty)
A homeowner hiring a professional plumber should expect a clear breakdown of costs, required permits, and the scope of any warranty before work begins.
The plumber will itemize labor, parts, and travel; clarify permit needs and inspection timelines; and specify warranty length, coverage, and exclusions.
Estimates may vary with material, access difficulty, and local code requirements; request written terms and invoice.
Preparing information for the plumber (pipe type, measurements, photos)
Before calling a plumber, homeowners should gather specific information—pipe material (copper, PEX, galvanized), approximate pipe diameter, distance from the house wall to the shutoff, and clear photos of the exterior bib, nearby connections, and any visible damage—to help the technician diagnose the issue and prepare needed parts.
Include notes on water pressure, leak timing, existing shutoff type, and any prior repairs.
Maintenance and winter care to extend hose bib life
Routine inspections for drips, loose fittings, and corrosion help prevent leaks and identify repairs early.
Proper winterization—such as draining, insulating, or using frost-free valves depending on hose bib type—reduces freeze damage.
A simple seasonal checklist with quick fixes (tighten packing nuts, replace washers, or shutoff and drain) keeps service life ideal.
Routine inspections and leak prevention
Regular inspections and seasonal maintenance can considerably reduce leaks and prolong a hose bib’s service life. A technician or homeowner should check fittings, valves, and surrounding seals monthly, address drips promptly, and guarantee proper drainage.
Recommended routine actions include:
- Inspect threads and packing nut for wear
- Tighten loose connections cautiously
- Replace degraded washers
- Lubricate valve stem sparingly
Proper winterization steps for different hose bib types
Several simple steps tailored to the specific hose bib type will prevent freeze damage and extend service life.
Frost-free frostless models require draining by shutting interior valve and opening exterior handle.
Standard sillcocks need disconnecting hoses, closing interior shutoff and draining lines.
Vacuum-breaker and frost-proof designs benefit from insulation or foam covers.
Inspect seals and test operation before freezing weather.
Seasonal checklist and quick fixes
After completing the season-specific winterization steps, a brief seasonal checklist helps guarantee the hose bib remains functional and leak-free through fluctuating temperatures.
Inspect for drips, corrosion, and loose fittings; tighten packing nuts and replace worn washers.
Drain or insulate exposed piping, remove hoses, and test shutoff valves.
Address minor leaks promptly with thread sealant or compression sleeve repairs to prevent freeze damage.
Cost estimate and time required
Typical material costs vary by hose bib type, from basic frost-free models at modest prices to specialty brass or anti-siphon units that cost more.
A homeowner can expect DIY replacement to take 30 minutes to 2 hours for common scenarios, while more complex repairs or pipe work add time.
If hiring a plumber, labor ranges widely depending on region and complexity, commonly adding $75–$250 in labor or more for extensive work.
Typical material costs by hose bib type
Material costs for replacing a hose bib vary primarily by valve type, body material, and whether frostproof or anti-siphon features are required. Typical price ranges help budget choices: basic brass, freeze-proof, and anti-siphon models differ. See quick comparison:
| Type | Typical Cost | Notes |
|---|---|---|
| Basic brass | $10–$25 | Standard |
| Frostproof | $25–$60 | Cold climates |
| Anti-siphon | $30–$70 | Code compliance |
Estimated DIY time for common scenarios
When estimating DIY time for replacing a hose bib, consider the valve type, wall access, and whether additional features like anti-siphon or frostproof construction require extra steps.
A simple swap of a basic brass bib through easy access can take 30–60 minutes, while installing a frostproof or anti-siphon model, cutting and soldering or re-piping, or working through an exterior wall can extend the job to 1.5–3 hours.
Typical scenarios:
- basic replacement 30–60 minutes;
- soldered copper or sweat joints 1–2 hours;
- PVC/PEX with fittings 1–1.5 hours;
- complex exterior work up to 3 hours.
Labor cost ranges if hiring a plumber
After estimating DIY time, homeowners should compare that effort to hiring a plumber, since labor costs will often exceed the price of the part and influence the decision to DIY.
Typical service calls range $75–$150, hourly rates $50–$120, and total jobs commonly $150–$400 depending on complexity and access.
Emergency or weekend work can add 25–100% premiums.
Quick reference checklists
A set of concise checklists guides the user through the hose bib replacement process.
One checklist covers pre-replacement steps such as shutting off water and gathering tools.
Another outlines installation tasks and proper fittings.
A post-installation checklist verifies leak tests and system restoration.
These quick references guarantee consistency, safety, and a successful finish.
Pre-replacement checklist
Before removing the existing hose bib, inspect the area and verify a concise checklist: shut off the water supply at the nearest valve, drain residual water by opening the bib, gather required tools and replacement parts (correct thread size, thread sealant or tape, wrench, plumber’s tape), validate shutoff effectiveness by observing no flow, and note pipe material and condition for proper joint technique.
- Verify valve location and operation
- Match thread type and size
- Confirm sealant and fittings are compatible
- Check surrounding wall and insulation for damage
Installation checklist
With the supply shut off and fittings verified, a compact installation checklist guides the actual replacement steps from mounting to leak testing.
It lists concise actions to follow during hose bib installation for safety and accuracy.
- Remove old bib and clean mounting surface
- Apply new thread sealant or tape
- Securely mount and torque fittings
- Restore supply briefly to inspect for visible leaks
Post-installation testing checklist
Several short checks confirm the new hose bib functions correctly and remains leak-free after installation.
The installer performs a quick, systematic test sequence to verify operation, pressure, and sealing.
Follow this concise checklist:
- Turn water on fully; inspect for immediate leaks.
- Open and close valve to test smooth operation.
- Attach hose; check connection under pressure.
- Inspect wall and fittings for drips.
Conclusion
Like a seasoned gardener pruning a stubborn rose, the homeowner can methodically replace a worn hose bib with care and the right tools. Following proper preparation, part selection, and stepwise removal and installation minimizes leaks and water damage. When corrosion, frozen pipes, or complex plumbing arise, a licensed plumber should be engaged. Regular maintenance and winterizing lengthen service life, saving time and money while keeping outdoor water access reliable and efficient.