How to Determine Toilet Flapper Size: Quick Steps to Measure and Replace the Right One
To determine the correct toilet flapper size, measure the flush-valve opening and the flapper diameter at its widest point. Note the attachment style and ensure the chain has about 1/2 inch of slack. Typically, older or compact toilets use a 2-inch flapper, while modern toilets often require a 3-inch flapper. Universal kits are available that fit many models.
To replace the flapper, first turn off the water supply and flush the toilet to empty the tank. Remove the old flapper and clean the seat. Install the new flapper, then test for leaks to ensure proper function. More detailed guidance follows below.
What Size Toilet Flapper Do You Need? A Clear Quick Answer
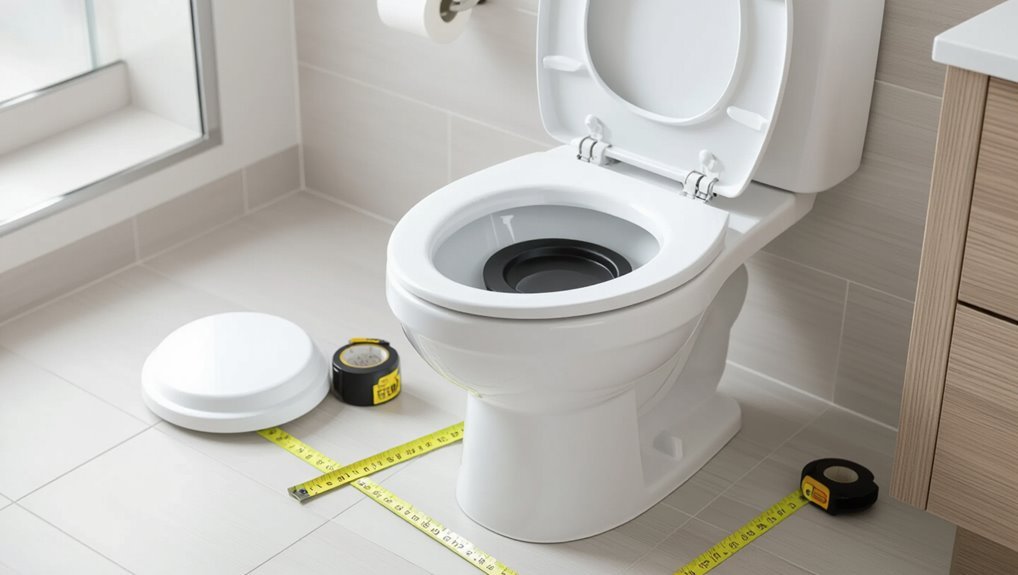
Most toilets use a few standard flapper sizes—typically 2-inch and 3-inch—each designed to match specific flush valve diameters.
Smaller 2-inch flappers fit older or compact valves, while 3-inch flappers are common in modern toilets for a faster flush.
Selecting the correct size requires measuring the flush valve opening to guarantee a proper seal and reliable operation.
Common flapper sizes and what they fit
To choose the correct toilet flapper, identify the tank type and measure the flush valve opening—common flapper sizes are 2 inches and 3 inches, with some older or specialized models using 4-inch or irregular openings that require specific replacements.
Technicians advise matching diameter, mounting style, and chain length.
For guidance on how to determine toilet flapper size, consult manufacturer specs or measure directly before ordering.
##
Selecting the correct flapper size begins with measuring the flush valve opening at the bottom of the tank. Measurements guide purchases and guarantee seal integrity. A clear record prevents returns and guessing. Note material, chain length, and seat type when replacing. Maintain a tidy workspace and test for leaks after installation.
| Measurement | Component | Note |
|---|---|---|
| Diameter | Flapper | Check snug fit |
| Height | Seat | Trim if needed |
| Chain | Length | Adjust slack |
| Material | Rubber | Replace if hard |
How Toilet Flappers Work and Why Size Matters
The flapper serves as the valve that seals the tank and lifts to release water into the bowl during a flush.
Using the wrong flapper size can prevent a proper seal or hinder full opening, causing leaks, weak flushes, or excessive water use.
Understanding fit and function clarifies why correct sizing preserves performance and conserves water.
Role of the flapper in toilet flushing mechanics
Controls water release, the flapper serves as the gate between the tank and bowl: when lifted, it allows a timed surge of water to flow into the bowl, and when it reseats, it stops the flow and lets the tank refill.
It times flush duration, coordinates with the flush lever and chain, and guarantees sufficient flow to create siphon action while permitting reliable tank resealing for refill.
How incorrect size affects leaks, flush performance, and water use
Install the wrong flapper size and a toilet can leak, underperform, or waste significant water.
A too-small flapper may not seal, causing continuous leaks and higher bills. An oversized flapper can delay tank refill or restrict flow, yielding weak flushes and clogs.
Improper fit accelerates wear, destabilizes valve timing, and undermines conservation efforts; correct sizing guarantees reliable sealing and peak performance.
Tools and Preparation Before Measuring
Before measuring a toilet flapper, the person should gather a ruler or tape measure, a notebook, and a camera to record dimensions and details.
They should shut off the water supply and flush to drain the tank to prevent spills and allow clear access.
These simple preparations make measurement faster and guarantee accurate replacement selection.
Tools required (ruler, tape measure, notebook, camera)
A few basic tools make measuring a toilet flapper straightforward: a ruler or straightedge for inside-tank diameters, a tape measure for reach and overall distances, and a notebook and camera to record dimensions and configuration details.
A small flashlight helps illuminate dark corners. A marker or masking tape labels parts and measurements. These tools guarantee accurate, repeatable measurements for selecting the correct replacement flapper.
Safety and preparation tips (shutting off water, draining tank)
Safety and preparation begin by shutting off the toilet’s water supply and fully draining the tank to prevent accidental flooding and to expose the flapper for accurate measurement.
Wear gloves, clear the area, and place towels to absorb residual water.
Flush until empty, lift remaining water with a sponge if needed, and disconnect or secure the chain.
Verify the shutoff valve is fully closed.
Step-by-Step Guide to Measuring Your Toilet Flapper
The guide begins by having the reader locate the flapper and note how it attaches to the flush valve.
Next, clear instructions cover measuring the flapper diameter, chain length and connection point, and the seat diameter or valve opening when relevant.
Finally, the reader is prompted to record the flapper’s material and shape (round, D-shaped, or bellows) for proper replacement matching.
Locate the flapper and identify attachment style
Begin by removing the tank lid and locating the rubber flapper at the bottom of the tank; it sits directly over the flush valve opening and is connected to the flush handle mechanism.
Inspect how the flapper attaches: hooked ears on the overflow tube, an integrated ring that slips over the valve seat, or a chain/clips linkage to the flush lever.
Note material and wear.
Measure flapper diameter
With the attachment type and condition noted, measuring the flapper diameter is the next practical step.
First, remove or lift the flapper to access its full edge. Use a ruler or tape measure across the widest point from one outer edge to the opposite outer edge.
Record the measurement in inches or millimeters; common sizes are 2, 2.5, 3, and 3.5 inches.
Measure chain length and connection point
Next, measure the chain length and note the connection point to guarantee reliable flapper operation.
Record chain slack with flapper seated, ensuring about 1/2 inch play so it seals fully without tension.
Identify where the chain clips to the flush lever or lift wire and whether an adjustable link or clip is used.
Note clip type and position for accurate replacement.
Measure seat diameter and valve opening if applicable
One clear measurement to take is the flapper seat diameter, which determines the flapper size that will form an effective seal.
Measure across the circular seat using a ruler or caliper at the tank opening.
If the flush valve has an exposed throat or overflow tube attachment, measure that opening’s inside diameter as well to confirm compatibility with replacement flappers.
Record material and shape (round vs. D-shaped vs. bellows)
A quick inspection should identify the flapper’s material and overall shape, since both affect fit and durability.
Note whether the flapper is rubber, silicone, or plastic and whether it’s flat-round, D-shaped, or bellows-style.
Record the hinge type and any molded ears or tabs. These details guarantee selection of a compatible replacement that seals properly and resists wear.
Matching Measurements to Replacement Options
The next step compares measured dimensions with product labels and descriptions to guarantee a correct fit.
Packaging typically lists flapper diameter, seat type, and compatible models, so buyers should match those specs to their measurements.
Consideration of universal versus model-specific flappers follows, weighing ease of fit and potential trade-offs in sealing or longevity.
How to read flapper packaging and size labels
Many flapper packages display size information in clear, standardized terms—diameter in inches or millimeters, universal compatibility notes, and part numbers—so consumers can match measurements taken from the toilet flush valve to replacement options without guesswork.
Labels also list material (rubber, silicone), mounting style (3-inch, 4-inch, adjustable), flow rate or pressure sensitivity, and manufacturer cross-references for accurate selection.
Universal vs. model-specific flappers: pros and cons
When deciding between universal and model-specific flappers, users should weigh compatibility, ease of installation, and long-term performance.
Universal flappers offer broader fit and simpler replacement for varied toilet models, while model-specific units promise exact fit and manufacturer-tested reliability.
Universal options save time and stock variety but may seal less perfectly. Model-specific parts often guarantee peak flush performance yet can be harder to source.
##
How can one quickly identify the flapper size needed for a toilet without disassembling the tank? Visual cues and measurements taken from outside the tank often suffice: note the flush type, inspect visible chain length, and compare brand/model markings.
- Look for model numbers on the tank exterior.
- Measure visible valve opening from bowl rim.
- Photograph internals for reference when buying.
How to Replace a Toilet Flapper: Quick Installation Steps
The process begins with safely removing the old flapper and inspecting the flush valve for debris or wear.
Next, the new flapper is installed, the chain adjusted for proper lift, and the seal seated evenly.
Finally, a few test flushes confirm flush performance and check for leaks while fine-tuning chain length and the seal as needed.
Removing the old flapper safely
Begin by turning off the toilet’s water supply and flushing to lower the tank water level; this reduces splashing and gives clear access to the flapper.
Disconnect the chain from the flush lever, detach the flapper ears or unclip the seat, and carefully lift the flapper off the valve.
Inspect the valve seat and remove mineral buildup or debris before installing a replacement.
Installing the new flapper and adjusting chain
With the old flapper removed and the valve seat cleaned, the replacement can be seated and secured.
The new flapper’s ears clip onto the overflow tube or pegs; guarantee a snug fit.
Attach the chain to the flush lever arm with one or two links slack so the flapper rests fully closed.
Trim or reposition chain to prevent binding or excessive tension.
Testing the flush and checking for leaks
Flush the toilet once to observe the flapper’s operation and initial water flow.
Note timing: the flapper should lift fully and reseat promptly.
Inspect bowl and tank for steady drips or running water.
Listen for hissing and watch water level stability for several minutes.
If leaks appear, confirm seat contact and replace parts or tighten fittings before concluding the repair.
Fine-tuning chain length and seal
Adjust the chain length so the flapper lifts fully without pulling the seat off its rings and rests closed when the handle is released.
The chain should have slight slack at rest to prevent constant tension. Trim or reconnect links to achieve this.
Confirm the flapper seals evenly around the valve; reposition or replace it if gaps or warping cause leaks.
Repeat adjustments until reliable sealing occurs.
Troubleshooting Common Flapper Problems After Replacement
After replacing a flapper, the most common issues are persistent leaks, weak or partial flushes, and a flapper that fails to seal.
A concise checklist can help diagnose leaks, while simple chain length and float adjustments often restore full flushing power.
If sealing problems persist, cleaning the seat and inspecting or replacing the flapper are the next recommended steps.
Persistent leaks: diagnosis checklist
When a newly installed flapper continues to allow water into the bowl, a systematic diagnosis can quickly isolate the cause; the checklist below guides a technician through the most common sources of persistent leaks.
Inspect seat and flapper for warping, debris, or mineral buildup; confirm correct size and material; check chain length and hinge alignment; verify flush valve surface flatness and secure mounting.
Poor flush or partial flush: adjustment steps
A few simple adjustments often restore full flushing performance after a flapper replacement. The technician should methodically check chain length, hinge alignment, and lift height to confirm the valve opens fully and closes reliably.
Shorten or lengthen the chain to prevent dragging or slack. Verify the flapper sits centered on its pegs, and adjust lift to permit adequate water flow without causing premature closure.
Flapper that won’t seal: seat cleaning and replacement tips
If adjustments to chain length, hinge alignment, and lift height fail to stop water loss, the flapper may not be forming a proper seal against the flush valve seat.
Inspect the seat for mineral buildup, nicks, or warping. Clean with vinegar and a soft brush; replace the seat or flapper if damage persists.
Verify compatible flapper size and correct seating during installation.
Buying Guide: Choosing the Best Flapper for Your Toilet
When selecting a replacement flapper, attention should be paid to material and durability—soft-seal rubber offers a better seal while harder materials may resist chemical wear.
Compatibility with water-saving and low-flow toilets is essential, so choose flappers specifically rated for such systems to avoid leaks or poor flush performance.
Suggested options from reputable brands and specific model examples can guide buyers toward reliable, long-lasting choices.
Materials, durability, and soft-seal vs. hard materials
Choosing the right flapper material directly affects longevity, seal quality, and overall toilet performance.
Rubber and silicone soft-seal flappers conform to irregular seats, resist mineral buildup, and reduce leaks but may degrade with chemicals.
Hard plastic or thermoplastic options resist wear and chlorine but often seal less effectively.
Select material based on tank chemistry, expected lifespan, and maintenance preferences.
Water-saving flappers and compatibility with low-flow toilets
Many modern low-flow toilets rely on flappers engineered to meter water release precisely, balancing effective bowl clearing with reduced tank volume.
Compatibility requires matching lift style, seat diameter, and flush timing to tank design.
Adjustable or pressure-assisted models can optimize conservation but must fit original mounting and chain length.
Verify manufacturer specifications to guarantee proper seal, flush performance, and water savings.
Recommended brands and model examples
Although performance needs vary by toilet type, a handful of brands consistently deliver reliable flappers across standard and low-flow models.
Consider Fluidmaster (Universal 2-inch/3-inch options, adjustable fill), Korky (Tri-Handle, universal designs, durable rubber), American Standard (OEM-matched sizes for exact fit), and Toto (manufacturer-specific low-flow replacements).
Choose by size compatibility, material (silicone preferred), and valve design for ideal seal and longevity.
##
When measuring a toilet flapper, begin by turning off the water supply and flushing to drain the tank so the flapper and its mounting can be seen clearly.
The person measures diameter across the flapper, notes mounting type (two-prong, adjustable, or fixed), and records chain length for proper sealing.
Accurate notes guarantee correct replacement.
- Measure flapper diameter precisely
- Identify mounting style
- Record chain length
When to Replace the Flush Valve or Call a Professional
Persistent leaks, multiple failed flapper replacements, or visible damage to the valve seat indicate the issue may extend beyond the flapper.
Replacing a flush valve can be more time-consuming and costly than swapping a flapper, often requiring tools, parts, and a temporary water shutdown.
Homeowners should weigh the valve replacement complexity and cost against hiring a professional for reliable installation.
Signs the problem isn’t just the flapper
If a toilet continues to run or leak after replacing the flapper, other components—most commonly the flush valve or overflow tube—may be failing and require replacement or professional inspection.
Additional signs include persistent water loss, visible cracks or warping at the valve seat, continuous siphoning, or irregular tank refill.
Corrosion, mineral buildup, or damaged seals also indicate the problem extends beyond the flapper.
Costs and complexity of valve replacement vs. DIY
Noticing that flapper replacement didn’t stop the leak often points to a failing flush valve or overflow tube.
Deciding whether to replace those parts oneself depends on cost, skill level, and the extent of damage.
Professional replacement typically costs more but guarantees correct seals, parts compatibility, and handles corroded bolts or porcelain issues.
DIY saves labor but risks mistakes and added repairs if underestimated.
Common Measurement and Replacement Mistakes to Avoid
Careful attention to measurements and fittings prevents common flapper replacement errors.
Confusing rim diameter with seat size, selecting the wrong attachment style, or over-tightening the chain and forcing parts can all cause leaks or malfunctions.
The following points clarify how to avoid each mistake.
Misreading diameter vs. seat size
When measuring a flapper, confusing the flapper’s outer diameter with the toilet seat opening can lead to buying the wrong part; the flapper must match the valve seat diameter and sealing surface, not the visible rim of the bowl.
Measure across the actual valve seat, note any recesses or lips, and verify material and contour to guarantee a proper seal and reliable flush performance.
Using the wrong attachment type
Although the flapper’s diameter and material are critical, matching the attachment type to the flush valve is equally important: using a chain, hinge, or clip incompatible with the valve or overflow tube can prevent a proper lift or seal, causing weak flushes or continuous running.
Install the correct attachment for the valve design, guarantee proper alignment, and test operation before finalizing replacement to avoid leaks.
Over-tightening chain or forcing components
Over-tightening the chain or forcing flapper components can warp the flapper, stress attachment points, and prevent a proper seal, leading to leaks or a perpetually running toilet.
Installers should leave slight slack in the chain, avoid bending tabs or stretching rubber, and test movement before closing the tank.
Gentle alignment and correct fasteners preserve function and extend flapper life.
Quick Reference Charts and Measurement Cheat-Sheet
A concise chart listing standard flapper diameters alongside the toilet models they commonly fit helps readers make quick, accurate selections.
The cheat-sheet highlights typical sizes such as 2-inch, 3-inch, and universal fittings and pairs them with common brand or model types.
This compact reference reduces measurement errors and speeds replacement decisions.
Standard flapper sizes and typical toilet matches
Most toilets use one of three common flapper sizes—2 inches, 3 inches, or a universal fit—and matching the flapper diameter to the flush valve opening guarantees a reliable seal and proper flush volume.
Typical matches: older or compact toilets often use 2″, modern mains and higher-flow bowls use 3″, and many replacement kits offer universal or adjustable models for varied valve styles and manufacturers.
##
Choosing the correct flapper type begins with identifying the toilet’s flush mechanism and the seat dimensions where the flapper mounts. Selection follows compatibility: valve style, chain attachment, and material resistances. Fit guarantees proper seal and reliable flush. Consult manufacturer specs when uncertain.
| Attribute | Check |
|---|---|
| Valve style | Flushometer or tank |
| Seat diameter | Measure opening |
| Chain type | Hook or clip |
| Material | Rubber or silicone |
Short Maintenance Tips to Prolong Flapper Life
A brief inspection checklist helps identify wear, warping, and leaks before they worsen.
Periodic wiping and gentle scrubbing remove grime while a vinegar soak prevents calcium buildup on rubber and valve seats.
These simple steps reduce replacement frequency and maintain reliable seal performance.
Regular inspection checklist
Regular inspections keep a toilet flapper functioning and prevent common failures.
Inspect the flapper for cracks, warping, hardening, or mineral deposits; check chain length and attachment for slack or snagging; guarantee proper seating and uniform contact.
Test for slow leaks by observing tank drop after flushing; confirm flush valve seat condition and replace parts showing wear to maintain reliable operation.
Simple cleaning and calcium buildup prevention
Keep the flapper and surrounding tank surfaces free of mineral deposits and grime to extend service life and maintain reliable seals.
Use a soft brush and mild vinegar solution to dissolve calcium; avoid harsh chemicals that degrade rubber. Rinse thoroughly and dry.
Inspect seals after cleaning and apply a thin silicone lubricant if manufacturer permits.
Schedule light cleaning every three months to prevent buildup.
##
Identifying the flapper type begins with inspecting the part where it seats against the flush valve; differences in shape, material, and attachment (bolt, chain, or clip) narrow the options quickly.
The inspector notes diameter, hinge style, and wear to select a compatible replacement; proper fit prevents leaks and guarantees correct flush volume.
- Measure across the flapper face
- Check hinge or clip form
- Inspect for warping or mineral buildup
Conclusion
Choosing the correct toilet flapper guarantees reliable flushes and conserves water; about 20% of household leaks are toilet-related, often due to worn flappers. By measuring seat diameter, noting hinge style, and matching materials, most replacements are straightforward. If measurements are unclear or persistent leaking occurs, consider replacing the flush valve or contacting a professional. Regular checks and simple maintenance can prevent most problems and extend a new flapper’s service life.