How to Cut Steel Braided Hose Safely: Tools, Steps, and Pro Tips
To cut steel braided hose safely, you’ll need the right tools, a steady hand, and personal protective equipment (PPE). Use a tubing or hose cutter, fine-tooth hacksaw, Dremel, or angle grinder, depending on the hose’s diameter and fitting type. Secure the hose in a padded vice, support the inner liner with a mandrel, mark a square cut, and make controlled cuts. After cutting, deburr the edges, restrain the braid, and pressure-test for leaks. Follow the detailed steps and precautions outlined below for a safe and effective process.
What Cutting Steel Braided Hose Involves and When to Do It
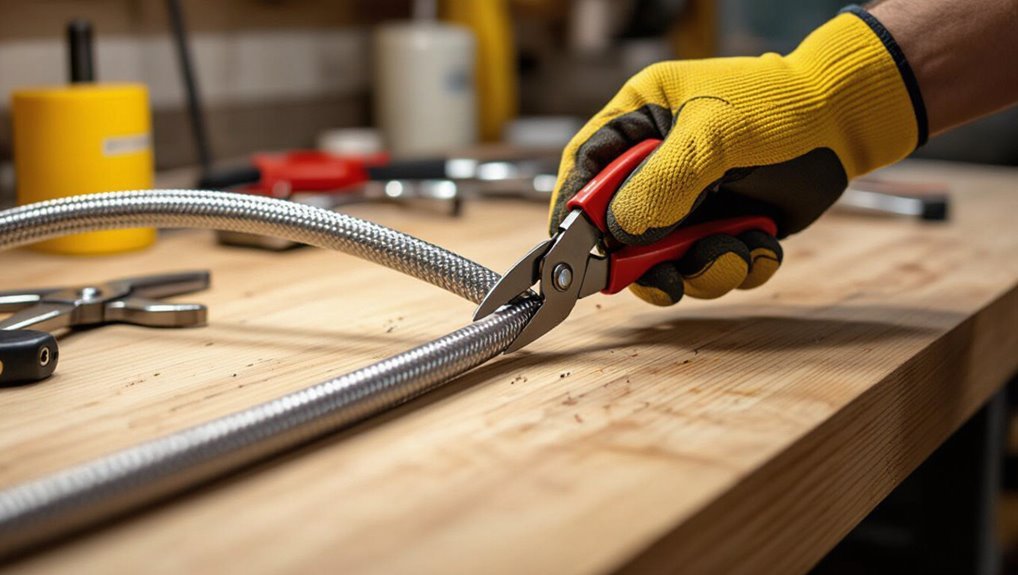
Cutting steel braided hose is often required for repairs, creating custom lengths, or fitting new installations.
The process involves understanding how the outer braid, inner tube, and end fittings interact so the cut and reassembly maintain a pressure-tight seal.
Incorrect cutting can cause fraying, compromised fittings, leaks, or personal injury, so proper technique and tools are essential.
Why you might need to cut steel braided hose (repairs, custom lengths, installations)
When a steel braided hose no longer fits an application or sustains damage, it often needs shortening, replacement of a damaged section, or precise trimming for a custom installation.
Technicians consult guides on how to cut steel braided hose for repairs, making clean ends for new fittings, or tailoring lengths for tight spaces.
Proper cutting prevents leaks, guarantees safe installations, and saves time and materials.
Overview of hose construction and how braid, inner tube, and fittings interact
Having determined that a hose must be shortened or repaired, understanding its layered construction clarifies what the work actually involves.
Steel braided hose consists of an inner elastomer or PTFE tube for fluid containment, a braided stainless-steel jacket for pressure support and abrasion resistance, and end fittings that compress or swage the tube and braid to form a leak-tight assembly.
Correct cuts preserve these interfaces.
Safety risks if cut incorrectly (fraying, leaks, injury)
Mistakes during hose modification can produce sharp, unruly braid ends, compromised seals, and projectiles that threaten both equipment and operator safety.
Frayed braid punctures gloves, skin, and nearby components. Improperly square cuts prevent fittings from seating, causing leaks, pressure loss, or sudden bursts.
Debris and high-pressure fluid ejecta risk eye injury. Proper tools, restraint, and inspection mitigate these hazards.
Tools and Materials Needed
This section lists the tools and materials required to cut steel braided hose safely, from essential cutters—such as a hose cutter, angle grinder, or cutoff saw—to supporting items like a vice, clamps, files, deburring tools, and compressed air.
It also specifies necessary personal protective equipment: cut-resistant gloves, eye protection, a face shield, and hearing protection.
Guidance is provided on when to prefer specialized hose-cutting tools versus common workshop equipment based on hose size, precision needs, and available setup.
Essential cutting tools (hose cutter, angle grinder, cutoff saw)
Essential cutting tools for steel braided hose include a dedicated hose cutter, an angle grinder, and a cutoff saw, each chosen for its balance of control, speed, and cut quality.
Recommended options and brief notes:
- Hose cutter — clean, controlled snips for thin braid.
- Angle grinder — fast cuts; use cutoff wheel.
- Cutoff saw — precise, repeatable crosscuts.
- Blade selection — match material and thickness.
Supporting tools and materials (vice, clamp, file, deburring tool, compressed air)
While cutters make the cut, a sturdy vice or clamp is required to hold the hose steady and prevent twisting or kickback during work.
Supporting tools finish the job cleanly and safely: a file smooths stray braid; a deburring tool clears inner edges; compressed air removes debris.
Recommended items:
- Vice or clamp
- Round file
- Deburring tool
- Compressed air canister
Personal protective equipment (gloves, eye protection, face shield, hearing protection)
Personal protective equipment protects the operator from sharp braid, flying particles, and noise during cutting and cleanup.
Proper PPE reduces injury risk and enables precise work.
Recommended items:
- Cut-resistant gloves — protect hands from strand edges.
- Safety goggles — block flying debris.
- Face shield — guards against larger fragments.
- Hearing protection — reduces noise exposure from power tools.
When to use specialized tools vs. common workshop tools
Many cutting jobs can be completed with common workshop tools, but certain hose types, diameters, and workplace constraints call for specialized equipment to guarantee a safe, clean cut.
Use common tools (bolt cutters, hacksaws, rotary grinders) for small, infrequent cuts.
Opt for specialized cutters, hydraulic shears, or dedicated hose-cutting machines when working with large diameters, high-volume production, or fittings-sensitive assemblies.
Preparing the Hose and Workspace
Before cutting, the hose should be inspected for damage and the exact cut point measured and marked to guarantee correct length.
The hose must be clamped or otherwise secured in a way that prevents movement and shields the inner tube.
The work area should be cleared of flammables and protected from sparks and debris before any cutting begins.
Inspecting hose condition and identifying the cut point
Examine the hose thoroughly to verify it is suitable for cutting: check for cracks, corrosion, flattened or kinked sections, and frayed or exposed braid that could compromise integrity.
Identify a cut point away from fittings, damaged areas, and high-flex zones. Ascertain sufficient serviceable length remains for a proper termination.
Note any internal contamination visible at the cut end.
Marking the hose and measuring for correct length
With the cut point confirmed, the hose should be laid straight on a clean, flat surface and measured from the designated termination back to the mark for the required overall length, accounting for any insertion depth and fitting overlap.
Use a steel ruler or tape for accuracy, mark with fine-tip permanent marker, double-check measurements, and note orientation or bend allowances before proceeding to cutting.
Securing the hose to prevent movement and protect the inner tube
Clamp the hose gently but firmly in a padded vise or dedicated hose fixture to prevent rotation and axial movement during cutting.
Wrap the hose end with tape or use a rubber sleeve to support and shield the inner tube.
Guarantee clamps avoid crushing the braid, align the cut mark with the blade path, and confirm stability before starting the cut to minimize fraying and inner-tube damage.
Clearing and protecting the work area from sparks and debris
After securing the hose, attention shifts to clearing and protecting the surrounding area from sparks and debris.
Work surfaces are cleared of flammables, combustibles moved, and a fire extinguisher placed within reach.
Nonconductive drop cloths or metal trays catch fragments.
Nearby personnel wear eye and skin protection and are kept at a safe distance.
Adequate ventilation minimizes dust and fumes.
Step-by-Step Cutting Methods
The following section outlines step-by-step approaches for cutting steel braided hose using different tools: a dedicated hose cutter, a hacksaw or tubing cutter, an angle grinder or cutoff wheel, and a Dremel or rotary tool for precision.
Each method will be described with setup, cutting technique, and finishing steps. A concise comparison of speed, cut cleanliness, and associated risks follows to help choose the appropriate tool for the job.
Cutting with a dedicated hose cutter
Begin by positioning the hose on a flat, stable surface and selecting a dedicated hose cutter sized for the braid and inner diameter. This tool guarantees a clean, square cut with minimal fraying when used correctly.
Clamp the hose lightly to prevent movement, align the cutter at the mark, squeeze steadily through the braid, then inspect the cut.
Remove burrs and re-seat fittings before testing.
Cutting with a hacksaw or tubing cutter
When a dedicated hose cutter is unavailable, a hacksaw or tubing cutter can be used to trim steel braided hose, provided the operator follows careful setup and cutting technique to minimize fraying and damage.
Secure the hose in a vice with protective jaws, mark the cut, and tension the braid.
For a hacksaw use steady strokes and light pressure; with a tubing cutter tighten incrementally and rotate smoothly.
Cutting with an angle grinder or cutoff wheel
Cutting steel braided hose with an angle grinder or cutoff wheel requires steady hands, proper protective gear, and a controlled setup to prevent fraying, sparks, and damage to the inner hose.
Secure the hose in a vise, mark cut line, use a thin metal cutoff wheel, apply light steady pressure, keep wheel perpendicular, cool periodically with cutting oil, and deburr the cut end for a clean finish.
Using a Dremel or rotary tool for precision cuts
Use a Dremel or rotary tool for tight, controlled cuts on steel braided hose when precision is required; this approach minimizes fraying and allows neat end finishes.
Secure the hose in a vise, mark the cut, use a thin metal cutting wheel at moderate speed, apply light steady pressure, and rotate the hose for an even cut.
Deburr and inspect before sealing or fitting.
Comparing speed, cleanliness, and risks of each method
Evaluate each cutting method by three practical criteria—speed, cleanliness, and risk—to decide which fits the job and skill level. Hand cutters are slow, clean if steady, low risk. Angle grinders are fast, messy, higher risk. Saws balance speed and cleanliness but need skill.
| Method | Speed | Risk |
|---|---|---|
| Hand cutter | Slow | Low |
| Grinder | Fast | High |
Controlling and Finishing the Braid and Inner Tube
Before cutting, the operator secures the braid to prevent fraying using tape, a temporary clamp, or a brief application of heat.
After the cut, the braid is carefully peeled back and trimmed away from the inner tube, which is then deburred and smoothed to remove sharp edges.
Finally, the finished end is protected and sealed with an appropriate option such as heat-shrink, a ferrule, or an end cap.
Techniques to prevent braid fraying before cutting (tape, clamp, heat)
Securing the braid prevents unraveling and makes a clean, safe cut possible. Techniques include tightly wrapping adhesive tape or heat-shrink over the cut line, applying a hose clamp or C-clamp to compress the braid, or briefly heating outer strands to fuse ends (with caution to avoid inner tube damage).
Each method stabilizes fibers, improving cutting accuracy and reducing fray during subsequent finishing.
How to separate and trim the braid from the inner tube safely
With the braid stabilized by tape, a clamp, or heat, attention shifts to separating the metal jacket from the inner tube and trimming each to suit the fitting.
Using fine snips or diagonal cutters, lift and cut braid strands flush with the jacket end.
Retract cut strands away from the inner tube, then trim the tube with a sharp utility or hose cutter to the required length, ensuring straight cuts.
Deburring and smoothing the inner tube edge
Deburr the cut inner tube immediately to prevent sharp edges from damaging seals or catching on the fitting during assembly.
Use a round file, deburring tool, or fine-grit sandpaper to remove burrs and create a slightly chamfered edge.
Rotate the hose for even smoothing, inspect under good light, and wipe away particles.
Confirm a clean, uniform edge before fitting assembly.
Sealing options for the cut end (heat shrink, ferrules, end caps)
After trimming and smoothing the inner tube, attention turns to sealing the cut end to protect the braid and prevent fluid leakage.
Options suit application, pressure, and corrosion resistance:
- Heat-shrink tubing: quick, low-pressure protection.
- Crimp ferrules: permanent, high-pressure, requires tooling.
- Mechanical end caps: removable, moderate pressure.
- Threaded fittings: secure seal, compatible with system connections.
Reattaching Fittings and Testing the Hose
The technician selects fittings and ferrules that match the hose material, size, and designed pressure rating before beginning reattachment.
Assembly follows the appropriate method—crimp, swage, or screw-on—using specified tooling and torque values.
After this, the hose is pressure-tested and inspected for leaks and proper sealing.
Persistent leaks, visible braid damage, kinking, or failure to hold pressure indicate a failed repair and necessitate hose replacement.
Selecting compatible fittings and ferrules for steel braided hose
Several key factors determine which fittings and ferrules will work with a given steel braided hose: hose inner diameter, braid type and thickness, pressure rating, and the fitting style specified by the hose manufacturer.
Compatibility requires matching materials (stainless grades), correct ferrule profile for braid containment, pressure- and temperature-rated seals, and manufacturer-approved part numbers.
Verify dimensions and certification before installation.
Proper assembly steps for crimp, swage, and screw-on fittings
Begin reattaching fittings by confirming hose end preparation: cut square, inner liner undamaged, and braid evenly trimmed to the manufacturer’s specified length.
For crimp fittings, seat insert, position ferrule, and use calibrated crimper to specified die and pressure.
For swage, align fitting and swage tool per spec.
For screw-on, hand-start threads, torque to spec and secure with proper backup to prevent hose twist.
Pressure testing and leak-check procedures
After reattachment and torqueing of fittings, pressure testing verifies joint integrity and reveals installation errors before the hose returns to service.
The hose should be isolated, filled with recommended fluid or water, and vented. Incremental pressure increases to specified working and test pressures are held while inspecting for leaks, deformation, or seepage.
Record results and relieve pressure safely before commissioning.
Signs a repair or cut was unsuccessful and when to replace the hose
Confirming a successful repair requires more than a visual check; persistent leaks, bulging, kinking, frayed braid, or seepage at the fitting are clear indicators a cut or reattachment failed and the hose should be taken out of service.
Additional signs include loss of pressure under load, abnormal vibrations, or contamination in the fluid. If any appear, replace the hose and fittings immediately to prevent failure.
Common Mistakes and How to Avoid Them
Common mistakes when cutting steel braided hose include using improper tools, failing to secure the hose, and mismeasuring lengths, which can ruin fittings and cause leaks.
Care must be taken to support the braid and inner tube during cutting to prevent fraying or collapse.
If cuts are uneven, damage is extensive, or fittings do not seat properly, work should stop and a professional technician consulted.
Top cutting mistakes (improper tools, insecure clamping, wrong measurements)
Mistakes when cutting steel braided hose most often stem from using improper tools, failing to secure the hose, and making inaccurate measurements; each error increases the risk of frayed braid, crushed inner cores, leaks, or personal injury.
- Using dull or wrong cutters causes uneven cuts.
- Poor clamping lets the hose slip.
- Skipping measurement verification yields wrong lengths.
- Rushing ignores safety and inspection steps.
How to prevent braid damage and inner tube collapse
After addressing tool choice, clamping, and measurement errors, attention must turn to preserving the braided jacket and the hose’s inner tube during cutting.
Use sharp, appropriate cutters; score outer braid lightly before full cut; support the inner tube with a mandrel or plug to prevent collapse; maintain steady, even pressure; avoid twisting.
Inspect and trim frayed strands; deburr internal edges before fitting.
When to stop and consult a professional
Recognize when a cut exceeds routine skill: if the hose shows deep braid damage, the inner tube wrinkles or gouges despite supports, or fittings must meet high-pressure or safety-critical specifications, stop and consult a professional.
A technician assesses integrity, selects proper termination methods, and restores rated performance. Avoid risky repairs, improvised fittings, or repeated attempts that worsen damage; prioritize certified replacement or repair.
Pro Tips and Best Practices
Experienced technicians prioritize cutting methods that match hose diameter and braid type to guarantee clean, safe ends.
Routine maintenance—proper sealing, inspection, and storage—extends service life and reduces failures.
Practical guidance will also weigh cost-saving strategies against safety trade-offs and recommend durable tools and trusted brands for frequent use.
Choosing the right cutting method for hose diameter and braid type
Select a cutting method that matches both the hose diameter and braid construction to guarantee a clean cut, preserve braid integrity, and minimize fraying.
For small diameters and single-layer braid, use fine-toothed rotary cutters or precision shears.
For larger diameters or multi-layer braid, employ abrasive saws or hydraulic cutters with proper clamping.
Match blade type, speed, and support to material for consistent results.
Maintenance tips to extend hose life after cutting
Inspect the freshly cut ends immediately and remove any loose strands or burrs using a stiff brush or deburring tool to prevent fraying and abrasion during service.
Apply corrosion-resistant sealant or tape to exposed braid, verify ferrule and fitting integrity, and torque fittings per specs.
Implement regular inspections, clean with appropriate solvents, protect hoses from rubbing or sharp edges, and replace damaged sections promptly to maximize service life.
Cost-saving strategies vs. safety trade-offs
After finishing post-cut maintenance, technicians must weigh cost-saving methods against potential safety compromises to guarantee long-term reliability.
Cheaper fittings, omitted inspections, or skipping corrosion protection reduce immediate expense but increase failure risk.
Prioritizing inspections, proper end fittings, and protective coatings minimizes downtime and liability.
Budgeting for quality materials and routine checks often proves more economical over a hose assembly’s lifecycle.
Recommended tools and brands for frequent use
When cutting steel braided hose frequently, technicians rely on high-quality, purpose-built tools—such as carbide rotary cutters, hydraulic hose cutters, and precision bench vises—to guarantee clean, square cuts and protect braid integrity.
Choosing reputable brands with proven durability and service support reduces downtime and long-term costs.
- RIDGID hydraulic cutters
- KNIPEX carbide rotary tools
- PARKER bench vises and fittings
- KLEIN insulated hand tools
Quick Reference Cheat Sheet
A concise cheat sheet lists recommended cutting tools by hose type and diameter to guarantee proper fit and clean results.
It also outlines a step-by-step checklist covering preparation, cutting technique, and post-cut inspection for safety and leak prevention.
Readers can use this quick reference to confirm tool choice and follow a reliable process before each cut.
Tool selection guide by hose type and diameter
Select the correct cutting tool by matching hose construction and nominal diameter to the tool’s blade type, clearance, and leverage requirements. The guide lists blade style (shear, abrasive, rotary), capacity and preferred use for braided, spiral, and multi-layer hoses. Choose high-leverage cutters for >1″ sizes and rotary/abrasive for dense braids to maintain clean, square ends.
| Hose type | Recommended tool |
|---|---|
| Braided | High-leverage rotary |
| Spiral/multi-layer | Abrasive wheel |
Step checklist for a safe, clean cut
With the proper cutter chosen for the hose type and diameter, the operator should follow a concise, ordered checklist to achieve a safe, square cut and prevent fraying or injury.
Inspect hose and mark cut; secure with vise or clamp; use correct cutter, steady 90° cut; deburr, seal ends, and verify dimensions.
- Inspect and mark
- Secure hose
- Cut squarely
- Deburr and seal
Conclusion
Like a surgeon closing a crucial artery, the final act on a steel-braided hose demands steady hands, the right tools, and wary respect for pressure and purpose. When cut cleanly, finished properly, and reassembled with compatible fittings, the hose returns to service like a repaired bridge—silent, strong, and safe. Neglecting steps invites leaks, injury, or failure; consequently, diligence and testing are not optional but the craft’s quiet covenant.