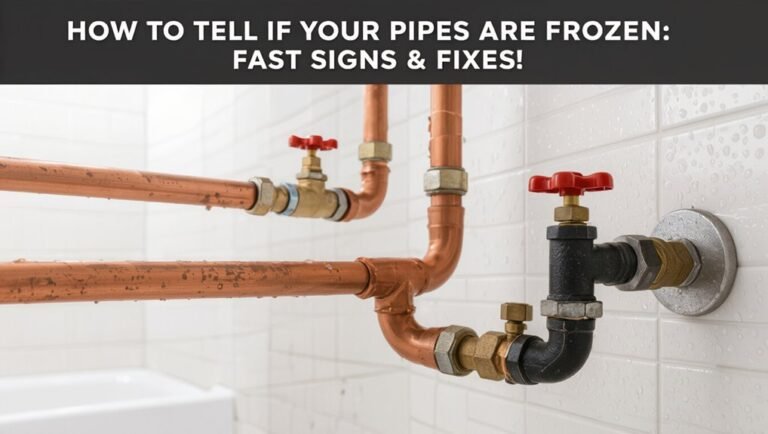
How to Repair a Yard Hydrant: Step-by-Step Fixes for Leaks, Frozen Pipes, and Low Flow
To repair a yard hydrant experiencing slow flow, leaks, or frost damage, follow these essential steps: first, shut off and drain the water supply. Next, inspect the seals and spindle for wear, replacing any damaged packing or stem components. Reassemble the hydrant ensuring proper alignment and use of sealant. For frozen hydrants, thaw them safely, check for cracks, and replace any broken parts. If you’re facing low flow, it may be due to debris or closed valves; testing the flow and pressure can help identify the problem. Continue reading for detailed step-by-step instructions and preventive maintenance tips.
Overview of Yard Hydrant Problems and When to Repair
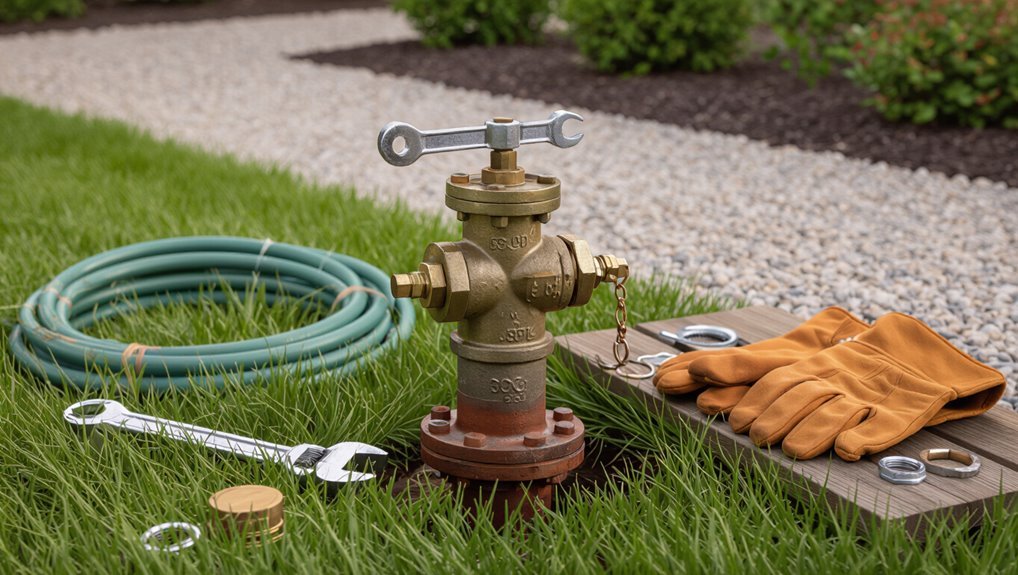
Common indicators that a yard hydrant requires attention include leaking at the stem or head, reduced or erratic flow, and visible damage or freezing.
Before any repair is attempted, basic safety precautions—shutting off the water supply, relieving pressure, and wearing eye and hand protection—should be observed.
Essential tools typically include adjustable wrenches, replacement washers or packing, pipe sealant, and a flashlight for inspection.
Common signs a yard hydrant needs repair
A yard hydrant shows several clear indicators when it requires attention: slow or inconsistent flow, visible leaks around the packing nut or base, water that sputters or sprays instead of running smoothly, and frost heave or misalignment after cold weather.
Additional signs include persistent low pressure, muddy discharge, or a handle that sticks. Recognizing these prompts guides timely how to repair a yard hydrant.
Safety precautions and tools required
Noting those warning signs leads directly to preparing for repair work with proper safety measures and the right tools.
The technician dons gloves, eye protection, and insulated footwear, shuts off and drains water supply, and verifies no electrical hazards.
Essential tools include adjustable wrenches, pipe cutters, replacement seals, plumber’s grease, a hydrant key, and a torch or heat source for thawing frozen sections.
Quick Diagnosis: Determine the Cause of the Issue
A brief inspection should locate visible leaks at the spout, packing nut, or buried riser and note any wet soil or pooling.
Simple tests—operating the hydrant to check for ice blockage, listening for running water when closed, and measuring flow and pressure—help confirm frozen components or low-flow causes like sediment or a partially closed valve.
If the source is unclear, internal parts are compromised, or repairs require digging or pressurized-system work, a professional should be called.
How to identify a leak location
Where is the water escaping? Inspect the hydrant, riser, valve bonnet and surrounding ground for visible wetness, pooling, or soggy soil.
Run the hydrant briefly and watch joints, packing nut and hose connections for drips.
Check the pitless adapter and freeze sleeve if present.
Mark the suspected spot, clean it, then monitor to confirm steady leakage before repair.
How to test for frozen components
Begin by isolating the hydrant and observing whether pipes, fittings, or the riser feel unusually cold or show frost, signs that ice is obstructing flow.
Check for lack of drainage after shutting off water; tap fittings gently to listen for hollow versus solid sounds.
Inspect exposed joints and the valve chamber for visible ice, and document locations before thawing attempts or repairs.
How to check for low water flow causes
Several simple checks can quickly distinguish whether low flow stems from the hydrant itself, supply issues, or downstream restrictions.
Inspect inlet screen and supply valve for debris or partial closure. Open hydrant fully and measure flow duration and pressure with a bucket and stopwatch.
Check other fixtures on the same line for statewide reduction. Listen for pipe noises indicating leaks or air locks.
When to call a professional
If basic checks—screening for debris, verifying the inlet valve, and measuring flow—fail to identify or resolve the problem, a professional should be consulted.
A licensed plumber or irrigation specialist can perform pressure tests, inspect buried supply lines, assess valve assembly integrity, and detect frozen or cracked pipes.
Call professional help when repairs require excavation, permit work, specialized tools, or when recurring issues persist.
Step-by-Step Repair for a Leaking Yard Hydrant
Before beginning repairs, the water supply is shut off and the hydrant is drained to prevent flooding and ease disassembly.
The technician then inspects and replaces the packing gland and seals, followed by removal and replacement of the hydrant stem and washer if worn.
Finally, the unit is reassembled and tested under pressure to confirm the leak is resolved.
Shutoff and drain procedures before repair
Shut off the water supply and fully drain the hydrant before beginning any repairs to prevent flooding and internal pressure hazards.
Locate and close the isolation valve or main, open the hydrant to relieve pressure, and insert a drain plug or loosen packing to allow complete drainage.
Verify zero flow, dry the interior, and cap the supply if repairs will be delayed.
Inspecting and replacing packing gland and seals
Begin by visually inspecting the packing gland area for signs of leakage, corrosion, or damaged packing; note any mineral buildup or wear that could compromise a seal.
Remove the gland nut, extract old packing rings, and clean the shaft and bore.
Replace packing with compatible material, reassemble with correct compression, and test for leaks, repeating adjustment until sealing is secure.
Replacing the hydrant stem and washer
With the packing gland reseated and checked for leaks, attention shifts to the hydrant stem and washer, components that commonly wear and cause dripping at the spout.
Shut water, remove handle and bonnet, extract stem with care. Inspect threads and seating surface; replace worn washer and any corroded stem.
Lubricate threads, fit new components, secure bonnet per torque specifications to restore proper seal.
Reassembling and testing for leaks
Reassemble the hydrant by reversing the disassembly steps, ensuring each component is aligned and seated correctly before tightening.
Once assembled, slowly restore water pressure and observe connections, bonnet, and packing for leaks.
Operate the handle multiple times to cycle the stem and confirm shutoff.
If small drips appear, tighten packing nut incrementally; persistent leaks require reinspection of seals and correct seating.
Fixing a Frozen Yard Hydrant
The section explains how frost-free hydrants keep water below the frost line and why exposed models are prone to freezing.
It outlines safe thawing techniques to avoid pipe or valve damage, then covers diagnosing and replacing internal parts harmed by ice.
Finally, it recommends preventive upgrades and installation practices to reduce the risk of future freezes.
How frost-free yard hydrants work
Frost-free yard hydrants keep water from freezing by locating the shutoff below the frost line, so when the above-ground handle is turned off the remaining water drains away from exposed piping.
A long stem connects the handle to the underground valve; gravity and a slight slope in the riser clear residual water. Durable seals prevent backflow and permit reliable winter operation without heat.
Safe thawing methods for frozen hydrants
When a yard hydrant freezes, safe thawing focuses on restoring flow without damaging the unit or risking injury. Professionals and homeowners should prioritize controlled heat, proper tools, and caution around pressurized water.
Apply warm (not open) heat—electric heat gun, warm water, or heated blankets—working gradually from the spout toward the frost line.
Shut off supply if possible, vent pressure, and monitor for leaks during thaw.
Repairing freeze-damaged internal parts
Begin by evaluating the extent of internal damage caused by freezing: inspect the hydrant for visible cracks, test operation to identify stuck or leaking components, and listen for abnormal sounds indicating fractured seals or bent rods.
Disassemble the barrel, remove broken packing, replace damaged seat, stem, or check valve parts with OEM or compatible replacements, clean debris, lubricate moving parts, and reassemble, testing for proper seal and flow.
Preventive upgrades to reduce future freezing
Although a repaired hydrant can function correctly, preventive upgrades greatly reduce the risk of future freeze damage by improving heat retention, drainage, and component resilience.
Common measures include adding heat-tracing or insulation, installing a frost collar or improved protective cover, lowering the hydrant rod or extending the drop to increase the thaw zone, and replacing vulnerable parts with cold-tolerant designs or materials.
Regularly slope and insulate surrounding soil, fit a thermostatic heat cable, and choose stainless or polymer components to minimize future failures.
Troubleshooting and Fixing Low Flow or No Flow
When a yard hydrant delivers low flow or no flow, the first checks should be the supply line and main shutoff valves to confirm they are fully open and intact.
If valves are fine, sediment, debris, or internal blockages are inspected and cleared, and pressure and flow are measured with a hose-bib gauge to pinpoint restrictions.
Persistent low pressure may require replacing or upsizing supply piping to restore adequate flow.
Checking supply line and main shutoff valves
Start by isolating the water source to confirm whether the yard hydrant’s low or no flow is caused by a closed or partially closed valve upstream.
Inspect supply-line valves, main shutoff, and any gate or ball valves for full open position and proper operation.
Verify nearby isolation valves aren’t corroded, seized, or leaking.
Restore or replace faulty valves, then retest hydrant flow.
Clearing sediment, debris, and blockages
Examine the hydrant for signs of sediment and foreign material, since mineral buildup, gravel, or organic debris commonly restricts flow.
Remove the nozzle, screen, and packing nut; inspect seals and the standpipe.
Flush with clean water, use a soft brush or pipe cleaner to dislodge deposits, and vacuum loose material.
Reassemble components, replace damaged screens, and retest for improved flow.
Testing pressure and flow with a hose bib gauge
Attach a hose bib gauge to the hydrant outlet to measure static pressure and flow rate before making repairs.
Record static pressure with all valves closed, then open the hydrant fully to note residual pressure under flow.
Compare readings to expected values to identify supply limitations versus internal obstruction.
Use results to prioritize internal cleaning, valve replacement, or further upstream investigation.
Replacing or upsizing supply piping if needed
If flow tests indicate adequate upstream pressure but persistently low output at the hydrant, replacing or upsizing the supply piping may be necessary to remove bottlenecks and restore capacity.
Evaluate pipe material, diameter, length, and fittings; calculate friction loss; and select a larger diameter or smoother pipe.
Install with proper slope, supports, and frost protection, then retest flow to confirm improvement.
Replacing the Entire Yard Hydrant
When a yard hydrant must be replaced, the technician first selects the correct type and size to match the existing supply and frost-free requirements.
The process then moves to excavating and removing the old unit, followed by a clear, step-by-step installation of the new hydrant.
After installation, the crew backfills and compacts the trench and performs final tests to confirm proper operation and leak-free connections.
Selecting the right type and size of hydrant
Choosing the appropriate yard hydrant for a full replacement requires matching the unit’s type, size, and materials to the property’s water supply, expected usage, and climate conditions.
Assess flow rate, inlet pipe diameter, frost-free depth, and mounting style. Choose brass or stainless components for corrosion resistance.
Confirm valve style (rising stem or ball), pressure rating, and compatibility with existing fittings to guarantee reliable, long-term performance.
Excavation and removal of the old hydrant
With the appropriate replacement selected and fittings verified, attention turns to excavating and removing the existing yard hydrant to prepare the ground for installation.
The process includes shutting off supply, draining residual water, digging to expose the bury depth and pipe connections, cutting or unthreading the riser, extracting the hydrant and base, and clearing debris while preserving undamaged service piping for the new fitment.
Installing a new hydrant step-by-step
Begin the installation by confirming the water supply remains shut and the trench is clear.
Then position the replacement hydrant near the excavation so fittings and alignment can be checked before final assembly.
Connect pipe with proper couplings, apply thread sealant or gasketed joints, set hydrant at correct depth and grade, brace securely, torque fittings to spec, and reinstall isolation valve and drain components before moving to finishing steps.
Backfill, compaction, and final testing
After the hydrant is set, fittings torqued, and the isolation valve reinstalled, attention turns to backfilling, compaction, and final testing to guarantee long-term performance.
Backfill with clean, granular material in layers, compacting each to prevent settling. Restore surface grade and vegetation.
Reopen supply slowly, check for leaks, verify full flow and shutoff.
Document installation depth and test results for future reference.
Preventive Maintenance and Seasonal Care
A concise preventive maintenance plan keeps a yard hydrant reliable and extends its service life.
It should include a regular inspection checklist, clear winterizing procedures for cold climates, and a lubrication and seal maintenance schedule.
Following these steps reduces leaks, freeze damage, and unexpected failures.
Regular inspection checklist
While small issues often start unnoticed, a concise regular inspection checklist helps prevent costly failures and seasonal surprises.
The checklist guides routine checks for leaks, flow, hardware condition, and vegetation interference.
- Check for visible leaks at spout and packing
- Verify steady flow and pressure
- Inspect handle and stem for wear
- Clear surrounding debris and vegetation
- Confirm drainage and surface grading are adequate
Winterizing procedures for cold climates
Many yards in cold regions require winterizing to prevent hydrant freeze damage and costly repairs.
Drainage of the riser, closing any isolation valves, and ensuring the hydrant is fully shut off reduce trapped water.
Insulating exposed piping and installing frost caps or heated enclosures where practical add protection.
Schedule winter checks and remove hoses before first freeze to minimize risk.
Lubrication and seal maintenance schedule
Regular lubrication and timely seal replacement form the foundation of a yard hydrant’s preventive maintenance, ensuring smooth valve operation and preventing leaks that can lead to corrosion or freeze damage.
Inspect seals and packing quarterly; apply silicone-based grease to moving parts annually before freeze season.
Replace worn O-rings or neoprene seals immediately.
Record dates, parts replaced, and observed flow to guide future service.
Parts, Tools, and Materials Checklist
A concise inventory of parts, tools, and materials prepares the reader for most yard hydrant repairs.
The list covers essential tools, common replacement parts and consumables, and typical price ranges.
Sources for parts and suggested retailers are noted to help obtain needed items quickly.
Essential tools for most repairs
Before beginning any repair, assemble a concise kit of parts, tools, and materials tailored to common yard-hydrant problems so work proceeds efficiently and without interruptions.
Essential tools include basics for diagnostics, disassembly, sealing, and safety. Keep items organized and ready to avoid delays.
- Adjustable wrench
- Pipe wrench
- Screwdrivers (flat and Phillips)
- Teflon tape and plumber’s grease
- Utility knife
Common replacement parts and materials
Common replacement parts for yard hydrants cover the components most likely to fail: packing kits (O-rings and leather or synthetic packing), spindles and valve seats, nozzle caps and chain assemblies, hose bib stems, and freeze plugs or check valves.
Recommended materials and extras include durable brass components, stainless fasteners, thread sealant, replacement gaskets, and potable-grade lubricants.
- Packing kits
- Spindles/valves
- Nozzle caps/chains
- Freeze/check valves
- Seals/gaskets
Estimated costs and where to buy parts
Having outlined the typical replacement parts and recommended materials, the next step is a practical checklist with estimated costs and reliable sources for purchasing parts, tools, and supplies.
Typical costs:
- packings $5–15
- stems $20–40
- hydrant bodies $50–150
- gaskets $3–10
- pipe sealant $5–10
- basic tool set $25–70
Buy at local hardware stores, plumbing suppliers, or online retailers like Home Depot, Lowe’s, and Amazon.
Troubleshooting Matrix for Common Symptoms
A concise troubleshooting matrix helps interpret diagnostic results and decide clear next steps for common yard hydrant issues. Below is a quick reference linking symptom, likely cause, and the recommended action:
| Symptom | Suggested Action |
|---|---|
| No water flow | Check supply valve and freeze damage; repair or thaw and replace damaged riser |
| Leaks at stem | Replace packing or worn stem assembly |
| Intermittent flow | Inspect foot valve and debris; clean or replace as needed |
This matrix guides interpretation of test outcomes and points to the appropriate repair or further inspection.
How to interpret diagnostic results and next steps
Use the troubleshooting matrix to translate observed symptoms and test results into prioritized actions: match the symptom (no flow, weak flow, leaks, or pressure loss) with corresponding diagnostic findings (air in line, frozen pipe, valve seat wear, or debris) to determine whether repair, parts replacement, or professional service is required.
Document findings, select corrective steps by severity, source needed parts, schedule repairs, or call a licensed plumber for complex or unsafe conditions.
Tips to Extend the Lifespan of a Yard Hydrant
The following tips focus on extending a yard hydrant’s service life through proper installation, routine care, and informed use.
Attention to installation best practices—correct siting, frost protection, and secure anchoring—reduces mechanical stress and leaks.
Considering water quality and filtration, along with practical maintenance routines recommended by professionals and experienced homeowners, helps prevent corrosion and clogging.
Installation best practices for longevity
Proper installation practices greatly reduce maintenance needs and extend a yard hydrant’s service life.
Install on stable, well-drained ground with frost-free depth and adequate gravel bedding. Use corrosion-resistant materials, secure joints with proper sealants, and slope piping for drainage.
Anchor the post to prevent movement, follow manufacturer torque specs, and pressure-test connections before backfilling to detect leaks early.
Water quality considerations and filtration
Several factors in source water—mineral content, sediment load, pH, and microbial presence—directly affect a yard hydrant’s components and performance.
Regular testing identifies hard water, corrosive pH, or bacteria. Appropriate filtration (sediment filters, water softeners, carbon) and targeted treatments reduce scale, corrosion, and biofilm.
Maintain and replace filters per manufacturer schedules to preserve seals, valves, and flow efficiency.
Practical tips from professionals and homeowners
Adopted habits from experienced plumbers and longtime homeowners can greatly extend a yard hydrant’s service life. Routine inspection, winterizing, and timely repairs prevent common failures.
Recommended practices include:
- Drain and blow out before freezing temperatures
- Lubricate stem seals annually
- Replace worn washers promptly
- Use filtered supply to reduce sediment
- Install a frost-free model where practical
Conclusion
Like a seasoned mechanic tuning a trusted old engine, the homeowner who follows these steps restores the yard hydrant to reliable service. Repairing leaks, thawing frozen sections, and restoring flow becomes a practiced ritual—part plumbing, part stewardship—so the fixture endures through seasons. With basic tools, timely maintenance, and attentive diagnosis, the hydrant returns to steady duty, offering water on demand and a quiet assurance reminiscent of simpler, well-kept days.