How to Use a Pipe Hanger: Step-by-Step Guide for Secure, Code-Compliant Installation
To securely install a pipe hanger, follow these steps to ensure it meets load requirements and code compliance. Begin by selecting the appropriate support device—such as clamps, clevises, U-bolts, or rod hangers—based on the pipe material and environment. Prepare by locating structural members and marking spacing according to code regulations, while also allowing for thermal movement. Install the hanger following the manufacturer’s torque and anchoring specifications, and verify that all clearances are met. Finally, document all inspections and conduct regular maintenance checks for corrosion or loosening to ensure ongoing safety. For detailed procedures and code references, continue reading.
What a Pipe Hanger Is and When You Need One
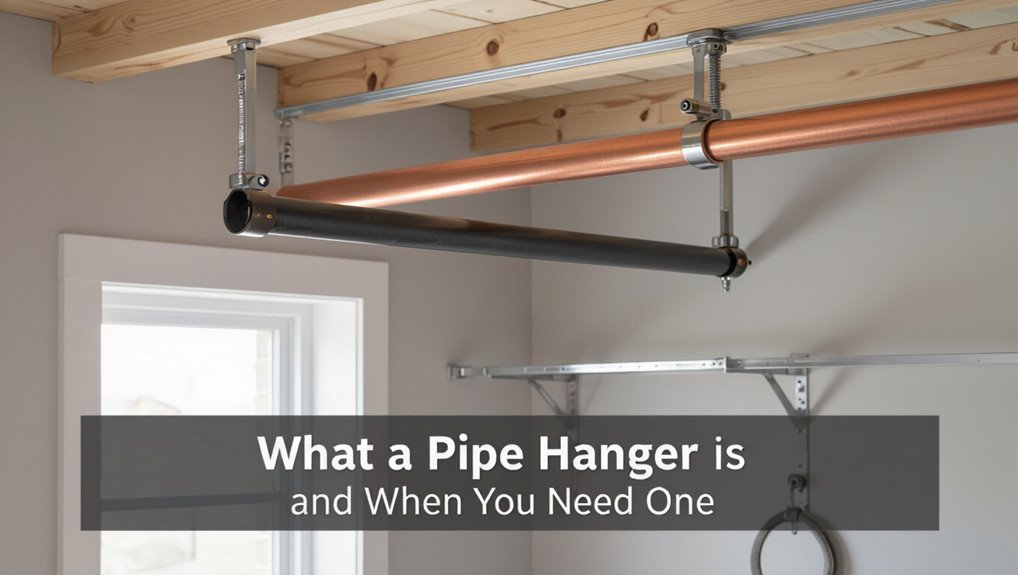
A pipe hanger is a support device available in several forms—clamps, clevises, rod hangers, and saddle supports—chosen for load, movement allowance, and corrosion resistance.
Selection depends on pipe material and system: plumbing, HVAC, gas, and sprinkler lines each have typical hanger types and spacing requirements.
Applicable building codes and standards dictate allowable loads, spacing, and attachment methods to guarantee safety and compliance.
Types of pipe hangers and supports
When selecting pipe hangers and supports, understanding the different types is essential to guarantee proper load distribution, vibration control, and thermal movement accommodation.
The guide explains how to use a pipe hanger across common categories, emphasizing selection criteria, material compatibility, and spacing requirements.
- Clevis and U-bolt hangers for rigid support
- Spring and sway restraints for vibration control
- Roller and sliding supports for thermal movement
Common applications by pipe material and system (plumbing, HVAC, gas, sprinkler)
After identifying hanger types and their performance characteristics, the selection process next considers the piping material and the system application, since load, corrosion resistance, thermal expansion, and code requirements vary by use.
Copper and CPVC plumbing favor cushioned clamps; steel HVAC ducts and chilled-water lines require vibration isolators and adjustable clevises; gas lines need rigid, grounded supports; sprinkler systems use corrosion-resistant, seismic-capable hangers.
Building codes and standards that govern pipe hanger use
Because pipe hangers directly affect structural integrity, fire safety, and system performance, numerous building codes and industry standards prescribe their selection, installation, and testing.
Applicable references include the International Building Code, NFPA standards for fire protection, ASME B31 piping codes, ASTM material specifications, and local plumbing and mechanical codes.
Compliance guarantees load capacity, spacing, seismic restraint, corrosion protection, and inspection requirements are met.
Choosing the Right Pipe Hanger for Your Project
Selecting the correct pipe hanger requires matching hanger type and size to the pipe’s diameter, material, and expected load.
Corrosion resistance, appropriate insulation or padding, and vibration control should be evaluated for the application environment.
A concise tools-and-materials checklist guarantees the chosen hanger can be installed safely and correctly.
Matching hanger type to pipe size, material, and load
Choosing the right pipe hanger requires matching hanger type to the pipe’s diameter, material, and the static and dynamic loads it will carry.
Hanger selection must consider weight per foot, full-span support versus point supports, and connection strength.
Use clamps for rigid metal, split-ring or cushioned supports for insulated or brittle materials, and engineered hangers for heavy or variable-load systems to guarantee secure, code-compliant installation.
Corrosion resistance, insulation, and vibration considerations
Several factors—corrosion resistance, thermal insulation, and vibration isolation—must be evaluated together when specifying hangers to confirm long-term pipe performance.
Material selection (stainless, galvanized, or coatings) and compatibility with piping media prevent degradation.
Insulating pads control thermal bridging and condensation.
Vibration isolators or resilient inserts reduce noise and fatigue.
Specify ratings for environment, temperature, and dynamic loads to affirm durability and compliance.
Tools and materials checklist for installation
A concise checklist of tools and materials helps guarantee a smooth pipe hanger installation and prevents costly delays.
The installer verifies hanger type, size range, and corrosion rating; selects anchors, fasteners, and vibration isolators; and prepares cutting, measuring, and torque tools.
Documentation and code references are included for compliance.
- Pipe hangers, clamps, insulation sleeves
- Anchors, bolts, washers, isolators
- Tape measure, level, torque wrench
Preparing for Installation
Before installation, the installer inspects the mounting surface and locates structural members to guarantee secure anchoring.
They measure spacing and calculate hanger intervals according to applicable code requirements.
Finally, they mark the layout and plan for thermal expansion to allow appropriate movement and prevent stress.
Assessing the mounting surface and locating structural members
Inspect the mounting area to determine material, condition, and access for fasteners.
The installer identifies studs, joists, concrete, or metal framing, noting corrosion, rot, or finished surfaces.
Use visual inspection, tapping, stud finders, and small exploratory holes where permitted.
Confirm load-bearing members and clearances for pipe routing, ensuring chosen attachment points provide secure anchorage without compromising structural integrity.
Measuring spacing and calculating hanger intervals per code
Properly spacing hangers guarantees pipe support, prevents sagging, and complies with applicable plumbing and mechanical codes.
Installers reference code tables for maximum spans by pipe material and diameter, adjust for weight, insulation, and slope, and calculate intervals accordingly.
Special conditions—long unsupported runs, vertical drops, or heavy fixtures—require closer spacing or additional supports.
Document measurements before ordering hardware.
Marking layout and planning thermal expansion allowances
Lay out hanger locations with a chalk line or laser level to establish a straight, consistent reference and mark exact positions for each support on the structural substrate.
Account for thermal expansion by marking expected movement ranges, adding expansion loops or sliding supports where needed.
Note fixed points versus guided supports, document clearances and material-specific expansion coefficients, and verify spacing against pipe size and operating temperature.
Step-by-Step Installation for Common Hanger Types
The following section outlines concise, step-by-step procedures for installing common hanger types used in piping systems.
It covers clevis hangers and pipe saddles, beam clamps and U-bolts, rod hangers with threaded rod assemblies, cushioned or insulated hangers for HVAC and chilled piping, and methods for securing hangers on vertical risers and offsets.
Each procedure emphasizes correct alignment, load capacity verification, and secure fastening to guarantee safe, code-compliant support.
Installing clevis hangers and pipe saddles
Begin by identifying the pipe size, load requirements, and mounting surface to select the correct clevis hanger or pipe saddle; this guarantees the chosen hardware matches the pipe diameter, weight, and thermal movement needs.
Position hangers at manufacturer’s spacing, level and align pipe, secure clevis pins or saddle straps, torque fasteners to spec, add insulation or vibration pads as required, and verify clearances and vertical support.
Installing beam clamps and U-bolts
Install beam clamps and U-bolts by first confirming beam size, pipe diameter, and load requirements to select appropriately rated hardware; mismatched clamps or undersized U-bolts can compromise support and safety.
Position clamps on compatible flange faces, torque set screws per manufacturer, and fit U-bolts snugly around pipe with protective saddles to prevent galvanic contact.
Verify alignment, torque, and clearances before commissioning.
Installing rod hangers and threaded rod assemblies
When preparing to install rod hangers and threaded rod assemblies, technicians should first confirm load calculations, rod size, thread type, and hanger compatibility to guarantee the selected components meet code and manufacturer specifications; proper planning reduces rework and safety risks.
Next, mark locations, drill anchors or attach beam clamps, cut and thread rods to length, install locknuts and washers, torque to spec, and verify alignment and clearance.
Installing cushioned/insulated hangers for HVAC and chilled piping
Several common cushioned and insulated hanger types—such as neoprene-lined pipe clamps, rubber-insert U-bolts, and cushioned split-ring supports—are used to minimize vibration transmission, prevent thermal bridging, and protect insulation on HVAC and chilled piping.
Install hangers at specified spacing, size pads to pipe diameter and insulation thickness, torque fasteners per manufacturer, maintain isolation between metal and insulated surfaces, and verify alignment and load capacity.
Securing hangers for vertical risers and offsets
After lining and cushioning hangers on horizontal runs, attention shifts to securing supports for vertical risers and offsets, where gravity loads, thermal movement, and alignment forces differ.
Vertical risers require continuous support, guide devices, and anchor points to control sway and load transfer.
Offsets need properly spaced hangers, swivel or spring hangers for movement, and verified plumb alignment to prevent undue stress.
Ensuring Code Compliance and Structural Safety
The installer confirms hanger load capacities and allowable deflection against applicable codes and manufacturer data.
Anchoring methods and approved fasteners are selected for each substrate to guarantee secure support and compliance.
A concise inspection checklist is completed prior to system pressurization or startup to verify fittings, fasteners, and alignment.
Verifying load capacities and deflection limits
Begin by determining the maximum load the hanger and supporting structure must carry, including the weight of the pipe, contents at full capacity, insulation, and any anticipated transient loads.
Calculate required safety factors per code, compare hanger rated capacity and supporting member strength, and verify allowable deflection limits for span and pipe material.
Document calculations and confirm compatibility with applicable standards and load combinations.
Anchoring methods and approved fasteners for different substrates
Select anchoring methods and fasteners that match the substrate, load requirements, and applicable code provisions to guarantee secure, durable pipe support. Determine concrete anchors, masonry anchors, toggle bolts, or screw anchors per load; use epoxy anchors for high loads and stainless fasteners in corrosive environments. Verify manufacturer ratings and code acceptance.
| Substrate | Anchor Type | Typical Use |
|---|---|---|
| Concrete | Wedge/epoxy | Heavy loads |
| Masonry | Sleeve/toggle | Medium loads |
| Drywall/wood | Toggle/screw | Light loads |
Inspection checklist before system pressurization or startup
After verifying anchors and fasteners are appropriate for substrate and load, a systematic pre-pressurization inspection guarantees supports, hangers, and attachments meet code and design intent.
The inspector confirms torque, load direction, alignment, and corrosion protection; verifies spacing and lateral restraint; and documents deficiencies for correction prior to startup.
- Check torque, alignment, and secure attachments.
- Verify spacing, lateral restraint, and load paths.
- Confirm corrosion protection and record corrective actions.
Common Installation Problems and How to Fix Them
Common installation issues include misaligned hangers and sagging pipe, noise and vibration from inadequate support or thermal movement, and corrosion or moisture damage.
Remedies range from repositioning and re-spacing hangers to adding expansion loops, isolation pads, or vibration isolators, and applying coatings or drainage to prevent corrosion.
The following section outlines practical corrective steps and preventive measures for each problem.
Misaligned hangers and sagging pipe corrective steps
Addressing misaligned hangers and sagging pipe requires identifying the span and points of failure, then applying corrective steps to restore proper support and alignment.
Inspect hanger spacing, replace damaged or incorrect hangers, reposition or add intermediate supports, and relevel runs.
Secure joints and guarantee pipe slope where required.
Verify loads meet hanger ratings and confirm alignment before final tightening and testing.
Noise, vibration, and thermal movement issues mitigation techniques
Control noise, vibration, and thermal movement by isolating dynamic forces, accommodating expansion, and damping transmitted energy at attachment points.
Use vibration isolators, resilient pads, and spring hangers where machinery or flow-induced vibration occurs.
Include sliding or guided expansion loops and properly rated expansion joints.
Secure clamps to minimize rattle without restricting movement.
Verify clearances and test under operating temperatures to confirm performance.
Corrosion and moisture damage prevention and remediation
Corrosion and moisture damage at pipe hanger installations degrade support integrity and shorten system life if not anticipated and corrected.
Inspect materials for corrosion resistance, apply coatings or galvanization, and use stainless or nonferrous hardware where appropriate.
Guarantee drainage, vapor barriers, and ventilation to limit moisture.
Replace compromised hangers, treat surrounding metal, and document maintenance intervals to prevent recurrence and guarantee code compliance.
Maintenance, Inspection, and Replacement Guidelines
A regular inspection schedule helps identify corrosion, loosened fasteners, deformation, and other signs of hanger failure before they compromise the piping system.
When replacement or retrofitting is required, technicians should select compatible hangers and follow safe removal and installation procedures to maintain alignment and load distribution.
Accurate record-keeping and updated as-built documentation guarantee future inspections and modifications can be performed efficiently and traceably.
Routine inspection schedule and signs of hanger failure
Regular inspections should be performed on pipe hangers at defined intervals to detect wear, deformation, loosening, or other early signs of failure before they compromise the system.
Inspectors document condition, measure clearance and load effects, and compare against schedules. Immediate attention is required for suspect hangers.
- Corrosion, cracked welds, bent straps
- Excessive sagging or misalignment
- Loose bolts, worn vibration isolators
Replacing or retrofitting hangers in existing systems
Begin by evaluating the existing hanger layout, load conditions, and attachment points to determine whether replacement or retrofit is required and what type of hardware will meet current codes and service demands.
Remove failed or undersized hangers, verify pipe alignment and support spacing, select corrosion-resistant, code-compliant replacements or retrofit kits, and guarantee secure anchorage.
Test supports under operational loads and correct deflections.
Record-keeping and as-built documentation best practices
Thorough records and accurate as-built documentation guarantee traceability of hanger types, locations, and modifications throughout a system’s service life.
Documentation should include installer, date, material specifications, load ratings, and deviation notes.
Use standardized templates, digital photos, and version-controlled CAD or BIM updates.
Retain inspection reports, maintenance actions, and replacement histories to support compliance, troubleshooting, and lifecycle planning.
Safety Precautions and Best Practices
Before beginning pipe hanger work, the installer should don appropriate personal protective equipment and follow established safe working procedures.
Tasks near live systems require strict isolation protocols and verification that lines are de-energized or depressurized.
Coordination with other trades and adherence to permit requirements help prevent conflicts and guarantee regulatory compliance.
Personal protective equipment and safe working procedures
When working with pipe hangers, personnel should wear appropriate personal protective equipment—safety glasses, gloves suited to material handling, hard hats where overhead hazards exist, and steel-toed boots—and follow established safe work procedures such as isolating work areas, verifying load limits, and using rated lifting gear.
Personnel must inspect PPE, secure tools, maintain clear communication, follow manufacturer instructions, and report hazards immediately to minimize incidents.
Working near live systems and isolation protocols
Working near live systems requires strict adherence to isolation protocols to prevent accidental energization, fluid release, or pressure buildup. Personnel must treat all piping and associated equipment as potentially hazardous until they have confirmed de-energization and depressurization through documented lockout/tagout and permit procedures.
Verification includes testing, double-checking valves, blinds or spool removal, and clear tagging. Only authorized, competent staff perform work following written isolation checklists.
Coordination with other trades and permit considerations
Because multiple trades often operate in the same area, clear coordination and formally documented permits are essential to prevent conflicts, resource clashes, and safety gaps.
Designated coordinators should verify scope, sequencing, access restrictions, and handover points through daily briefings and a centralized permit log.
Contractors must confirm permit validity, lockout/tagout responsibilities, inspection windows, and utility clearances, documenting changes and approvals before hanger installation.
Quick Reference Resources
The section provides quick-reference materials such as typical hanger spacing tables and compact charts for common pipe types.
It points to recommended products and manufacturer technical resources for load capacities, installation instructions, and compatibility.
Applicable code sections and standards sources are listed so users can verify compliance and obtain official guidance.
Typical hanger spacing tables and quick charts
When planning pipe hanger layout, quick-reference tables condense manufacturer guidelines and code requirements into usable spacing charts that help guarantee safe support while simplifying installation decisions. Typical tables list pipe size, maximum spacing, and notes; installers consult them for steel, copper, and plastic lines to maintain structural and thermal considerations.
| Pipe Size | Max Spacing | Notes |
|---|---|---|
| 1/2″–1″ | 6 ft | copper |
| 1¼”–2″ | 8 ft | steel |
| 2½”+ | 10 ft | plastic |
Recommended products and manufacturer technical resources
Although installers may favor different brands for cost or availability, reliable pipe hanger selection hinges on matching product specifications to the system’s material, load, and environmental needs.
Manufacturer datasheets, load tables, and corrosion ratings should guide choices. Quick reference resources provide tested options and installation notes.
- Manufacturer technical datasheets and CAD details
- Load/span charts and safety factors
- Corrosion-resistant coating and material guides
Where to find applicable code sections and standards
Code and standards for pipe hangers are located across several authoritative sources—national model codes, industry standards organizations, and manufacturer guidance—that together define required materials, load criteria, seismic restraints, and installation practices.
Relevant references include model plumbing and mechanical codes, ASME/ANSI standards, and manufacturer installation manuals; inspectors and engineers consult them for compliance and detailing.
- International Plumbing and Mechanical Codes (IPC, IMC)
- ASME B31 series and MSS SP standards
- Manufacturer installation guides and seismic design bulletins
Conclusion
Like a careful gardener staking young vines, the installer secures pipes so systems grow straight and strong. Each hanger, chosen and placed with foresight, becomes a steady cane that prevents sagging and strain. Neglect is the storm that bends supports and invites failure; diligent selection, correct spacing, and routine inspection are the sunlight and pruning that preserve reliability. In this way, small acts of proper installation keep the whole network healthy and enduring.