How to Dissolve Plastic Stuck in Toilet: Safe DIY Methods That Actually Work
If plastic is stuck in your toilet, you can safely remove it using a few DIY methods. First, assess the size, depth, and type of plastic. Ventilate the area and put on gloves for protection. For visible pieces, try using a plunger, toilet auger, long-tongued grabber, or pliers for mechanical extraction. If the plastic is softer, pour controlled hot water (120–140°F) mixed with dish soap to help soften and float it. While enzyme cleaners may assist in breaking down some materials, avoid strong solvents that could damage the porcelain. If the plastic remains stuck, it’s best to call a plumber for professional help.
Quick solution summary for dissolving plastic stuck in a toilet
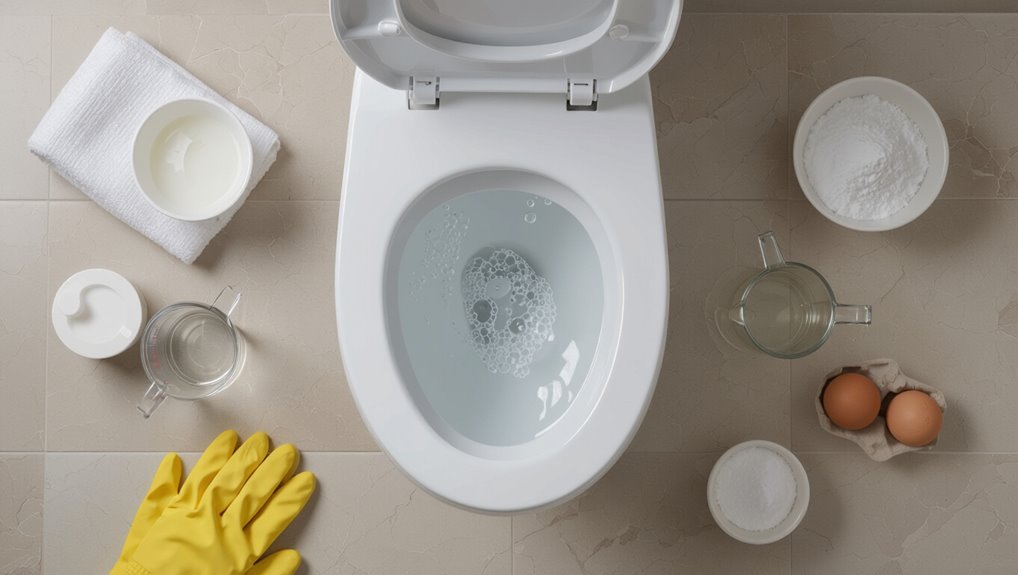
The summary outlines when a homeowner can attempt safe DIY methods to dissolve or dislodge plastic and when the complexity or risk warrants calling a plumber.
It highlights essential safety precautions to take first, such as ventilating the area, wearing gloves and eye protection, and avoiding mixing chemicals.
It cautions that persistent blockages, chemical hazards, or potential damage to plumbing should prompt professional intervention.
When DIY is appropriate and when to call a plumber
Assess whether the blockage is small, visible, and reachable with basic tools before attempting DIY fixes; minor pieces of plastic near the trap or bowl rim can often be retrieved or softened with safe household methods.
For larger, unseen, or recurring obstructions, or if water rises dangerously, contact a plumber.
Professionals handle complex clogs, flange or sewer-line issues, and prevent damage from improper attempts at how to dissolve plastic stuck in toilet.
Safety precautions before you start
After deciding whether a DIY attempt is appropriate, attention turns to safety precautions before attempting to dissolve plastic stuck in a toilet.
The writer recommends wearing gloves and eye protection, ventilating the bathroom, keeping children and pets away, and testing a small amount of any chemical in an inconspicuous area.
Read product labels, have neutralizing agents and a phone nearby, and stop if corrosion or fumes worsen.
Assessing the situation: identify type and location of the plastic obstruction
The writer first assesses the plastic by size, rigidity, and whether it resembles common flushable items or large, hard pieces that resist breaking.
Next, they check visual and accessible areas—bowl, trap, and visible drain line—while noting signs of a deeper blockage such as slow drainage or gurgling.
They recommend having gloves, a flashlight, a plunger, a toilet auger, and basic protective supplies on hand before proceeding.
How to determine if the plastic is flushable or large/hard
How can one tell whether the plastic in a toilet is small and flushable or large and likely to cause a blockage?
Visual inspection and size comparison to the drain opening help: small, flexible pieces (toilet paper-like) often pass; rigid, thick, or folded items exceeding the trap diameter risk snagging.
Texture and buoyancy also indicate behavior—stiff, heavy, or snag-prone plastics require intervention.
How to tell if the plastic is lodged in the bowl, trap, or drain line
Once size and flexibility are evaluated, attention shifts to locating where the plastic is stuck: in the visible bowl, within the toilet’s curved trap, or further down the drain line.
Observe water level and bowl visibility, flush gently to note movement, and listen for gurgling or slowed drainage.
If flushing clears water but not obstruction, the trap or drain line is likely involved.
Tools and items to have on hand
Several basic tools and safety items should be gathered before attempting to locate or remove a plastic obstruction.
Gloves, eye protection, and durable work clothes protect against splashes and debris. A flashlight and mirror aid inspection; a plumber’s snake, toilet auger, or long tongs assist retrieval.
Bucket, rags, and a small pry tool help manage water and gently dislodge lodged plastic.
Step-by-step methods to remove or dissolve plastic safely
The section outlines practical, ordered approaches for dislodging or softening plastic obstructions, from simple tools to professional interventions.
It covers mechanical extraction with household implements, hot water and dish soap for heat-tolerant plastics, enzymatic or biological drain cleaners and their limits, and the hazards of chemical solvents.
It also notes professional-grade techniques a plumber may employ when DIY methods fail or pose risks.
Method 1 Mechanical removal with household tools
Begin by evaluating the size, shape, and position of the plastic piece without flushing. Understanding whether it is large, lodged in the trap, or floating helps determine which household tools and techniques will be effective and safe for removal.
- Wear gloves and eye protection.
- Use pliers or tongs for reachable pieces.
- Employ a coat hanger or plumbing snake for deeper grabs.
- Try a plunger with firm, controlled strokes.
- Remove debris gradually, avoiding force that could damage porcelain.
Method 2 Hot water and dish soap technique (safe for common plastics)
Heat water (not boiling) and add a few drops of dish soap to create a lubricating solution that can soften and help dislodge many common household plastics without chemical solvents.
Pour slowly into the bowl, allowing warmth to reach the blockage for 10–15 minutes.
Use a plunger or gloved hand to nudge the softened plastic; repeat warming and plunging until removal succeeds.
Method 3 Use of enzymatic or biological drain cleaners (what works and limitations)
After attempting warm water and soap, attention can shift to enzymatic or biological drain cleaners as a gentler alternative to harsh chemicals.
These products use microbes or enzymes to break down organic matter; they do not dissolve most plastics but can clear clogs surrounding plastic items.
Follow manufacturer instructions, allow sufficient dwell time, and avoid mixing with other cleaners.
Effectiveness varies by formulation and temperature.
Method 4 Chemical solvents and their risks (when to avoid)
Although chemical solvents can sometimes soften or dissolve certain plastics, they carry significant risks and should be used only when safer mechanical methods have failed and the user can follow strict precautions.
Strong solvents (acetone, lacquer thinner) can damage porcelain, seals, and pipes, produce toxic fumes, and pose fire hazards.
Avoid in poorly ventilated spaces, near children/pets, or with unknown pipe materials; wear PPE and test discreetly.
Method 5 Professional-grade options a plumber may use
A licensed plumber will typically rely on specialized tools and controlled chemical agents that are safer and more effective than household remedies, applying them in sequence to minimize damage to porcelain, seals, and drain piping.
They may use inspection cameras, industrial-grade augers and retrieval claws, hot-water flushing, EPA-approved solvent gels, and localized heat or steam.
Procedures prioritize containment, ventilation, and replacement of compromised components.
Detailed procedure for each safe DIY method
The following section outlines specific preparations, tools, and step-by-step procedures for each safe DIY approach to removing plastic from a toilet.
It covers protecting surrounding surfaces, mechanical techniques (plunger, auger, grabbers), hot water plus soap parameters (temperatures, volumes, timing), enzymatic cleaner selection and application, and simple tests to confirm clearing.
Readers should follow each method in order and stop if obstruction worsens or damage is likely.
Preparing the toilet and protecting surfaces
Before attempting any removal method, clear the area and shut off the toilet’s water supply to prevent accidental flushing or overflow.
Don protective gloves and eye protection.
Lay absorbent towels or plastic sheeting around the base and on nearby fixtures to catch splashes and debris.
Ventilate the room and keep chemical neutralizers and a bucket within reach.
Guarantee good lighting for visibility.
Exact steps for mechanical removal (plunger, auger, grabbers)
Begin by evaluating the visible position and size of the plastic obstruction and choose the method—plunger, auger (toilet snake), or grabber—that best matches its depth and rigidity.
For a shallow blockage, seal and plunge with firm, steady strokes.
For deeper items, insert an auger, rotate until grab, then retract.
Use a long-tongued grabber for visible pieces, extracting gently to avoid damage.
Exact steps for hot water + soap method (temperatures, volumes, timing)
Several simple supplies—hot water, dish soap, and a heat-resistant container—are sufficient for attempting to heat-soften small to moderate plastic obstructions; the procedure requires controlled temperatures (ideally 120–140°F / 49–60°C), measured volumes (enough to submerge the visible plastic portion), and timed intervals (5–10 minutes per application) to avoid damage to porcelain or seals.
Pour soapy water slowly, wait, test with a gloved tool, repeat once or twice, then cool and flush.
Exact steps and product guidance for enzymatic cleaners (application and wait times)
Use an enzymatic cleaner formulated for organic breakdown to soften and help dislodge small plastic fragments that have adhered to toilet surfaces.
Pour manufacturer-recommended dose around affected area, avoiding bleach or acid mixtures. Let sit 4–8 hours (overnight if possible).
Agitate gently with a soft brush, then flush. Repeat once if residue remains.
Rinse thoroughly per product instructions.
How to test whether the obstruction is clearing
After the enzymatic treatment and gentle agitation, attention turns to verifying whether the obstruction is loosening.
Flush tests are performed: run small controlled flushes while observing bowl drainage and water level. Use a plunger between tests to detect improved suction.
For solvent or heat methods, watch for softened edges and incremental movement with a hooked tool; stop if resistance persists or leaks appear.
Comparison of methods: effectiveness, safety, cost, and time
This section compares common approaches for dissolving plastic stuck in a toilet—chemical solvents, hot water and mechanical tools, enzymatic cleaners, and professional plumbing services—evaluating each by effectiveness at removing the obstruction, safety for users and fixtures, direct and indirect costs, and the time required from start to completion.
| Method | Quick visual summary |
|---|---|
| Solvents | Fast, risky, moderate cost |
| Mechanical/hot | Immediate, safe if careful |
| Enzymatic | Slow, very safe, low cost |
Common mistakes and hazards to avoid
The article warns that strong chemical solvents can etch porcelain glaze and corrode plumbing fittings if used improperly.
It notes the serious risk of toxic fumes or chemical reactions from mixing common household cleaners.
It advises techniques to prevent pushing the plastic farther into the trap and sewer line.
Why chemical solvents can damage porcelain and plumbing
Using strong chemical solvents to dissolve plastic lodged in a toilet can quickly corrode porcelain glazes, damage rubber seals, and weaken PVC or older metal pipes.
Solvents may etch finishes, causing discoloration and hairline cracks. They degrade wax rings, gaskets, and flexible connectors, leading to leaks.
Long-term exposure accelerates pipe failure and can necessitate costly repairs or full fixture replacement.
Risks of mixing cleaners and toxic fumes
Mixing household cleaners can produce dangerous chemical reactions that release toxic gases and heat, posing immediate breathing hazards and chemical burns.
Chlorine bleach plus acids or ammonia yields chloramine or chlorine gas; peroxide with bleach can form oxygen bursts.
Ventilation, avoiding combinations, reading labels, and keeping incompatible products separate prevents acute poisoning, respiratory distress, eye injury, and corrosion to fixtures and pipes.
How to avoid pushing the obstruction further down
After noting the respiratory and corrosive dangers of combining household chemicals, attention should shift to physical mistakes that worsen a lodged plastic piece.
Avoid vigorous flushing, prodding with narrow tools, or using drainsnake force without proper grip—these push objects deeper.
Use gentle suction, a flange plunger, or calibrated extraction tools.
Stop and call a plumber if resistance persists to prevent damage and blockage escalation.
If the DIY methods fail: what to expect from professional service
If DIY attempts fail, a professional plumber will typically use tools such as heavy-duty augers, drain cameras, hydro-jetters, or manual removal with specialized grabbers to locate and extract the plastic.
Expect a service call to take from one hour for a straightforward pull to several hours if inspection and breaking up the obstruction are required, with costs varying widely by region and complexity—often ranging from modest service fees to several hundred dollars for extensive work.
The plumber may recommend toilet or drain replacement when the fixture is cracked, the clog is inaccessible without damaging the bowl, or repeated failures indicate underlying system issues.
Typical plumber techniques and tools
Call a licensed plumber when DIY attempts fail; professionals bring equipment and experience to remove stubborn plastic without damaging the trap or toilet.
They use inspection cameras, plumbing snakes or augers, specialized retrieval tools, and wet/dry vacuums.
For fused or fragile blockages, plumbers may employ steam, hot water jets, or controlled disassembly of the trap and sealant-safe solvents applied with caution.
Estimated costs and time for professional removal
When professional intervention becomes necessary, homeowners can expect service time and costs to vary with the problem’s complexity and local rates.
Simple removal by a plumber or drain specialist typically takes 30–90 minutes and costs $100–$300.
More involved retrieval, requiring inspection cameras, extended labor, or specialty tools, can take several hours and run $300–$800 or more, depending on access and urgency.
When toilet or drain replacement is recommended
Although many blockages can be resolved with plunging, augering, or chemical softening, replacement becomes advisable when the fixture or drain shows irreparable damage, persistent leaks, repeated clogs despite professional clearing, or when the cost of repairs approaches that of a new toilet or section of drain.
A plumber will assess structural damage, diagnose inaccessible obstructions, provide a replacement estimate, and schedule removal and installation if repair is impractical.
Preventing future incidents
The article then outlines practical prevention measures to reduce the risk of plastic and other non-flushable items entering the toilet, specifying common materials that should never be flushed.
It also recommends simple household habits and routine maintenance practices to minimize clogs.
Finally, it lists useful products to keep on hand for addressing minor blockages quickly.
What materials should never be flushed
Items such as wipes, sanitary products, cotton swabs, dental floss, and plastics should never be flushed because they can clog pipes, damage sewage systems, and resist breakdown in water treatment processes.
Additionally, grease, cooking oils, paper towels, diapers, cat litter, medication, and non-biodegradable packaging pose serious blockages, chemical contamination, and costly repairs when introduced into domestic or municipal wastewater systems.
Household habits and maintenance tips to reduce clogs
Many household clogs originate from the materials listed previously, so adopting consistent habits and simple maintenance can greatly reduce repeat incidents.
- Inspect plumbing fixtures regularly for slow drains.
- Educate household members about what not to flush.
- Secure trash bins near toilets for disposables.
- Use drain strainers in sinks and tubs.
- Schedule periodic professional inspections for older systems.
Products to keep on hand for minor clogs
Keep a small set of reliable tools and products on hand to handle minor toilet clogs quickly and avoid emergency calls.
Recommended items include a flange plunger, a compact toilet auger, nitrile gloves, a bucket, biodegradable enzyme drain cleaner, and a pair of long-handled tongs.
Store them accessibly and label containers.
Regularly check supplies for damage or expiry to guarantee readiness.
Signs of lingering damage after removal and follow-up checks
After the plastic has been removed, the fixture should be monitored for signs of lingering damage such as slow drainage or subtle leaks around the base and connections.
Simple checks include timing bowl refill, inspecting for water stains, and running a dye test in the tank to reveal hidden leaks.
If slow flow or any leakage persists beyond a day or two, a professional follow-up inspection should be scheduled promptly.
How to check for slow drainage or hidden leaks
Inspect the toilet and surrounding areas closely for subtle signs that a dissolved-plastic blockage caused lingering issues: slow drain times, gurgling noises, water seeping at the base, dampness on the floor or wall behind the bowl, and discoloration or mineral buildup around seals and joints.
Run several test flushes, observe tank refill rate, check under the tank and around supply lines, and monitor for persistent odors or stains.
When to schedule a follow-up inspection
Although the immediate blockage may be cleared, a follow-up inspection should be scheduled whenever signs of residual damage persist—such as recurring slow drainage, persistent gurgling, unexplained moisture at the base or behind the bowl, foul odors that do not dissipate, or discoloration and mineral deposits around seals and joints—since these indicate incomplete removal or chemical damage that can worsen if left unchecked.
A professional evaluates seals, trap integrity, and drain lines, and documents needed repairs.
Quick troubleshooting checklist for repeated clogs
One clear checklist can help identify why clogs recur and which fixes are appropriate.
It guides practical steps to diagnose causes, preventive measures, and when to call a professional.
Consider these checks:
- Inspect for persistent foreign objects or accumulated waste
- Test flush performance and water level
- Check venting and sewer line access
- Verify appropriate toilet paper use
- Note frequency and patterns of clogs
Conclusion
Like a small boat freed from reeds, the toilet regains calm after careful, patient work. The plastic once lodged behaves like a winter snag, coaxed loose by sensible tools and steady hands, or surrendered to professionals when stubborn. Vigilant habits become the lighthouse—simple checks, mindful flushing—guarding against future storms. The restored bowl hints at normal flow; the homeowner carries forward gentle practices, ensuring the plumbing’s quiet sea remains untroubled.