How to Loosen a Stuck Plastic Pipe Fitting: 8 Safe, Professional Techniques
To loosen a stuck plastic pipe fitting, a plumber first evaluates the materials and joint type, identifying potential causes such as overtightening or solvent bonding. After isolating and depressurizing the line, they gather necessary tools like strap wrenches, padded pliers, and a low-temp heat gun. Effective techniques include applying gentle leverage, using heat or warm water, utilizing compatible penetrants, and tapping with rubber. If needed, they may cut and replace glued joints or remove PEX crimps, ensuring careful reassembly with matched fittings. Finally, thorough leak testing confirms success. For detailed steps and precautions, see below.
How to Quickly Assess Why a Plastic Pipe Fitting Is Stuck
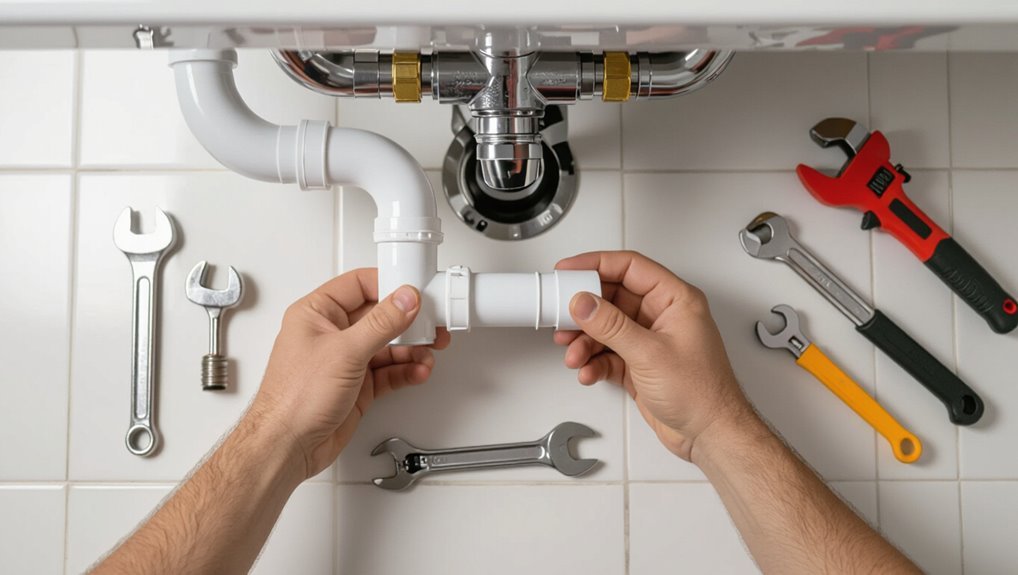
A quick assessment begins by noting common causes such as overtightening, chemical or heat damage, mineral buildup, or adhesive failure.
The inspector then identifies the fitting type and material—compression, threaded, solvent-weld, or push-fit—and whether it is PVC, CPVC, ABS, or polyethylene—to determine compatible removal methods.
Before any action, basic safety checks for pressure, nearby electrical hazards, and appropriate personal protective equipment are confirmed.
Common causes of stuck plastic fittings
Start by inspecting the joint and surrounding area to identify why the plastic fitting resists movement.
Common causes include chemical bonding from solvent cement, mineral or chemical deposits, thread galling, heat-deformation, UV brittleness, trapped debris, or corrosion on adjacent metal parts.
Understanding these factors informs how to loosen a stuck plastic pipe fitting safely and selects appropriate mechanical or chemical remedies.
How to identify the type of fitting and material
Having noted possible causes, the next step is to identify the fitting type and material so the correct loosening method can be chosen.
Inspect for markings (PVC, CPVC, ABS), joint style (threaded, solvent-weld, push-fit, compression), and visible fasteners.
Note color, wall thickness, and any adhesive residue.
Photographs and measurements aid selection of compatible tools and heat or chemical approaches.
Safety considerations before beginning work
Because trapped pressure, residual solvent, or nearby electrical hazards can turn a simple loosening task into a dangerous one, a quick safety assessment should precede any attempt to free a stuck plastic fitting.
Verify water and gas supply isolation, depressurize and drain the line, ventilate spaces with solvent odors, shut off nearby electrical circuits if moisture or tools are present, and wear appropriate PPE.
Immediate Tools and Materials You’ll Need
A concise kit of basic hand tools and protective gear — adjustable pliers, pipe wrenches, gloves and eye protection — is essential before attempting to loosen a stuck plastic fitting.
Heat sources, penetrating agents and a few specialty items (such as a heat gun, plumbing-safe lubricant, and strap wrench) can help free seized connections when used carefully.
If resistance remains or fittings are brittle or cracked, professional equipment or a plumber should be called to avoid damage.
Basic hand tools and safety gear
Gather the essential hand tools and safety gear before attempting to loosen a stuck plastic pipe fitting to guarantee efficiency and reduce risk.
The technician should assemble durable hand tools and protective equipment to prevent damage and injury while working in tight spaces.
- Adjustable wrench with padded jaws
- Slip-joint pliers and tongue-and-groove pliers
- Utility knife and nylon strap wrench
- Safety glasses and nitrile gloves
Heat sources, penetrating agents, and specialty tools
With the basic hand tools and safety gear in place, the technician should prepare heat sources, penetrating agents, and a few specialty tools that target stubborn plastic fittings without causing damage.
Apply controlled heat (hair dryer, heat gun on low), use nylon-safe penetrating spray, and have soft-jaw pliers and strap wrenches ready to distribute force evenly.
- Low-temperature heat gun
- Nylon-safe penetrant
- Soft-jaw pliers
- Strap wrench
When to call a plumber or use professional equipment
Recognize the limits of DIY work and prepare to call a professional when antiseize, heat, and standard hand tools fail, when fittings are brittle, fused, or access is confined, or when the job risks compromising plumbing systems.
A plumber brings inspection cameras, hydrostatic testers, PID-controlled heaters, and extraction rigs; they assess leak, vent, or code issues, preventing further damage and ensuring safe, code-compliant repair.
Eight Safe, Professional Techniques to Loosen a Stuck Plastic Pipe Fitting
The following section outlines eight safe, professional techniques for freeing a stuck plastic pipe fitting, each chosen to minimize damage to the fitting and surrounding plumbing.
It covers controlled twisting and leverage, heat application via a heat gun or warm water, appropriate penetrating lubricants, tapping and vibration methods, and protective gripping tools such as soft-jaw pliers and strap wrenches.
Warnings and proper application steps are provided so the reader can select and apply the right method for the specific material and situation.
1 Gentle twisting and leverage: proper technique and warnings
Apply steady, controlled twisting combined with a small amount of leverage to coax a stuck plastic fitting free without overstressing the material.
Support the adjacent pipe to prevent torque transfer. Use padded wrenches or strap tools to distribute pressure.
Alternate gentle clockwise and counterclockwise motions, pausing to inspect.
Stop if cracking, excessive resistance, or deformation appears; reassess with safer methods or professional help.
2 Heat application: safe use of a heat gun and warm water methods
Warmth can loosen a seized plastic fitting by softening the material and expanding clearances without mechanical stress.
Apply controlled heat with a heat gun at low setting, keeping a safe distance and constant motion to avoid melting.
Alternatively, circulate warm (not boiling) water around the joint to equalize temperature.
Allow gradual cooling before attempting rotation; inspect for deformation afterward.
3 Penetrating lubricant options for plastic fittings and how to apply
After using controlled heat or warm water to relax a seized plastic fitting, attention turns to suitable penetrating lubricants that can penetrate threads or interfaces without damaging the polymer.
Recommended options:
- silicone-based spray for safe sliding action;
- PTFE (dry Teflon) aerosol for low-friction residue;
- light machine oil (mineral) applied sparingly for seepage.
Apply minimal amounts, allow dwell time, then attempt gentle rotation.
4 Tapping and vibration: using a rubber mallet and tapping rod safely
Tap gently and purposefully: controlled percussive force and targeted vibration can break microscopic bonds and loosen a seized plastic fitting without excessive torque.
A rubber mallet applied to a wooden block absorbs impact and spreads force; a tapping rod delivers localized pulses.
Pause between strikes, inspect for damage, avoid metal-on-plastic contact, and stop if cracking or leaks appear.
Work slowly until movement occurs.
5 Soft-jaw pliers, strap wrenches, and protective gripping methods
Use tools that protect the plastic while increasing grip: soft-jaw pliers and strap wrenches distribute clamping force over a larger area and reduce the risk of gouging or crushing a fitting.
Operators should pad metal jaws with rubber, leather, or tape, select adjustable straps sized to the pipe, apply steady even pressure, and avoid excessive torque.
Protective wraps prevent surface damage and preserve thread integrity.
6 Rotational alternating (back-and-forth) method to break sealant bonds
When sealant or threadlocker has bonded a plastic fitting, applying small alternating rotational movements—clockwise then counterclockwise—can progressively shear the bond without overstressing the material.
The technician should use controlled, incremental angles (5–15°), increasing amplitude as needed while maintaining steady grip and alignment.
Pause periodically to assess movement and heat; stop if cracking or deformation appears.
Repeat until threads yield.
7 Chemical softening for hardened thread sealants: what’s safe on plastic
Although many adhesives and thread sealants harden into resistant films, certain solvents and conditioners can soften them without damaging common plumbing plastics.
Professionals recommend testing on scrap material, using mild citrus or glycol-based removers, isopropyl alcohol for light films, and commercially formulated plastic-safe sealant breakers.
Apply sparingly, allow dwell time, flush thoroughly, and ventilate.
Avoid aggressive solvents like methylene chloride or ketones that attack PVC/CPVC.
8 Controlled cutting and replacement when loosening is impossible
Cutting out and replacing a stubborn fitting becomes the safest practical option once repeated attempts to free it risk cracking the pipe or the surrounding connections.
The technician isolates water, marks cut locations to preserve usable pipe, uses a fine-toothed tubing cutter or oscillating tool, deburrs ends, and installs compatible replacement fittings with proper solvent or mechanical joints.
Test for leaks under pressure before finishing.
Step-by-Step Procedures for the Most Common Scenarios
The following sections present concise, step-by-step procedures for the situations most often encountered when a plastic pipe fitting is stuck.
Each procedure addresses removing a glued solvent-weld PVC joint, loosening threaded PVC or CPVC fittings, and handling PEX fittings with crimped or expansion connections.
Clear safety precautions and the specific tools or solvents required are noted for each scenario.
Removing a glued solvent-weld PVC joint
Removing a glued solvent-weld PVC joint requires careful preparation and the right method, since the bond is designed to be permanent.
Work in a ventilated area, wear gloves and eye protection.
Cut the pipe flush near the fitting, remove the fitting with gentle prying or heat applied briefly with a heat gun, then sand and deburr surviving ends.
Replace with new components and solvent-cement.
Loosening threaded PVC or CPVC fittings
Begin by evaluating the joint and surrounding system to choose the safest, most effective approach for freeing a stuck threaded PVC or CPVC fitting.
Drain and depressurize the line, protect adjacent surfaces, apply penetrating lubricant compatible with plastics, then use strap or adjustable wrenches with padded jaws for even torque.
Alternate gentle heat to relax plastic, avoid excessive force to prevent cracking.
Dealing with PEX fittings and crimped/expansion connections
Address PEX fittings and crimped or expansion connections by first identifying the joint type and the retaining method—crimp ring, clamp, or expansion sleeve—so the correct removal and repair steps are chosen.
For crimped rings, cut and replace the ring and fitting; for stainless clamps, pry or cut the clamp and reuse or replace the fitting; for expansion sleeves, replace the connector and use proper expansion tools and new rings.
Preventing Damage While Working on Plastic Pipe Fittings
Maintaining the integrity of plastic pipe fittings requires attention to cracking, warping, and wall thinning while loosening connections.
Proper torque application and controlled, localized heat minimize material stress and prevent deformation.
Protective measures for adjacent fixtures and finishes reduce the risk of incidental damage during the operation.
How to avoid cracking, warping, and wall thinning
When working on stuck plastic pipe fittings, technicians must take deliberate steps to prevent cracking, warping, and wall thinning that compromise joint integrity.
They should inspect material condition, support pipes to distribute forces, use appropriately sized tools and padding, apply controlled, localized mechanical methods, avoid excessive bending or impact, and limit solvent or chemical exposure that softens polymer walls prior to reassembly.
Best practices for applying torque and heat control
Apply torque and heat with restraint and precision to prevent deformation or failure of plastic pipe fittings.
Use calibrated torque tools and incremental turns, allowing recovery between attempts.
Apply heat evenly with a low-temperature heat gun, monitoring surface temperature and avoiding prolonged exposure.
Combine gentle mechanical persuasion—back-and-forth motion and penetrating lubricant—with controlled heat to loosen joints without overstressing plastic.
Protective measures for nearby fixtures and finishes
Because nearby fixtures and finishes are easily damaged by heat, solvent, or mechanical force, take proactive steps to protect them before loosening a stuck plastic pipe fitting.
Cover adjacent surfaces with heat-resistant cloths or cardboard, mask edges with painter’s tape, remove removable items, and use drop cloths to catch debris.
Position heat shields and work incrementally to minimize exposure and accidental impact.
Troubleshooting When Initial Methods Fail
If the fitting resists removal, check for symptoms of compromise such as cracks, deformation, persistent leaks, or softened material.
Next, follow a safe escalation: repeat gentle DIY steps with caution, try controlled heat or lubricant, and call a professional if the risk of damage or leak increases.
Finally, weigh temporary fixes—like a clamp or sealant—against the need for full replacement when integrity is doubtful.
Signs that the fitting or pipe is compromised
When initial loosening techniques fail, inspection for damage becomes essential; a compromised fitting or pipe will often show visible indicators such as cracked or deformed plastic, hairline fractures near joints, stripped threads, or persistent leaks despite attempts to reseat the connection.
Additional signs include softening or brittleness from chemical or UV exposure, misshapen mating faces, corrosion around metal inserts, and wrench-induced gouges.
Safe escalation sequence: from DIY to professional intervention
Begin by evaluating the situation calmly and progressing through a defined escalation path that prioritizes safety, minimizes further damage, and preserves salvageable components.
Attempt noninvasive measures first: shut off water, relieve pressure, apply penetrating lubricant, gentle heat, and handheld tools.
If resistance, visible cracking, leaks, or unknown fittings persist, stop and contact a licensed plumber.
Document actions and provide clear access for professionals.
Temporary fixes versus permanent replacement
Assess the condition of the stuck fitting and surrounding piping to determine whether a temporary fix can safely bridge to a permanent solution or if replacement is required immediately.
Temporary measures—sealant, tape, or a compression sleeve—may stop leaks briefly but are unreliable long-term.
Prioritize replacement when fittings show cracks, deformation, persistent leaks, or if system pressure and safety could be compromised.
Comparison of Methods: Speed, Safety, and Likelihood of Success
Weighing speed, safety, and likelihood of success clarifies which techniques best suit a stuck plastic pipe fitting: rapid options like heat application or twisting with a pipe wrench can free joints quickly but carry higher risk of softening or cracking the plastic, whereas slower approaches—soaking with penetrating oil, gradual mechanical persuasion with strap wrenches, or gentle heat-cool cycling—reduce damage risk and often succeed on stubborn fittings.
| Method | Trade-off |
|---|---|
| Heat | Fast, higher damage risk |
| Penetrant/Patience | Slower, safer, often effective |
Materials, Replacement Parts, and Where to Source Them
The section outlines common replacement fittings and connectors typically used with plastic plumbing, such as couplings, adapters, and compression fittings.
It explains how to match material, size, and pressure ratings to existing pipe types (PVC, CPVC, PEX) to guarantee a proper, code-compliant repair.
It also lists recommended brands and professional-grade products and suggests reliable sources, including local plumbing supply houses and major online retailers.
Common replacement fittings and connectors
When a plastic pipe fitting refuses to budge, replacing it with the correct material and connector guarantees a reliable repair.
Common replacements include compression fittings, slip couplings, threaded adapters, and push-fit connectors. Common materials are PVC, CPVC, PEX, and ABS. Parts are readily available at plumbing supply stores, big-box retailers, or online specialist vendors.
- Compression nut and ferrule
- Slip coupling with solvent-weld ends
- Threaded male/female adapter
- Push-fit straight connector
How to match pipe material, size, and pressure ratings
Although different plastics may look similar, matching pipe material, diameter, and pressure rating is essential to guarantee a safe, durable connection. Using the wrong combination can cause leaks, chemical incompatibility, or premature failure.
Compare markings (PVC, CPVC, PEX), measure outside/inside diameters, confirm nominal size and wall thickness, and choose fittings rated for system pressure and conveyed fluid.
Source parts from plumbing suppliers or OEM catalogs.
Recommended brands and professional-grade products
Many reputable manufacturers produce professional-grade plastic piping, fittings, and replacement parts designed for long-term, high-pressure service.
Brands like Victaulic, GF Piping Systems, Uponor, Watts, and NIBCO offer certified CPVC, PVC, PEX, and engineered polymer fittings.
Source parts from authorized distributors, plumbing wholesalers, or manufacturer websites to guarantee traceability, pressure ratings, and warranty compliance for safe repairs and replacements.
Real-World Examples and Short Case Notes
Two brief case notes illustrate common scenarios and practical outcomes.
One describes a stuck outdoor irrigation fitting freed with targeted heat and penetrating oil, followed by thread cleaning and replacement of a damaged coupling.
The other recounts a kitchen sink PVC trap seized by mineral deposits that was loosened after soaking, gentle mechanical agitation, and replacement of worn washers.
Example 1: Stuck outdoor irrigation fittings approach and outcome
A homeowner encountered a seized polyvinyl chloride elbow on an outdoor irrigation line after years of sun exposure and mineral buildup.
The chosen approach combined penetrating lubricant, careful heat application with a heat gun, and gradual counter-rotational force using channel-lock pliers protected by cloth to avoid crushing the fitting.
The fitting loosened after several cycles; minor cleanup removed residue and the joint was resealed successfully.
Example 2: Kitchen sink PVC trap seized by deposits approach and outcome
Following the outdoor irrigation example, attention turns indoors to a kitchen sink PVC trap that had become immovable from years of soap scum, food particles, and hard-water deposits.
The technician applied penetrating cleaner, allowed dwell time, then used strap wrenches and controlled heat to soften deposits.
The trap was freed without damage, cleaned, and resealed with new washers, restoring flow and preventing recurrence.
Final Checklist After Loosening or Replacing a Fitting
A final checklist guarantees the repair is secure, clean, and ready for normal use.
It should cover leak and pressure testing, proper disposal of old parts, and restoration of any insulation or coverings.
Include brief maintenance tips to prevent future seizing, such as corrosion inhibitors, correct torque, and regular inspections.
Leak testing and pressure checks
Begin pressure verification by restoring system flow slowly and monitoring for leaks at the repaired fitting and surrounding joints.
Increase pressure to normal operating levels while watching for weeps, bulges, or audible escapes. Use a pressure gauge and soap solution or electronic leak detector for confirmation.
Hold pressure for the recommended duration, document readings, then depressurize gradually before final system return to service.
Clean-up, disposal of old parts, and restoration of insulation
Clean up the work area by removing tools, debris, and any remaining sealant or solder flakes.
Take care to collect small parts and plastic fragments in a sealed container to prevent contamination.
Dispose of damaged fittings and O‑rings per local regulations, label recyclable plastics, and wipe surfaces.
Restore pipe insulation with appropriate materials, secure with tape or clamps, and note replaced components for records.
Maintenance tips to prevent future seizing
Several practical steps help prevent future seizing of plastic pipe fittings: regular inspection, proper torque application, compatible lubricants or thread sealants, and ensuring correct support and alignment of the piping system.
A concise checklist promotes longevity and reduces failures. Visualize routine care and targeted fixes:
- Inspect joints monthly for stress or deformation
- Apply recommended torque with a calibrated wrench
- Use compatible silicone-based lubricant or PTFE tape
- Add clamps and support brackets to relieve strain
Conclusion
After a brisk tour of eight “professional” tricks to free a stubborn plastic fitting, the reader can smugly celebrate newfound prowess—until the next leak proves patience, not tricks, was the real teacher. Ironically, the safest, most lasting victories came from the least dramatic moves: gentle heat, proper grips, and a quiet decision to replace brittle parts. In plumbing as in life, forceful flair yields headlines; careful work yields dry floors.