How to Determine the Flow Rate of a Well Pump: Step-by-Step Test and Calculation
To determine the flow rate of a well pump, conduct a timed gallon test at a tap after measuring the static water level and recording drawdown during pumping. Use a calibrated container, a stopwatch, and a pressure gauge; a flow meter can also be helpful. Convert the measured volume over time into gallons per minute (gpm) or liters per minute (L/min), and adjust for any well losses. Compare your results against household water needs and be mindful of any rapid drawdown. For detailed calculations and troubleshooting options, refer to the follow-up guidance.
Overview of Measuring Well Pump Flow Rate
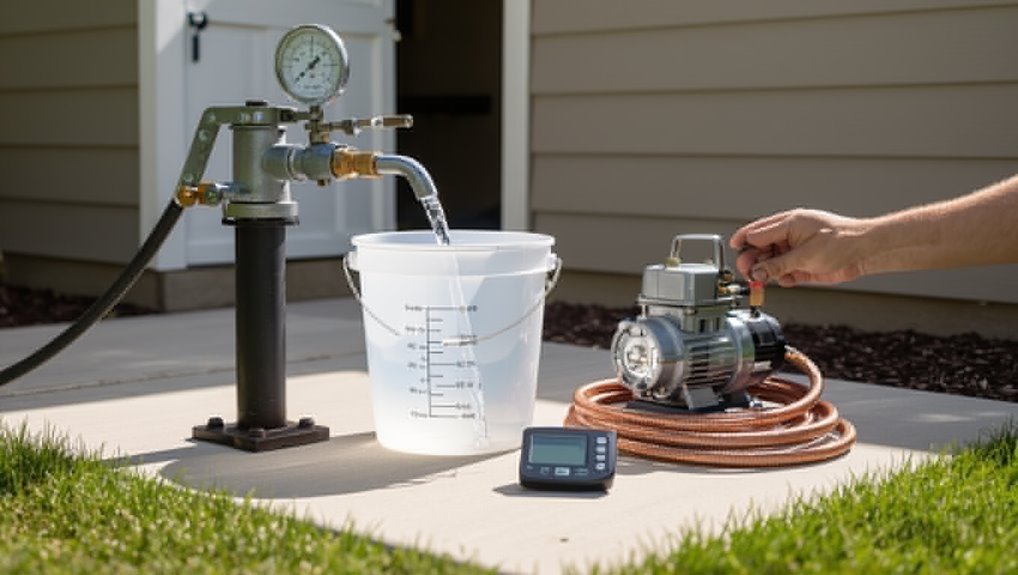
Understanding a well pump’s flow rate is essential for evaluating water availability, system performance, and planning maintenance.
Tests should be performed when users notice reduced pressure, unusual pump cycling, or after repairs and seasonal changes.
Before testing, a clear safety and preparation checklist—including shutting off power, checking valves, and ensuring proper protective gear—should be followed.
Why knowing your well pump flow rate matters
Because a well pump’s flow rate determines how much water is available for daily use and how the system performs under demand, knowing that rate is essential for efficient operation and informed maintenance.
It enables proper system sizing, prevents overloading, supports conservation, guides repairs, and informs upgrades.
Clear knowledge of how to determine flow rate of well pump helps prioritize interventions and guarantee reliable supply.
When to test flow rate (signs and triggers)
After establishing why flow rate matters for system sizing, repairs, and conservation, attention turns to when to measure it.
Testing is warranted after pressure drops, decreased household supply, frequent pump cycling, new or repaired equipment, spring or seasonal changes, water quality shifts, or before sizing storage and treatment.
Routine checks during maintenance cycles help detect gradual declines and prevent failures.
Safety and preparation checklist before testing
Prepare a clear safety and preparation checklist before testing a well pump to reduce risk and secure accurate measurements.
The checklist includes:
- verify power off and lockout/tagout;
- inspect electrical connections, hoses, gauges, and valves;
- wear PPE (gloves, eye protection, boots);
- ascertain stable work area and adequate lighting;
- have a companion or emergency plan;
- confirm pressure relief and proper discharge routing;
- gather measurement tools and calibration records.
Tools and Materials Needed
A concise list of essential tools and materials is required to perform a reliable well pump flow test, including a suitable container, a stopwatch or timer, and basic shutoff and measurement fittings.
Optional items for greater accuracy and troubleshooting—such as a calibrated flow meter, pressure gauge, and inline strainer—can improve results and help diagnose issues.
Guidance on selecting the right container size and a precise timing method will determine measurement accuracy and repeatability.
Essential tools for a flow test
Several basic tools and a few specialty items are required to perform an accurate well pump flow test.
The tester should prepare items for measuring volume, timing, and pressure while ensuring safe access and shutoff capability.
- Graduated container (calibrated) and hose adapter
- Stopwatch or timer
- Pressure gauge and wrench for tap fittings
Optional tools for accuracy and troubleshooting
To improve measurement precision and diagnose common problems, the tester may bring optional tools beyond the basic kit. These enhance accuracy, verify pump health, and isolate faults without replacing core equipment.
- Pressure gauge with quick-connect fittings for static and dynamic readings
- Portable multimeter to check motor voltage and continuity
- Inline TDS/flow sensor for continuous verification and anomaly detection
How to choose the right container and timer
After verifying pump performance with optional gauges and meters, attention turns to selecting the container and timer that will produce reliable flow measurements.
A rigid, marked container (5–20 gallons) minimizes spill and reading error; opaque buckets require external scale markings.
Choose a stopwatch or digital timer with second resolution and easy start/stop.
Confirm container capacity suits expected flow to avoid overflow or short timing intervals.
Step-by-Step Static and Pumping Tests
The following steps outline practical field tests for evaluating well performance, beginning with measuring the static water level before any pumping.
Procedures then cover conducting a drawdown test, a timed gallon test at the tap to quantify flow, and measuring recovery rate after pumping.
Together these measurements provide the data needed to calculate reliable pump flow and well capacity.
How to measure static water level
When evaluating a well’s capacity, measuring the static water level provides the baseline depth from the water surface to the top of the well before pumping begins. This measurement is essential for accurate step-by-step static and pumping tests.
A tape, electric probe, or pressure transducer records depth to water. Record well reference point, temperature, and time.
Repeat until stabilized and log results for test comparisons.
How to perform a drawdown test
Begin by establishing a stable baseline and clear objectives for the drawdown test: record the static water level, note well reference points and temperature, and determine pump rate and test duration.
Then run the pump while measuring water level decline at regular intervals until targeted drawdown or equilibrium is reached.
Plot depth versus time, compute drawdown rate, and document recovery behavior after pumping stops.
How to perform a timed gallon test at the tap
Following completion of a drawdown test and documentation of static level, pump rate, and recovery behavior, attention shifts to quantifying flow at the outlet using a timed gallon test at the tap.
The tester opens a single fixture fully, times a measured interval (typically 1–5 minutes), collects all water in a calibrated container, records volume and duration, then calculates gallons per minute.
How to measure recovery rate after pumping
Measure the recovery rate by monitoring how quickly the water level rises after stopping the pump, using consistent timing and measurement points.
Record static water level, pump down to a known drawdown, then note water level at regular intervals (e.g., every minute for ten minutes).
Calculate recovery as volume or feet per minute; extrapolate to estimate sustainable yield and recharge characteristics.
Calculations and Conversions
This section introduces the key calculations and unit conversions needed to turn timed test data into meaningful flow rates and yields.
It covers converting gallons and liters, minutes and hours, using the instantaneous flow rate formula from a timed pump test, and estimating well yield from drawdown and recovery measurements.
Sample calculations with numeric examples illustrate each step for clear application.
Converting gallons, liters, minutes, and hours
How many gallons flow in an hour when a pump’s rate is given in liters per minute?
The reader converts liters per minute to liters per hour by multiplying by 60, then converts liters to gallons using 1 liter ≈ 0.264172 gallons.
Conversely, multiply gallons per minute by 60 for gallons per hour and divide by 0.264172 to obtain liters.
Use precise unit labels throughout.
Formula to calculate instantaneous flow rate from timed test
To calculate an instantaneous flow rate from a timed test, divide the measured volume collected by the duration of collection and express the result with clear units (e.g., liters per minute or gallons per hour).
Convert units if needed (e.g., liters to gallons, minutes to hours). Report as Q = V / t.
Note measurement precision, temperature effects, and include significant figures appropriate to instruments.
Calculating well yield from drawdown and recovery data
Calculate well yield from drawdown and recovery data by analyzing the change in water level relative to pumping rate, then converting those measurements into standardized units for comparison and design.
Determine specific capacity (Q/drawdown), correct for well losses if needed, and use recovery slopes to estimate aquifer transmissivity.
Report yield in volume per time (e.g., L/min or gpm) at selected drawdown for design and permitting.
Example calculations with sample numbers
Several concise worked examples illustrate converting measured drawdown and recovery data into usable well-yield values and units. Example 1: 10 ft drawdown at 5 gpm gives derived yield; Example 2: 20 ft drawdown at 10 gpm; Example 3: recovery slope used to confirm sustainable rate. Table summarizes inputs, calculations, and results.
| Input | Calculation | Result |
|---|---|---|
| 10 ft, 5 gpm | Yield = gpm | 5 gpm |
| 20 ft, 10 gpm | Scaled yield | 10 gpm |
| Recovery slope | Confirm sustainable | Yes |
Interpreting Test Results
Results are compared to typical household needs to determine whether the measured flow rate is sufficient for normal water use.
Distinguishing persistent low-yield wells from temporary drops caused by heavy use or recovery time is essential for accurate diagnosis.
If flow rates fall well below expected values or decline rapidly during a test, it may indicate pump malfunction, clogged intake, or an underlying well capacity problem.
What constitutes a healthy flow rate for household use
A healthy household flow rate typically falls between 6 and 12 gallons per minute (GPM) depending on home size and fixture demand, providing enough water for showers, dishwashing, and simultaneous appliance use without excessive pump cycling or pressure drop.
Values within this range support typical fixtures and small appliance loads; rates above accommodate larger homes, while consistent delivery and stable pressure are key indicators of satisfactory performance.
Identifying low-yield wells versus temporary drops
When evaluating whether a well’s measured flow indicates a permanent low yield or a temporary decline, test conditions and recovery behavior provide the key clues.
Consistent low output across multiple tests, slow or incomplete recovery after pumping, and dry seasons suggest true low yield.
Rapid rebound after rest, recent heavy use, or transient aquifer stress point to temporary drops that may improve with time or reduced demand.
When flow rate indicates pump or well problems
If measured flow falls well below expected yield or shows irregular cycling during a drawdown test, it often signals mechanical or integrity problems with the pump or well rather than aquifer limits.
Possible causes include worn impellers, clogged intake screens, collapsed casing, leaky drop pipe, or failing seals.
Recommend inspection, pressure and amperage checks, and video or downhole diagnostics before attributing low flow to the aquifer.
Common Causes of Low Flow and Diagnostic Steps
Common causes of low well pump flow include mechanical failures in the pump, pressure tank issues, or control system malfunctions.
Well-related problems such as damaged casing or screens and aquifer depletion can also reduce output.
Diagnostic steps should first isolate the pump from household plumbing to determine whether the issue is downhole or within the distribution system.
Problems with pump, pressure tank, or control systems
Diagnosing low well flow requires examining the pump, pressure tank, and control systems as a single, interdependent assembly.
Faulty pump impellers, worn seals, or motor issues reduce output; pressure tank bladder failure or incorrect precharge causes rapid cycling; control switch or wiring faults prevent proper start/stop or pressure cut-in/out.
- Inspect pump mechanical condition
- Check tank precharge and bladder
- Test controls and electrical connections
Well-related issues: casing, screens, and aquifer depletion
Well integrity and aquifer condition directly affect a well’s delivery; problems with casing, screens, or the surrounding formation often manifest as steadily falling yields, sand production, or slow recovery after pumping.
Inspection and tests should target physical damage, screen clogging, and aquifer drawdown to pinpoint causes and remedy selection.
- Inspect casing for corrosion, perforations, collapsed sections
- Assess screen plugging and fines intrusion
- Evaluate static level trends and recharge capacity
How to isolate pump issues from plumbing issues
Problems originating in the pump or the household plumbing can produce similar symptoms—low flow, sputtering faucets, or pressure cycling—so distinguishing between them is necessary to target repairs effectively.
Inspect visible plumbing for leaks, closed valves, clogged aerators and pressure-reducing valves.
Run a static pressure test at the well and compare to pressure at fixtures. If well output is stable but fixtures remain weak, the issue is internal plumbing.
Solutions and Next Steps
After identifying causes of low flow, the article outlines simple remedies homeowners can try, such as cleaning screens, checking pressure tanks, and repairing visible leaks.
It then specifies when professional help from a licensed well contractor is advisable for tasks like pump testing or electrical troubleshooting.
Finally, it reviews options for improving yield—pump replacement, well deepening, or adding storage—to help readers weigh costs and benefits.
Simple remedies homeowners can try
Homeowners can often resolve low or inconsistent pump flow with a few targeted checks and adjustments before calling a professional.
Inspect for visible leaks, tighten fittings, and replace damaged pressure tank components or leaking check valves.
Clean or replace clogged intake filters and aerators.
Verify correct pressure switch settings and reset or adjust as needed.
Document changes and remeasure flow to confirm improvement.
When to call a professional well contractor
When should a professional well contractor be called? A professional is needed when tests show persistently low flow, erratic pressure, contamination, mechanical noise, electrical faults, or repeated pump cycling.
Also call if water stops suddenly, casing or surface infrastructure is damaged, or well records and permits are required.
Professionals diagnose, perform safe repairs, comply with regulations, and recommend long-term solutions.
Options for improving yield: pump replacement, well deepening, storage solutions
Consider several targeted approaches to improve a well’s yield: replacing an undersized or failing pump, deepening or rehabilitating the well to reach higher-producing aquifers, or adding storage to buffer supply and meet peak demand.
Evaluate cost, expected yield gain, site constraints, and long-term maintenance.
Prioritize solutions based on test results; combine methods (pump upgrade plus storage) when single measures cannot reliably meet demand.
Maintenance Tips to Preserve Flow Rate
A regular testing schedule with clear logs of run time, drawdown, and measured flow helps track pump performance over time.
Routine tasks—including inspecting electrical connections, checking the pressure tank bladder and pressure switch, and cleaning or replacing filters—reduce wear and maintain consistent output.
Seasonal checks and long-term monitoring for gradual declines or changes in static level guide timely repairs or adjustments.
Regular testing schedule and what to log
Because well performance can change gradually and unpredictably, owners should follow a consistent testing schedule to detect declines before they become emergencies.
Testing quarterly and after heavy use or drought provides comparative data. Record dates, static and pumping water levels, recovery times, drawdown volumes, flow rate measurements, and any pressure fluctuations.
- Test dates and conditions
- Measured levels and times
- Calculated flow figures
Routine maintenance tasks for pump and pressure tank
Regular testing highlights trends that maintenance can address before flow suffers. Routine tasks for the pump and pressure tank help preserve measured performance between inspections.
Inspect for leaks, corrosion, and loose fittings; clean or replace filters and strainers; verify pressure switch settings and dead‑band; check tank air charge and bladder integrity; lubricate moving parts per manufacturer guidance; schedule prompt repairs to prevent gradual flow degradation.
Seasonal considerations and long-term monitoring
Many homeowners should adjust maintenance routines as seasons change, since temperature shifts and precipitation patterns directly affect well performance and pump stress.
Inspect for freezing, sediment, and vegetative debris after storms. Monitor static and drawdown levels monthly, record trends, and schedule professional testing annually.
Adjust pump cycling, pressure settings, and filtration based on observations to preserve flow rate and extend equipment life.
Cost, Permits, and Safety Considerations
Typical costs for flow testing and professional services are outlined, including when hiring a certified pump technician is advisable.
Readers are reminded to verify permits and local regulations before undertaking major work or installations.
Basic safety practices for DIY testing and repairs are summarized to reduce risk and comply with codes.
Typical costs for testing and professional services
Because accurate flow-rate assessment often requires specialized equipment and expertise, homeowners should budget for both testing fees and potential follow-up services.
Typical pump flow tests range $150–$400.
Extensive hydrogeological evaluations or well rehabilitation can cost $500–$3,000 depending on complexity.
Emergency repairs, replacement parts, and diagnostic visits may add separate charges; written estimates and itemized invoices are advised.
Permits and local regulations to check before major work
After budgeting for testing and repairs, homeowners should confirm which permits and local regulations apply before undertaking major well work.
Authorities may require building, electrical, or well-construction permits; groundwater protection and setback rules; and licensed contractor involvement.
Failure to comply can result in fines, required corrective work, or voided insurance.
Verify requirements with county health, building departments, and state water agencies before contracting.
Safety best practices for DIY testing and repairs
When attempting DIY testing or minor repairs on a well system, homeowners should prioritize safety by using appropriate personal protective equipment, following lockout/tagout procedures for electrical components, and working with a second person nearby to assist in emergencies.
They must verify power is off, avoid confined-space entry, use grounded tools, respect pressure-rated fittings, document changes, and call licensed professionals for complex electrical, structural, or contamination issues.
Real-World Examples and Case Scenarios
The section presents concise real-world examples to illustrate common flow-rate issues and remedies.
One case contrasts low output corrected by replacing a pressure tank with another where aquifer depletion, not pump failure, was the actual cause.
A compact checklist for documenting test results is provided to help homeowners and contractors record consistent, actionable data.
Example: low flow fixed by pressure tank replacement
A homeowner discovered persistently low water flow despite a pump that cycled normally.
Inspection revealed a waterlogged pressure tank with collapsed bladder, causing rapid pump cycling and reduced volume delivery.
After replacing the tank and resetting cut-in/cut-out pressures, flow and drawdown normalized.
Measured flow rate returned to expected values, confirming the tank — not the pump or well — caused the issue.
Example: aquifer depletion vs. pump failure diagnosis
Following the pressure tank example, attention shifts to distinguishing aquifer depletion from pump failure—two problems that can produce similar symptoms but require very different remedies.
Technicians compare drawdown and recovery patterns from measured well tests, inspect pump electrical and mechanical signs, and correlate long-term declines with seasonal or regional data.
Diagnosis guides repair, recharge strategies, or well rehabilitation decisions.
Checklist for documenting test results for contractors
When documenting well test results for contractors, technicians should record a concise, standardized checklist that captures all measurements, observations, and contextual details necessary for accurate interpretation and action.
The checklist should be clear, dated, and signed, enabling contractors to prioritize repairs or adjustments based on reliable data and observed trends.
- Static and pumping water levels, drawdown, and recovery times
- Pump model, settings, test duration, and flow calculations
- Visual observations, photos, timestamps, and site conditions
Conclusion
Measuring a well pump’s flow rate marries precision with everyday practicality: detailed tests yield numerical clarity while a dripping faucet reveals the human stakes. Where calculations and charts sit coolly on paper, household routines depend on their outcomes. Accurate tests guide repairs, conservation, or system upgrades; assumptions invite surprises. By treating data and daily use as equal partners, readers can act confidently—balancing technical exactness against lived water needs for sustainable, reliable supply.