How to Increase Water Temperature in Your Shower: 12 Quick Fixes and Expert Tips
To increase the water temperature in your shower, start by adjusting the mixing valve toward hot and running hot taps to balance pressure. If you still experience low heat, consider cleaning or removing the showerhead, and check the heater’s thermostat or breaker. For long-term solutions, flush the water heater, insulate pipes, upgrade valves, or replace flow restrictors. If problems persist, consult a professional for a thorough inspection and tailored advice.
Why Your Shower Water Might Be Too Cold
Common household causes such as a faulty mixing valve, buildup in the showerhead, or simultaneous high hot-water demand can leave the shower noticeably cool.
The type, size, and condition of the water heater — tank versus tankless, sediment, and thermostat settings — directly influence available hot water and recovery rate.
In some cases, persistent cold water or sudden temperature loss signals a safety issue or system failure that requires immediate inspection.
Common household causes of low shower temperature
Although a cold shower can feel sudden, several routine household issues typically cause water to run cooler than expected.
Common causes include partially closed valves, mineral buildup in showerheads, clogged aerators, long pipe runs losing heat, simultaneous appliance use, and thermostat missettings on mixing valves.
Checking fixtures, clearing deposits, and timing hot-water use are practical steps on how to increase water temperature in shower.
How water heating systems affect shower temperature
Investigate the water heater when shower temperature problems persist, because the heater’s type, capacity, and condition largely determine how hot water reaches the shower.
Tank size, recovery rate, and thermostat settings influence available hot water.
Tankless units require sufficient flow and proper gas/electric supply.
Sediment, scale, or failing components reduce output.
Matching system capacity to household demand prevents cold surges during simultaneous use.
When cold showers indicate a safety or system failure
Recognize that a suddenly cold shower can signal more than an inconvenience; it may indicate a safety issue or system failure requiring prompt attention.
Possible causes include failed thermostat controls, blocked burners or heating elements, sediment-clogged heat exchangers, gas supply interruption, tripped high-limit switches, or leaks causing pressure loss.
Immediate inspection by a qualified technician is advised to prevent scalding, carbon monoxide risk, or further equipment damage.
Quick Fixes You Can Try Right Now
A few fast checks and small adjustments often restore comfortable shower heat without calling a plumber.
The reader can try simple actions like adjusting the mixer, clearing a clogged showerhead, or verifying thermostatic and water heater settings to pinpoint and fix common causes.
These quick fixes target pressure balance, flow restrictions, and temperature controls so a warmer shower can usually be achieved immediately.
- Adjust the shower handle or mixer to favor hot flow
- Run hot water at a sink to rebalance pressure and temperature
- Remove and clean the showerhead to restore full hot flow
Adjust the shower mixer or handle
Turn the shower mixer or handle toward the hot side to immediately increase water temperature; most mixers have a clear range between cold and hot, and small adjustments can yield noticeable changes.
Rotate slowly to avoid scalding; test with a hand before stepping in.
If the handle feels stiff or unresponsive, cease forceful tuning and consider service to prevent damage or leaks.
Run hot water elsewhere to balance pressure
If adjusting the mixer doesn’t restore sufficient heat, running a hot tap elsewhere in the house can rebalance water flow and raise shower temperature.
Open a nearby sink or bathtub hot faucet partially to divert cold supply and increase hot water pressure to the shower.
Monitor temperature and close the auxiliary tap once stable.
Use briefly to conserve water and energy.
Remove and clean the showerhead
Unscrew the showerhead and inspect it for mineral buildup, debris, or clogged nozzles that can restrict hot-water flow and lower perceived temperature.
Soak the head in vinegar or a descaling solution to dissolve limescale, scrub nozzles with a brush, and rinse thoroughly.
Reinstall securely, testing for improved flow and temperature.
Replace the head if corrosion or persistent blockage remains.
Check and reset a thermostatic mixing valve
Locate the thermostatic mixing valve (TMV) near the shower’s control assembly or behind an access panel and inspect it for obvious signs of misalignment, wear, or mineral buildup that can restrict hot-water flow.
If accessible, follow manufacturer instructions to remove the cartridge, clean deposits with vinegar or replacement parts, then reassemble and test temperature.
Adjust trim or limit stop to allow greater hot-water proportion.
Inspect and reset water heater thermostat or circuit breaker
Check the water heater’s thermostat setting and the breaker panel to rule out simple electrical or temperature-limit issues before calling a pro.
Confirm the thermostat dial or digital setpoint matches desired output and hasn’t tripped an internal high-limit cutoff.
Inspect the breaker for a tripped switch; reset if needed.
If resets fail or controls seem faulty, schedule a qualified technician to diagnose safely.
Increase water heater temperature safely
If thermostat settings and breakers appear normal but the shower still runs cool, there are a few safe, immediate adjustments a homeowner can try before calling a technician.
Verify the water heater’s temperature dial and raise it in small increments (2–5°F). Allow 30–60 minutes between changes.
Check mixed-valve positions, and confirm inlet/outlet pipes are unobstructed.
Follow manufacturer limits and safety warnings.
Flush the water heater to remove sediment
Flushing a water heater clears accumulated sediment that can insulate the tank bottom and reduce usable hot water.
Homeowners should perform a quick drain-and-flush to restore capacity and improve delivery.
Shut power or gas, attach a garden hose to the drain valve, open a hot faucet, and flush until clear.
Close, refill, restore power, and check for leaks and proper operation.
Insulate exposed hot water pipes
Insulating exposed hot water pipes reduces heat loss between the water heater and fixtures, delivering hotter water faster and conserving energy.
Simple foam or fiberglass wrap applied to accessible runs minimizes temperature drop and shortens wait time.
Install insulation on both hot and return lines, seal seams with tape, and prioritize uninsulated basement, crawlspace, and garage piping to improve efficiency and comfort.
Use a high-flow or thermostatic shower valve
Swap to a high-flow or thermostatic shower valve to deliver stronger, more consistent hot water at the fixture.
A high-flow valve reduces pressure loss, increasing hot supply when multiple outlets run.
A thermostatic valve maintains set temperature by adjusting hot/cold mix rapidly, preventing sudden chills.
Both require proper sizing and professional installation to guarantee compatibility with existing plumbing and water heater capacity.
Replace restrictive flow regulators or aerators
Check the showerhead and faucet aerators for restrictive flow regulators, as these small devices often limit hot water delivery and can be removed or swapped quickly to raise temperature and pressure at the spray.
Remove, clean, or replace low-flow inserts with higher-flow equivalents rated for the fixture.
Reassemble securely, test temperature and flow, and verify local regulations on flow rates are followed.
Temporarily use a point-of-use inline water heater
If replacing restrictive flow parts doesn’t bring the shower to a comfortable temperature, a temporary point-of-use inline water heater can provide an immediate boost.
These compact units install on the shower line, offering instant supplemental heating without altering the main water heater.
Choose appropriate power and flow ratings, follow manufacturer safety instructions, and verify electrical capacity before use to prevent overloads or improper installation.
Schedule professional inspection if unsure
When uncertainty remains after quick fixes, schedule a professional inspection to diagnose underlying issues safely and accurately.
A licensed plumber evaluates water heater settings, sediment buildup, faulty thermostats, dip tube failures, cross-connections, and pressure-balancing valves.
They perform pressure and temperature tests, recommend repairs or replacement, and guarantee code compliance.
Professional assessment prevents misdiagnosis, reduces risk, and restores reliable hot water performance.
How to Diagnose the Root Cause Step-by-Step
A systematic diagnosis begins by testing water temperature at multiple fixtures and measuring both incoming cold and hot supply temperatures to establish where the loss occurs.
Next, the water heater’s type and capacity should be verified and the system inspected for cross-connections or backflow that can mix cold into hot lines.
Finally, signs of failing components—worn valves, a broken dip tube, or a weak heating element—should be identified to target repairs.
Test water temperature at multiple fixtures
Why check multiple fixtures? Testing hot and mixed temperatures at the shower, sink, bathtub, and laundry reveals whether the issue is isolated or systemic.
Record temperatures, flow rates, and time-to-heat for each location. Consistent low heat across fixtures points to water heater or supply problems; a single-cold-fixture suggests localized valve, cartridge, or piping issues requiring targeted inspection or repair.
Measure incoming cold and hot water temperatures
How hot is the water entering the home and how cold is the supply—measuring those baseline temperatures isolates whether the problem originates at the water heater, the municipal feed, or in-branch plumbing.
Use a reliable thermometer at the incoming main cold and the hot outlet from the heater. Record steady-state readings, note time of day, and compare to expected municipal and appliance specs to pinpoint source.
Check water heater type and capacity
With baseline inlet and outlet temperatures documented, the next step is to identify the home’s water heater type and its rated capacity to determine whether the appliance can meet demand.
Inspect the unit label for model, fuel source, storage volume or flow rate (tankless).
Compare capacity to household peak hot-water draws and manufacturer recovery or BTU ratings to see if upgrades or adjustments are warranted.
Inspect for cross-connections and backflow issues
Begin by visually tracing the plumbing from fixtures back to the water heater to identify any improper connections that could mix cold and hot lines or allow backflow.
Check for unauthorized bypasses, improperly installed mixing valves, or hoses connected incorrectly.
Observe for water flow when fixtures are off, test with dye for cross-contamination, and isolate sections to pinpoint the offending connection.
Identify signs of failing components (valves, dip tube, heating element)
After ruling out cross-connections and backflow as sources of temperature loss, attention turns to individual components that commonly fail and mimic supply problems.
Signs include inconsistent output and sputtering (dip tube deterioration), lukewarm steady flow despite boiler heat (mixing valve failure), and no hot water or tripped breakers (heating element fault).
Inspect, test resistance, and replace faulty parts promptly.
Fixes for Specific Water Heating Systems
Different water heating systems require targeted fixes based on their design and common failure modes.
The discussion will compare electric and gas tank units, troubleshoot tankless on-demand problems, and note special considerations for heat pump and solar hot water setups.
It will also address combination boiler arrangements that supply domestic hot water.
Tank water heaters electric vs gas troubleshooting
Troubleshooting tank water heaters requires a focused comparison of electric and gas units because their failure modes, diagnostic steps, and repairs differ markedly.
Electric heaters: check thermostats, heating elements, fuses, and wiring; replace faulty elements or thermostats.
Gas heaters: inspect pilot/igniter, thermocouple, burner, and venting; clean burners, relight pilot, or service gas controls.
Always cut power or gas before work.
Tankless (on-demand) water heaters common issues and remedies
Inspecting tankless (on-demand) water heaters begins with recognizing that their issues and remedies differ from tank systems because heating occurs instantly and depends on flow rate, fuel source, and scale buildup.
Common problems include lime scale reducing heat transfer, clogged filters, insufficient gas supply or electrical capacity, and flow sensors failing.
Remedies: descaling, cleaning inlet screens, checking fuel/electrical supply, and replacing sensors or burners.
Heat pump and solar hot water system considerations
Heat pump and solar hot water systems require distinct attention because they rely on ambient heat capture and renewable inputs rather than direct combustion or large storage tanks.
Inspect collectors and panels for shading; clean and check antifreeze levels.
Verify heat pump airflow, refrigerant charge, and compressor performance.
Optimize setpoints, confirm proper backup immersion or electric boost, and schedule professional servicing for seasonal efficiency losses.
Combination boiler and domestic hot water setups
Because combination boilers supply both space heating and on-demand domestic hot water without a separate storage tank, diagnosing low shower temperatures focuses on flow rate, plate heat exchanger condition, and diverter valve operation.
Check for lime scale, restricted flow from thermostatic mixer valves, and correct boiler temperature settings.
Inspect diverter valve for wear or sticking and purge faults.
Call a qualified engineer for repairs or replacement.
Parts to Inspect, Repair, or Replace
A systematic inspection of key components often reveals why shower water runs cool.
Technicians and homeowners should check thermostatic mixing and anti-scald devices, the shower cartridge, diverter, and pressure-balancing valve, plus water heater parts such as the thermostat, heating element, dip tube, and anode rod.
Also inspect pipes, insulation, and any recirculation pump components for damage, buildup, or incorrect settings that reduce hot-water delivery.
Thermostatic mixing valve and anti-scald devices
Safety and consistency are the primary concerns when inspecting thermostatic mixing valves and anti-scald devices in a shower system.
Technicians check temperature setpoints, sensor integrity, and response time. Mineral buildup, worn seals, or corrosion reduce performance.
Clean, recalibrate, or replace faulty units to restore safe hot-water delivery. After repair, verify mixed-water temperature under typical flow conditions to guarantee anti-scald protection.
Shower cartridge, diverter, and pressure-balancing valve
Inspecting the shower cartridge, diverter, and pressure-balancing valve reveals the components that most directly control flow, temperature stability, and shower function; worn cartridges cause leaks and temperature drift, sticky diverters prevent proper outlet selection, and failing pressure-balancing valves allow sudden scalds or cold shocks.
Replace or rebuild cartridges, clean or replace diverters, and service pressure-balancing valves to restore consistent hot delivery and safe operation.
Water heater components: thermostat, element, dip tube, anode rod
Once shower-side parts are checked, attention shifts to the water heater, where the thermostat, heating element, dip tube, and anode rod determine available hot water volume, temperature accuracy, and tank longevity.
Technicians inspect and calibrate thermostats, test and replace faulty elements, swap deteriorated dip tubes that cause cold-water mixing, and replace corroded anode rods to prevent tank corrosion and maintain performance.
Pipes, insulation, and recirculation pump components
Several key pipework and circulation components directly affect shower water temperature and delivery.
Inspect for corroded, leaking, or undersized pipes restricting flow; repair or replace galvanized or damaged sections.
Add or restore pipe insulation to reduce heat loss on runs.
Check recirculation pump, check valves, and timers for proper operation; service or replace failing pumps to restore rapid hot-water availability.
Safety and Energy Considerations
Safety and energy implications should guide any changes to water temperature, starting with recommended thermostat limits (typically 120°F or 49°C) and scald-prevention measures.
The discussion should also cover energy-efficient methods to increase usable hot water and when higher setpoints will noticeably raise utility costs.
Finally, relevant local codes and regulations governing thermostat settings and anti-scald devices must be checked before making adjustments.
Safe maximum thermostat settings and scald prevention
Set a water heater thermostat no higher than 120°F (49°C) for typical household use to reduce scald risk while conserving energy.
Install anti-scald mixing valves or thermostatic mixing valves at fixtures to limit outlet temperature.
Test water temperatures after adjustments.
Supervise children and elderly; label controls.
Maintain the heater and replace faulty thermostats to guarantee consistent, safe delivery of hot water.
Energy-efficient ways to raise usable hot water
Increase usable hot water without wasting energy by optimizing storage, delivery, and demand rather than simply raising the heater thermostat.
Insulation for tanks and hot pipes reduces standby losses.
Install a tempering valve and low-flow fixtures to stretch supply.
Consider heat trap fittings, recirculation timers or demand pumps, and schedule heavy hot-water use to off-peak times.
Maintain the system to preserve efficiency.
When higher temperature increases energy costs
Although raising the water heater thermostat can deliver hotter showers and faster dishwashing, higher setpoints also raise energy consumption and electric or gas bills because more heat is stored and lost to the surroundings.
Increased standby losses, longer recovery cycles, and greater thermostat cycling reduce efficiency. Users should weigh comfort gains against operating costs and consider alternative measures like insulation or point-of-use boosters.
Local codes and regulations to consider
When modifying water temperature or installing equipment that affects it, homeowners and contractors must comply with applicable local plumbing, electrical, and building codes as well as any state energy-efficiency regulations.
These rules dictate safe maximum temperatures, anti-scald device requirements, venting and combustion clearances for fuel-fired heaters, and permitted locations for thermostats and mixing valves.
Inspectors enforce permits, installation standards, and safety testing; noncompliance risks fines and voided warranties.
Tools and Materials You’ll Need for DIY Repairs
A concise set of tools and parts makes common shower temperature issues easier to diagnose and fix.
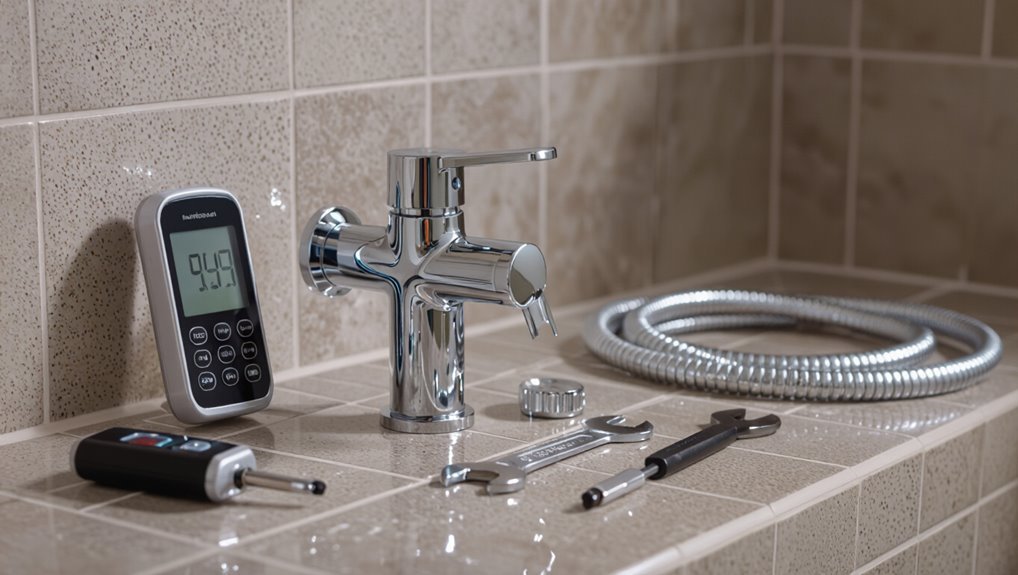
Essential items include a thermometer and multimeter for checks, basic plumbing tools and sealants for adjustments, and a selection of common replacement parts to keep on hand.
If electrical work or complex valve replacement is required, a licensed plumber or electrician should be contacted.
- Thermometer, multimeter, and diagnostic supplies
- Wrenches, pliers, sealant, and basic plumbing tools
- Spare cartridges, washers, and recommended replacement parts
Temperature thermometer and multimeter
To accurately diagnose shower temperature issues, a digital infrared thermometer and a multimeter are essential diagnostic tools.
The thermometer measures surface and outlet water temperatures quickly, identifying cold spots or inconsistent flow.
The multimeter checks electrical components—thermostatic valve actuators, sensors, and tankless heater circuits—for continuity and voltage.
Together they distinguish mechanical, thermal, and electrical causes before parts replacement.
Basic plumbing tools and sealants
Gather essential hand tools and a few reliable sealants before attempting any shower plumbing repair. A plumber’s wrench, adjustable pliers, screwdriver set, pipe cutter, and tape measure handle most tasks.
Thread seal tape, silicone bathroom caulk, and plumber’s putty prevent leaks at joints and fixtures. Safety gloves and a flashlight improve access and protection.
Keep tools organized for efficient, precise work.
Replacement parts to keep on hand
Keeping the toolbox stocked with common replacement parts complements the hand tools and sealants already assembled, ensuring repairs proceed without delays.
Essential spares include cartridge or ceramic disk replacements, O-rings and neoprene washers, compression seats and springs, threaded adapters, supply line connectors, shutoff valves, and a basic valve trim kit.
Label parts by fixture type and store in a dry, accessible container for quick access.
When to call a licensed plumber or electrician
When should a homeowner stop troubleshooting and call a licensed plumber or electrician?
Persistent temperature fluctuations, no hot water, gas smell, tripped breakers tied to water heating, visible leaks, corroded pipes, or failed thermostatic mixing valves warrant professional help.
Complex water heater repairs, gas connections, or rewiring exceed typical DIY scope; a licensed tradesperson guarantees safety, code compliance, and reliable diagnosis.
Comparison of Solutions by Cost, Time, and Effectiveness
A comparison of quick DIY tweaks versus professional repairs, and short-term fixes versus long-term upgrades, helps readers choose the best path for raising shower water temperature. The table below summarizes typical cost, time, and effectiveness trade-offs to guide decision-making. Consider immediate needs, budget, and desired longevity when evaluating options.
| Solution Type | Typical Cost | Expected Effectiveness |
|---|---|---|
| DIY minor tweaks (e.g., adjusting mixer) | Low | Moderate |
| Short-term fixes (e.g., insulating pipes) | Low–Moderate | Short-term improvement |
| Professional repairs (e.g., valve replacement) | Moderate–High | High and lasting |
| Long-term upgrades (e.g., new water heater) | High | Very high and durable |
Quick DIY tweaks vs professional repairs
Compare quick DIY tweaks and professional repairs by weighing cost, time, and effectiveness to determine the best path for restoring hotter showers.
DIY actions—thermostat adjustments, cleaning showerheads, or replacing cartridges—are low-cost and fast but may offer temporary gains.
Professional repair or replacement costs more and takes longer, yet provides durable, safe fixes for malfunctioning tanks, valves, or complex plumbing issues.
Short-term fixes vs long-term upgrades
Trade-offs define the choice between short-term fixes and long-term upgrades for hotter showers: quick actions such as adjusting thermostats, flushing sediment, or swapping cartridges are inexpensive and fast but often temporary.
In contrast, extensive options—tank replacement, larger-capacity heaters, or repiping—require greater expense and time yet deliver sustained, reliable results and improved efficiency.
Short-term saves money now; long-term reduces callbacks, energy use, and future cost.
Preventive Maintenance to Keep Showers Hot
Regular preventive maintenance preserves shower temperature and system reliability.
A scheduled water heater flush reduces sediment and improves heat transfer, while periodic inspection and replacement of valves and cartridges prevents flow and mixing issues.
Simple practices—staggering hot water use during peak demand and checking thermostatic settings—help maintain consistent hot water.
Regular water heater flushing schedule
A predictable flushing schedule can prevent sediment buildup in a water heater, maintaining heat transfer efficiency and preserving flow and temperature at the showerhead.
Flushing every six to twelve months, or more often with hard water, removes mineral deposits that reduce capacity and cause uneven heating.
Homeowners should follow manufacturer guidance or hire a technician for thorough, safe tank flushing.
Periodic inspection of valves and cartridges
Inspect valves and cartridges periodically to guarantee consistent water temperature and proper flow at the showerhead.
Technicians recommend removing trim, examining seals and O-rings for wear, and testing cartridge movement for smooth mixing.
Replace corroded or clogged components to prevent cold surges and leaks.
Regular inspections extend valve life, restore accurate hot/cold balance, and reduce emergency repairs.
Tips for maintaining consistent hot water during peak use
Following valve and cartridge checks, homeowners should adopt targeted preventive steps to preserve hot-water delivery during high-demand periods.
Schedule periodic water heater maintenance, flush sediment, and verify thermostat calibration.
Insulate hot-water pipes and increase tank capacity or adjust recovery settings if needed.
Stagger simultaneous hot-water uses, install flow restrictors, and consider a demand-activated circulation pump to minimize temperature drops during peak demand.
Real-World Scenarios and Recommended Actions
Common household plumbing issues produce distinctive symptoms that point to different fixes. The following scenarios summarize typical causes and recommended actions for restoring consistent shower heat. Each item highlights a concise troubleshooting step or next move.
- Multiple fixtures running simultaneously — stagger usage or inspect pressure-balancing valves and pipe sizing.
- Intermittent cold bursts during shower — check for a faulty mixing valve or sediment buildup in the shower cartridge.
- Entire house no hot water / low hot water volume but high temperature at heater — verify the heater’s delivery (circulation, dip tube, or a failed pump) and call a licensed plumber if repairs or part replacements are needed.
Multiple fixtures running simultaneously
When multiple fixtures—such as a washing machine, dishwasher, or another shower—operate simultaneously, the available hot water and measured pressure to the shower valve can drop abruptly, causing temperature swings and cold shocks.
The homeowner should stagger hot-water appliances, install a pressure-balancing or thermostatic mixing valve, increase tank capacity or flow rate, and consider a priority or dedicated hot-water line for the shower.
Intermittent cold bursts during shower
Even after addressing simultaneous hot-water draws, many homeowners still report sudden cold spikes mid-shower caused by brief pressure drops, thermostatic valve overshoot, or intermittent burner/pump cycling.
Troubleshooting includes checking pressure-balancing or thermostatic cartridge function, inspecting water heater cycling behavior and pump relays, ensuring adequate inlet pressure, and installing a tempering valve or small buffer tank.
If uncertain, consult a qualified plumber or HVAC technician.
Entire house no hot water
Diagnose the situation by noting symptoms and recent changes: complete absence of hot water across all fixtures can stem from a failed water heater (no ignition, blown heating element, tripped breaker), a closed or blocked supply, a malfunctioning gas or electric supply, or a failed mixing/tempering valve.
Recommend checking breakers, gas supply, shutoff valves, pilot light or power to heater, and calling a licensed plumber or HVAC technician for repairs.
Low hot water volume but high temperature at heater
Low hot-water flow at fixtures despite the water heater reaching high temperatures typically indicates a restriction or failure downstream rather than a problem with the heater itself.
Possible causes include clogged aerators, mineral-scaled showerheads, partially closed valves, corroded pipes, or failing mixing valves.
Recommend inspecting and cleaning fixtures, checking zone valves, flushing lines, and replacing defective cartridges or diverters; call a plumber for hidden pipe blockages.
Final Checklist Before Calling a Professional
Before contacting a professional, the homeowner should compile clear notes on symptoms and the tests already performed to save time and avoid repeated diagnostics.
Concise documentation helps a plumber or HVAC technician assess the situation remotely and prepare necessary parts. Providing specific measurements, error codes, and recent changes to the system will speed up the repair.
- List of observed symptoms with dates and times (temperature variations, noises, pressure changes)
- Results of simple tests performed (thermostat settings checked, aerators removed, heater reset, temperature readings)
- Relevant system details to give the technician (water heater model and age, recent maintenance, any error codes or warning lights)
What to document about symptoms and tests performed
When preparing to contact a professional, record clear, specific details about the shower’s behavior and any tests already conducted so the technician can assess the problem quickly.
Note onset, frequency, temperature ranges, sudden drops, and whether hot water elsewhere is affected.
Log flow rates, thermostat settings tried, pilot light or breaker checks, error codes, dates/times of tests, and any unusual noises or odors.
Information to provide to a plumber or HVAC technician
If the homeowner plans to call a plumber or HVAC technician, they should compile a concise packet of facts that lets the professional diagnose the issue efficiently:
- list appliance type, age, model, and installation date;
- describe symptoms, temperatures measured, times and duration of incidents;
- note recent repairs, water pressure readings, and any sediment or discolored water;
- include photos, error codes, and access restrictions to streamline assessment and repair.
Conclusion
When a lukewarm shower persists, the homeowner learns that small faults often cast long shadows: clogged screens, misadjusted thermostats, or competing household demands can all steal warmth. By following the quick fixes, diagnostic steps, and targeted repairs outlined, one can restore steady heat or know when to call a pro. Like tuning an instrument before a performance, thoughtful maintenance brings predictable comfort back to the daily ritual of bathing.