
How to Determine the Age of a Water Heater: 6 Simple Ways to Check Its Manufacture Date
To find out how old your water heater is, start by checking the manufacturer’s data plate or serial number on the tank. You can decode brand-specific formats from companies like AO Smith, Rheem, Bradford White, Whirlpool, and GE, or contact the manufacturer for confirmation. If the data plate is illegible, look for installation receipts, service tags, permits, or home-inspection records. Additionally, physical signs such as corrosion, sediment noise, and anode wear can help you estimate its age. For a more precise date, follow up with model decoding and review the maintenance history.
How to Quickly Tell the Age of a Water Heater
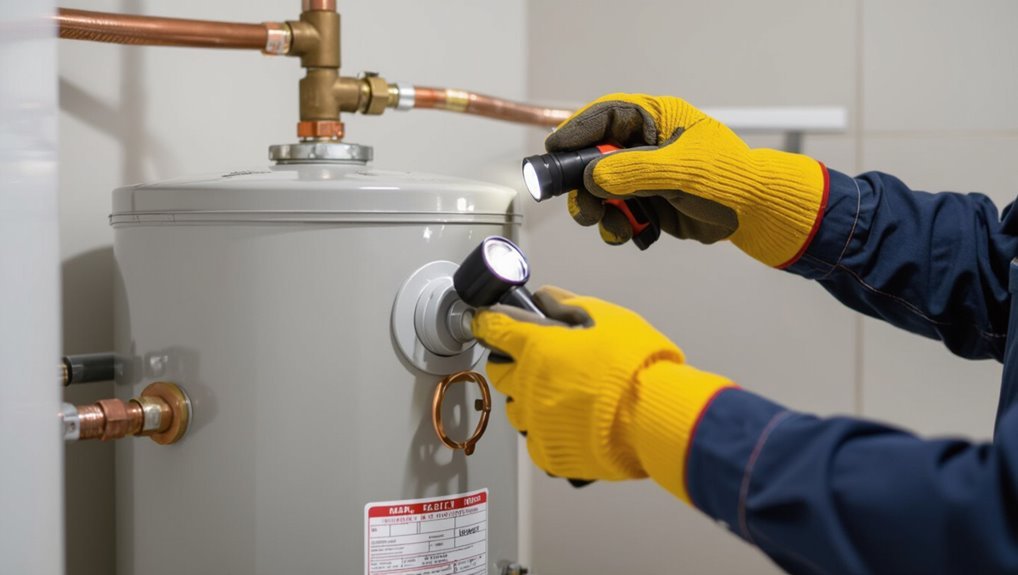
A quick method to find a water heater’s manufacture date is to read the serial number on the unit’s label and match its code to the maker’s date system.
Knowing the age matters because older heaters are more likely to pose safety risks, lose efficiency, and require replacement.
This information helps prioritize repairs or plan for timely replacement.
One-sentence quick method to find manufacture date
Quick inspection of the unit’s serial number usually reveals the manufacturing date: many manufacturers encode the year and month directly in the serial string, so locating and decoding that stamp provides the fastest age estimate.
To determine age of water heater, read the serial on the tank or label, compare its code to the maker’s decoding chart (online or manual), and record the derived month and year.
Why knowing the age matters for safety, efficiency, and replacement planning
Knowing a water heater’s manufacture date does more than satisfy curiosity; it informs decisions about safety, operating costs, and timing for replacement.
Older units pose higher risks of leaks, corrosion, and tank failure. Efficiency declines with age, raising energy bills.
Planned replacement avoids emergency breakdowns, allows budgeted upgrades to more efficient models, and guarantees compliance with modern safety and efficiency standards.
Where to Find the Manufacturer’s Label or Data Plate
The manufacturer’s label or data plate is typically located on the front or side of tank-style water heaters, near the top for gas units and around the control area for electric models.
For tankless and heat-pump systems, the plate is often on the access panel, inside the cabinet, or on an exterior side panel.
If the label is faded, damaged, or missing, the technician should check service records, serial-number formats, or contact the manufacturer with remaining markings or photos.
Common label locations on tank-style water heaters
Locating the manufacturer’s label or data plate on a tank-style water heater is the essential first step in determining its age. These labels typically contain model and serial numbers, manufacturing dates, and other identifying information.
Common placements include the upper front panel, near the temperature/pressure relief valve, on the side near inlet/outlet connections, or on the back lower access panel.
Check behind insulation or mounting brackets.
Where to look on tankless and heat-pump water heaters
On tankless and heat-pump water heaters, the manufacturer’s label or data plate is usually placed on an easily accessible exterior surface—often the front panel, side casing, or inside a removable service access cover—so technicians can read model and serial numbers without disassembling the unit.
Additional locations include near electrical junction boxes, on mounting brackets, or inside lower access panels beside plumbing and wiring connections.
What to do if the label is faded, damaged, or missing
A faded or missing data plate need not halt identification efforts; technicians and homeowners can rely on alternative clues and methods to establish a water heater’s age.
Inspect serial numbers stamped on fittings or the burner assembly, check installation records or permits, examine component styles and plumbing materials for era clues, consult manufacturer support with photos, and use photographic comparison to dated models online.
Decoding the Serial Number by Major Brands
The following section explains how different manufacturers embed date information in their serial numbers and what to look for when identifying a unit’s age.
It covers common formats used by AO Smith, Rheem/Ruud, Bradford White, Whirlpool, GE, and other major brands. Readers are encouraged to compare a heater’s serial plate against these patterns to estimate its manufacture date.
- Typical serial number formats and date codes for AO Smith
- Serial number decoding for Rheem and Ruud
- How to read Bradford White serial numbers
- Interpreting serials for Whirlpool, GE, and other common brands
Typical serial number formats and date codes for AO Smith
AO Smith water heater serial numbers typically embed the manufacture date using a month/year or week/year code near the start of the string, with recognizable patterns that vary by production era and model line.
Common formats include MMYY, MYY, or a three- to four-digit week/year code. Letters sometimes indicate plant or line.
Consulting AO Smith charts or support confirms decoding for specific models.
Serial number decoding for Rheem and Ruud
Following the overview of AO Smith formats, Rheem and Ruud serial numbers present their own consistent patterns that help identify manufacture dates and plant codes.
Rheem typically uses a letter for month and two digits for year plus plant code; Ruud often places year and week digits early in the string with a plant identifier following.
Consult manufacturer charts for exact decoding.
How to read Bradford White serial numbers
How can a Bradford White serial number be decoded to reveal manufacture date and plant information?
Bradford White serials typically begin with a letter indicating plant, followed by two digits for year and two for month (YYMM) or a Julian day code.
Remaining characters are production sequence.
Consult Bradford White resources or a dealer to confirm specific plant codes and format variations for older or commercial units.
Interpreting serials for Whirlpool, GE, and other common brands
After decoding Bradford White serials, homeowners and technicians often need to interpret codes from other major manufacturers.
Whirlpool and GE each use distinct serial formats that reveal manufacture dates and sometimes plant locations. Whirlpool commonly encodes year and week near the start or end of the serial. GE often uses a letter for year plus digits for week.
Other brands follow similar patterns—consult manufacturer guides for exact decoding.
Alternative Methods When the Serial Number Is Unreadable
If the serial number cannot be read, other records can often establish the water heater’s age.
Inspectors and owners should look for installation or service stickers with dates, home inspection reports, receipts, and permit filings.
Photographs, smart-home logs, and HVAC or plumbing service records can also provide timestamped evidence.
Finding the installation or service sticker and interpreting dates
Installation or service stickers often provide a clear date stamp when serial numbers are obscured or worn. Technicians and homeowners should inspect the sides, front panel, and the tank top for adhesive labels that list install or maintenance dates.
Note date formats (MM/YYYY, YYYY, or stamped month/day) and compare earliest service entries to infer age. Photographs and legible transcription aid verification.
Checking home inspection reports, receipts, and permit records
Consult local paperwork such as home inspection reports, purchase receipts, and building permit records to verify a water heater’s installation date when the serial number is unreadable.
Inspectors often note appliance models and installation dates. Receipts show purchase and installation details. Permit filings record official installation dates and contractor information.
Cross-referencing these documents establishes a reliable age estimate without relying on the unit’s serial data.
Using photos, smart-home logs, or HVAC/plumbing service records
When the serial number cannot be read, homeowners can often determine a water heater’s age by reviewing photographic records, smart-home logs, and maintenance service histories.
Photographs timestamp installation context; smart thermostats or home hubs may log installation or replacement events.
HVAC/plumbing invoices, service tags, and warranty paperwork typically list make, model, and installation dates, providing reliable age confirmation when labels are illegible.
Estimating Age by Physical and Performance Clues
Visible corrosion, a pitted or bulging tank, and a heavily worn anode rod can all indicate an older water heater.
Performance changes such as reduced hot-water capacity, discolored or rusty water, and unusual noises further suggest advanced age or impending failure.
Energy-efficiency features and design details—like insulation thickness, pilot light style, or electronic controls—also help place a unit within a particular era.
Visual signs of aging (corrosion, tank condition, anode rod wear)
Rust, pitting, and mineral buildup along a water heater’s exterior and fittings often signal advancing age and potential failure.
Visual inspection of tank seams, flange areas, and pipe connections reveals corrosion extent. A heavily corroded or bulging tank indicates long service life.
Anode rod inspection—severe depletion, sludge, or wire exposure—confirms significant wear and suggests imminent replacement to prevent tank deterioration.
Performance indicators (reduced capacity, rusty water, noises)
Several clear performance changes often betray a water heater’s advancing age: diminished hot-water output, discoloration of water, and unusual noises.
Reduced capacity and longer recovery times indicate sediment buildup and declining component efficiency.
Rusty or brown water suggests internal corrosion or failing anode protection.
Pinging, cracking or rumbling noises point to sediment heating and metal stress, signaling near-term service or replacement.
Energy-efficiency cues and model features by era
While exact manufacture dates require serial numbers, energy-efficiency features and era-specific design cues offer reliable age estimates: older tanks commonly lack insulation wraps, have lower energy factor ratings, and use simple mechanical thermostats.
Mid-era models introduced thicker foam insulation, electronic ignition on gas units, and improved anode designs, and modern heaters display high-efficiency labels, low-NOx or condensing burners, digital controls, and compact heat-exchanger designs indicative of the past decade.
Owners note component styles, venting types, control interfaces, and certification stickers to place units within eras; combined with performance signs, these cues narrow age estimates when serial decoding isn’t possible.
Using Model Numbers and Manufacturer Resources
Model and serial numbers can be matched against manufacturer catalogs to pinpoint production years.
If catalog lookup is inconclusive, contacting the manufacturer’s support line or email with the serial/model details often yields a definitive manufacture date.
Additionally, online databases and owner forums can help identify model-year patterns or corroborate dates from similar units.
How to cross-reference model numbers with manufacturer catalogs
Begin by locating the full model number on the water heater’s data plate.
Then use that identifier to search manufacturer catalogs and online resources for production and revision details.
Match model variants, suffixes, and revision codes against catalog tables or PDF archives.
Note production years, manufacturing plant codes, and compatible serial ranges to narrow the manufacture date window without contacting support.
When and how to contact manufacturer support for date verification
When should manufacturer support be contacted for date verification, and how should one prepare before reaching out?
Contact support when model number decoding, serial ambiguity, or warranty questions persist.
Provide model and serial numbers, purchase receipt, installation date, and photos of the rating plate.
Note tank location and any modification history.
Request written confirmation of manufacture date and any relevant production codes.
Online databases and forums that track model years
After contacting the manufacturer (or while awaiting a response), owners can consult online databases and specialty forums that catalog model years and decode serial numbers.
These resources compile user-reported data, service manuals, and pattern recognition to interpret model-format changes. Cross-referencing multiple sites and archived manufacturer catalogs reduces errors.
Participation in forum threads may reveal rare variations and regional coding nuances useful for accurate age estimates.
When to Replace Instead of Repairing
Typical lifespan varies by type—tank units often last 8–12 years, tankless 15–20 years, and heat pump models around 10–15 years—so age is a primary replacement factor.
A simple cost-benefit checklist comparing repair cost, remaining useful life, efficiency losses, and warranty status helps decide whether to repair or replace.
Immediate replacement is recommended if there are clear safety signs such as leaking from the tank, rusty water with corrosion, or gas/combustion odors.
Typical lifespan ranges by water heater type (tank, tankless, heat pump)
Although water heaters share the same basic function, expected service life varies considerably by type: conventional tank models usually last 8–12 years, tankless units commonly reach 15–20 years, and heat pump (hybrid) systems often operate reliably for 10–15 years.
Lifespan depends on installation quality, water hardness, maintenance frequency, and usage patterns.
End-of-life signs include leaks, reduced capacity, and frequent failures.
Cost-benefit checklist: repair vs. replace
Evaluate repair versus replacement by weighing immediate costs against long-term value and risk.
Consider age relative to expected lifespan, frequency and cost of past repairs, energy efficiency differences, warranty status, and likelihood of future failures.
Factor in resale or home value impact and potential utility savings.
Opt for replacement when cumulative repair costs approach new-unit price or reliability and efficiency gains justify investment.
Safety signs that require immediate replacement
Several clear safety signs indicate a water heater should be replaced immediately rather than repaired.
Visible corrosion, active leaks, bulging tank walls, or rust-colored water signal structural failure.
Repeated pilot outages, persistent gas odors, or loud rumbling and knocking suggest internal damage or sediment buildup beyond safe repair.
Any pressure relief valve discharge or thermal expansion causing leakage mandates prompt replacement to prevent catastrophic failure.
Record-Keeping and Maintenance Tips to Track Water Heater Age
A concise record kept at installation and during each service visit—model and serial number, installation date, installer contact, and work performed—provides a clear provenance for the unit.
A simple maintenance schedule tied to age milestones (annual checks, tank flushes at 1–3 years, more frequent inspections after year 8) helps preserve performance and identify end-of-life signs.
Age also determines warranty applicability, the likelihood of available replacement parts, and the unit’s resale value, so documentation supports warranty claims and informed replacement decisions.
What records to keep at installation and during service visits
At installation and each service visit, owners should create and maintain a concise record that includes the heater’s make, model, serial number, installation date, installer contact, and initial warranty information.
Records should also note service dates, performed actions, replacement parts with part numbers, technician name, observed issues, and next recommended check.
Store copies digitally and with appliance paperwork for warranty or replacement reference.
Simple maintenance schedule tied to age milestones
Owners should follow a concise, age-based maintenance schedule that ties specific checks and tasks to clear year milestones, making it easier to track condition and anticipate repairs or replacement.
Yearly: inspect for leaks, test pressure relief valve, flush sediment.
Years 5–7: check anode rod, evaluate insulation and thermostat.
Years 10+: increase inspection frequency, document findings, and plan for eventual replacement.
How age affects warranty, parts availability, and resale value
Although warranties, replacement parts, and resale value all decline over time, maintaining clear age records can preserve remaining coverage, simplify part sourcing, and support fair pricing.
Accurate records (photos, receipts, serial numbers) help verify warranty eligibility, speed technician diagnostics, and identify compatible components.
Transparent age documentation also informs buyers, enabling realistic offers and reducing disputes during sale or trade-in of the unit.
Quick Reference Resources
A concise set of quick-reference tools helps identify water heater age and guide next steps. Below is a snapshot combining brand/serial decoding and a simple action timeline to illustrate typical formats and responses by age or symptom severity.
| Reference | Snapshot |
|---|---|
| Brand decoding & common serial formats | Example codes: AO Smith (A0YYMM…), Rheem (####YY#…), Bradford White (YYMM####) |
| Typical lifespan & action timeline | 8–12 years typical; inspect at 8, consider replacement by 12 or sooner if leaks/inefficiency |
Table: Brand decoding summary, common serial formats, typical lifespan
This quick-reference table condenses brand-specific serial-number decoding methods, common serial formats, and typical lifespans into an at-a-glance resource to help identify a water heater’s manufacture date and expected service life.
It lists major brands, where to find serials, decoding patterns (month/year, week/year, letter codes), typical warranty periods, and average lifespans (6–15 years) for gas, electric, and tankless models.
Table: Action timeline based on age and symptom severity
With manufacture date and expected service life established in the previous summary, the action timeline table maps recommended responses to a water heater’s age and symptom severity.
It outlines immediate, short-term, and long-term actions: monitor minor issues, schedule repairs for moderate problems, and prioritize replacement for older units or severe failures.
Safety, cost, and efficiency guide each recommendation.
Practical Step-by-Step Checklist to Determine Your Heater’s Age
A concise checklist guides the owner through confirming a water heater’s age using observable data and records.
It begins with documenting the unit’s data plate and proceeds through serial/model decoding, record verification, and a condition/performance assessment.
The process ends with a decision on repair or replacement and formal documentation of findings.
- Photograph the data plate and note visible identifiers.
- Decode the serial/model number or contact the manufacturer for production details.
- Cross-check installation records and service history against the decoded age.
- Inspect physical condition, test performance, then decide repair or replacement and record the outcome.
Step 1: Locate and photograph the data plate
Begin by locating the water heater’s data plate—typically a metal or adhesive label on the tank’s side, front, or upper collar.
Then photograph it clearly so all printed fields are legible. Capture close-ups and a wider shot showing plate location.
Include any surrounding orientation markers or model numbers visible. Confirm good lighting, steady focus, and multiple angles to preserve readable evidence for later reference.
Step 2: Decode serial/model or contact manufacturer
After photographing the data plate, the next step is to decode the serial and model numbers or contact the manufacturer to obtain the manufacture date.
Consult manufacturer decoding guides online or use known format charts; some serials embed month/year codes.
If unclear, record serial/model and call or email the manufacturer’s support with photos.
Document the response for verification.
Step 3: Cross-check installation records and service history
Documentation and service logs offer a practical cross-check against manufacturer dates: review installation invoices, building permits, warranty registrations, and maintenance receipts to confirm the tank’s in-service date and track any replacements or major repairs.
Compare installer notes, serial numbers recorded at installation, and service intervals to spot discrepancies.
Note ownership transfers or remodel records that might indicate undocumented replacements or retrofits.
Step 4: Inspect physical condition and test performance
With records reviewed, the next step is a hands-on inspection of the unit and basic performance tests to corroborate paperwork and serial-date findings.
Visually assess corrosion, leaks, sediment buildup, and anode rod condition. Measure water temperature, recovery time, and pressure. Note unusual noises or cycling.
Record findings to validate age estimates and identify wear inconsistent with manufacture date.
Step 5: Decide repair or replacement and document findings
Evaluate repair versus replacement by weighing the unit’s age, condition, performance test results, and estimated remaining useful life.
Recommend replacement if age exceeds typical lifespan, corrosion or leaks are present, repairs are costly relative to value, or efficiency is poor.
If repairable, document needed parts, labor estimates, and expected lifespan gain.
Record serial number, manufacture date, inspection findings, and chosen action.
Conclusion
Determining a water heater’s age helps plan maintenance, avoid failures, and budget for replacement. By checking the data plate, decoding serial numbers, inspecting wear and leaks, tracking service records, and noting performance changes, homeowners can assess condition and timing. Use manufacturer resources for verification, choose replacement when efficiency or safety declines, and keep clear records. Regular inspections preserve function, prevent surprises, and extend lifespan with timely care.
