How to Make a DIY Water Heater Rod at Home: Safe Steps and Materials
To create a DIY water heater rod at home, you’ll need corrosion-resistant metal (like stainless steel or nichrome), high-temperature insulation, watertight connectors, and proper grounding. Follow these essential steps for a safe and effective design:
- Select Materials: Use stainless steel or nichrome for the heating element, and ensure all components are rated for high temperatures.
- Design Resistance and Power: Calculate the required resistance and power output for your heating needs.
- Fit Insulated Terminals: Attach insulated terminals to prevent electrical shocks.
- Seal Joints: Use marine epoxy to seal all joints and ensure watertight connections.
- Add Safety Features: Incorporate GFCI protection and a thermostat to minimize shock and fire risks.
- Test Your Device: Check for continuity and insulation integrity before any wet trials.
- Safety Inspections: Regularly inspect for corrosion and wear, and consider certified alternatives for enhanced safety.
This guide provides a clear path to constructing your water heater rod while prioritizing safety.
Overview of Homemade Water Heater Rods and Safety Considerations

A water heater rod is a simple electrical element used to heat water for tasks such as small-scale immersion heating, camping setups, or experimental projects.
Before attempting any DIY construction, legal and safety disclaimers emphasize compliance with local codes, proper electrical certification, and that the author assumes no liability for harm or damage.
Homemade heating elements carry risks like electric shock, fire, corrosion, and scalding, which can be reduced by using appropriate insulation, ground-fault protection, thermostatic controls, and corrosion-resistant materials.
What a water heater rod is and common uses
Water heater rods, often improvised by hobbyists from steel or copper stock, are simple conductive elements designed to convert electrical energy into heat when immersed in water.
They typically serve for small-scale heating, experimental baths, or emergency warm-up tasks.
Guides on how to make water heater rod at home describe materials, connections, and common uses like immersion heating, thawing pipes, or hobbyist demonstrations.
Legal and safety disclaimers before attempting DIY
Because homemade immersion heaters involve live electricity and open elements, strict legal and safety warnings are essential before attempting construction or use.
Makers should recognize potential code violations, insurance implications, and liability for injuries or property damage. Local regulations may prohibit such devices.
Professional consultation, adherence to electrical codes, and avoiding use in rented or commercial properties are strongly advised to minimize legal exposure.
Risks associated with homemade heating elements and mitigations
Having acknowledged the legal and safety warnings surrounding homemade immersion heaters, attention turns to the specific hazards posed by DIY heating elements and practical ways to reduce them.
Risks include electric shock, corrosion, overheating, fire, water contamination and unreliable thermal regulation.
Mitigations: use proper insulation, ground-fault protection, corrosion-resistant materials, thermostatic cutoffs, secure wiring, regular inspections and immediate retirement of damaged components.
Materials and Tools Required
This section lists the essential materials and tools for building a safe, functional water heater rod, including suitable metals (such as stainless or nichrome), insulation and connectors.
It also specifies required electrical components and ratings — wattage, voltage, and thermostat selection — to match the planned application.
Finally, it outlines necessary tools and personal protective equipment for safe assembly and testing.
Recommended materials (type of metal, insulation, connectors)
When selecting components for a DIY water heater rod, prioritize corrosion-resistant metals, high-temperature electrical insulation, and watertight connectors to guarantee safety and longevity.
Stainless steel or nichrome elements resist corrosion; ceramic or PTFE-insulated leads prevent breakdown; and compression or marine-grade cable glands keep joints dry.
Recommended items:
- Stainless steel sheath or nichrome coil
- PTFE or ceramic insulation sleeves
- Marine-grade, watertight connectors
Electrical components and ratings to choose (wattage, voltage, thermostat)
Because heating requirements and supply constraints vary, selecting electrical components for a DIY water heater rod hinges on matching wattage and voltage to the available circuit while incorporating an appropriate thermostat and protective devices.
Choose a wattage that the circuit and wiring can safely carry. Confirm voltage compatibility (typically 120V or 240V). Use a thermostat with an accurate setpoint range, and include overcurrent and thermal cutouts for safety.
Tools and protective equipment needed
Tools and protective equipment form the foundation of safe, effective assembly and testing of a DIY water heater rod. Proper tools reduce error; protective gear mitigates burn, shock, and chemical risks.
Recommended items include:
- Insulated hand tools, wire strippers, and a multimeter for safe electrical work.
- Heat-resistant gloves and safety goggles.
- Rubber-soled footwear and a grounded work surface.
Basic Principles of Electric Heating Elements
The rod element converts electrical energy to heat through resistance, with power output determined by the material’s resistivity and the element’s geometry.
Performance and longevity depend on material selection—conductivity, oxidation and corrosion resistance, and allowable operating temperature all matter.
Proper sealing and insulation are essential to maintain waterproofing, prevent short circuits, and keep the element within its thermal limits.
How resistance heating works in a rod element
A metal rod element converts electrical energy into heat by forcing current through a resistive conductor: as electrons collide with the atomic lattice, their kinetic energy transfers to the material and raises its temperature.
The generated heat spreads via conduction to the rod surface and then to surrounding fluid by convection and radiation.
Power follows P = I^2R or P = V^2/R, controlling heating rate.
Material properties that affect performance and corrosion resistance
Because operating temperature, electrical resistivity, mechanical strength, and chemical stability all interact to determine an element’s effectiveness, selecting materials requires balancing thermal performance with longevity in the designated environment.
Metal alloys (nichrome, stainless steel, Incoloy) offer differing resistivity and creep resistance.
Passivation, pitting resistance, and galvanic compatibility influence corrosion rates.
Surface finish and protective coatings further modify durability without discussing insulation or waterproofing.
Thermal limits, waterproofing, and electrical insulation basics
When operating near their design limits, heating elements require careful management of maximum service temperature, moisture ingress, and dielectric separation to prevent failure.
Materials must tolerate peak temperatures without oxidation or structural change.
Seals and enclosures prevent water contact; potting compounds or glass-to-metal seals are common.
Insulation and proper grounding maintain dielectric strength, minimizing leakage, arcing, and shock risk.
Regular inspection guarantees integrity.
Step-by-Step Construction Process
The construction process begins with designing the heater, calculating required length, resistance, and power to match the planned application.
Next come preparing and shaping the metal rod, attaching robust electrical terminals, and applying insulation and seals to protect against water.
Finally, installation of a thermostat or thermal cutoff guarantees safe temperature control and overheat protection.
Designing the heater: calculating length, resistance, and power
Begin by determining the target electrical power and the supply voltage. Then convert those into the required heating element resistance and physical length using the chosen conductor’s resistivity and cross-sectional area. This establishes clear numerical goals for wire selection and winding layout before any cutting or assembly begins.
Calculate current, verify power density per unit length, select wire gauge to meet resistance and temperature limits, and include safety margins.
Preparing and shaping the metal rod
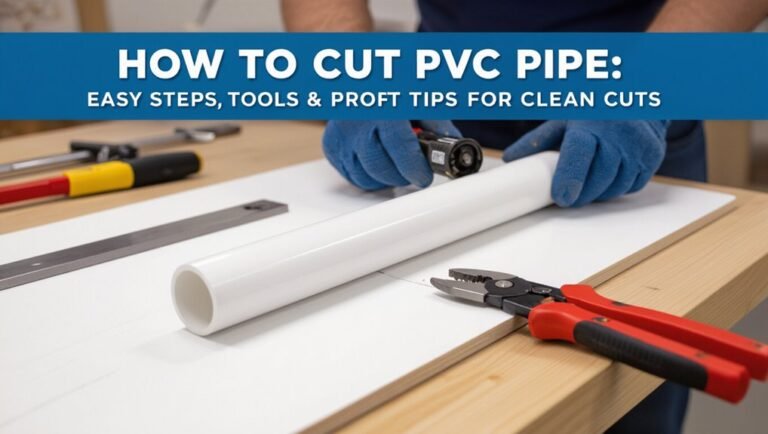
Clamp the metal rod securely in a vise and mark the planned length and any feature locations (threads, holes, flats) with a scribe and calipers.
Cut to length using a bandsaw or cutoff wheel, deburr with a file, then centerless-grind or turn on a lathe for precise diameter.
Drill or tap marked holes, verify dimensions with calipers, and clean surfaces before corrosion protection.
Attaching electrical terminals and ensuring secure connections
With the rod machined, attention shifts to attaching the electrical terminals and ensuring secure connections.
The technician fits insulated high-temperature terminals to each end, tightens with appropriate torque, and solders or crimps joints where specified.
All connections are inspected for continuity and resistance, and strain relief is added.
Exposed conductors are minimized, and fasteners are checked against vibration and corrosion.
Applying insulation and sealing for water exposure
Several layers of protection are applied to prevent water ingress and insulate the electrical heater rod.
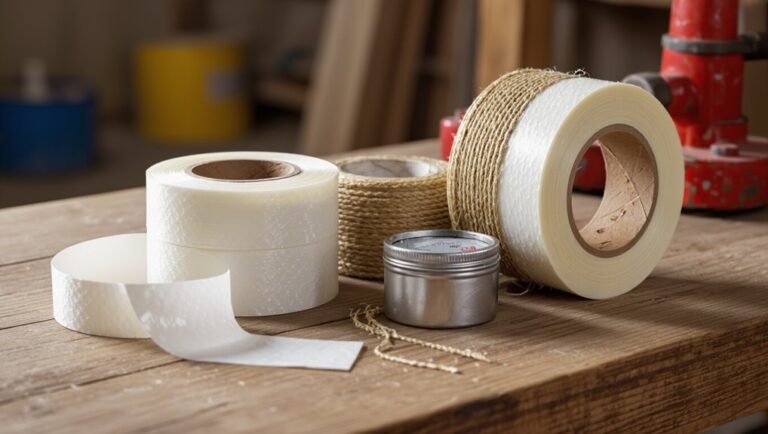
The exposed assembly is wrapped with high-temperature silicone tape, followed by heat-shrink tubing over terminals.
A marine-grade epoxy or waterproof potting compound is applied to joints and cable entries.
External silicone sealant reinforces seams.
All materials chosen resist heat, water, and chemical exposure; cured seals are inspected for voids.
Installing a thermostat or thermal cutoff
Begin by identifying an appropriate mounting location for the thermostat or thermal cutoff that guarantees direct thermal contact with the heater rod while remaining clear of electrical connections and moving components.
Secure the sensor with high-temperature-rated clamps or thermal epoxy.
Route its leads to the control wiring using heat-resistant sleeving and strain relief.
Test continuity and setpoints per manufacturer specifications before live operation.
Final assembly and mounting options
Once the thermostat and electrical connections are verified, the final assembly proceeds by securing the heater rod into its chosen mounting configuration and enclosing all wiring and terminals to confirm mechanical stability and protection from moisture and accidental contact.
Mounting options include flange fittings, compression glands, or clamp brackets; make sure seals, strain reliefs, and corrosion-resistant fasteners are used.
Test for leaks, secure panels, and label circuits before use.
Testing and Safe Commissioning
Before first use, the builder conducts electrical continuity and insulation resistance checks to verify safe wiring and element integrity.
Next, a dry-run bench test measures temperature rise and confirms control responses, followed by a controlled wet test that inspects for leaks and proper heat transfer.
During initial operation, the system is closely monitored with defined emergency shutdown steps ready if abnormal temperatures, currents, or leaks occur.
Pre-use electrical continuity and insulation resistance checks
Performing pre-use electrical continuity and insulation resistance checks is essential to verify that all wiring, connections, and heating elements in the DIY water heater rod are intact, correctly connected, and electrically isolated from grounded parts.
A multimeter confirms continuity across designated circuits; an insulation tester (megger) measures resistance between live conductors and earth.
Record readings, compare to safety thresholds, and rectify any faults before powering the device.
Initial dry-run bench tests and measuring temperature rise
With continuity and insulation confirmed, the next phase is a controlled dry-run on the bench to verify functionality and measure temperature rise without introducing water.
The device is powered via a fused, current-limited supply while surface temperatures are recorded with a calibrated thermocouple.
Log steady-state temperature, time-to-rise, and current draw.
Abort if overheating, odor, smoke, or unexpected resistance changes occur.
Wet testing protocol and leak checks
Proceed to introduce water slowly and under supervision, using a secondary containment tray to catch any leaks and preventing live wiring from contacting liquid during filling.
Inspect all seals, joints, and connections for weeping.
Apply a low-pressure pneumatic or hydrostatic test, monitor for pressure drop, and tighten or replace fittings as needed.
Document results and only proceed once dry and watertight.
Monitoring during first use and emergency shutdown procedures
After confirming the unit is dry and watertight, initial operation should be conducted under close observation to detect abnormal noises, odors, leaks, or electrical symptoms.
Operators monitor temperature rise, current draw, and pressure, keeping a fire extinguisher and insulated gloves nearby.
If overheating, sparking, persistent leak, or tripped breakers occur, cut power immediately at the breaker, isolate water supply, and document faults before further use.
Maintenance, Troubleshooting, and Longevity
A concise routine inspection checklist helps identify wear, corrosion, and electrical issues before they worsen.
Common failure modes—such as element burnout, thermostat faults, and scale buildup—are summarized with simple diagnostic steps to isolate the cause.
Clear repair-versus-replacement indicators guide whether to replace individual components or the entire rod for reliable longevity.
Routine inspection checklist
Why inspect the DIY water heater rod regularly? Routine checks guarantee safe operation, detect corrosion, and prevent energy loss. A concise checklist guides owners to verify integrity and connections before issues escalate.
- Inspect terminals and insulation for wear, looseness, or discoloration.
- Check rod surface for corrosion, pitting, or scale buildup.
- Confirm mounting, seals, and proper grounding are intact.
Common failure modes and how to diagnose them
Common failure modes for a DIY water heater rod typically fall into electrical faults, corrosion-related degradation, and mechanical seal or mounting issues; diagnosing them requires targeted observation and simple tests.
Inspect for discoloration, brittle insulation, tripped breakers, or blown fuses. Measure continuity and resistance with a multimeter, check for visible pitting or scaling, and verify seals and mounting tightness for leaks or movement.
Repair versus replacement indicators
When evaluation shows isolated electrical faults, minor corrosion, or worn seals, repair is often practical; however, extensive element pitting, repeated failures, significant wiring damage, or persistent leaks indicate replacement is the safer, more cost-effective choice.
Decisions should weigh component age, parts availability, safety risks, and labor cost.
If efficiency loss, sediment buildup, or multiple fault categories coexist, replacement is recommended.
Alternatives to DIY Heater Rods and When to Choose Them
The article contrasts homemade rods with commercial immersion heaters, noting their higher safety standards and varying cost and efficiency trade-offs.
It also outlines safer low-voltage and tankless options that reduce electrical risk and standby losses.
Guidance is provided on when to hire a licensed electrician or purchase certified equipment, especially for permanent installations, high-power units, or where local code requires professional work.
Commercial immersion heaters: pros and cons
Commercial immersion heaters offer a ready-made alternative to DIY heater rods, combining factory-tested elements, safety features, and warranties that likely exceed what a home-built unit can provide. They deliver consistent power, certifications, and easier installation, but cost more, limit customization, and may require compatible fittings or professional installation.
| Advantage | Drawback |
|---|---|
| Certified safety | Higher cost |
| Warranty | Less customization |
| Consistent output | Specific fittings |
| Easier install | Possible pro labor |
| Durable build | Limited adaptability |
Safer low-voltage or tankless alternatives
Several safer alternatives to DIY heater rods exist, particularly low-voltage immersion units and tankless on-demand water heaters, which reduce electrical and scalding risks while offering comparable heating performance.
Low-voltage immersions limit shock hazard and are suitable for small volumes.
Tankless units provide controlled, continuous hot water with built-in safety features.
Both options favor certified devices over improvised elements.
When to hire a licensed electrician or buy certified equipment
When should a professional be engaged instead of attempting a DIY heater solution?
A licensed electrician should be hired for high-voltage installations, complex wiring, older homes, unclear local code requirements, or when warranty and certification are needed.
Buying UL/CE-certified equipment is advised for permanence, safety testing, and insurance compliance.
Professional assessment prevents fire, electrocution, and code violations.
Practical Safety Tips and Best Practices
The section outlines essential precautions for working with water heater rods, focusing on electrical safety and proper grounding to prevent shock hazards.
It also covers choosing corrosion-resistant materials and routine maintenance to extend element life.
Finally, it explains safe disposal and recycling procedures for failed elements to minimize environmental and safety risks.
Electrical safety around water and grounding requirements
Any interaction between electricity and water demands strict precautions because water drastically lowers resistance and increases shock risk.
Grounding, GFCI protection, and insulation are essential when installing or operating a DIY heater rod. Proper bonding prevents stray voltages; GFCIs detect imbalance quickly; sealed connections avoid moisture ingress.
- Guarantee dedicated grounded circuit and bonding
- Install GFCI-protected outlet or breaker
- Use waterproof cable glands and insulated terminals
Corrosion prevention and material selection tips
Several key considerations determine component longevity in DIY heater rods: select corrosion-resistant materials (stainless steel grades like 316 or titanium for harsh or saline environments).
Use compatible fasteners and fittings, apply insulating coatings or PTFE tape where needed, avoid dissimilar metal contact to prevent galvanic corrosion, and consider sacrificial anodes or controlled-water chemistry to minimize scaling and pitting for reliable, long-term performance.
Safe disposal and recycling of faulty elements
Dispose faulty heating elements responsibly to prevent environmental harm and safety risks: contaminated or corroded rods should be de-energized, cooled, and handled with insulated gloves before transport.
The article recommends separating metal types, removing hazardous residues, and placing components in labeled containers.
Use licensed recycling centers or hazardous waste facilities, follow local regulations, and document disposal to guarantee traceability and compliance.
Example DIY Designs and Use Cases
The section outlines two practical heater rod designs: a simple low-power unit suitable for small containers with basic materials and wiring, and a higher-power version incorporating a thermostat and a schematic overview for larger tanks.
It then matches these designs to use cases such as camping, emergency water heating, and quick household hacks.
The descriptions focus on component choices, wiring considerations, and situational suitability.
Simple low-power rod for small containers (materials and wiring)
A simple low-power heating rod for small containers can be built from a stainless-steel or nichrome wire element housed in a small-diameter metal tube, insulated with high-temperature ceramic fiber or mica and connected to a low-voltage, limited-current supply.
Materials typically include the element, tube, high-temperature insulation, two insulated lead wires with waterproof feedthroughs, and basic fasteners or end caps to seal the assembly.
Assembly: secure element inside tube, pack insulation, attach leads through sealed feedthroughs, verify continuity and insulation, and use a fused low-voltage supply with current limiting for safe, brief immersion heating of small volumes.
Higher-power design with thermostat for larger tanks (schematic overview)
Designing a higher-power immersion heater for larger tanks combines a robust heating element, a reliable thermostat, and safety protections into a coordinated schematic that supports controlled, sustained operation.
The overview shows mains-rated heating element, thermal cutoff, adjustable thermostat, RCD/ground fault protection, properly rated wiring, and a contactor or SSR for switching.
Include temperature sensor placement, overtemperature interlock, and clear grounding.
Case scenarios: camping, emergency heating, and household hacks
Many practical situations call for a compact, portable immersion heater solution tailored to specific constraints—camping trips, power-outage emergency heating, and quick household fixes each impose different limits on power, fuel, and safety.
Practical examples prioritize low-voltage, insulated designs; battery or gas alternatives for off-grid use; and clear shutdown methods for indoor safety.
- Lightweight, low-voltage camping coil
- Emergency car-battery immersion
- Short-duration household quick-heat rod
Conclusion
In the quiet glow of careful craft and caution, the homemade heater rod stands as a small, honest forge—useful when respect for electricity and water is not sacrificed. Balancing proper materials, sound technique, and vigilant testing, the DIY path rewards prudence over haste. Yet like any hand-forged tool, it demands routine care and humility before safer alternatives; treated wisely, it warms; treated recklessly, it warns.