How to Install a Bathtub Liner: Step-by-Step Guide for a Professional-Looking Finish
Installing a bathtub liner is a straightforward way to rejuvenate your tub, providing a custom acrylic or PVC shell that conceals damage and stains. Begin with accurate measurements and a dry fit to ensure a perfect match. Clean the existing tub thoroughly, then apply a compatible adhesive. Carefully position the liner using rollers to eliminate air pockets. Trim the liner for the drain and overflow, secure the flange, and seal it with tub-grade silicone. Allow the liner to fully cure before using the tub. For detailed tips, troubleshooting advice, and maintenance recommendations, continue reading.
What a Bathtub Liner Is and When It Makes Sense
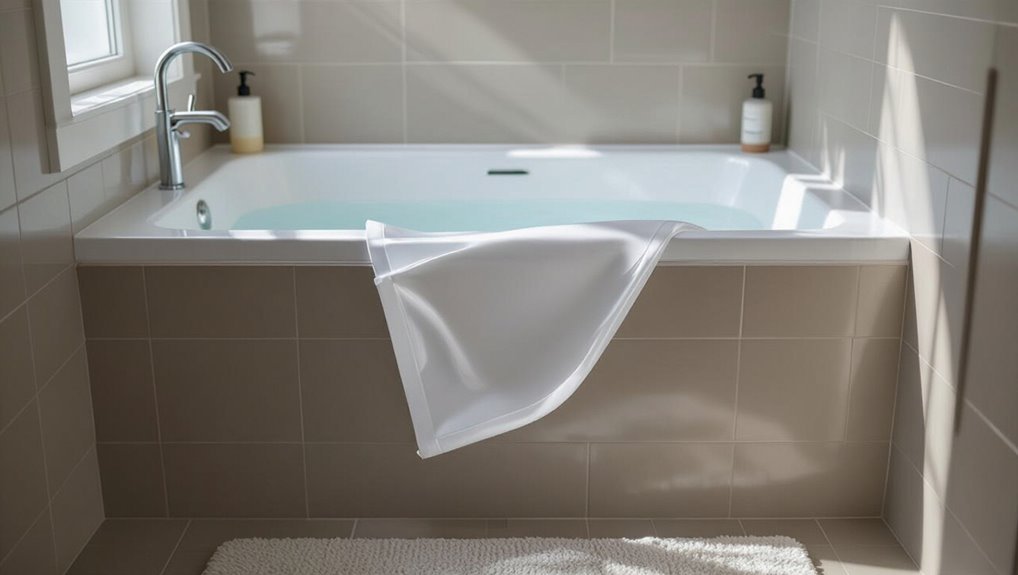
A bathtub liner is a custom-cut acrylic or PVC shell fitted over an existing tub, available in full-coverage, partial, and custom-shaped varieties.
It is often chosen as a middle ground between reglazing and full replacement because it offers quicker installation and stronger durability than refinishing but costs less and is less invasive than replacing the tub.
Consider a liner when the tub has surface damage, persistent staining, or aesthetic issues and the homeowner seeks a budget-friendly, longer-lasting alternative to refinishing.
Definition and types of bathtub liners
When a homeowner wants to refresh a worn or damaged tub without a full replacement, a bathtub liner offers a prefabricated shell that fits over the existing surface.
Liners come in acrylic, PVC, and enameled steel variants sized for alcove, freestanding, and corner tubs.
Understanding materials and fit is essential before learning how to install a bathtub liner to guarantee proper adhesion and drainage.
Pros and cons compared to reglazing and full replacement
Having outlined liner materials and fits, the discussion turns to how liners stack up against reglazing and full tub replacement.
Liners offer faster installation, durable surface, and minimal demolition, but can hide underlying damage and limit style changes.
Reglazing is cheaper short-term but less durable; full replacement provides complete renewal and configurational freedom but costs more and requires extensive labor and downtime.
Signs your tub needs a liner (damage, aesthetics, budget)
Why consider a bathtub liner now?
Visible cracks, chips, stains, or peeling finish indicate structural or surface deterioration. Persistent mold, deep scratches, or worn nonstick surfaces reduce usability.
When aesthetics matter but budget or time limits prevent full replacement, a liner offers quick, cost-effective renewal.
Choose a liner if repairability is low, resale appearance is important, or interim affordability outweighs complete renovation.
Tools, Materials, and Preparation Checklist
This section lists the essential tools and materials needed to remove the old finish and install a bathtub liner, plus optional supplies that improve fit and appearance.
It also covers safety gear and ventilation requirements to protect the installer during surface preparation and adhesive work.
Readers are encouraged to gather items before starting to guarantee an efficient, safe installation.
Required tools and materials
Gather the right tools and materials before beginning to confirm a smooth bathtub liner installation. A concise kit prevents delays and guarantees proper adhesion.
Essential items include cleaning supplies, measuring tools, and secure fasteners. Safety gear protects the installer. Prepare materials in advance to maintain confidence and control throughout the process.
- Caulk remover and cleaner
- Tape measure and level
- Adhesive and trowel
- Safety glasses and gloves
Optional supplies for a professional finish
Several additional tools and materials can elevate a bathtub liner installation from adequate to professional, improving fit, finish, and longevity.
A few targeted supplies reduce gaps, hide seams, and guarantee a smooth surface:
- Precision router or trim tool for crisp edges.
- High-grade adhesive and primer for lasting bonds.
- Flexible caulk and smoothers for invisible seams.
- Fine-grit sanding pads and polishing compound for shine.
Safety equipment and ventilation considerations
One essential step before installing a bathtub liner is ensuring appropriate personal protective equipment and adequate ventilation to protect installers from dust, fumes, and chemical exposure.
Installers should wear N95 or respirator masks, chemical-resistant gloves, eye protection, and disposable coveralls.
Use exhaust fans, open windows, and portable ventilation to exchange air.
Keep a fire extinguisher nearby and follow product safety data sheets.
Measuring Your Tub Accurately
Accurate measurements are essential before ordering or cutting a liner; the process should follow a clear step-by-step routine for length, width, depth, and drain location.
The author compares template and shape considerations for custom versus stock liners, noting when templates or on-site adjustments are necessary.
Common measuring mistakes—misreading curved edges, ignoring lip overhangs, and failing to recheck critical dimensions—are highlighted with tips to avoid them.
How to take precise measurements step-by-step
Begin by assembling the required tools—tape measure, straightedge, level, notepad, and pencil—so measurements proceed without interruption.
Record overall length, width, and rim-to-floor depth at multiple points. Measure lip thickness and drain center location from two reference edges.
Note wall-to-wall variance and any slope with the level. Double-check each figure, label entries clearly, and photograph dimensions for reference.
Template and shape considerations for custom vs. stock liners
Clarity in the tub’s outline determines whether a stock liner will fit or a custom template is required.
Inspect curves, faucet locations, apron style, and drain placement to classify the tub. Standard liners suit uniform, common shapes; irregular contours, integrated seats, or offset drains necessitate a custom template.
Document critical dimensions and reference factory tolerances when deciding between stock availability and bespoke fabrication.
Common measuring mistakes and how to avoid them
Many mistakes stem from rushed or imprecise measurements, so a careful, methodical approach is essential.
Technicians should double-check length, width, depth, and offset locations, measuring at multiple points and recording the smallest clearances. Use calibrated tools, square against walls, note drain and overflow positions, and verify template fit before ordering.
Allow for manufacturer tolerances and document all dimensions for installers.
Choosing the Right Liner Material and Style
The homeowner should compare acrylic, PVC, and composite liners for durability, cost, and ease of installation to determine the best fit.
Attention to color, texture, and finished-edge options helps achieve a seamless appearance that complements the bathroom.
Finally, verifying fixture styles and existing drain locations guarantees the chosen liner will align with plumbing and hardware.
Acrylic vs. PVC vs. composite liners short comparison
Choosing between acrylic, PVC, and composite bathtub liners requires evaluating durability, appearance, cost, and installation method to match both bathroom use and budget. Acrylic: glossy, durable, higher cost. PVC: affordable, lightweight, less durable. Composite: rigid, impact-resistant, mid-price. Consider warranty, repairability, and compatibility with existing tub substrate.
| Material | Pros | Cons |
|---|---|---|
| Acrylic | Durable, glossy | Costly |
| PVC | Cheap, lightweight | Less durable |
| Composite | Stiff, impact-resistant | Heavier |
Color, texture, and edge options for a seamless look
Color, texture, and edge options determine how a liner blends with existing tile, fixtures, and room lighting, so selecting finishes that match both aesthetic and functional needs is essential.
Neutral colors hide wear; subtle patterns disguise minor imperfections. Matte textures reduce glare, gloss enhances brightness.
Rolled, squared, or molded edges affect seam visibility and water runoff. Choose combinations that complement the bathroom’s palette and maintenance routine.
Matching fixtures and drain locations
After selecting finishes that harmonize with tile and lighting, attention turns to how the liner will interface with existing fixtures and the drain.
Measure tub dimensions, fixture spacing, and drain offset to choose a liner with compatible cutouts or reversible trim.
Confirm faucet and overflow alignments; relocate or adapt plumbing if necessary.
Precise fit prevents leaks, improves appearance, and guarantees functionality.
Preparing the Bathroom and Existing Tub
Before fitting a liner, the bathroom and existing tub must be prepared to guarantee proper adhesion and a smooth finish.
The surface should be cleaned and degreased thoroughly, old caulk and adhesive removed, and any loose material cleared away.
Chips, cracks, and rough spots must be repaired and sanded level before proceeding.
Cleaning and degreasing the tub surface thoroughly
Scrub the bathtub surface methodically to remove soap scum, oils, and mineral deposits that would prevent adhesive from bonding.
Rinse thoroughly, then apply a commercial degreaser compatible with the tub material.
Agitate with nonabrasive pads, repeat as needed, and neutralize per product instructions.
Finish with a solvent wipe (isopropyl alcohol) and allow the surface to dry completely before proceeding with liner placement.
Repairing chips, cracks, and rough spots before installation
With the surface clean and free of grease, attention turns to repairing chips, cracks, and rough areas that can undermine the liner’s fit and adhesive bond.
Small chips receive automotive-grade epoxy or polyester filler, sanded flush when cured.
Hairline cracks are injected with flexible sealant or epoxy.
Rough spots are sanded smooth and wiped clean.
Repairs must be fully cured and level before liner placement.
Removing caulk, adhesives, and loose material
Begin by removing all old caulk, adhesive residue, and any loose material that could prevent a new liner from adhering properly.
Use a utility knife or caulk remover tool to cut and scrape remaining sealant.
Follow with a solvent appropriate for the adhesive, then scour gently with a non-abrasive pad.
Vacuum and wipe with isopropyl alcohol; allow full drying before proceeding.
Dry-Fit and Test Placement
The liner is set into the tub opening to check overall positioning and clearances around the rim and walls.
The installer verifies that the liner’s drain and overflow align with the existing plumbing and notes any offset.
Minor adjustments are made to accommodate in-wall or alcove installations before final trimming and adhesive application.
How to position the liner and check clearances
Lift the liner carefully into the tub cavity and set it roughly in place to assess fit and clearances.
The installer centers the liner, ensuring even gaps at walls and flange contact. Sides should sit flush without pinching; corners must align with contours.
Check front skirt clearance for cabinet doors and access panels.
Make minor adjustments until the liner sits uniformly and stable.
Verifying drain alignment and overflow fit
With the liner settled and clearances confirmed, attention shifts to aligning the drain and overflow assemblies for a dry-fit trial.
The liner is lowered, centered over existing openings; the drain trim and overflow faceplate are positioned without sealant. Gaps, offsets, or interference are noted.
Adjustments to the liner’s position are made until fastener holes line up and components seat flush for final installation.
Adjusting the liner for in-wall or alcove configurations
Although an alcove or in-wall installation restricts lateral movement, the liner is eased into place and oriented so its flanges sit evenly against each wall.
Test placement focuses on verifying that side clearances, wall contours, and any built-in ledges or niches do not pinch or bow the liner.
The installer checks for uniform gaps, confirms level seating, inspects flange contact, and marks any trim or relief required before final adhesive application.
Adhesive Selection and Application
The installer should choose an adhesive or bonding agent specified for the liner material and bathtub substrate, typically a two-part epoxy, polyurethane, or solvent-based contact cement.
Adhesive must be applied in an even, continuous layer or ribbon pattern to guarantee full contact and avoid voids, observing the product’s working time and recommended open time.
Curing expectations and final strength depend on temperature and humidity, so installers should follow manufacturer guidelines and allow proper cure before use.
Types of adhesives and bonding agents suitable for liners
Selecting the correct adhesive is critical to ensuring a bathtub liner bonds securely, resists water infiltration, and endures temperature and chemical exposure over time.
Compatible options include polyurethane adhesives for strong, flexible bonds; MS polymer (hybrid) adhesives for lower odor and good adhesion; and solvent-based contact cements for quick tack.
Epoxy fillers suit localized repairs.
Choose marine- or plumbing-grade formulations rated for wet environments.
How to apply adhesive evenly for full contact
Begin by laying out a clear adhesive plan that accounts for liner material, adhesive type, tub contours, and application tools; proper planning guarantees consistent coverage and minimizes voids.
Apply adhesive in manufacturer-recommended patterns (beads, ribbon, or skim coat), maintain steady speed and pressure, and use notched trowels or rollers for uniform thickness.
Press liner systematically, working from center outward to expel air.
Working time, curing expectations, and temperature effects
Consider working time and cure schedules as the clock that governs every step after adhesive application: each adhesive has a defined open time during which the liner can be positioned and a longer cure period before full strength and water resistance are achieved.
Temperature and humidity alter both open time and cure rate; colder slows curing and reduces tack, heat accelerates and may shorten reposition window.
Follow manufacturer charts and allow full cure before use.
Installing the Bathtub Liner Step-by-Step
The installer aligns the liner carefully over the tub, using slow, even pressure from the center outward to prevent air pockets.
A rubber roller, squeegee, and hand-held press are used to smooth the surface and guarantee full contact with the adhesive.
Finally, the edges are seated into the flange and mechanically fastened or sealed to secure the perimeter and finish the installation.
Final placement technique to avoid air pockets
Lower the liner carefully into the tub, aligning drain holes and flanges before any adhesive contact, so a single controlled motion places it evenly.
Once seated, pause briefly to verify alignment.
Apply gentle, even pressure from center outward with gloved hands to expel trapped air toward edges.
Inspect visible seams and edges for bubbles; adjust immediately before adhesive sets for a smooth, airtight fit.
Tools and methods for pressing and smoothing the liner
Gather a small set of specialized tools—soft rubber roller, microfiber squeegee, flat gloved hands, and a trim-safe shim—to press and smooth the liner efficiently and prevent trapped air or adhesive gaps.
Work from center outward with overlapping passes, applying steady even pressure.
Use the shim for tight corners and to lift and re-seat small bubbles, wiping adhesive residue promptly for a clean, uniform bond.
Securing the liner edges and flange attachment
Start by aligning the liner flange with the tub rim and surrounding wall so the edge sits flush without gaps.
Then apply marine-grade adhesive evenly along the flange and behind the lip, press firmly, and insert fasteners per manufacturer spacing.
Seal seams with silicone caulk, smooth bead, and wipe excess.
Allow adhesive and sealant to cure fully before testing for leaks or reinstalling fixtures.
Drain and Overflow Installation
The installer cuts the liner precisely around the drain and smooths the opening to prevent gaps or sharp edges.
Next, the drain assembly is fitted and tightened with appropriate gaskets or sealants to achieve a watertight connection.
Finally, the overflow and drain are tested for proper operation and leaks before allowing any sealant or adhesive to cure.
Cutting the liner for the drain and finishing the hole
Measure and mark the liner precisely around the drain and overflow before cutting to guarantee a snug, watertight fit.
Using a sharp utility knife, cut slowly along marked lines, leaving a small adjustment margin. Trim gradually until the liner seats flush.
Smooth edges with fine sandpaper or a deburring tool, remove debris, and verify alignment before proceeding to the next installation step.
Installing the drain assembly and ensuring watertight seals
Install the drain assembly with care to guarantee all seals are watertight and components align correctly.
The installer fits the drain flange through the liner hole, seats a neoprene or rubber gasket, and secures the nut beneath.
For overflow, the plate and gasket are positioned flush, connections tightened to manufacturer torque.
Excess sealant is wiped away and joints inspected for uniform compression.
Testing overflow and drain function before curing
Once the drain flange and overflow plate are tightened and sealant wiped clean, testing of the overflow and drain function should be performed before the liner cure is complete.
Fill the tub to the overflow level, observe for leaks at flange and overflow connections, and confirm proper drainage when the plug is removed.
Address any seepage immediately, re-seat gaskets or add sealant, then retest.
Caulking, Sealing, and Finishing Touches
Next, attention turns to caulking, sealing, and final cosmetic work to guarantee a watertight, long-lasting installation.
The installer selects a tub-rated, mildew-resistant silicone or polyurethane sealant and applies it with a steady hand to create a smooth, continuous bead.
Any remaining gaps are trimmed and concealed for a neat, professional appearance that prevents water intrusion.
Choosing the right caulk and sealant for tubs
Selecting the correct caulk and sealant is essential to guarantee a watertight bond between a tub liner and the surrounding surfaces; compatibility with liner material, mold resistance, and flexibility for movement are the primary factors to take into account.
Silicone or hybrid polymer sealants are preferred for longevity and elasticity; choose mildew-resistant formulations, color-matched options, and products rated for constant water exposure and bathroom temperatures.
Proper caulking technique for a clean seam
Apply caulk with steady pressure and a consistent speed to form a smooth, continuous bead that will bond the liner to the tub and wall.
After tooling, wipe excess immediately with a damp cloth, maintaining the bead’s shape.
Allow recommended cure time, ventilating the area.
Inspect for voids and reapply thinly where needed.
Avoid disturbing the seam until fully set.
Trimming and concealing gaps for a professional appearance
Once the caulk has been tooled and allowed to set, attention turns to trimming excess liner edges and concealing any gaps to achieve a finished, professional look.
Use a sharp utility knife to trim flush with the tub flange, remove debris, and test-fit trim pieces.
Apply a thin bead of matching silicone into remaining gaps, smooth, and install discreet trim or PVC molding for a seamless, durable finish.
Curing, Drying Time, and First Use Guidelines
Recommended curing times and ideal temperature and humidity conditions are provided to guarantee adhesive and sealants reach full strength before the bathtub liner is used.
Before first use, simple integrity checks—such as visual inspection, gentle pressure testing, and verifying seals around drains and edges—are described to confirm proper installation.
Guidance on cleaning and minimal maintenance during the initial period explains which products and actions to avoid to protect the liner while it finishes curing.
Recommended curing times and conditions
Proper curing of a bathtub liner requires adherence to specific timeframes and environmental conditions to guarantee full chemical cure and long-term adhesion.
Manufacturers typically specify 24–72 hours at 65–80°F (18–27°C) and relative humidity below 60%. Extended curing (up to 7 days) benefits heavy-use scenarios.
Avoid rapid temperature changes, direct sunlight, and moisture exposure during the prescribed period to prevent bond failure.
Steps to test integrity before use
Begin by visually inspecting the liner and surrounding seal for uniform adhesion, surface continuity, and absence of gaps, wrinkles, or adhesive squeeze-out.
Confirm recommended curing time has elapsed.
Run a short cold water fill to check for leaks, monitor seams and caulk joints, and observe drainage.
After drying, perform a modest warm-water test to verify stability before regular use.
Cleaning and maintenance during the initial period
Allow the liner to cure undisturbed for the full manufacturer-specified period, keeping the bathroom well-ventilated and preventing weight or stress on seams. During this time, only minimal, gentle cleaning is permitted, and any spills should be blotted immediately to avoid compromising the adhesive or caulk.
After curing, inspect seams and adhesive. Use nonabrasive cleaners, avoid harsh chemicals, and wait the advised interval before regular bathing.
Common Installation Problems and How to Fix Them
Common installation problems include air pockets or bulges, misaligned drains or overflow assemblies, and adhesive failures or loose edges.
Each issue requires specific diagnosis and corrective steps to restore fit and function without damaging the liner.
The following guidance explains how to identify these faults and apply appropriate fixes.
Dealing with air pockets and bulges
When installing a bathtub liner, air pockets and bulges are among the most frequent defects and can compromise both appearance and seal integrity.
Addressing them promptly prevents water intrusion and adhesive failure. Technicians should locate voids, peel back the liner edge slightly, inject solvent cement or adhesive through a syringe, press and roll the area, trim excess, and allow proper cure time before testing for firmness.
Fixing misaligned drains or overflow issues
Address misaligned drains or overflow fittings promptly to guarantee proper drainage and prevent leaks; installers should verify that the liner’s drain hole aligns with the existing plumbing before securing the piece.
If offset, trim the liner carefully, use a flexible extender or adapter, and reseal connections with plumber’s putty or silicone.
Test flow and inspect for leaks before finishing trim and caulking.
Repairing adhesive failures or loose edges
Even with drains and overflow properly aligned, adhesive failures or loose liner edges can undermine the installation and allow water to seep beneath the liner.
Inspect separations, clean surfaces with alcohol, and dry thoroughly.
Apply manufacturer-recommended adhesive in thin, even beads; press and clamp edges until set.
Replace damaged sections if bonding fails repeatedly, and seal seams with compatible silicone to prevent future leaks.
Maintenance Tips to Keep a Liner Looking New
Maintaining a bathtub liner requires using manufacturer-recommended, nonabrasive cleaners and soft cloths to avoid damage.
Regular care should focus on preventing stains, scratches, and discoloration through prompt cleaning, gentle products, and protective mats.
If cracks, lifting, or persistent staining occur, a professional inspection and repair are advised.
Recommended cleaning products and methods
Use gentle, nonabrasive cleaners and soft tools to preserve the liner’s finish and prevent scratches or dulling.
Mild dish soap, diluted vinegar solutions, or a pH-neutral bathroom cleaner remove grime without harming acrylic.
Soft microfiber cloths or sponges are recommended.
Rinse thoroughly and dry after cleaning to maintain sheen.
- Mild soap
- Vinegar solution
- Microfiber cloth
- Gentle scrub sponge
Preventing stains, scratches, and discoloration
Protect the liner by addressing common causes of damage before they take hold: promptly wipe up bath oils and colored products, avoid abrasive cleaners or tools, and place a non-slip mat or protective pads under bath accessories to prevent localized scratching.
Regularly rinse soap residue, dry surfaces after use, and use gentle, pH-neutral cleaners.
Inspect periodically for staining, treat promptly with manufacturer-approved products, and avoid prolonged chemical exposure.
When to call a professional for repairs
Recognize signs that exceed routine care—deep scratches, cracks, persistent discoloration, warping, loose edges, or water seeping behind the liner—because these issues typically require a professional assessment to prevent further damage and secure a safe, watertight repair.
A professional evaluates substrate integrity, addresses mold or rot, recommends replacement versus patching, and guarantees proper adhesion and drainage, restoring safety and prolonging liner life.
Cost Breakdown and Time Estimate
The section outlines typical DIY versus professional installation costs, giving readers a clear sense of budget ranges.
It then summarizes the time required for each stage—measurement, prep, fitting, and finishing—to set realistic expectations.
Finally, it highlights factors that can raise price or extend duration, such as damage repairs, custom cuts, and complex plumbing.
Typical DIY vs. professional installation costs
A clear cost comparison helps homeowners decide whether to tackle a bathtub liner as a DIY project or hire a pro: DIY materials often run $200–$800; professional jobs range $1,000–$3,000. Consider skill level, warranty, and finish quality when choosing.
| Item | Typical Cost |
|---|---|
| DIY materials | $200–$800 |
| Professional labor | $700–$2,200 |
| Total pro price | $1,000–$3,000 |
| Warranty/finish | Variable |
Time required for each installation stage
Typical installations break down into clear stages—measurement and preparation, liner fitting and adhesive application, curing, and final trim and cleanup—each with its own time window that affects overall scheduling.
Measurement and prep: 30–90 minutes.
Liner fitting and adhesive: 1–3 hours.
Curing: 6–24 hours depending on adhesive.
Final trim and cleanup: 30–60 minutes.
Total: one to two days.
Factors that increase cost or duration
Considerations such as tub shape, existing damage, access constraints, and material choice substantially affect both price and schedule for a bathtub liner installation.
Complex contours, severe corrosion or mold remediation, plumbing relocations, and difficult access increase labor and permit costs.
Premium acrylics or custom-fit liners raise material expenses.
Rush scheduling or specialty trims add fees, extending project timelines and total budget.
When to Hire a Professional Instead of DIY
Complex plumbing issues, irregularly shaped tubs, or extensive damage often warrant hiring a professional rather than attempting a DIY liner.
Homeowners should verify installers’ credentials, ask for references and written estimates, and inquire about experience with similar tub styles.
They should also confirm warranty terms, required permits, and proof of insurance before hiring.
Complex situations requiring pros (plumbing, irregular tubs)
Call a professional when the project involves plumbing alterations, unusually shaped tubs, damaged substrates, or unclear structural issues that exceed basic resurfacing skills.
Licensed contractors assess water supply and drain rerouting, reinforce or replace compromised bases, and fabricate custom liners for nonstandard contours.
Complex waterproofing, mold remediation, or hidden leaks also warrant expert diagnosis and repair to guarantee safety, warranty coverage, and long-term performance.
How to vet installers and questions to ask
After problems exceed basic resurfacing, homeowners should shift focus from diagnosis to finding a qualified installer who can safely handle plumbing, structural repairs, and custom liners.
Assess credentials, references, and portfolio; request written estimates and timelines. Prioritize clear communication and problem-solving experience.
- Ask for licenses and references
- Verify prior similar projects
- Confirm detailed scope and price
- Clarify timelines and contingencies
Warranty, permits, and insurance considerations
When work moves beyond simple resurfacing, homeowners should evaluate warranties, required permits, and insurance coverage to decide whether to hire a professional rather than attempt DIY.
Professionals provide manufacturer and labor warranties, handle permit acquisition, and carry liability and workers’ compensation insurance.
If structural changes, plumbing modifications, or complex warranty conditions apply, hiring licensed contractors reduces legal risk and guarantees compliant, insured work.
Project Checklist and Quick Reference Guide
A concise checklist frames the bathtub liner project from start to finish, ensuring nothing critical is missed.
It separates tasks into pre-install, day-of, post-install, and ongoing maintenance so readers can prepare, execute, and preserve results.
The following quick reference condenses those steps for fast review.
- Pre-install checklist – gather tools, measure, and inspect the tub
- Day-of-installation checklist – surface prep, fit liner, and secure edges
- Post-installation checklist – final sealing, cleanup, and inspection
- Maintenance schedule – cleaning routine, inspections, and repair timeline
Pre-install checklist
Before any tools are unpacked, a concise pre-install checklist consolidates measurements, materials, and site preparation tasks so installers can verify readiness at a glance.
Include bathtub dimensions, drain and overflow locations, liner model and fit confirmation, adhesive and sealant quantities, ventilation and electrical needs, access for removal of fixtures, substrate condition assessment, protective coverings, required permits, and contact information for supplier or contractor.
Day-of-installation checklist
Several concise checklists guide installers through the day’s sequence of tasks, ensuring the bathtub liner installation proceeds smoothly and safely.
Confirm materials, tools, and adhesive are on site. Verify substrate preparation, measurements, and liner fit. Shut off water, protect surrounding surfaces, and set ventilation.
Test-fit liner, mark anchoring points, and review sealant and cure times. Assign roles and confirm timetable.
Post-installation checklist and maintenance schedule
How should the finished liner be cared for to guarantee lasting performance and warranty compliance?
Inspect seams, caulk, and drain for gaps or movement; document photos.
Allow full cure time before light use (per manufacturer).
Provide owner with cleaning recommendations: non-abrasive cleaners, no bleach or solvents, temperature limits.
Schedule inspections at 1, 6, and 12 months, then annually.
Retain warranty paperwork and maintenance log.
Conclusion
A bathtub liner transforms a worn tub into a refreshed centerpiece, and when installed with care it can last years. Like laying a new skin over an old scar, the right measurements, materials, and preparation make the difference between a temporary patch and a professional finish. Homeowners who follow guidelines, keep maintenance simple, and recognize limits will enjoy durable results; those unsure should consider a pro for lasting peace of mind and flawless appearance.