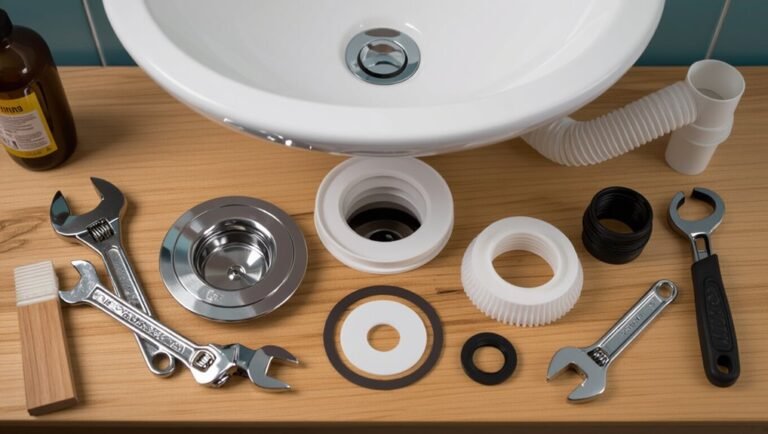
How to Clean a S-Trap (S Bend) Drain Fast: Step-by-Step Guide for Kitchens & Baths
To quickly clean an S-trap (S Bend) drain, start by removing any visible debris. Next, use a plunger with firm pressure, then pour a fast-acting enzymatic or chemical cleaner as directed, followed by hot water. If the blockage persists, employ a hand auger or snake to tackle deeper issues. For a thorough clean, shut off the water, detach the trap into a bucket, clear it out, and inspect for any damage before reassembling. This guide offers complete steps for removal, prevention, and troubleshooting.
What an S-Trap (S Bend) Drain Is and How It Differs from a P-Trap
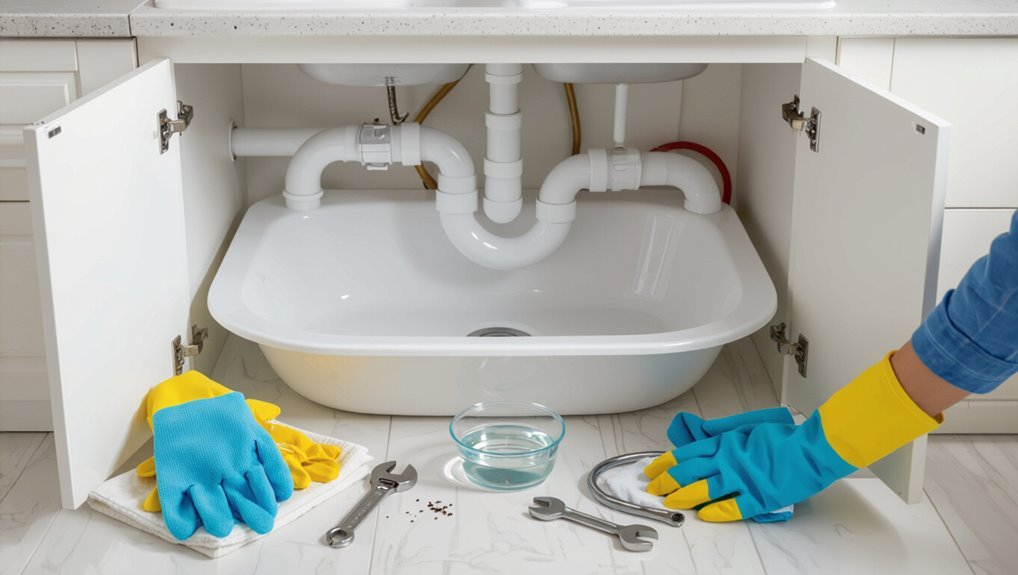
An S-trap is a pipe shaped like an “S” that creates a water seal but drops vertically, unlike the horizontal loop of a P-trap.
They are often found on older fixtures and some kitchen connections where space or routing forces a steeper run.
Because the vertical drop encourages siphoning, S-traps are more prone to losing their seal, producing odors and collecting debris that leads to clogs.
Basic anatomy of an S-trap
S-shaped plumbing bends, commonly called S-traps or S-bends, form a continuous downward then upward curve beneath fixtures to hold a water seal that blocks sewer gases.
The anatomy includes inlet, deep trap bend, outlet tailpiece and trap seal depth; unlike P-traps, S-traps descend too far before rising.
Clear instructions on how to clean a su bend focus on accessing and removing blockages.
Where S-traps are commonly found (kitchens vs bathrooms)
Many older homes and certain fixtures employ S-trap drains, which are more commonly found under floor-mounted sinks and older bathroom fixtures than in modern kitchen installations.
They also appear in basement laundry sinks and vintage utility sinks.
Kitchens built or remodeled after the 1970s typically use P-traps.
Presence depends on installation era, local plumbing practices, and whether drains vent through the wall or floor.
Why S-traps can cause problems (siphoning, odors, clogs)
Although visually similar to a P-trap, an S-trap’s deeper, continuous bend drops the water seal lower and lacks the same effective venting, which makes it prone to siphoning, odors, and frequent clogs.
This design allows wastewater to be pulled dry during drainage, letting sewer gas escape.
Debris also settles in the sharper curve, increasing blockage risk and maintenance needs.
Quick Safety and Preparation Checklist
Before beginning work on an S-trap, gather basic tools and materials such as a bucket, adjustable wrench, plumber’s snake, rags, and mild cleaner.
Wear gloves and eye protection, guarantee good ventilation, and keep a flashlight or phone light available.
If the leak is large, the trap is corroded, or odors and backups persist after basic cleaning, contact a licensed plumber.
Tools and materials to have on hand
A basic kit of tools and materials streamlines S-trap cleaning and reduces risks: rubber gloves, eye protection, a bucket, adjustable wrench or channel-lock pliers, a hand auger or closet auger sized for the trap, plumbers’ tape, scrub brush or bottle brush, rags, and a mild drain-safe cleaner or mixture of baking soda and vinegar.
- Bucket
- Wrench or pliers
- Hand auger
- Brushes and rags
- Plumbers’ tape
Safety precautions (gloves, eye protection, ventilation)
When preparing to clean an S-trap, proper personal protection and ventilation reduce injury and chemical exposure risk; gloves protect hands from contaminants and sharp edges, eye protection prevents splashes from entering the eyes, and adequate airflow disperses fumes from cleaners.
Wear chemical-resistant gloves and safety glasses, open windows or use a fan, avoid inhaling vapors, and keep children and pets away during the procedure.
When to call a professional
Recognize situations that require professional help to prevent damage and secure safety: persistent clogs after DIY attempts, sewage backups, damaged or corroded S-traps, leaks inside walls or under floors, recurring foul odors, or use of hazardous chemicals.
A licensed plumber assesses risks, performs safe repairs, replaces fittings, and guarantees code compliance.
Call promptly to avoid structural damage and health hazards.
Fast Step-by-Step Method to Clean an S-Trap Without Removing It
The following concise procedure outlines steps to clear an S-trap without removing it:
Start by removing visible debris from the drain opening.
Then employ a plunger to dislodge shallow clogs.
If needed, apply a fast-acting enzymatic or chemical cleaner according to safety instructions and flush the trap with hot water, repeating as necessary.
For persistent or deeper blockages, a plumbing snake or auger may be used to reach and remove the obstruction.
Step 1 Remove visible debris from the drain opening
Start by clearing visible hair, soap scum, and other debris from the drain opening using gloved fingers, a pair of tweezers, or a plastic drain pick; this immediate removal reduces clogs and makes subsequent cleaning steps more effective.
Work systematically, removing accumulated material and placing it in a disposable bag.
Wipe the rim and visible flange with a disinfectant wipe before proceeding.
Step 2 Use a plunger effectively on an S-trap
Place a cup-style plunger over the drain and guarantee a firm seal before pumping; this focused pressure dislodges trapped gunk in the S-trap without dismantling plumbing.
With water covering the plunger lip, pump vigorously 10–15 times, then pull sharply to break the clog.
Repeat as needed. Clear loosened debris with a flashlight and gloved hand, and run hot water to confirm flow.
Step 3 Apply a fast-acting enzymatic or chemical cleaner safely
Choose an appropriate enzymatic or chemical drain cleaner and follow label instructions precisely, using personal protective equipment such as gloves and eye protection; enzymatic cleaners are safer for pipes and the environment but act slower, while fast-acting chemical cleaners (caustic or oxidizing) remove organic clogs quickly but require extra caution.
Apply product to drain per directions, avoid splashback, ventilate area, and store chemicals securely after use.
Step 4 Flush the trap with hot water and repeat as needed
Flush the trap with a steady stream of hot water to help dissolve loosened debris and wash enzymatic or chemical residues through the bend; maintain flow for several minutes, check for improved drainage, and repeat the process—reapplying cleaner and flushing—until water runs freely and odors subside.
Observe flow rate, listen for gurgling, and repeat short hot-water flushes after each treatment cycle to confirm clearance.
Step 5 Use a plumbing snake/auger for deeper blockages
If hot-water flushing and repeated treatments fail to restore full flow, a plumbing snake (manual auger) is the next practical tool for clearing deeper obstructions in an S‑trap without removing the fixture.
Wear gloves, insert the snake gently into the drain, crank clockwise to engage debris, then withdraw slowly while rotating.
Repeat until water drains freely; sanitize and lubricate threads before storage.
How to Clean an S-Trap by Removing and Reassembling It (More Thorough)
Before beginning, the water supply should be shut off and a bucket placed beneath the S-trap to catch residual water.
The trap is then loosened and removed for inspection and manual cleaning, with adjoining pipes and fittings checked and cleared as needed.
Finally, the assembly is reattached, tested for leaks, and adjusted to guarantee a proper seal.
Step 1 Turn off water and place bucket under the trap
Shut off the water supply to the fixture and set a bucket directly beneath the S-trap to catch any standing water or debris when the trap is disconnected.
Verify valves are fully closed, then open the faucet briefly to relieve pressure.
Wear gloves and eye protection.
Clear the surrounding area for tools, place a rag for small spills, and guarantee adequate lighting before proceeding.
Step 2 Loosen connections and remove the S-trap
Loosen the slip nuts on both ends of the S‑trap using an adjustable wrench or channel locks, turning counterclockwise while holding the adjoining pipe with a second wrench to prevent twisting.
Lower the trap straight down into the bucket, watching for residual water.
Inspect thread seals; replace worn washers or use plumber’s tape as needed.
Set removed parts on a clean surface for reassembly.
Step 3 Inspect and manually clean the trap interior
With the trap removed and drained, inspect the interior for debris, mineral buildup, and hair clogs using a flashlight and gloved hand; note any corrosion or pitting that may warrant replacement rather than reassembly.
Clear blockages with a flexible brush or pipe cleaner, scraping gently to avoid scratching. Rinse thoroughly with clean water, repeat until flow is unobstructed, and dry before reassembling.
Step 4 Check and clean adjoining pipes and fittings
Proceed to inspect the pipe runs and fittings that connect to the S‑trap, as blockages often extend beyond the trap itself.
Remove debris from inlet and outlet pipes using a flexible brush or plumber’s snake.
Check slip joints, washers and short sections for scale, hair, or grease.
Flush with water to confirm clearance.
Replace any corroded or damaged fittings before reassembly.
Step 5 Reassemble, test for leaks, and ensure proper seal
Reassemble the S‑trap by reversing the disassembly steps, fitting cleaned components and new washers in their original orientation to guarantee correct alignment and drainage.
Hand‑tighten slip nuts, then snug with a wrench without overtightening.
Restore water supply, run water and inspect joints for drips.
If leaks appear, tighten slightly or reseat washers.
Confirm proper seal and unobstructed flow before finishing.
Alternative Tools and Techniques
The section considers alternative tools and techniques for S-trap maintenance, including using a wet/dry vacuum to extract loose clogs and comparing hand augers with power augers for reach and control.
It also notes natural cleaning options like baking soda and vinegar, and their limited effectiveness on heavy or solid blockages.
Practical pros, cons, and basic safety tips for each method are briefly outlined.
Using a wet/dry vacuum to extract clogs
A wet/dry vacuum can remove water and dislodge debris from an S-trap quickly and with minimal disassembly, making it a useful alternative when plunging or chemical cleaners fail.
The technician seals the hose over the drain, uses a wet setting and a short burst to create suction, then inspects and repeats until flow resumes.
Safety goggles and gloves are recommended.
Using a hand auger vs power auger
After attempting suction-based removal, attention often turns to augering to reach deeper or more stubborn obstructions.
Choosing between a hand auger and a power auger depends on clog severity, pipe accessibility, and user experience.
A hand auger suits light blockages and tight S-bend access, offering control and low cost.
A power auger handles dense or long clogs faster but risks pipe damage and requires skill.
Natural cleaning options (baking soda + vinegar) and limitations
Many homeowners turn to a simple baking soda and vinegar treatment as a natural, low-cost way to break down minor organic buildup in S-traps.
The fizzing reaction can loosen light clogs and reduce odors, but it rarely clears heavy blockages or inorganic debris.
Repeated use may corrode certain metal pipes; persistent clogs require mechanical cleaning or professional service.
Signs the Problem Is Not Solved or Is Structural
If odors persist or clogs recur after cleaning, the issue may be unresolved or structural.
Slow draining despite a clear trap suggests a deeper blockage or pipe slope problem.
Siphoning or gurgling noises point to venting failures that require professional inspection.
Persistent odors or recurring clogs
Persistent odors or recurring clogs indicate that routine cleaning has not resolved the underlying S-trap issue and may point to a structural problem such as a dry trap, improper venting, or a deep blockage within the trap or connected drain line.
Investigation should target trap seals, vent function, and inline obstructions; professional inspection or replacement may be required when simple remedies fail to stop odor or repeat blockages.
Slow draining despite cleaning
Slow flow that remains after thorough cleaning signals a problem beyond surface clogs and suggests a structural issue within the S-trap or its connected plumbing.
Water pooling, slow emptying, or reduced flow after multiple cleanings indicate misalignment, partial collapse, buildup inside pipe bends, or obstruction upstream.
Professional inspection or pipe replacement may be required to restore proper drainage and prevent recurring issues.
Siphoning or gurgling sounds indicating venting issues
Frequent siphoning or gurgling noises from an S-trap signal a venting problem rather than a simple clog: air is being drawn through the trap because the vent stack is blocked, improperly installed, or the trap itself is configured in a way that allows siphonage.
Such sounds indicate negative pressure cycles; corrective actions require inspecting vents, ensuring proper venting or installing an air admittance valve, or reconfiguring the trap.
Preventive Maintenance and Best Practices
Routine habits such as using sink strainers and avoiding pouring grease down the drain can greatly reduce buildup in an S-trap.
A simple monthly maintenance routine—flushing with hot water, removing debris from strainers, and using a mild enzymatic cleaner—helps prevent clogs before they form.
If persistent problems or code requirements arise, replacing an S-trap with a P-trap should be considered and handled per local plumbing codes.
Daily habits to reduce buildup (strain ers, avoid grease)
A few simple daily habits can greatly reduce buildup in an S-trap, preventing clogs and minimizing the need for deep cleaning.
Install and use sink strainers to catch hair, food, and debris.
Avoid pouring grease or oils down drains; collect them in containers for disposal.
Flush drains with hot water after use to help move residue and keep water flowing smoothly.
Monthly maintenance routine
Perform a quick monthly inspection and basic maintenance of the S-trap to prevent buildup from becoming a clog.
Check for leaks, run hot water to loosen residue, flush with a mild enzymatic cleaner, clean accessible trap parts, and guarantee strainers are intact.
Regular attention extends function and avoids odor.
- Inspect for leaks and corrosion
- Run hot water thoroughly
- Use enzymatic flush
- Remove and clean accessible parts
- Verify strainers are fitted
When to replace an S-trap with a P-trap and code considerations
When local plumbing codes change or chronic siphoning, persistent odors, or frequent clogs appear, replacing an S‑trap with a P‑trap becomes a necessary preventive step.
P‑traps provide a stable water seal and are widely required by modern code to prevent sewer gas backflow and maintain venting integrity.
A licensed plumber should assess venting, trap arm length, materials, and local regulations before replacement to guarantee compliance and reliable performance.
Common Mistakes to Avoid When Cleaning an S-Trap
When cleaning an S-trap, one common error is mixing chemical cleaners or using them in excess, which can create dangerous reactions or damage pipes.
Another frequent mistake is over-tightening or cross-threading fittings, leading to leaks or stripped threads.
Finally, ignoring persistent smells, slow drainage, or recurring clogs instead of calling a plumber can allow small problems to become major repairs.
Mixing chemicals or using excessive drain cleaners
Frequent use of harsh chemical drain cleaners or combining different products can damage the S-trap’s pipes and harm indoor air quality.
Prolonged exposure corrodes metal and plastic, weakens seals, and can release toxic fumes.
Instead, employ mechanical cleaning, enzyme-based cleaners, or mild baking soda and vinegar treatments sparingly.
Follow product instructions and ventilate the space to minimize risks.
Over-tightening or cross-threading fittings
Over-tightening or cross-threading fittings during S-trap maintenance can strip threads, crack fittings, and create leaks that are difficult to detect until water damage occurs.
Technicians should hand-start connections, align threads carefully, and use appropriate tools with controlled torque.
Replace damaged nuts or washers, test joints gently, and avoid forcing fittings; small compromises save time and prevent costly repairs.
Ignoring signs that require a plumber
Why continue past warning signs that clearly exceed routine maintenance? Ignoring persistent odors, repeated clogs, slow drainage, water stains, or corrosion risks worsening damage.
A professional inspection identifies hidden leaks, vent issues, or pipe deterioration. Attempting advanced repairs without expertise can void warranties and increase costs.
Call a licensed plumber when symptoms persist beyond basic cleaning to guarantee safe, lasting solutions.
Quick Troubleshooting Flowchart
A concise troubleshooting flowchart helps identify common S‑trap problems and resolve them quickly. The table below summarizes typical symptoms, likely causes, and immediate fixes to try before calling a plumber. This snapshot guides fast decision-making during a drain issue.
| Symptom | Likely Cause | Quick Fix |
|---|---|---|
| Slow drainage | Partial clog (hair/grease) | Snaking or plunger |
| Gurgling noises | Air trapped / partial blockage | Flush with hot water |
| Persistent odor | Dry seal or trapped debris | Refill trap / clean trap |
Symptom vs Likely Cause vs Quick Fix
Begin by mapping common symptoms to their most probable causes and immediate remedies so the user can quickly isolate issues without unnecessary disassembly. A concise table guides quick decisions; follow recommended fixes before deeper measures.
| Symptom | Likely Cause | Quick Fix |
|---|---|---|
| Slow drain | Hair/grease | Plunge or snake |
| Gurgling | Partial blockage | Vent/flush with water |
| Odor | Dry trap | Add water/sanitizer |
| Leak | Loose joint | Tighten or reseal |
| Backup | Severe clog | Remove and clean pipe |
Conclusion
An S-trap can be cleaned quickly or cleaned thoroughly, and each approach restores flow, restores scent, restores confidence. One can plunge and flush, snake and rinse, or detach and scrub—each method returning water to free movement, air to fresh passage, and routine to uninterrupted use. With care, with the right tools, with regular maintenance, the S-bend resumes its quiet work, safeguarding home hygiene and peace of mind.