
How to Replace a Pipe Jack: Step-by-Step Guide for DIY Roof Flashing Repairs
To replace a pipe jack on your roof, follow these steps to ensure a proper seal and prevent leaks. First, gather the necessary materials: a matching boot, roofing cement, sealant, corrosion-resistant fasteners, and safety gear. Start by removing the old pipe jack and cleaning the area around the penetration. Lift any overlapping shingles as needed. Position the new boot plumb over the pipe, bed the flange in roofing cement, and securely fasten and seal all edges. Finally, test for leaks to confirm a successful installation. Additional instructions cover variations for different roof types, maintenance tips, and troubleshooting advice.
What a Pipe Jack Is and Why Replacement May Be Needed
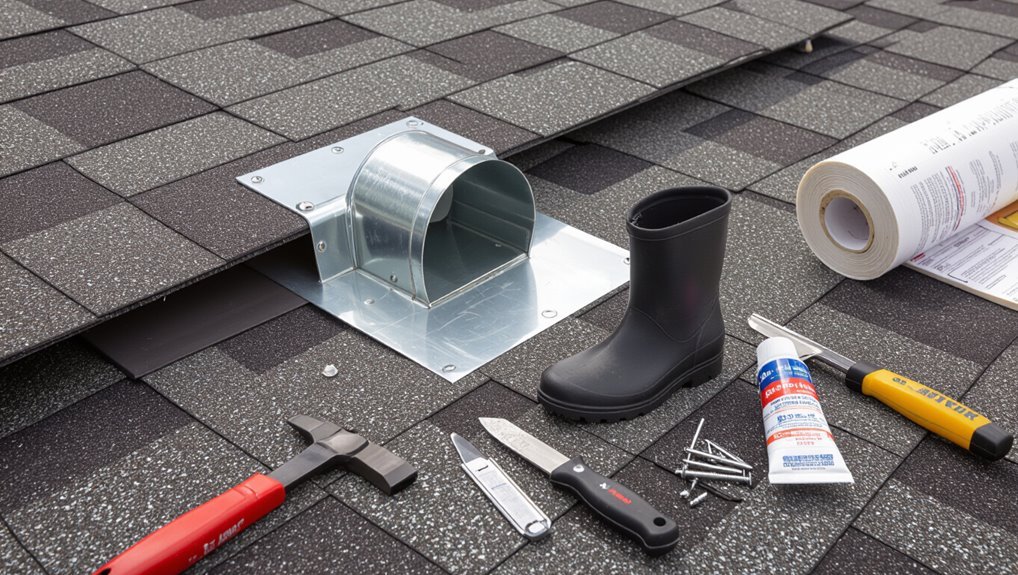
A pipe jack is a roof flashing component that seals the gap around pipes to prevent water intrusion and direct runoff away from the penetration.
Signs that a pipe jack needs replacement include visible cracking, torn or hardened rubber boots, rusted metal bases, and persistent leaks or water stains beneath the roof.
Common materials—rubber, silicone, plastic, and metal—have varying lifespans, with rubber often lasting 5–15 years and metal or silicone generally offering longer service when properly maintained.
Definition and purpose of a pipe jack in roof flashing
Pipe jacks are roof flashing components that seal around vertical pipes where they penetrate the roofing surface, preventing water intrusion and directing runoff away from the opening.
They provide a watertight barrier, accommodate thermal movement, and protect roof structure.
Understanding their function helps homeowners assess repair needs and follow instructions on how to replace pipe jack safely and effectively, maintaining roof integrity.
Common signs the pipe jack needs replacement
Having established how a pipe jack seals roof penetrations and prevents leaks, homeowners should recognize visible and functional signs that the unit is failing.
Cracked or split rubber boots, rusted or corroded metal flashing, gaps around the base, persistent roof stains or interior water spots, and recurring leaks after repairs all indicate replacement is warranted to restore a watertight seal.
Materials and lifespan overview
Durability depends largely on construction: most pipe jacks combine a flexible rubber or silicone boot with metal or plastic flashing, and each material defines its strengths and failure modes.
Rubber boots resist vibration but crack in UV and cold after 5–15 years; silicone lasts longer, 10–25 years.
Metal flashing (aluminum, galvanized steel, or copper) resists tearing; corrosion and seam failures determine replacement timing.
Tools and Materials Required for Replacing a Pipe Jack
A concise list of essential tools — including cutting, fastening, and sealing implements — is presented to guarantee an efficient replacement.
Recommended replacement pipe jack types and compatible materials are outlined to match roof type and pipe dimensions.
Required safety gear and key precautions are summarized to protect installers and preserve roof integrity.
Essential tools checklist
Before beginning work on a pipe jack replacement, assemble a concise set of tools and materials to guarantee efficiency and safety: a utility knife, adjustable wrench, roofing cement, replacement pipe boot sized to the pipe, roofing nails or screws, flashing, a pry bar, caulk gun with suitable sealant, and safety gear such as gloves and eye protection.
- Inspect tools for damage
- Verify boot size fits pipe
- Organize fasteners and sealant
Recommended replacement pipe jack types and materials
With the checklist complete and tools inspected, attention turns to selecting the correct replacement pipe jack and materials for the job.
Choices depend on pipe diameter, roof pitch, and shingle type. Suitable materials resist UV and corrosion and match roof aesthetics.
- Rubber boot for common residential vent pipes (various diameters)
- Metal flashing for high-heat or exposed locations
- Compatible sealants and roofing nails
Safety gear and precautions
Wear proper personal protective equipment and establish fall protection measures before mounting the roof to replace a pipe jack.
The worker should use a harness, roof anchors, non-slip footwear, gloves, eye protection, and a hard hat.
Store tools securely, keep a clear work area, check ladder stability, monitor weather, and avoid roof edges.
Have a partner for assistance and emergency communication.
Assessing the Roof and Preparing for Work
Before beginning work, the roof should be inspected for slope, shingle condition, and the state of nearby flashing to identify any additional repairs.
The technician must confirm that the pipe diameter, boot style, and roofing material are compatible with the chosen replacement parts.
Work should be scheduled for dry, calm weather and at a time when safe access and adequate daylight are available.
Inspecting roof slope, shingles, and surrounding flashing
A careful survey of the roof slope, shingles, and surrounding flashing establishes the baseline for safe, effective pipe jack replacement.
The inspector notes pitch, drainage patterns, damaged or loose shingles, and any curling or granule loss.
Adjacent flashing seams, sealant condition, and evidence of past repairs are recorded.
Photos and measurements guide material selection and sequencing of removal, repair, and resealing.
Determining compatibility: pipe size, boot type, and roof material
Because pipe jacks must form a watertight connection between plumbing vents and the roof surface, the inspector first verifies pipe diameter, material, and protrusion height to select an appropriately sized boot; boot types (rubber/silicone, metal flange, or multi-fit) each have limitations depending on pipe composition and slope.
Next, roof material—asphalt shingle, metal, tile, or flat membrane—influences flashing style, sealant compatibility, and fastener choice.
Weather and timing considerations for safe repair
With pipe dimensions and boot type confirmed, the inspector must next evaluate weather and timing to guarantee a safe, effective repair.
Work should occur on dry, calm days with temperatures within the boot sealant’s recommended range. Wind, rain, or freezing conditions increase slip and adhesion risks.
Schedule during daylight, confirm forecast for 24–48 hours, and postpone if hazards or short-term storms are predicted.
Step-by-Step Replacement Process
The step-by-step replacement process begins with carefully removing the old pipe jack and cleaning the roof penetration to guarantee a secure base.
Next, underlayment is installed and the new pipe jack positioned and integrated with surrounding shingles or metal roofing.
Finally, roofing cement, sealants, and fasteners are applied correctly to create a watertight seal.
Removing the old pipe jack safely
Begin by confirming the work area is secure and the roof surface is dry. Then lay out tools and safety gear within easy reach.
Wear fall protection and gloves.
Carefully remove surrounding shingles as needed, exposing flashing fasteners. Unscrew or pry fasteners, lift the damaged boot, and cut any sealant bonding it to the pipe.
Lower removed components safely to avoid roof damage.
Preparing the area and cleaning the roof penetration
Clear the immediate area around the pipe and remove loose debris so the penetration is fully exposed and accessible for inspection.
Inspect the flange seat, surrounding shingles, and pipe surface for damage, rot, or old sealant.
Scrape away hardened caulk and torn flashing with a putty knife, brush residue with a stiff broom, and wipe surfaces with a rag and solvent to guarantee a clean, dry bonding area.
Installing underlayment and positioning the new pipe jack
Carefully roll out and secure roofing underlayment around the penetration to create a watertight base before fitting the new pipe jack.
Center the new boot over the pipe, aligning its flange with the roof plane. Trim underlayment as needed for a snug fit beneath the flange.
Temporarily fasten the pipe jack with nails or screws, checking vertical alignment and stable seating before final attachment.
Sealing and integrating with shingles or metal roofing
With the pipe jack temporarily secured and checked for plumb, the next stage is to seal it and integrate the flange with the surrounding roofing material so water is shed properly.
Slide shingles or metal panels over the flange’s upper edge, lift adjacent courses as needed, trim to fit lower edges, guarantee overlap directs runoff, and confirm flashings lie flat without gaps or buckling before final sealing.
Applying roofing cement, sealants, and fasteners correctly
Begin by preparing the work area and materials: confirm the pipe jack sits plumb, clean the flange and surrounding roofing surfaces of debris and old sealant, and have roofing cement, a compatible exterior-grade sealant, and corrosion-resistant fasteners within reach.
Apply roofing cement sparingly under the flange edges. Bed fasteners with sealant, torque screws snugly—not overdriven—and finish with a continuous sealant bead around the pipe base.
Final checks and waterproofing verification
Inspect the completed installation systematically to confirm seals, fasteners, and flashing are correctly installed and intact.
Verify that sealant beads are continuous, nail heads are covered, and no gaps exist where water can enter.
Perform a controlled water test or wait for natural rain, then recheck the attic or ceiling for leaks.
Document observations and address any defects immediately for reliable waterproofing.
Variations by Roof Type and Pipe Material
Procedures for replacing a pipe jack vary with roof covering and pipe material, affecting flashing choice, fasteners, and sealing methods.
Asphalt shingle, metal, and tile/slate or flat roofs each present distinct attachment and trimming requirements, while underlying underlayment and pitch influence the approach.
Pipe composition—PVC, copper, or cast vent stacks—dictates connector types and thermal or corrosion considerations that alter installation details.
Replacing pipe jacks on asphalt shingle roofs
Replacing pipe jacks on asphalt shingle roofs requires attention to the roof’s slope, shingle profile, and the pipe material—each factor alters flashing choice, sealant compatibility, and installation technique.
Use low-profile or stepped flashings for standard shingles, select polymer-compatible sealants for PVC or ABS, and guarantee proper underlayment exposure.
Lift surrounding shingles carefully, slide flashing under upper courses, and fasten with corrosion-resistant nails.
Replacing pipe jacks on metal roofs
Start by identifying the specific metal roof profile and pipe material, since standing-seam, corrugated, and ribbed panels each require different flashing shapes, attachment methods, and sealant compatibility; likewise, metal, PVC, ABS, or cast-iron pipes demand distinct boot types and fastener corrosion protections.
Select a compatible boot, match flange geometry, use non-reactive sealant, employ stainless or coated fasteners, and guarantee watertight seams without penetrating standing seams.
Replacing pipe jacks on tile, slate, or flat roofs
On tile, slate, and flat roofs, attention to roof material, pipe composition, and local underlayment details determines the correct boot and flashing approach; brittle slate and glazed clay tiles require broken-tile removal and saddle-style flashings.
Flat roofs often need flange-mounted, membrane-compatible boots and clamping rings to maintain a continuous waterproof membrane.
Install boots sized to pipe, seal interfaces with compatible sealant, and replace surrounding tiles or membrane neatly.
Handling different pipe materials (PVC, copper, vent stacks)
Different pipe materials and functions demand tailored jack and flashing choices: PVC, copper, and cast-iron vent stacks each have distinct diameters, thermal expansion rates, chemical compatibilities, and corrosion profiles that influence boot material, fastening method, and sealant selection.
PVC benefits from flexible EPDM boots and non-corrosive fasteners; copper pairs with metal-compatible flashing and silicone-free sealants; cast-iron needs robust stainless hardware and thicker flashing to resist movement.
Common Problems During Replacement and How to Solve Them
Common problems during pipe jack replacement include post-installation leaks, damaged shingles or underlayment, improper fit or flashing gaps, and rusted surrounding metal flashing.
Each issue requires a targeted approach—diagnose leak paths and reseal or replace sealant, patch or replace compromised roofing materials, refit or swap flashing to eliminate gaps, and remove or replace corroded metal components.
Identifying the specific cause quickly reduces further roof damage and guarantees a durable repair.
Leaks after installation: diagnosis and fixes
Inspecting for leaks immediately after a pipe jack replacement prevents small issues from becoming water damage.
The installer should check inside the attic for drips, stains, or damp insulation and externally for visible gaps, loose flashing, or sealant failures.
If found, tighten flashing screws, reseal with compatible roofing sealant, and replace misaligned boots.
Reinspect after a rain to confirm repair integrity.
Damaged shingles or underlayment: repair options
When removing and reinstalling a pipe jack, surrounding shingles and underlayment can be damaged by nails, tearing, or improper lifting, creating pathways for leaks and shortening roof lifespan.
Inspect for cracked, curled, or punctured shingles and torn underlayment.
Replace individual shingles or use shingle cement for minor splits; install a patch of underlayment or cut-and-seal new strip beneath shingles for reliable waterproofing.
Improper fit or flashing gaps: corrective steps
Address gaps or a poor fit promptly, because even small spaces between a pipe jack and flashing can allow water intrusion and accelerate surrounding material failure.
Inspect the joint, remove old sealant, and test-fit a correctly sized boot.
Trim or replace the flange as needed, apply compatible roofing sealant and silicone, secure fasteners, and verify a watertight seal with a controlled water test.
When rust or corrosion affects surrounding metal flashing
Corrosion on metal flashing compromises the seal around a pipe jack and can rapidly spread to adjacent roofing components if not remedied.
Inspect extent, remove loose rust, and cut out severely corroded sections. Replace with compatible flashing, applying corrosion-resistant primer and sealant.
Guarantee proper overlap and fasteners with neoprene washers.
Consider replacing surrounding shingles and using stainless or aluminum flashing to prevent recurrence.
Safety Risks and When to Hire a Professional
When roof height, steep slope, or visible structural damage increases fall or collapse risk, a professional roofer should be considered.
Homeowners should weigh the upfront cost of hiring a pro against the time, tools, and potential liability of a DIY replacement.
When choosing a contractor, evaluate licenses, insurance, references, written estimates, and guarantees.
Height, slope, and structural concerns that warrant pros
How high a pipe jack sits above the roof, how steep the slope around it is, and whether the surrounding decking or rafters show signs of compromise determine whether a homeowner should attempt replacement or call a contractor.
Steep pitches, elevated jacks, and visible structural damage introduce fall, access, and load-bearing hazards that exceed routine DIY skills and tools.
Professionals assess bracing, safe access, and repair sequencing.
Cost comparison: DIY vs professional replacement
Although a homeowner may save on labor by replacing a pipe jack themselves, the total cost comparison must account for materials, tools rental, time, and potential mistake-related repairs. DIY often lowers immediate expense but raises risk of leaks, warranty voids, and added repairs. Consider complexity, safety, and long-term value before choosing DIY over hiring a qualified roofer.
| Item | DIY Cost | Pro Cost |
|---|---|---|
| Immediate expense | Lower | Higher |
| Risk of repairs | Higher | Lower |
| Warranty/guarantee | Rare | Common |
How to find and evaluate qualified roofers
Deciding between DIY and professional replacement should prompt homeowners to assess safety risks and know when to hire a qualified roofer.
Seek licensed, insured contractors with local references and verifiable reviews. Confirm experience with pipe jacks, request written estimates, warranties, and timeline.
Evaluate communication, safety practices, and compliance with codes.
Prioritize professionals for steep roofs, complex flashing, or uncertain structural issues.
Maintenance Tips to Extend the Life of a Pipe Jack
Regular inspections on a set schedule help identify cracked boots, loose flashing, and sealant failure before leaks start.
Simple seasonal tasks—clearing debris, resealing small gaps, and tightening fasteners—can be performed by most homeowners to delay deterioration.
Selecting long-lasting materials such as EPDM or metal collars and corrosion-resistant fasteners reduces the frequency of full replacements.
Routine inspection schedule and what to look for
When establishing a routine inspection schedule, homeowners should plan checks at least twice a year—ideally in spring and fall—and after any severe weather event.
Inspections focus on flashing integrity, seal deterioration, and surrounding roofing condition. Prompt documentation and scheduling of repairs reduce leak risk.
- Cracked or lifted flashing
- Worn or brittle seals
- Water stains or rot near the pipe
Seasonal care and minor repairs homeowners can do
Following a twice‑yearly inspection routine and after severe weather, homeowners can take straightforward seasonal steps to preserve pipe jacks and delay major repairs.
Remove debris, clear surrounding shingles, and reseal small cracks with compatible roofing sealant.
Tighten loose flashing fasteners, replace deteriorated rubber collars, and guarantee proper drainage around the penetration.
Document conditions and schedule professional evaluation for recurring issues.
Choosing durable materials to minimize future replacement
Select materials with longevity and compatibility in mind to reduce the frequency of pipe jack replacement and limit related roof repairs.
Opt for UV-resistant, EPDM or silicone boots for elasticity; choose lead, stainless steel, or high-grade aluminum flashing to resist corrosion; use marine-grade sealant compatible with chosen materials.
Prioritize proper sizing and manufacturer-recommended components to guarantee durable, watertight assemblies and fewer interventions.
Quick Troubleshooting Checklist After Replacement
A brief checklist helps confirm the new pipe jack is watertight and secure after installation.
The contractor or homeowner should monitor the area for short-term signs of leaks, settling, or loose hardware. The guide also notes specific triggers for re-sealing or tightening fasteners to prevent recurrence.
- Inspect for drips and water stains daily for the first week.
- Check flashings and sealant edges after the next heavy rain.
- Re-tighten fasteners and re-seal if movement, gaps, or deterioration appear.
Short-term monitoring steps
Begin monitoring immediately after the pipe jack replacement to verify system integrity and detect early issues. Check for visible leaks, listen for unusual sounds, and inspect surrounding seals and flashing for gaps or loose fasteners.
Continue daily checks for the first week, then weekly for a month. Note any water stains, track weather-related performance, and document findings with photos and brief notes for comparison.
When to re-seal or re-check fasteners
When should re-sealing or fastener checks be performed after a pipe jack replacement?
A homeowner or inspector should re-check fasteners and seals after the first heavy rain, then again at one month.
Thereafter, inspect annually and after severe weather or roof work.
Tighten loose screws, replace degraded sealant, and correct flashing shifts immediately to prevent leaks and structural damage.
Visual Guide and Measurement Cheat Sheet
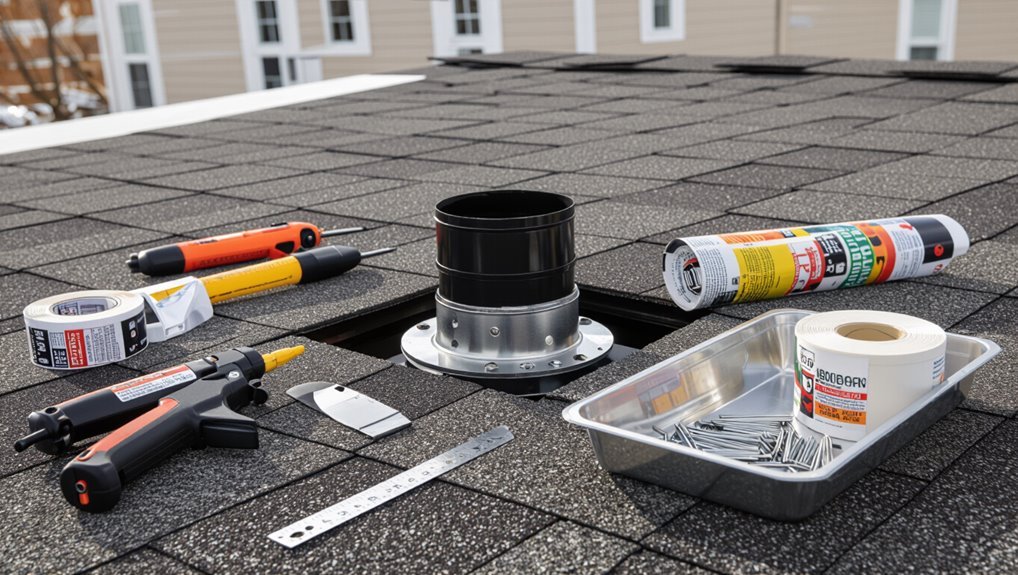
The article presents a compact visual guide showing typical pipe jack dimensions and fit diagrams to aid accurate selection and alignment.
A photo checklist accompanies the diagrams, documenting each replacement stage from roof prep to final seal.
Readers are directed to compare on-site measurements and photos against the cheat sheet to confirm proper fit and installation.
Typical pipe jack dimensions and fit diagrams
A compact visual guide and measurement cheat sheet for typical pipe jack dimensions presents standardized part sizes, clearance requirements, and common roof penetrations in a single reference to speed selection and installation.
It lists flashing base diameters, boot opening ranges, collar heights, recommended overlap with shingles, minimum clearances from vents and chimneys, and simple fit diagrams showing concentric sizing and mounting offsets for proper sealing.
Photo checklist for each replacement stage
Photographs organized by stage provide an objective record that guides installers through each replacement step and verifies compliance with measurements and clearances.
Capture: overall roof context, pipe orientation, existing flashing condition, removed jack footprint, substrate exposure, new boot fit, sealant bead width, fastener locations, flashing overlap, and final water test.
Label images with date, measurement notes, and verifier initials for traceability.
Conclusion
The conclusion summarizes that replacing a pipe jack restores roof integrity and prevents leaks, emphasizing careful assessment, correct materials, and adherence to safety. It suggests visualizing layers—shingle, flashing, boot, and pipe—as stacked shields, each needing proper overlap to deflect water. The theory that clear, measured visuals reduce errors is supported: diagrams and a simple measurement cheat sheet translate procedures into reliable outcomes. When uncertainty or risk arises, a professional should be engaged.
