How to Ground a CSST Gas Line Safely: Step-by-Step Guide for Homeowners
To ground a CSST gas line safely, homeowners must bond it to the electrical grounding system using a listed clamp and a #6 AWG copper bonding conductor. This should connect to an approved grounding electrode or the main service ground. Always turn off the gas, confirm zero pressure, and adhere to the manufacturer’s instructions and local codes. Use appropriate personal protective equipment (PPE), test continuity with a multimeter, and document the work. For complex installations, corrosion issues, or uncertainties, it’s advisable to hire a licensed electrician. Further detailed steps are provided below.
Can and Should You Ground a CSST Gas Line?
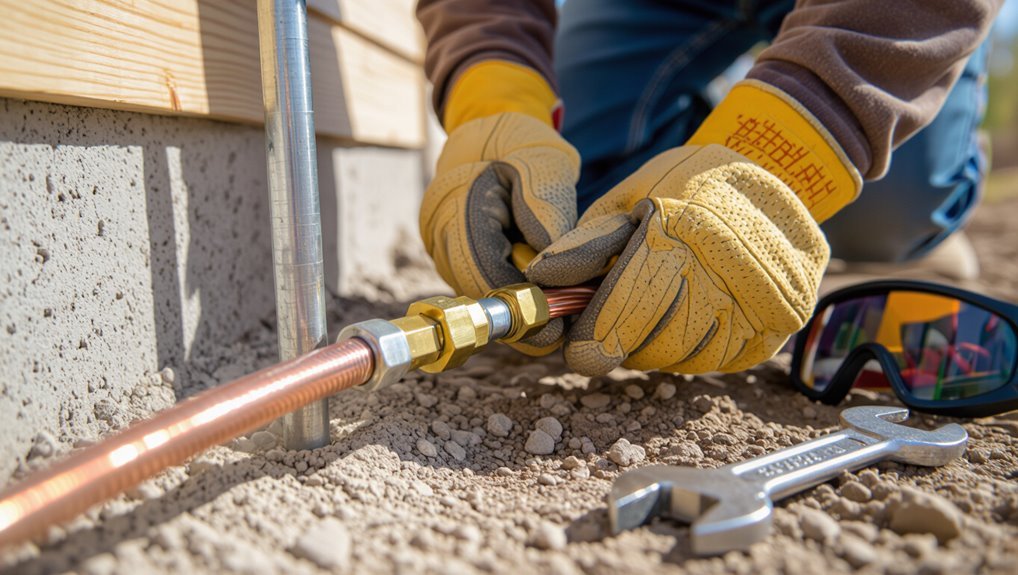
Homeowners are advised to have CSST grounded, but only if local code requires it or the installation shows signs of improper bonding.
Simple grounding checks and minor bonding may be handled by a competent DIYer with the right tools and knowledge.
For any uncertainty, complex runs, or where local regulations apply, a licensed electrician or gas contractor should be consulted.
Short, direct recommendation for homeowners
Verify the type of CSST and local code before deciding: bonds and grounding are recommended or required for many CSST systems to reduce lightning and electrical-fault risks, but specifics vary by product and jurisdiction.
Homeowners should follow manufacturer instructions and local rules when learning how to ground csst gas line; prioritize documented bonding to the electrical grounding system and retain records of compliance.
When to call a professional vs. DIY
After confirming the CSST type and applicable codes and following manufacturer instructions for bonding and grounding, the next decision is whether to hire a licensed professional or attempt the work oneself.
Call a professional if unfamiliar with electrical bonding, local permit requirements, complex routing, or proximity to other utilities.
DIY only if confident, certified, and able to obtain permits, following all specs and safety checks.
Basic Understanding of CSST and Grounding
Corrugated Stainless Steel Tubing (CSST) is a flexible gas piping material whose thin metal jacket and construction make its electrical continuity and protection from lightning or electrical faults an important safety consideration.
Grounding or bonding CSST helps prevent arcing or rupture by directing stray or fault current away from the tubing, and it is important to distinguish grounding (connecting to earth) from bonding (creating an equipotential connection between metal systems).
Relevant requirements come from the National Electrical Code, local codes, and manufacturer instructions, which should be consulted to determine the proper practice.
What is CSST (Corrugated Stainless Steel Tubing)?
CSST (corrugated stainless steel tubing) is a flexible metal gas piping used to distribute natural gas and propane in residential and commercial buildings.
Its thin-walled, corrugated core covered by an outer jacket allows easier routing than rigid black iron pipe.
Manufactured in lengths or coils, CSST connects to fittings and appliances, requires compatible connectors, and is available in different brands and jacket colors indicating specifications and approvals.
Why grounding or bonding CSST matters for safety
Gas piping that uses thin-walled corrugated stainless steel requires electrical bonding because its jacket and metal core can be vulnerable to lightning strikes and stray electrical faults.
Without a proper bond, punctures or arcing can ignite surrounding materials or vaporized gas, increasing fire and explosion risk.
Bonding maintains electrical continuity, diverts fault currents safely to ground, reduces potential differences, and protects occupants and property.
Difference between grounding and bonding
Although both involve directing electricity away from structures, grounding and bonding serve distinct functions: grounding connects a system to the earth to stabilize voltage and dissipate lightning or fault currents, while bonding electrically ties metallic parts together to eliminate potential differences between them so that touch-voltage and arcing risks are minimized.
Grounding provides a reference to earth; bonding guarantees equal potential across conductive components.
Relevant codes and standards overview (NEC, local codes, manufacturer instructions)
After distinguishing grounding from bonding, attention turns to the regulatory framework that governs how metallic gas piping systems are installed and electrically handled. Codes—NEC, local amendments, and manufacturer instructions—dictate bonding points, conductor size, and installation methods. Compliance prevents hazards and liability; verification and permits are advised before work begins.
| Source | Purpose | Key Focus |
|---|---|---|
| NEC | Safety baseline | Bonding specs |
| Local codes | Regional requirements | Amendments |
| Manufacturer | Product limits | Installation |
Safety Precautions Before You Start
Before any grounding work begins, the reader should confirm required permits and inspection schedules and gather a concise checklist of tools, materials, and PPE.
They must know how to shut off the gas supply and verify zero pressure using proper testing methods.
The article will also specify clear scenarios when grounding must be left to licensed professionals.
Required permits and inspections
Local building codes and utility regulations typically require permits and inspections for installing or modifying CSST gas lines. Homeowners or contractors must secure the appropriate permits before work begins and arrange for an inspector to verify compliance at key stages.
Required documentation, approved plans, and permit fees vary by jurisdiction. Scheduling inspections for rough-in and final connections prevents delays and guarantees legal, safe installation.
Tools, materials, and PPE checklist
A concise checklist of tools, materials, and personal protective equipment (PPE) guarantees safe, efficient CSST grounding work and reduces the risk of errors or injury.
Essential items include conductor, grounding clamp, wrench set, wire stripper, and inspection tags. Confirm material compatibility and condition before use; select rated PPE for eye, hand, and respiratory protection. Keep tools organized and accessible.
- Copper grounding conductor
- Listed grounding clamp
- Insulated wrench set
- Safety glasses and gloves
- Multimeter and inspection tags
How to shut off gas and verify zero pressure safely
Shut off the gas supply at the appropriate service valve and confirm isolation using the meter or appliance shutoff.
Then verify zero pressure at the CSST line with a properly rated manometer or multimeter pressure sensor.
Record readings, wait for pressure stabilization, and recheck fittings for leaks with soapy solution.
Keep ignition sources away, ventilate area if smell detected, and notify utility if pressure cannot be reduced to zero.
When NOT to attempt DIY grounding
When should grounding be left to a professional?
Experienced electricians should handle grounding when local codes require permits, bonding to metal piping networks, or complex electrical panels exist.
Avoid DIY if corrosion, hidden damage, or unknown bonding status is present, or if specialized tools and testing (continuity, impedance) are required.
If any uncertainty or heightened risk exists, contact a licensed professional to guarantee safety and compliance.
Quick Overview of the Grounding/Bonding Process
A concise sequence outlines the grounding and bonding of CSST: first consult the manufacturer’s instructions and local code before any work.
Next, identify a suitable bonding point, prepare the bonding conductor and fittings, clamp the conductor to the CSST or pipe, and run it to the grounding electrode or service grounding point.
Finally, test continuity and record the installation details.
Step 0: Read manufacturer instructions and local code
Before any physical work begins, consult the CSST manufacturer’s installation and grounding instructions and the applicable local electrical and plumbing codes to confirm required bonding points, conductor sizes, attachment methods, and testing procedures.
Review label warnings, approved bonding clamp types, and permitted conductor materials.
Note any special requirements for inspectors, documentation, or installer qualifications.
Follow manufacturer and code hierarchy where conflicts arise.
Step 1: Locate suitable bonding point
With manufacturer instructions and local codes reviewed, the installer must identify an appropriate bonding point on the CSST system or associated rigid piping where a bonding clamp can be installed without damaging the jacket or internal tubing.
The point should be accessible, on metal (not plastic), electrically continuous to the gas piping system, and preferably near the meter or service entrance to minimize conductor length.
Step 2: Prepare bonding conductor and fittings
Cut the bonding conductor to the measured length, allowing enough slack for routing and future service, and select fittings rated for the conductor size and the local electrical code.
Strip insulation where required, deburr and clean terminations, and apply anti-oxidant compound if specified.
Verify compatibility of clamps and connectors with CSST and conductor material, and stage components for efficient installation without attaching to the gas piping yet.
Step 3: Install bonding clamp and run conductor to grounding electrode or service grounding point
Attach the approved bonding clamp to the CSST at the prepared location, ensuring it seats squarely on the fitting or jacketed section and torques to the manufacturer’s specification; then route the bonding conductor along the planned path to the grounding electrode or service grounding point, securing it at regular intervals and avoiding sharp bends, heat sources, and contact with dissimilar metals that could cause corrosion.
Verify secure mechanical connections and protected conductor routing.
Step 4: Test continuity and document work
After securing the bonding clamp and routing the conductor, the installer must verify electrical continuity between the CSST system and the grounding electrode or service grounding point.
Using a calibrated multimeter or continuity tester, measure resistance—expect near-zero ohms. Record readings, date, tester model, and installer name.
Photograph connections and clamp locations. File documentation with home records and provide copies to relevant inspectors or homeowners.
Detailed Step-by-Step Guide to Bonding a CSST Gas Line
The following steps outline the practical sequence for bonding a CSST gas line, beginning with verification of applicable codes and manufacturer instructions.
It then covers locating the approved bonding point, selecting the proper conductor gauge and type, and choosing compatible clamps and connectors.
Finally, it describes preparing the surface and securing the bonding clamp to guarantee a reliable connection.
Step 1 Confirm code requirements and manufacturer rules
Why confirm code and manufacturer requirements before beginning work?
The installer verifies local electrical and gas codes, applicable national standards, and CSST manufacturer installation and bonding instructions.
Documentation dictates acceptable bonding conductors, clamp types, torque, and grounding system connection points.
Compliance prevents voiding warranties, guarantees safety, and avoids inspection failures.
Record referenced code editions and manufacturer model-specific directives before proceeding.
Step 2 Identify the correct bonding location on the CSST or associated fitting
With codes and manufacturer instructions confirmed, attention shifts to locating the approved bonding point on the CSST or an attached fitting.
The installer inspects manufacturer-marked clamps, bonding tabs, or listed fittings near accessible pipe runs. Bonding must be at the specified location—often at a metal fitting or junction—avoiding thin jacket areas.
Document the chosen spot before proceeding.
Step 3 Select correct gauge and type of bonding conductor
Selection of the correct bonding conductor hinges on matching conductor gauge and type to both electrical code requirements and the CSST manufacturer’s instructions.
The installer verifies required minimum AWG (often #6 copper for typical residential systems), chooses bare or insulated copper as specified, confirms continuous unbroken run to grounding electrode system, and guarantees durability against mechanical damage and corrosion per local code.
Step 4 Choose approved bonding clamps and connectors
Choose approved bonding clamps and connectors that are listed for use on CSST and sized for the conductor and pipe material; these fittings must provide a secure, low-resistance electrical connection, resist corrosion and mechanical stress, and carry the manufacturer’s and local electrical authority’s approval markings.
Verify material compatibility (brass, stainless steel), correct screw torque rating, insulation displacement if applicable, and traceable labeling before installation.
Step 5 Prepare the surface and attach the bonding clamp securely
Prepare the pipe surface by removing coatings, paint, and loose corrosion so the bonding clamp contacts clean base metal; use a non-ferrous abrasive pad or fine emery cloth to expose bare brass or stainless steel over the clamp seating area.
Then clean the area with a solvent recommended by the clamp manufacturer to remove oils and debris.
Position clamp squarely, tighten per torque spec, and verify mechanical and electrical contact.
Step 6 Route the bonding conductor to the grounding electrode system or service grounding point
Once the bonding clamp is secured, the bonding conductor must be routed from the CSST fitting to the building’s grounding electrode system or service grounding point using the most direct, practical path that minimizes length and avoids sharp bends, heat sources, and areas prone to mechanical damage.
Secure conductor with approved straps at intervals, maintain clearance from piping and insulation, and protect runs through walls or floors with grommets or conduit where exposed.
Step 7 Make the connection at the grounding electrode or panel using approved methods
Terminate the bonding conductor at the grounding electrode or service panel using only listed clamps or lugs, ensuring the conductor is straight, clean, and free of paint or corrosion where the connection will be made.
Secure the clamp per manufacturer torque specs, verify mechanical stability, and route the conductor to avoid sharp edges or heat sources.
Document connection type and location for inspection.
Step 8 Continuity testing with a multimeter and acceptable resistance values
Begin by verifying electrical continuity between the bonded CSST fitting and the designated grounding electrode/system using a calibrated digital multimeter set to the low ohms or continuity mode.
Probe the bonding clamp and the grounding electrode conductor or panel ground. Acceptable resistance is typically near 0 Ω; values under 1 Ω confirm good continuity.
Record readings and retest after any adjustments.
Step 9 Labeling, documentation, and scheduling inspection
Document the completed bonding work clearly, attach permanent labels, and arrange a code-compliant inspection to close out the installation.
Photograph connections, record date, installer, materials, and test results.
Affix durable labels near the bonding clamp and at the meter indicating bonding path.
Submit documents to the local authority having jurisdiction, schedule the inspection, and retain copies for homeowner records and future service.
Materials, Tools, and Cost Estimates
The section lists recommended materials with common part numbers (bond clamps, grounding conductors, fittings) to guarantee compatibility and code compliance.
It also outlines required hand tools and optional specialty tools that can simplify installation.
Finally, a concise cost comparison presents typical DIY expenses versus professional labor and permit estimates.
Recommended materials and part numbers
For grounding a CSST gas line safely, a concise list of specifically rated materials and commonly available part numbers helps guarantee compatibility and code compliance; typical items include a listed bonding clamp for gas piping (e.g., Hargrave/Ideal 78-052 or Thomas & Betts 1533), a #6 AWG copper bonding conductor (solid or stranded) with insulated or bare options per local code, a listed grounding electrode conductor connector or lug (e.g., Burndy HGC series), and a compatible ground rod or connection to the building grounding electrode system.
- Bonding clamp (Hargrave/Ideal 78-052)
- Bonding clamp (Thomas & Betts 1533)
- #6 AWG copper conductor (solid/stranded)
- Burndy HGC series lug/connector
- Ground rod (8 ft copper-clad)
Required tools and optional specialty tools
After selecting the listed clamps, conductor, and connectors, attention shifts to the tools required to install and test the bonding assembly for a CSST gas line.
Essential and optional tools streamline safe installation and verification while minimizing risk.
- Adjustable wrench and torque wrench
- Insulated screwdrivers and nut drivers
- Wire stripper and crimper
- Multimeter for continuity and resistance
- Flexible conduit fish tape
Typical DIY vs. professional cost breakdown
While homeowners can often purchase the necessary clamps, conductors, and connectors for a CSST bonding job at modest prices, a clear cost comparison shows notable differences between a DIY approach and hiring a licensed professional. Materials/tools DIY: $30–$150; professional: $200–$600 (labor, inspection). Risk, warranty, and code compliance often justify higher professional fees.
| Item | DIY | Professional |
|---|---|---|
| Materials | Low | Included |
| Labor | None | Higher |
| Liability | Personal | Covered |
Common Mistakes and How to Avoid Them
Common errors include improper clamp placement or use of nonapproved clamps, undersized bonding conductors, and tying into incorrect grounding points.
Failure to follow manufacturer instructions or local codes and neglecting to test and document the bond can leave the installation unsafe.
Addressing each of these issues with correct parts, proper conductor sizing, verified grounding locations, and documented testing prevents costly and dangerous mistakes.
Improper clamp placement or using wrong clamps
Improper clamp placement or using the wrong clamps undermines the electrical continuity of a CSST grounding system and can create safety hazards.
Clamps must contact the metal fitting, avoid tubing bodies, and tighten per manufacturer torque. Using nonapproved or corrosive materials, loose fittings, or insulating coatings breaks the bond.
Inspect, follow manufacturer specifications, and replace damaged clamps to guarantee a reliable grounding connection.
Undersized bonding conductor
Many installations use a bonding conductor that is too small for the fault current and grounding path length, which compromises the CSST grounding system’s ability to safely carry fault or lightning currents.
Contractors should size conductors per local code and NEC tables, avoid using improvised wiring, and verify length and material.
Undersizing increases resistance, heat, and failure risk; inspect and replace undersized runs.
Connecting to incorrect grounding points
When a bonding conductor is attached to an inappropriate grounding point—such as a gas meter, metallic plumbing parts not bonded to the electrical system, or a distant electrical enclosure—the CSST system may not achieve a low-impedance path for fault or lightning currents.
Inspect and verify the chosen connection is the building electrical grounding electrode or service equipment ground.
Use proper clamps, and document the attachment for inspection.
Failing to follow manufacturer instructions or codes
Failure to follow manufacturer instructions or applicable codes undermines the effectiveness of CSST grounding and bonding by introducing inconsistent methods, improper materials, or incorrect attachment points that can leave gas piping vulnerable to electrical fault or lightning energy.
Installers who ignore specifications risk voiding warranties and creating unsafe conditions.
Adherence to manufacturer guidance and local code requirements guarantees proper connector selection, placement, and secure bonding for reliable protection.
Neglecting to test and document
Overlooking post-installation testing and thorough documentation leaves CSST grounding efforts unverifiable and harder to troubleshoot.
Technicians should record continuity, resistance readings, clamp locations, and date-stamped photos. Skipping tests risks undetected faults and liability; failing to keep clear records complicates future inspections or modifications.
Adopting checklists, retaining receipts, and providing homeowners with a concise report prevents ambiguity and supports code compliance.
Troubleshooting and Special Scenarios
The section addresses troubleshooting and atypical situations such as integrating CSST with existing metal piping and handling multiple grounding paths.
It contrasts bonding approaches for retrofit projects versus new construction, notes considerations for plastic fittings and flexible connectors, and outlines steps to take if a continuity test fails.
Practical checkpoints and decision points are provided to help resolve conflicts and guarantee a reliable grounding connection.
Existing metal piping networks and multiple grounding paths
When metal gas piping connects into an existing bonded plumbing or electrical grounding system, care must be taken to identify all conductive paths and their interconnections to guarantee a single, effective fault current path for CSST bonding.
Inspect shared water, heating, and gas branches; document clamps, jumpers, and bonding conductors; remove or manage parallel paths that bypass the designated bond; consult code and a licensed electrician if uncertainties arise.
Bonding in retrofit installations vs. new construction
How does bonding strategy differ between retrofit installations and new construction?
In retrofits, installers often must assess existing grounding paths, add bonding jumpers to isolated CSST sections, and connect to the nearest accessible electrode without disturbing finished surfaces.
New construction allows planned continuous bonding, direct connection to the main grounding electrode, and integration with building electrical grounding during rough-in for simpler, code-compliant installation.
Dealing with plastic fittings or flexible connectors
Many installers encounter plastic fittings or flexible connectors on CSST runs, which require careful evaluation because these components can interrupt required electrical continuity.
Inspect fittings for nonmetallic sections and note locations. When nonconductive elements exist, bond the metallic parts on either side using approved clamps and conductors, following manufacturer and electrical code guidance.
Document modifications and inform inspectors.
What to do if continuity test fails
If a continuity test on a CSST run fails after addressing plastic fittings or flexible connectors, the installer must proceed methodically to identify the fault and restore a continuous conductive path.
Inspect joints, fittings, and bonding clamps for corrosion, loose connections, or missing bonding straps.
Isolate sections and retest to locate the break.
Repair or replace defective components, then verify continuity and document results per code.
Alternatives and Complementary Measures
Consideration of lightning protection, whole-home surge arrestors, and broader grounding upgrades can complement or reduce risk beyond CSST grounding alone.
Homeowners and electricians should weigh surge protection and improved system grounding as part of an overall strategy.
In some cases—repeated damage, pervasive installation defects, or local code requirements—replacement of CSST with bonded rigid pipe may be the safer long-term option.
Lightning protection considerations
Beyond basic bonding and grounding of CSST, additional lightning protection strategies can reduce risk by controlling where and how lightning current enters and travels through a structure.
Install or assess lightning rods, down conductors, and proper air terminals to direct strikes to designated grounding electrodes.
Maintain continuous low-impedance paths, avoid shared conductive routes with gas piping, and consult a qualified lightning protection installer for design and code compliance.
Surge protection and whole-home grounding improvements
While lightning protection directs high-current strikes away from a structure, surge protection and whole-home grounding improvements address lower-energy but more frequent transient events and systemic grounding deficiencies that can still threaten CSST integrity and connected equipment.
Install whole-house surge arresters at service entrance, bond meter, panel and CSST bonding point. Improve grounding electrode system continuity, and use coordinated SPD stages to limit voltage stress on gas fittings and appliances.
When to replace CSST with rigid pipe
When is replacement of corrugated stainless steel tubing (CSST) with rigid pipe warranted?
Replacement is warranted when local code or utility mandates require it, when CSST shows physical damage or improper fittings, after lightning-related strikes suspected to have compromised tubing, or where mechanical protection is insufficient.
Homeowners should consult a licensed plumber or gas contractor to assess risk and perform replacement following code and manufacturer guidelines.
Best Practices and Maintenance
A concise periodic inspection checklist should guide routine checks of CSST grounding and fittings.
Attention should focus on signs of corrosion, loose connections, abrasion, or other damage that could compromise the ground.
Clear recordkeeping with defined inspection intervals guarantees issues are tracked and repairs are timely.
Periodic inspection checklist
Because regular inspections catch small issues before they become hazards, a concise checklist guarantees CSST gas lines remain safe and compliant.
Inspect grounding conductor continuity, verify clamp tightness, confirm bonding to electrical ground, check routing clearances, and review recent work records.
Document findings, note corrective actions, set reinspection intervals, and retain photos for reference.
- Verify grounding conductor continuity
- Confirm clamp tightness
- Check bonding to electrical ground
- Inspect routing clearances
- Review recent installation or repair records
Signs of corrosion, loose connections, or damage
Corrosion, loose connections, and physical damage on CSST gas lines present clear indicators that grounding or bonding may be compromised and require prompt attention.
Visible pitting, discoloration, frayed or exposed sheathing, deformed fittings, and movement at joints suggest wear.
Electrical arcing marks, greenish deposits, or brittle insulation indicate deterioration.
Any of these signs warrants immediate evaluation by a qualified technician.
Recordkeeping and inspection intervals
Recognizing signs of damage on CSST gas lines should prompt not only immediate repair but also the initiation of systematic recordkeeping and scheduled inspections.
Detailed logs should include installation dates, grounding actions, inspection findings, repairs, and technician credentials.
Inspections are recommended annually, after seismic events, and following alterations.
Retain records for the life of the installation and provide copies to service professionals and insurers.
When to Hire a Licensed Professional
When grounding a CSST gas line, homeowners should recognize signs the work exceeds DIY skills—complex routing, corroded fittings, or local code requirements.
A licensed contractor should be vetted by checking credentials, insurance, references, and asking about experience with CSST grounding and permit handling.
During a professional visit one should expect inspection, documented recommendations, a written estimate, proper bonding and testing, and a final compliance report.
Indicators that the job is out of scope for homeowners
Several clear signs indicate that grounding a CSST gas line should be entrusted to a licensed professional:
- presence of existing electrical or gas code violations,
- complex building wiring or multi-tenant systems,
- visible damage or corrosion on CSST,
- inability to access grounding points,
- prior lightning damage,
- uncertain bonding requirements,
- or any permit requirement.
In such cases, homeowners should defer to certified trades to guarantee safety and compliance.
How to vet contractors and what to ask
Because improper grounding can create serious safety and liability risks, homeowners should verify a contractor’s qualifications before hiring.
Verify licensing, insurance, and bonding. Request references and recent CSST grounding examples. Confirm code familiarity and permit handling. Ask for written estimates, warranties, and scope.
- License number and trade classification
- General liability and workers’ comp proof
- Local permit experience
- References with photos
- Written warranty terms
What to expect from a professional service visit
A professional CSST grounding service visit typically begins with a focused inspection to assess the piping layout, bonding points, and surrounding electrical infrastructure.
The technician will test continuity, measure potential differences, recommend proper clamp placement, and verify grounding conductor size and routing.
A written estimate, timeline, permit guidance, and post-work testing report are provided.
Homeowner questions are addressed before project completion.
Useful Resources and References
The article references manufacturer installation manuals and technical bulletins to clarify product-specific grounding requirements.
It also points readers to relevant code excerpts and official sources for locating applicable regulations.
Finally, links to testing procedures and equipment manuals are provided to support proper verification and inspection.
Manufacturer installation manuals and technical bulletins
Several manufacturers provide detailed installation manuals and technical bulletins that explain grounding requirements, approved materials, and step-by-step procedures for CSST gas lines.
These documents clarify product-specific grounding points, bonding conductor sizes, connector types, and installation caveats, offering authoritative guidance for homeowners and professionals.
- Model-specific grounding diagrams
- Approved bonding clamp types
- Minimum conductor size tables
- Torque and fastening specifications
- Field inspection checklists
Relevant code excerpts and where to find them
Relevant code excerpts and standards provide the legal and technical framework for grounding and bonding CSST, specifying required practices, conductor sizing, attachment methods, and inspection points.
Excerpts commonly referenced include NEC sections, International Fuel Gas Code, and manufacturer-specific mandates. Copies are available from code publishers, local building departments, and manufacturer websites for verification during permitting and inspection.
- NEC (National Electrical Code) sections
- International Fuel Gas Code passages
- Local building code amendments
- Manufacturer installation requirements
- AHJ inspection checklists
Links to testing procedures and equipment manuals
When referencing testing procedures and equipment manuals for CSST grounding and bonding, professionals should consult manufacturer-specific test protocols, industry-standard measurement procedures, and calibration guides to secure accuracy and code compliance.
Relevant links should include official manufacturer manuals, calibration certificates, and procedural checklists to confirm repeatable, documented results.
- Manufacturer CSST grounding test protocol
- Multimeter and clamp meter manuals
- Ground impedance measurement procedures
- Calibration lab accreditation references
- Recordkeeping and inspection checklists
Conclusion
In the end, the homeowner nods sagely, convinced that bonding CSST is both simple and the secret to eternal plumbing enlightenment. Reality, however, prefers licensed electricians and code-compliant fittings. Grounding matters, but it is not a DIY rite of passage. Proper bonding, professional inspection, and periodic maintenance keep gas lines behaving and insurers appeased. If anything, this guide demonstrates that prudence and expertise make for far more combustible-free outcomes than overconfident tinkering.