How to Clean Toilet Holes Effectively: Step-by-Step Tips for a Germ-Free Bowl
To effectively clean toilet rim jets and drain holes, start by assessing any deposits. Use a stiff brush, pipe cleaner, or flexible tube brush to dislodge debris. For mineral buildup, apply vinegar or a citric-acid descaler, and for biofilm, use bleach or enzyme cleaners—ensuring you follow safety and septic-compatibility guidelines. After cleaning, rinse the area and test the flush strength. Repeat the process on any stubborn spots, and establish a regular maintenance schedule to keep your toilet bowl germ-free and odor-free. For detailed step-by-step techniques, safety tips, and product recommendations, continue reading.
Why Cleaning Toilet Rim Jets and Holes Matters for Hygiene and Performance
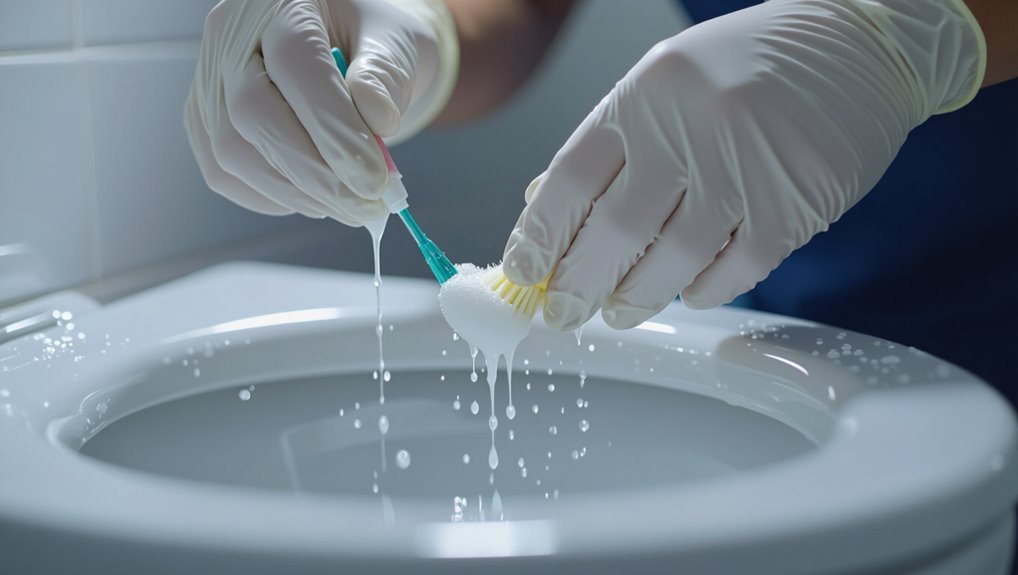
Rim jets and drain holes directly influence flush strength and how well odors are controlled, so their condition affects toilet performance.
Mineral deposits, soap scum, and biological buildup commonly cause partial or complete blockages of these openings.
Neglected holes can harbor bacteria and mold, increasing infection risk and unpleasant smells.
How rim jets and drain holes affect flushing and odor control
Because small jets and drainage holes direct and control the flow of water during a flush, their condition directly influences both bowl cleansing and odor management.
Clogged or corroded rim jets and drain holes reduce rinse force, leaving residue that breeds odors.
Proper maintenance, including guidance on how to clean toilet holes, restores balanced flushing, prevents stagnation, and improves overall sanitation and scent control.
Common causes of buildup and blockage in toilet holes
Many factors contribute to buildup and blockage in toilet rim jets and drain holes, with mineral deposits, organic residue, and foreign objects the most frequent culprits.
Hard water leaves limescale and calcium, while soap scum and biofilm accumulate from use.
Toilet paper compaction, sanitary products, and small debris can obstruct flow.
Infrequent cleaning and low-flush designs exacerbate deposition and clogging.
Health risks from neglected toilet holes
Regularly overlooked, clogged toilet rim jets and drain holes create conditions that increase microbial growth, odor, and the risk of pathogen spread.
Neglected openings harbor bacteria, viruses, and mold, compromising household hygiene and aggravating respiratory or gastrointestinal illnesses.
Reduced flush efficiency promotes residue buildup and pest attraction.
Timely cleaning mitigates contamination, preserves performance, and lowers exposure risks for occupants and maintenance personnel.
Quick Overview: Effective Toilet Hole Cleaning in 5 Steps
The section lists the tools and cleaners needed for a quick, effective toilet hole clean.
It notes essential safety steps to protect skin and eyes before beginning.
A concise five-step sequence is then presented to guide a fast, thorough process.
Gather necessary tools and cleaners
Preparation begins with selecting the right tools and cleaners to guarantee safe, efficient toilet hole cleaning.
Essential items include a stiff-bristled toilet brush, disposable gloves, a narrow nozzle bottle or syringe for targeted application, microbial or bleach-based cleaner, descaling agent for mineral buildup, and disposable towels or paper wipes.
A bucket and scrub pad complete the kit for thorough, focused cleaning.
Safety precautions before you start
Before beginning, wear protective gloves and eye protection and make sure the bathroom is well-ventilated to minimize inhalation of fumes from cleaners and descalers.
Close pets and children out of the area. Read product labels for proper dilution and contact times.
Avoid mixing chemicals (especially bleach and acids). Confirm a stable ladder or step if reaching high fixtures and keep a phone nearby for emergencies.
Step-by-step summary for a fast clean
Begin by gathering gloves, a toilet brush, a descaler or bowl cleaner, a disinfectant, and a disposable cloth or paper towels; this concise kit supports a focused five-step routine for a quick, effective toilet hole clean.
Apply cleaner, let sit; scrub the rim and holes thoroughly; flush to rinse; treat remaining stains with descaler; wipe and disinfect exterior surfaces, then dispose of waste.
Tools, Materials, and Cleaning Agents Recommended
This section lists the essential tools and materials for cleaning toilet holes, including various brushes (toilet, bottle, toothbrush), pipe cleaners, and a drain snake for mechanical buildup.
Recommended cleaning agents range from household options like vinegar and baking soda to bleach, commercial descalers, and enzymatic cleaners, with septic-safe and eco-friendly formulas noted where appropriate.
Personal protective equipment—gloves, eye protection, and adequate ventilation—should be used whenever chemical or mechanical methods are applied.
Tools: brushes, pipe cleaners, bottle brushes, drain snake, toothbrush
When tackling toilet-hole cleaning, selecting the right tools streamlines the job and reduces damage risk:
A stiff toilet brush clears typical residue; a narrow bottle brush reaches under rims; pipe cleaners access tight passages; a small toothbrush scrubs crevices and hinges; a flexible drain snake dislodges deeper clogs.
Choose durable, nonmetallic tools for porcelain protection and discard worn, contaminated implements promptly.
Cleaning agents: vinegar, baking soda, bleach, commercial descalers, enzymatic cleaners
Select cleaning agents based on the soil type and toilet materials:
Mild acids like white vinegar dissolve mineral buildup.
Baking soda provides gentle abrasion and odor neutralization.
Bleach sanitizes and whitens but can damage seals and should never be mixed with acids.
Commercial descalers target limescale with stronger acids, and enzymatic cleaners break down organic residues safely over time.
Choose concentrated products for severe scale, dilute per instructions, and rinse thoroughly.
PPE and protective supplies: gloves, eye protection, ventilation
Put on appropriate personal protective equipment before handling cleaning agents or reaching into drain holes: chemical-resistant gloves protect skin from acids, alkalis, and bleach; splash-proof eye protection guards against sprays and fumes; and a mask or respirator can reduce inhalation of strong vapors.
Additionally, use long-sleeved clothing, closed-toe shoes, and guarantee mechanical ventilation or open windows to disperse fumes while avoiding confined-space exposure.
Environmentally friendly and septic-safe options
Why choose environmentally friendly and septic-safe products for toilet hole cleaning? They minimize chemical runoff, protect septic systems, and reduce indoor fumes.
Recommended tools and agents include:
- Biodegradable toilet cleaners formulated for septic systems
- Enzyme-based drain treatments to break down organic matter
- Bicarbonate and vinegar mixtures for mild descaling
- Natural-bristle brushes and reusable microfiber cloths
Detailed Step-by-Step Cleaning Process for Toilet Holes and Rim Jets
The following section outlines a concise, step-by-step procedure for cleaning toilet rim jets, overflow holes, and the trapway beginning with simple preparatory actions such as turning off the water and lowering the bowl level if necessary.
It then covers inspection for buildup, mechanical removal with brushes, flexible scrubbers, and picks, and safe application of chemical agents like vinegar, baking soda, or approved commercial cleaners.
Finally, it explains approaches for descaling heavily mineral-encrusted holes and precautions to protect fixtures and plumbing.
Preparatory steps: turn off water if needed and remove water level
Before beginning, make certain the toilet’s water supply is shut off and the bowl’s water level is lowered so that rim jets and trap passages are accessible for cleaning.
Next, flush to drain most water, then use a sponge or hand pump to remove remaining water.
Wear gloves and eye protection, place towels around the base, and guarantee adequate ventilation before proceeding with cleaning.
Inspecting rim jets, overflow holes, and trapway for buildup
Once water has been lowered and safety precautions are in place, the inspector should closely examine rim jets, overflow holes, and the trapway for mineral deposits, biofilm, or debris using a flashlight and mirror; note locations, severity, and any discoloration.
Photograph problem areas if needed. Record access limitations and potential corrosion.
Prioritize hard-water deposits and organic buildup for targeted cleaning in subsequent steps.
Mechanical cleaning: using brushes, flexible scrubbers, and picks
With areas of buildup identified and photographed, attention shifts to mechanical cleaning using brushes, flexible scrubbers, and picks.
The process begins by selecting appropriate tools: a narrow toilet brush for rim jets, a flexible tube brush for overflow holes, and plastic picks for stubborn spots.
Work methodically, dislodging deposits, flushing debris, and rinsing tools between passes until flow is restored and surfaces feel smooth.
Chemical cleaning: applying vinegar, baking soda, or commercial cleaners safely
Begin by choosing the appropriate chemical agent and safety gear: white vinegar or a baking soda paste for mild mineral buildup, a diluted commercial descaler for heavier deposits, and gloves and eye protection for any caustic product.
Apply solution to rim jets and holes, allow recommended dwell time, agitate with a small brush or pick, rinse thoroughly, flush, and ventilate the area to remove fumes.
Descaling heavily mineral-encrusted holes
How should one tackle heavily mineral-encrusted rim jets and toilet holes to restore proper flow and spray patterns?
One method uses diluted muriatic or phosphoric acid applied carefully with a brush and protected gloves, goggles, and ventilation.
Soak briefly, agitate deposits with nylon brush or dental pick, rinse thoroughly, neutralize residue, repeat as needed.
Inspect for damage and avoid metal tools that scratch porcelain.
Flushing and testing flush performance after cleaning
After cleaning the rim jets and toilet holes, the next step is to flush and evaluate performance systematically to confirm restored flow and detect unresolved issues.
Perform multiple flushes, observe water level, swirl strength, and any sputtering.
Inspect underside of rim for residual debris during flushes.
Note slow drains, weak washdown, or continued dripping, and document problems for targeted re-cleaning or mechanical adjustment.
Final rinse and odor neutralization
One careful final rinse removes residual cleaners and loosened debris while targeted odor neutralization prevents lingering smells and protects the bowl surfaces.
After scrubbing, flush repeatedly or pour cold water to clear residues.
Apply a pH-neutral deodorizer or enzymatic spray to rim holes and bowl, allow specified dwell time, then perform a final flush.
Inspect for fresh scent and unobstructed rim jets.
Dealing with Specific Problems
The section addresses common complications encountered around toilet holes and rim jets, including mineral scale and hard-water buildup as well as biological slime and mold.
It distinguishes clogged rim jets from a blocked trapway and outlines targeted cleaning or clearing methods for each.
Guidance is also provided on signs that professional plumbing or toilet replacement is the most practical remedy.
Mineral scale and hard-water deposits removal
Tackle mineral scale and hard-water deposits with acidic cleaners or descaling agents formulated to dissolve calcium and magnesium buildup without damaging porcelain or seals.
Apply product per instructions, allow dwell time, then agitate with a nonabrasive brush or pumice stone designed for toilets.
Rinse thoroughly, repeat for stubborn rings, and consider a water softener or routine descaling to prevent rapid recurrence.
Biological slime and mold elimination
After removing mineral scale, attention can turn to biological slime and mold, which require different treatments.
The writer recommends scrubbing with a brush and an enzymatic cleaner or diluted bleach solution, allowing dwell time to kill spores.
Rinse thoroughly, repeat for persistent growth, and guarantee ventilation and regular cleaning to prevent recurrence.
Protective gloves and eye protection are advised.
Clogged rim jets vs. clogged trapway: identification and solutions
How can one distinguish a clogged rim jet from a blocked trapway, and why does it matter for remedy selection?
A rim jet clog reduces flushing pressure and uneven water flow; clearing with a brush, vinegar, or needle restores spray.
A trapway blockage causes slow or no drain and possible overflow; resolving requires plunging, augering, or targeted chemical treatment.
Identify by flow pattern and drainage response.
When to call a plumber or replace the toilet
Knowing whether the problem is a clogged rim jet or a blocked trapway informs whether the next step is a simple cleaning or a larger intervention.
However, some symptoms signal that professional help or a full replacement is warranted. Persistent odors, recurring clogs after proper cleaning, cracks in the bowl, shifting at the base, or inefficient flushing despite new parts justify calling a plumber or considering replacement.
Preventive Maintenance and Routine Cleaning Schedule
A clear maintenance plan helps prevent buildup and keeps toilet holes functioning efficiently.
Weekly, monthly, and quarterly tasks are outlined to target grime, mineral deposits, and check for wear.
Simple daily habits for keeping rim jets clear and recommended products or in-tank solutions for reducing buildup are also covered.
Weekly, monthly, and quarterly maintenance tasks
Establishes a predictable cadence of weekly, monthly, and quarterly tasks to prevent buildup and catch developing issues before they require intensive intervention.
Weekly: flush with cleaner, scrub bowl and under-rim with brush, inspect jets.
Monthly: use descaler in tank and bowl, check for mineral deposits, clean overflow and tank components.
Quarterly: deep descaling, inspect seals and mounting, replace worn parts.
Simple daily habits to keep rim jets clear
Several small daily habits can prevent rim jets from clogging and keep flush performance consistent.
Rinse the bowl after use by triggering a quick flush to move sediments. Wipe visible mineral deposits or toilet paper residues from the rim with a damp cloth.
Avoid flushing greasy or fibrous waste. Inspect under the rim briefly each day and address buildup promptly to maintain flow.
Products and in-tank solutions to reduce buildup
Many homeowners find that targeted products and in-tank treatments greatly reduce mineral and organic buildup before it becomes a problem.
In-tank tablets, citric acid powders, and gentle enzymatic formulas prevent deposits; compatibility with seals and manufacturer guidelines matters. Regular inspection avoids staining.
Recommended items include:
- In-tank chlorine or enzyme tablets
- Citric acid sachets
- Floating dispenser with mild cleaner
- Periodic seal-safe descaler
Safe Use and Compatibility of Cleaners
The section outlines which chemical combinations must never be mixed and lists immediate steps to take if skin or eye exposure occurs.
It also identifies cleaners that can damage porcelain, rubber seals, and septic systems.
Finally, it compares effective eco-friendly alternatives and their suitability for routine use.
Mixing chemicals to avoid and emergency steps if exposure occurs
When cleaning toilet holes, users must never mix bleach with ammonia, acids, or products labeled as containing hydrogen peroxide or percarbonate.
This is because those combinations produce toxic gases (chloramine, chlorine, or oxygen-release reactions) that can cause respiratory distress, chemical burns, or worse.
If exposure occurs, evacuate, ventilate, remove contaminated clothing, rinse skin or eyes with water for 15+ minutes, and seek emergency medical help immediately.
Cleaners to avoid for porcelain, seals, and septic systems
After addressing dangerous chemical combinations and emergency steps, attention turns to products that can damage fixtures, seals, or septic systems. Harsh acids, abrasive powders, and solvent-based drain cleaners can etch porcelain, degrade rubber gaskets, or kill beneficial bacteria. Avoid prolonged exposure and follow manufacturer guidance.
| Product type | Risk |
|---|---|
| Muriatic acid | Etching |
| Abrasives | Scratching |
| Solvents | Seal damage |
| Enzyme killers | Septic harm |
Eco-friendly alternatives and their effectiveness
Why choose eco-friendly cleaners for toilet holes? Eco-friendly options—vinegar, baking soda, citric acid, and plant-based enzymatic cleaners—clean effectively while minimizing corrosion, seal damage, and septic disruption.
They remove scale, organic buildup, and odors when used properly and with contact time. Users should confirm product compatibility with seals and follow manufacturer guidance for concentrated formulas to maintain safety and effectiveness.
Troubleshooting Checklist
If symptoms persist after cleaning, the guide lists clear signs that the problem remains unresolved, such as lingering odors, stained trapways, or a weak flush.
It then provides quick diagnostic steps to isolate causes—checking water level, inspecting for partial clogs, and testing the flapper and venting.
Finally, it compares rough cost and time estimates for further DIY efforts versus hiring a professional service.
Signs that cleaning didn’t fix the issue
When basic cleaning fails to restore proper flow or function, a clear set of signs can help determine that deeper troubleshooting is required.
Persistent slow drain, recurring stains despite scrubbing, water level fluctuations, gurgling noises, foul odors that return quickly, and repeated clogs indicate issues beyond surface grime.
Visible mineral buildup inside rim holes or cracked seals also signal professional inspection is needed.
Quick diagnostic steps for persistent odors or weak flush
Persistent odors or a weak flush often indicate issues that go beyond routine cleaning and require targeted checks.
Inspect trapway and rim jets for clogs; run a dye test for hidden leaks; verify water level and fill-valve operation; test flush valve and flapper seating; check vent-stack for obstruction if multiple fixtures affected; note unusual sounds or slow drainage.
Document findings for next steps.
Cost and time estimates for DIY vs. professional service
How much time and money should be expected for tackling toilet holes depends on the problem’s complexity and the chosen route:
Simple DIY cleaning (vinegar, brush, plunging) typically takes 30–90 minutes and costs $5–30.
Moderate repairs (seal replacement, mineral removal) require 1–3 hours, $20–100.
Professional service for deep clogs or hardware faults may take 1–2 hours and cost $75–250+ including call fees.
Tips for Long-Term Hygiene and Odor Prevention
For sustained cleanliness, recommended routines for guest bathrooms and high-traffic toilets include more frequent light cleanings and targeted checks of seals and drains.
Natural deodorizers and odor-absorbing products—such as baking soda, activated charcoal, and essential-oil sprays—can be used regularly to neutralize smells without harsh chemicals.
Seasonal deep-clean actions, including descaling, wiping hidden crevices, and replacing worn seals or liners, help prevent buildup and recurring odors.
Best practices for guest bathrooms and high-traffic toilets
Many guest bathrooms and high-traffic toilets benefit from a predictable routine that emphasizes quick daily touch-ups and deeper weekly maintenance to prevent buildup and odors.
Assign simple daily tasks (wipe seats, check supplies), schedule weekly scrubbing of rim holes and under-rim areas, inspect seals and flush performance monthly, keep cleaning tools accessible, and document when professional plumbing or deep descaling is required to maintain hygiene.
Natural deodorizers and odor-absorbing products
After establishing a routine of quick touch-ups and weekly rim-hole scrubs, attention turns to combating lingering odors with natural deodorizers and odor-absorbing products that support long-term hygiene.
Activated charcoal pouches, baking soda bowls, and cotton balls with essential oils neutralize smells without harsh chemicals.
Place discreetly near the bowl, replace or refresh monthly, and combine with ventilation for consistent odor control.
Seasonal deep-clean actions
When seasons change, a thorough deep clean helps prevent residue buildup and persistent odors that quick touch-ups miss; this involves descaling mineral deposits, disinfecting under-rim jets, and revitalizing seals and vents.
Technicians or diligent homeowners should remove and soak removable parts, flush with sanitizer, inspect and replace worn seals, clean vent pathways, and apply protective treatments to inhibit scale and bacterial regrowth.
Additional Resources and Product Recommendations
Several trusted resources and targeted products can simplify maintenance and prevent common issues with toilet holes.
Recommendations include reliable guides, efficient cleaners, and tools that reduce buildup.
Suggested items and resources:
- Manufacturer manuals and online maintenance guides
- Enzymatic or mild acidic bowl cleaners
- Flexible toilet brush or nozzle cleaner
- Protective gloves and safety goggles
Conclusion
The article concludes that regular attention to toilet rim jets and holes greatly improves hygiene and flushing performance. Practical, safe cleaning methods—mechanical scrubbing, targeted descaling, and compatible disinfectants—offer predictable results when applied correctly. Visualizing the process as clearing clogged channels into flowing pathways helps verify the theory: unobstructed jets equal stronger flushes and reduced bacterial niches. Consistent maintenance and appropriate products sustain these outcomes, minimizing odors and prolonging fixture function.