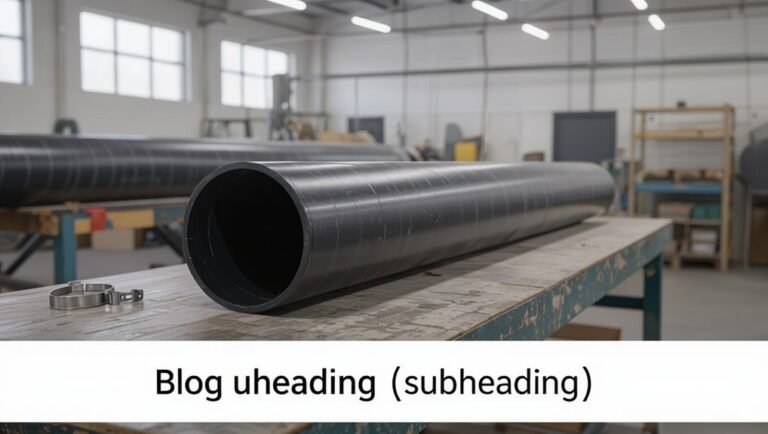
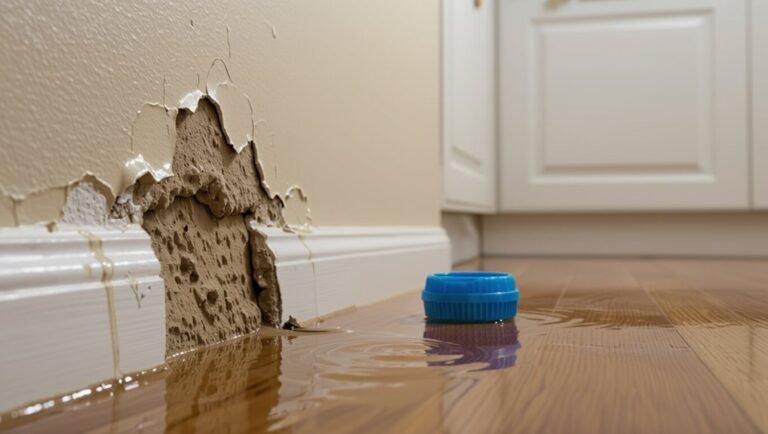
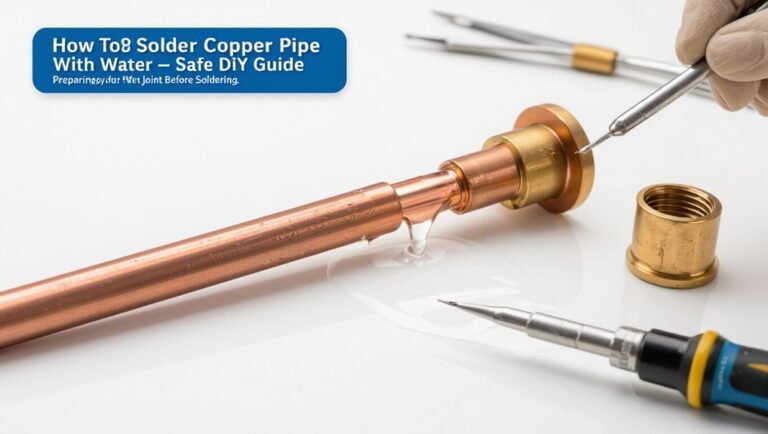
How to Cut PVC Pipe in Tight Spaces Without Special Tools
Cutting PVC pipe in tight spaces can be accomplished effectively with common tools and a few handy tricks. Start by measuring and marking your cut, then stabilize the pipe using scrap wood or foam to keep it secure. Protect nearby surfaces to avoid damage. For the actual cutting, a compact hacksaw, a utility knife for thin-walled pipes, or a rotary rasp can be used with controlled strokes. Instead of traditional clamps, you can use rubber bands or hose clamps to hold the pipe in place. After cutting, deburr the edges for a clean finish, and always test the joints after assembly. Follow these techniques along with safety tips and reconnection advice for a successful project.
How to Cut PVC Pipe in Tight Spaces Quick Overview and Best Single-Step Options
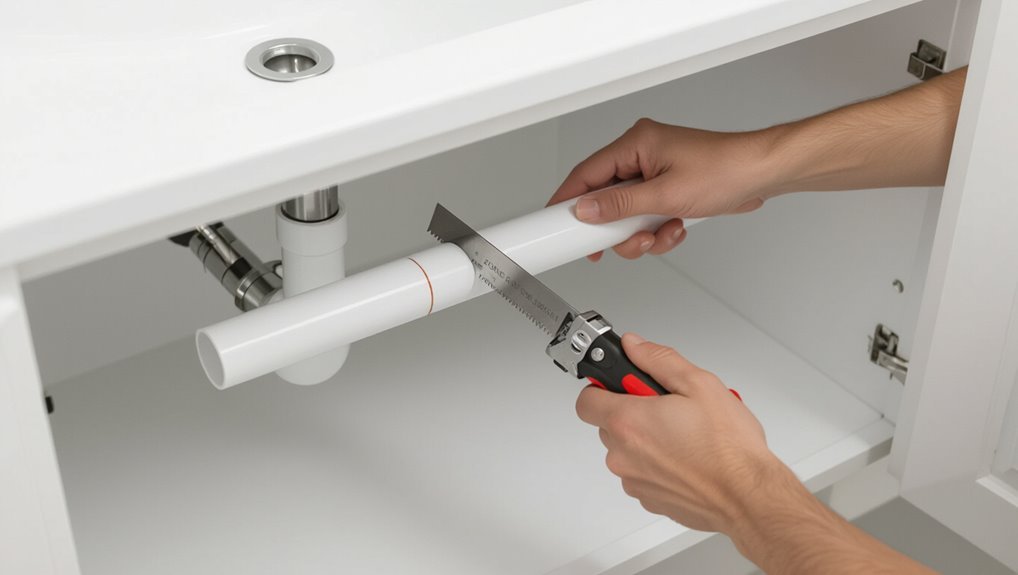
A concise summary highlights that for tight spaces the safest quick cuts use a ratcheting PVC cutter, a compact hacksaw, or a utility knife with repeated scoring when wall thickness and access allow.
If plumbing is live, fittings are fragile, or the cut would compromise nearby structures, cutting should be avoided and alternatives like using couplers, relocating fittings, or hiring a pro should be considered.
These single-step options balance speed with safety but require judgment about when not to cut at all.
Fast answer: safest quick methods without special tools
For quick, safe cuts in cramped areas without special tools, rely on methodical hand techniques that minimize slips and debris:
how to cut pvc pipe in tight spaces using a utility knife for scoring, a hacksaw with short strokes, or a ratcheting PVC cutter operated within reach.
Support the pipe, mark clearly, rotate for even cutting, deburr with a file, and wear eye protection.
When to avoid cutting and consider alternatives
Sometimes cutting PVC in a confined spot is more trouble than it’s worth; professionals should assess whether rerouting, using pre-formed fittings, slip joints, or push-fit connectors will save time and reduce risk.
Alternatives suit cramped access, fragile assemblies, or when maintaining alignment matters. Consider temporary disconnects, flexible hoses, or replacing accessible sections instead of forcing cuts that can cause leaks, misalignment, or damage.
Materials and ordinary household tools you can use
A compact list of common household cutting tools—hacksaws, PVC cutters, utility knives, and even a Dremel or oscillating tool—can handle most tight-space cuts.
Basic safety gear such as gloves, eye protection, and a dust mask are usually already on hand and should be used.
Tool choice should be matched to pipe diameter and wall thickness, with smaller handheld cutters for thin-walled or small-diameter PVC and powered tools for larger or thicker sections.
Common household items that work as cutting tools
Several everyday items can substitute for specialized pipe cutters when space or budget limits available tools.
Small, sharp implements and common hand tools handle PVC in tight spots with care and steady control.
- Utility knife (scoring, repeated passes)
- Hacksaw blade (solo, narrow access)
- Strong kitchen shears (small-diameter PVC)
- Metal file (finish edges)
- Wire cutters (thin-walled conduit)
Necessary safety gear you likely already have
Basic protective gear turns common household items into a safe work setup when cutting PVC in tight spaces.
Safety glasses, dust mask or respirator, heavy-duty gloves, and ear protection reduce injury from shards, dust, and noise.
A snug-fitting long-sleeve shirt and work boots protect skin and feet.
Clamps or a non-slip pad stabilize pipe, preventing slips that cause cuts or damage.
How pipe size and type affect tool choice
Pipe diameter and wall thickness determine which tools and techniques will produce a clean, safe cut: small-diameter, thin-walled PVC can be sliced accurately with a utility knife or fine-toothed hacksaw, while larger or schedule-rated pipe often requires a powered rotary saw, tubing cutter, or miter box to control burrs and alignment.
Material rigidity and fittings influence clamping, deburring tools, and finishing with sandpaper or a file.
Preparatory steps before cutting in confined areas
Before cutting in a confined area, the writer recommends accurate measuring and clear marking using compact tools suited to tight spots.
If clamps or vises are impractical, improvised holding methods and simple stabilization techniques are suggested, along with small adjustments to create extra working room without major disassembly.
The paragraph also covers quick ways to protect adjacent surfaces and fixtures from nicks, dust, and debris.
Measuring and marking accurately in tight spaces
Accurate measuring and marking in tight spaces starts with selecting compact tools and planning clear reference points; small errors become magnified when access is limited.
Use a tape with a narrow blade, a retractable marker, and feel for pipe orientation.
Establish two fixed landmarks, measure twice, mark once, and check alignment from multiple angles before cutting to avoid rework.
Securing the pipe when clamps or vises aren’t available
With measurements set and marks verified, attention turns to holding the pipe steady when clamps or vises cannot be used.
The installer braces the pipe against nearby framing, wedges foam or scrap wood to prevent rolling, and wraps a non-slip cloth or rubber strip where pressure is applied.
Hands remain close but clear of the cut line; a helper steadies when possible to guarantee safe, accurate sawing.
Creating more working room without major disassembly
Create a bit of extra clearance by removing or shifting nearby obstructions—loosen trim, pull back insulation, slide adjacent drywall panels where accessible, and temporarily detach light fixtures or shelving fasteners that interfere with the cutting path.
Then pivot or rotate the pipe slightly within fittings, retract nearby wiring bundles, and remove nearby screws or clips.
Work incrementally, testing clearance before each cut.
Tips for protecting surrounding surfaces and fixtures
After clearing or shifting nearby obstructions to gain a few extra inches of access, attention should turn to shielding surrounding surfaces and fixtures before any cutting begins.
Use adhesive-backed foam, cloth, or cardboard to protect walls and cabinets. Wrap exposed pipes and valves with tape or rags.
Lay a drop cloth beneath the work area to catch debris and prevent scratches or chemical damage.
Step-by-step methods to cut PVC in confined spaces without special tools
The section outlines practical, tool‑light techniques for cutting PVC in tight quarters, including hack saw and small hand saw methods for minimal clearance and scoring‑and‑snap approaches for thin‑walled pipe.
It also covers keyhole or drywall saw use for recessed cuts, rotary rasp or file motions to abrade through material, and abrasive cutting with sandpaper or emery cloth when required.
Each method is presented step‑by‑step with attention to safety and achieving a clean, square edge.
Using a hack saw or small hand saw technique for minimal clearance
When faced with minimal clearance, a hack saw or compact hand saw provides a straightforward way to cut PVC where larger tools can’t fit.
Secure the pipe, mark the cut, and use short, controlled strokes to avoid wandering. Rotate the pipe as needed for an even kerf.
Deburr the edge with a file or sandpaper and inspect the cut for square alignment before fitting.
Using a utility knife or scoring and snapping (thin-walled PVC)
Score and snap thin-walled PVC with a utility knife by making repeated shallow cuts around the circumference until the groove deepens enough to allow a clean break.
Rotate the pipe, keeping the blade perpendicular and controlled. After scoring, apply steady bending pressure opposite the groove to snap.
File or sand the edge smooth. Use gloves and eye protection; avoid deep cuts that compromise the fitting.
Using a keyhole or drywall saw for recessed cuts
Reach into tight cavities with a keyhole or drywall saw to make recessed PVC cuts where larger tools cannot access.
Position the saw blade perpendicular, mark cut line, and use short, controlled strokes. Rotate around the pipe as workspace allows, cutting incrementally to avoid binding.
Debris should be cleared periodically and edges deburred with a rasp or sandpaper for a clean fit.
Using a rotary motion with a rasp or file to wear through
Grind the PVC by applying steady, rotary strokes with a round rasp or bastard file to wear through the wall where larger saws cannot fit.
Rotate tool while maintaining even pressure, checking progress frequently to avoid gouging.
Work around the circumference for a clean break, clearing shavings regularly.
Finish by smoothing the edge with the file for an even, burr-free surface ready for fitting.
Cutting by abrasion with sandpaper or emery cloth when needed
When sanding is the only option, abrasive paper or emery cloth can remove PVC gradually and cleanly in cramped spots where blades won’t fit.
Wrap paper around the pipe or fold cloth for a small abrasive pad. Use steady, even strokes, checking progress frequently.
Rotate the pipe or reposition the pad to maintain a straight edge. Finish with finer grit for a smooth, deburred cut.
Combining methods for stubborn or thick-walled pipe
If sanding alone proves too slow or the wall is too thick, combining simple techniques lets someone cut PVC in tight quarters without special tools.
Mark the cut, score around the circumference with a razor or utility knife, then abrade the scored line with emery cloth.
Alternate deeper scoring and sanding, tapping gently to relieve shavings.
Finish by filing burrs smooth for a clean fit.
Tool-free and near-tool-free techniques for extremely tight spots
For extremely tight spots, simple techniques can replace full toolkits: thin-walled PVC may be scored and snapped by hand, while short sections can sometimes be softened with controlled heat and gently bent to expose a cutting point (observe heat and ventilation safety).
Minimal disassembly, such as removing nearby fittings or slip couplings, often provides enough clearance with little effort. These approaches prioritize caution and practicality when tools cannot reach.
Snap-and-twist method for thin PVC
Handle thin PVC with a snap-and-twist technique that requires little or no tooling and works well in cramped quarters.
The pipe is scored deeply around the circumference using a sharp utility blade or nail, scored several passes until a groove forms.
Bending gently opposite the groove and twisting causes the pipe to fracture cleanly.
Finish with a light deburr using the blade edge.
Heating and bending small sections to access a cut point (safety notes)
Apply gentle heat to a short section of PVC to soften it enough to bend toward a reachable cutting point, taking care to concentrate warmth only where needed and avoiding open flames near fittings or combustible materials.
Wear heat-resistant gloves and eye protection. Limit heating time, monitor odor for overheating, cool before cutting, and ventilate the area.
Avoid structural joints and excessive force that could crack or deform adjacent piping.
Removing adjacent fittings to gain clearance with minimal effort
Several simple, low-effort methods let a technician remove adjacent fittings to gain working clearance in very tight spaces without full toolkits.
Twist-off plastic caps, push-fit connectors, and slip-joint nuts often loosen by hand or with minimal leverage from a flathead or adjustable wrench substitute.
Gentle rocking and targeted silicone release spray reduce force.
Mark positions to guarantee correct reassembly and test joints for leaks.
Common problems when cutting in tight spaces and how to fix them
Common issues when cutting PVC in confined areas include uneven or jagged edges, hairline cracks or splits, inaccurate lengths from awkward positioning, and accidental damage to nearby fixtures.
Practical fixes range from sanding and re-truing cut faces, to using sleeve repairs or couplings to salvage cracked sections, to re-measuring and trimming for length corrections, and to temporary shields or tape to protect surrounding surfaces.
The following tips explain quick diagnostic steps and simple repair techniques for each problem.
Uneven or jagged cuts smoothing and truing techniques
Uneven or jagged cuts frequently result from limited access, dull blades, or unstable pipe support; addressing them requires specific smoothing and truing steps tailored to confined spaces.
Small files, sandpaper wrapped around dowels, and rotary motions restore roundness. Clamp alternatives stabilize the pipe.
Work progressively from coarse to fine abrasives, check fit frequently, and remove burrs to guarantee secure joints and leak-free connections.
Cracked or split pipe repair and salvage options
When a PVC pipe cracks or splits while being cut in a confined area, assess the damage immediately to determine whether repair or replacement is appropriate.
Small longitudinal hairline cracks can be reinforced with epoxy or PVC cement and external clamps.
For larger breaches, cut out the damaged section if possible and splice in a coupler or repair sleeve.
Guarantee proper cleaning and pressure testing after repairs.
Inaccurate lengths after limited-access cuts measuring corrections
After addressing cracks or splices, attention often turns to length accuracy—one of the most frequent issues when cutting PVC in confined spaces.
Limited access causes misreads and angled cuts; measure twice using a compact marker and sight-line reference.
If too short, add a coupling or sleeve; if too long, trim squarely with a rasp.
Re-check fit before solvent welding.
Damage to nearby fixtures quick protective fixes
Protect nearby fixtures by creating immediate barriers and clearances before cutting: cover exposed surfaces with tape, cardboard, or drop cloths, disconnect or loosen adjacent fittings if possible, and use a small shield or scrap wood to deflect chips and blade contact.
If damage occurs, sand minor scratches, touch up paint, replace scratched trim, or swap out compromised fittings; document and tighten connections to prevent leaks.
Reconnecting and finishing after cutting
After the cut, attention turns to preparing the pipe end—deburring, chamfering, and removing debris—to guarantee a proper seal.
Selection of couplings or fittings should reflect space constraints and whether solvent welds or mechanical connectors are more practical.
Finally, pressure testing and thorough leak-checking confirm the repair before restoring service.
Deburring, chamfering, and cleaning the cut end
Deburring and chamfering the freshly cut PVC end prepares it for a secure joint and smooth flow; removing burrs prevents leaks, fittings from binding, and inner-edge turbulence.
Use a utility knife, file, or sandpaper to bevel the outer and inner edges slightly.
Wipe away dust and solvent residue with a clean cloth and inspect the end for straightness and uniformity before bonding or inserting a fitting.
Choosing the right couplings or fittings post-cut
When reconnecting a cut PVC run, selecting fittings that match the pipe’s schedule, diameter, and planned service is essential to guarantee mechanical integrity and leak-free joints.
Mismatched couplings or unsuitable materials can cause failures or incompatible solvent-weld or mechanical connections.
Choose corrosion- and UV-resistant materials, allow for thermal expansion, prefer low-profile or stub couplings in tight spaces, and confirm pressure ratings and thread types before final assembly.
Gluing vs. mechanical fittings in confined installations
Although solvent-weld joints provide a permanent, low-profile seal ideal for tight cavities, mechanical fittings offer faster, reversible connections and can accommodate slight misalignment or thermal movement.
The choice hinges on access for application, required serviceability, pressure and chemical compatibility, and the ability to achieve proper solvent-weld cure or torque in the confined space.
Practitioners prefer solvent-weld for permanence, mechanical for serviceability or limited access.
Pressure testing and leak-checking after repair
Begin pressure testing only after all cuts, fittings, and joints are fully assembled and any adhesives or sealants have reached their recommended cure time.
The system should be isolated, filled slowly, and pressurized to the working pressure or a manufacturer-recommended test pressure.
Inspect all joints and connections visually and with a soapy-water spray for bubbles.
Release pressure gradually; repair any leaks and retest until dry.
Safety hazards and precautions specific to tight-space cutting
Tight-space PVC cutting raises specific safety concerns including laceration, eye and hand injuries, and strategies such as gloves, eye protection, and secure clamping to mitigate risk.
When heat-based methods are used, adequate ventilation and fume extraction are required to avoid inhaling toxic vapors and to control heat buildup.
Awareness of nearby electrical wiring and plumbing is essential to prevent accidental contact or damage during cutting.
Personal injury risks and how to mitigate them
Working in confined areas increases the likelihood of cuts, eye injuries, strains, and inhalation hazards when cutting PVC, so identifying specific risks beforehand is essential.
Use cut-resistant gloves, safety glasses, and long sleeves; secure the pipe to prevent movement; adopt neutral postures and take breaks to avoid strains; keep a first-aid kit nearby; guarantee communication and an emergency exit path are clear.
Ventilation, heat, and fumes when using heat-based tricks
Any use of heat to cut or shape PVC in confined areas elevates risks from poor ventilation, hot surfaces, and toxic fumes.
One should guarantee airflow, open windows or use a fan, and limit exposure time.
Wear heat-resistant gloves and eye protection.
Avoid inhaling smoke; consider a respirator rated for organic vapors.
Cool surfaces before handling and extinguish ignition sources promptly.
Electrical and plumbing system awareness
Awareness of nearby electrical and plumbing systems is critical when cutting PVC in confined areas; live wires, pressurized pipes, and concealed junctions can create immediate shock, flood, or fire hazards.
Inspect and de-energize circuits, shut off water, and verify with a tester. Maintain safe clearance, use nonconductive tools, contain debris, and avoid striking fittings.
If unsure, consult a qualified electrician or plumber before proceeding.
Time-saving tips, tricks, and tool hacks from professionals
Professionals often share quick techniques and simple tool tweaks that save minutes and reduce frustration when working in cramped spots.
Common practical fixes include makeshift jigs, blade choices, angle tricks, and knowing when a job demands better kit or a pro.
Consider these concrete images to guide decisions and speed up the work:
- A strip of scrap wood clamped as a temporary guide for a hacksaw
- Rubber bands and hose clamps turned into quick pipe holders
- A fine-tooth carbide blade for a clean, controlled cut
- Tilting the saw at a shallow angle to start a precise kerf
- Putting the project down and calling a contractor when access or risk is too high
Makeshift jigs and temporary clamps using common items
A few common household items—clothespins, hose clamps, scrap plywood, and zip ties—can be repurposed into effective makeshift jigs and temporary clamps for cutting PVC in tight spaces.
Fabricate a simple cradle from plywood to steady pipe, use hose clamps or zip ties to secure position, and employ clothespins as quick spacing guides.
These inexpensive hacks stabilize cuts and save time without specialty gear.
Preferred saw blade types and cutting angles for tight cuts
After stabilizing the pipe with makeshift jigs or clamps, choosing the right blade and angle becomes the next time-saver for tight cuts.
A fine-toothed hacksaw or compact razor saw minimizes chatter and burrs; a carbide or high-speed blade on a small reciprocating tool speeds thicker sections.
Shallow, controlled strokes at 90° for straight cuts, 45° for chamfers, reduce binding and cleanup.
When to stop and switch to proper tools or hire a pro
Recognize the limits of improvised setups and stop when time, safety, or quality starts to suffer.
If cuts become uneven, noisy, or repeatedly jammed, switch to a proper PVC cutter, compact reciprocating saw, or ratcheting cutter.
Call a professional when access, pressure testing, or permanent fittings are involved, or when delays and risk of damage outweigh DIY savings.
Prioritize reliable results.
Comparison of methods for different scenarios
To choose the best cutting approach, the article compares recommended methods by pipe diameter and access limitation alongside trade-offs in speed, finish quality, risk, and required skill. The table below summarizes typical recommendations and their primary compromises. Readers can match scenario to method quickly and decide which compromise is acceptable.
| Scenario | Recommendation |
|---|---|
| Small diameter, tight access | Use tubing cutter — fast, clean, low skill |
| Large diameter, moderate access | Use reciprocating saw with guide — fast, rough, higher risk |
| Confined space with finish requirement | Use oscillating tool or hand saw — slower, clean, low risk |
Recommended method by pipe diameter and access limitation
Select methods based on pipe diameter and how much room surrounds the cut:
Small-diameter PVC in very tight cavities is best handled with a compact rotary cutter or PVC-specific ratchet cutter.
Medium diameters suit a jamb saw or hacksaw with a slim blade when a little clearance exists.
Large pipes typically require a tubing cutter, miter saw, or reciprocating saw where access permits.
Choose tool for reach, control, and safety.
Trade-offs: speed, finish quality, risk, and required skill
Having chosen an appropriate tool for diameter and clearance, the next consideration is how speed, cut quality, risk, and operator skill interact for each method.
Fast hacksaw or reciprocating cuts sacrifice finish and raise burr risk but suit rough work.
Razor or ratchet cutters yield cleaner edges with lower risk yet require steadier hands and more time.
File or sand finishing mitigates imperfections.
Short checklist to follow before, during, and after any tight-space PVC cut
Begin with a quick systems check: confirm measurements and mark the cut, verify the fit of tools and blade, guarantee adequate lighting and ventilation, and put on eye and respiratory protection.
Then follow a terse checklist before, during, and after the cut:
- Clear workspace and stabilize pipe
- Reconfirm alignment and clamp if possible
- Cut slowly, watch blade path
- Deburr edges and test fit
- Clean area and store tools
Conclusion
Like a gardener pruning roots beneath a stone path, the handyman works unseen, coaxing a stubborn PVC pipe into shape with patient hands and simple tools. Each careful nick and steady twist removes what is unnecessary, freeing flow where space once constrained it. In tight quarters, ingenuity becomes the true blade; foresight and safety, the steady sheath. When the task is done, the hidden cut leaves the system ready to breathe again.