How to Clean a Pipe Deburring Tool: Step-by-Step Guide for Faster, Safer Work
To keep your pipe deburring tool in optimal condition, regular cleaning is essential. This process enhances cutting performance and minimizes safety risks. Start by disassembling any removable parts to access all areas. Remove metal shavings with a brush, then wipe the blades using a mild degreaser. For light rust, gently scrub with fine abrasive pads, and lubricate the bearings before reassembling. If you notice any worn or chipped blades, replace them immediately. Always wear gloves, eye protection, and work in a well-ventilated area. For quick fixes, use compressed air to clear chips and apply penetrating oil for stuck components. Follow detailed steps and maintenance schedules for best results.
What a Pipe Deburring Tool Is and Why Cleaning Matters
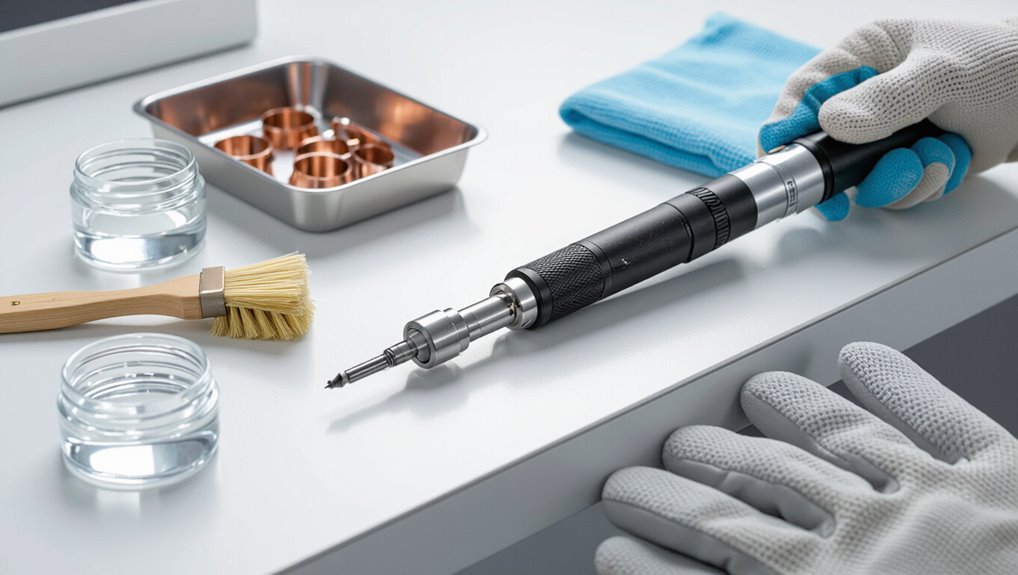
A pipe deburring tool removes burrs and sharp edges from cut tubing and commonly appears as hand-held reamers, rotary deburrers, or multi-blade cutters.
Accumulated metal shavings, corrosion, and blade wear reduce cutting efficiency and can create safety hazards such as jagged edges or tool slippage.
Routine cleaning restores performance, while excessive wear or damaged blades indicates replacement is necessary.
Definition and common types of pipe deburring tools
Pipe deburring tools remove rough edges, burrs, and flash from the inner and outer surfaces of cut pipes to guarantee proper fit, seal, and safe handling.
Common types include handheld rotary deburrers, reamers, countersinks, and blade-style scrapers.
Each design dictates maintenance frequency and informs how to clean pipe deburring tool components, blades, and housings to sustain function and longevity.
How residue and wear affect performance and safety
Residue buildup and blade wear directly reduce a deburring tool’s effectiveness, increasing friction, causing uneven cuts, and raising the likelihood of snagging or incomplete burr removal.
Accumulated metal filings, grease, and corrosion blunt edges, force extra torque, and stress handles and pipe fittings. Compromised tools produce rough finishes, increase rework, and elevate injury risk from slips or sudden tool failure, so maintenance preserves performance and safety.
When to clean versus when to replace the tool
Decide whether to clean or replace a deburring tool by evaluating blade sharpness, structural integrity, and contamination level: light buildup, surface rust that responds to cleaning, and intact handles indicate cleaning can restore function, while chipped or warped cutters, broken mechanisms, or deep corrosion warrant replacement.
Routine inspection frequency depends on usage; prioritize replacement when performance, safety, or alignment are compromised beyond safe restoration.
Quick Checklist: What You Need Before You Start
Before beginning, a concise checklist helps guarantee an efficient and safe cleaning session.
- Recommended cleaning supplies and protective gear
- Tools and materials for stubborn buildup
- Safety precautions to follow
The list below outlines the essential items and precautions to have on hand.
Recommended cleaning supplies and protective gear
A compact kit of the right cleaners, tools, and protective gear makes pipe deburring cleanup faster and safer.
Essential items include a soft-bristle brush, lint-free cloths, a mild degreaser or isopropyl alcohol, and a small container for solvent.
Protective gear: nitrile gloves, safety glasses, and a dust mask.
Optional: a toothbrush-sized scraper and disposable wipes for quick residue removal.
Tools and materials for stubborn buildup
Several specific tools and materials help tackle stubborn carbon, grease, and mineral buildup on a pipe deburring tool.
A brass or nylon brush, fine steel wool, and small pick set remove deposits without damaging edges. Penetrating oil and a mild descaler dissolve grime; a solvent like isopropyl alcohol removes residue.
Lint-free rags, a toothbrush, and a small container for soaking complete the checklist.
Safety precautions to follow
With the tools and cleaners assembled, attention turns to safety precautions to minimize injury and protect the tool.
Wear gloves, eye protection, and a dust mask; guarantee good ventilation.
Disconnect or secure the tool to prevent movement.
Keep cleaners off skin and away from sparks.
Work on a stable surface with adequate lighting.
Dispose of waste per local regulations.
Step-by-Step Cleaning Process for Handheld Pipe Deburring Tools
The technician prepares a clean, well-lit workspace and secures the handheld deburring tool before beginning.
They disassemble removable parts, clear metal shavings and loose debris, and inspect cutting edges and blades.
Finally, they degrease components and treat any rust or corrosion to restore proper function.
Prepare the workspace and secure the tool
Before any cleaning begins, the workspace should be arranged for safety and efficiency: a well-lit, flat surface cleared of clutter, adequate ventilation, and nearby access to needed tools and cleaning supplies.
The tool should be immobilized—clamped or braced—to prevent rolling or slipping, workpad protection placed beneath, and personal protective equipment set out.
Inspect visually for obvious damage before proceeding.
Disassemble removable parts safely
Having secured the workspace and immobilized the tool, proceed to disassemble removable parts safely to expose areas needing cleaning.
The operator should consult the manual, wear gloves and eye protection, and use appropriate screwdrivers or wrenches.
Remove blades, guards, and detachable housings methodically, keeping fasteners organized.
Note component orientation and avoid forcing stuck parts; set pieces aside on a clean tray for inspection.
Remove metal shavings and loose debris
Begin by brushing away loose metal shavings and debris from exposed surfaces and interior cavities, using a small stiff-bristle brush or compressed air held at a low setting to prevent driving particles deeper into mechanisms.
Collect removed debris with a magnet or tray, wipe interior passages with a lint-free cloth, and inspect crevices.
Repeat until no visible particles remain before proceeding to blade cleaning.
Clean cutting edges and blades thoroughly
Inspect the blades visually and by touch (with a protective glove) to identify nicks, burrs, or built-up residue before cleaning.
Use a small brush or toothpick to dislodge lodged particles, then wipe edges with a lint-free cloth.
For stubborn deposits, gently scrape with a plastic or wooden tool to avoid damaging edges.
Confirm blades are dry and reassemble carefully.
Degreasing and removing rust or corrosion
After cleaning the cutting edges, focus on degreasing and addressing any rust or corrosion to restore smooth operation and prevent further damage.
Use a solvent or degreaser to remove oil, grease, and debris, then scrub rusted areas gently with a brass brush or fine steel wool.
For stubborn corrosion, apply a rust remover per instructions, rinse residue thoroughly, and inspect for pitting or weakened metal.
Drying and applying rust inhibitor or lubricant
Wipe the tool thoroughly with a clean, lint-free cloth to remove all solvent residue and trapped moisture, paying special attention to joints, hinges, and the cutting chamber where liquid can collect.
Allow air drying or use low-pressure compressed air to evacuate hidden moisture.
Apply a thin film of rust inhibitor or light machine oil to metal surfaces and pivot points; wipe away excess to prevent buildup.
Reassemble and check alignment and operation
Once all solvent and lubricant residues have been removed and moving parts lightly oiled, the tool can be reassembled.
Components are fitted in correct order, fasteners torqued to specification, and blades or cutters seated properly.
The operator verifies smooth rotation, consistent blade engagement, and concentric alignment using visual inspection and a trial run on scrap pipe.
Adjustments are made until operation is reliable and safe.
Step-by-Step Cleaning Process for Powered / Rotary Deburring Tools
Before any maintenance, the operator verifies the tool is unplugged or the battery removed and checked for damage.
Parts such as bits, wheels, and guards are detached for separate cleaning while rotating surfaces, ventilation ports, bearings, and collets are inspected and cleared of debris.
After re-lubrication and reassembly, the tool is briefly tested under no-load conditions to confirm smooth operation.
Unplugging and battery safety checks
A few simple safety checks precede any cleaning of a powered deburring tool: disconnect mains power and remove or secure the battery to eliminate accidental startup, then verify the tool is de-energized by attempting to switch it on or consulting the indicator light.
Inspect battery terminals for corrosion, guarantee contacts are clean and dry, store batteries separately in a cool, non-conductive container.
Removing bits, wheels, and guards
Begin by securing the tool in a vise or on a stable surface to prevent movement. Then confirm power is isolated and batteries are removed.
Remove bits and wheels using appropriate wrenches, following manufacturer directions to avoid stripping fasteners.
Detach guards and retaining rings carefully, noting orientation for reassembly.
Place removed parts in labeled containers and inspect for wear or damage before cleaning or replacement.
Cleaning rotating surfaces and ventilation ports
Clean rotating surfaces and ventilation ports with care to prevent debris from entering bearings or motor housings.
Use a soft brush and compressed air at low pressure to dislodge chips, then wipe with a lint-free cloth dampened with mild solvent.
Confirm vents are clear, rotating parts spin freely, and residue is removed.
Reassemble only after components are dry and visually clean.
Inspecting and maintaining bearings and collets
Inspect bearings and collets for wear, corrosion, or contamination before reassembly, since these components directly affect runout, vibration, and tool life.
Remove debris with a lint-free cloth and solvent; use a magnifier to detect pitting, brinelling, or uneven surfaces.
Verify collet spring tension and concentricity; replace damaged bearings or collets.
Document parts replaced and keep spares matched to tool specifications.
Re-lubrication and testing under no-load conditions
Apply a light, manufacturer-recommended lubricant to moving parts and bearing races before reassembly.
Then run the tool briefly without load to verify smooth operation and proper lubrication distribution.
Observe for unusual vibration, noise, or heat. Reapply sparingly if needed.
Confirm collet and cutter free rotation, then shut down, wipe excess lubricant, and tighten fasteners to specified torque before regular use.
Cleaning Methods for Different Pipe Materials
Different pipe materials require tailored cleaning approaches to preserve tool performance and prevent contamination.
Recommended focal points include:
- Copper and brass pipe deburring tool care
- Stainless steel and hard metals best practices
- PVC, CPVC, and plastic pipe considerations
Each category calls for specific cleaners, brushes, and handling to avoid corrosion, abrasion, or plastic melting.
Copper and brass pipe deburring tool care
When caring for deburring tools used on copper and brass, remove metal shavings promptly and wipe surfaces with a soft, lint-free cloth to prevent corrosion and avoid transferring abrasive particles to softer materials.
Apply a light film of nonacidic lubricant to cutting edges, inspect for galling or deformation, and store tools separately in padded compartments to preserve edge integrity and prevent contact with harder metals.
Stainless steel and hard metals best practices
Handle stainless steel and other hard metals with methods that prioritize edge preservation and contamination control: remove chips with a soft-bristled brush or compressed air, avoid abrasive wiping that can dull hardened edges, and use a noncorrosive solvent to dissolve oils and metal powders without leaving residues.
After cleaning, inspect cutting edges, apply a light corrosion inhibitor, and store separately to prevent cross-contamination.
PVC, CPVC, and plastic pipe considerations
For PVC, CPVC, and other plastic pipes, cleaning focuses on removing burrs, shavings, and surface contaminants without deforming or chemically damaging the material.
Soft brushes, low-pressure air, and mild, plastic-safe cleaners are preferred, and abrasive tools or strong solvents that can craze or soften the plastic should be avoided.
Inspection for stress cracks, gentle drying, and storing tools away from sunlight preserves plastic integrity.
How to Inspect and Sharpen Deburring Blades
The condition of deburring blades should be checked regularly for signs of dulling, chipping, or irregular cuts that indicate sharpening or replacement is needed.
Practical sharpening techniques—such as using a fine diamond file, maintaining the original bevel angle, and testing on scrap material—will restore cutting performance.
Clear criteria for replacement (excessive wear, repeated chips, or inability to hold an edge) and guidance on selecting compatible, hardened-steel replacements conclude the inspection process.
Signs a blade needs sharpening or replacement
Inspecting deburring blades begins with observing their cutting performance and physical condition: a blade that drags, tears, or leaves uneven edges instead of producing smooth, consistent bevels is likely dull or damaged.
Additional signs include visible nicks, chips, corrosion, bent tips, increased cutting force, smoking or burning odors, and poor fit or wobble in the holder.
Replace if repair is impossible.
Step-by-step blade sharpening techniques
Begin by securing the deburring tool and evaluating blade condition under good light to determine whether sharpening will restore performance.
Clean residue, clamp blade if removable, and use a fine file or sharpening stone at the original bevel angle.
Make smooth, even strokes away from the cutting edge.
Deburr and polish with a strop, reassemble, and test on scrap to confirm crisp, safe cutting.
When to replace blades and how to choose replacements
After sharpening, users should assess whether continued use of the existing blade is practical or if replacement will restore safety and cutting quality.
Replace blades when chips, cracks, excessive burr, or persistent dullness remain.
Match replacements to tool model, material (HSS, carbide), and pipe type.
Prefer OEM or equivalent-quality blades, verify fit and locking mechanism, and dispose of damaged blades safely.
Common Problems and How to Fix Them
Common issues with pipe deburring tools include seized or stuck components, persistent rust or pitting on cutting edges, and vibration or wobble that degrades cutting performance.
Each problem has distinct causes — contamination and lack of lubrication for seized parts, corrosion for pitting, and wear, loose fittings, or bent shafts for vibration.
Addressing them requires targeted inspection, cleaning or replacement of affected parts, and proper adjustment or balancing.
Stuck or seized components
Stuck or seized components in a pipe deburring tool often result from corrosion, dried lubricant, or compacted debris that prevent moving parts from operating smoothly.
Inspect joints, pivots, and slides; apply penetrating oil sparingly, let it soak, then work parts gently.
Use nonmarring tools or soft brushes to clear residue.
If movement returns, clean, lubricate lightly, and reassemble; replace damaged parts if binding persists.
Persistent rust or pitting on cutting edges
Persistent rust or pitting on the cutting edges of a pipe deburring tool degrades performance by dulling edges and creating uneven cuts. It often indicates prolonged exposure to moisture, acidic residues, or improper storage.
Address by removing light rust with fine abrasive pads, using penetrating oil for stubborn spots, and applying rust converter or replacing severely pitted blades.
Finish with protective coating and dry storage.
Vibration, wobble, or poor cutting performance
Vibration, wobble, and degraded cutting performance in a pipe deburring tool usually stem from misaligned cutters, worn bearings or shafts, loose fasteners, or unevenly worn blades; each issue reduces control and produces inconsistent edges.
Inspect and tighten fasteners, realign cutter assemblies, replace bearings or shafts as needed, and rotate or replace blades.
Balance rotating parts and verify secure mounting before use to restore smooth operation.
Maintenance Schedule and Long-Term Care
A clear maintenance schedule separates daily, weekly, and monthly tasks to keep the deburring tool reliable and safe.
Proper storage practices, such as drying, lubricating moving parts, and using protective cases, further extend tool life.
Consistent record-keeping of inspections, maintenance performed, and hours of use helps predict wear and plan replacements.
Daily, weekly, and monthly maintenance tasks
Regular inspection and light cleaning after each use prevent buildup and catch wear early; daily wipes remove debris and lubricant.
Weekly checks tighten fasteners and inspect blades.
Monthly deep clean disassembles components for rust treatment and sharpening.
Maintain a log of findings for replacement timing.
- Daily: wipe, brief lubrication
- Weekly: tighten, inspect blades
- Monthly: disassemble, clean, sharpen
Proper storage to extend tool life
Store pipe deburring tools in a dry, organized location to prevent corrosion, damage, and misplacement.
After cleaning and drying, apply light lubricant to metal parts and protect blades with guards or covers.
Use labeled bins or foam inserts to avoid contact and movement.
Keep away from extreme temperatures and chemicals.
Inspect before each use and replace worn components promptly to prolong service life.
Record-keeping and tracking tool usage
Implementing a simple record-keeping system assures each pipe deburring tool receives scheduled maintenance and service tracking throughout its lifespan.
Logs note cleaning dates, blade replacements, lubrication, and inspections. Assign usage counts or hours per tool, record operator name and job details, and flag units needing repair.
Review records monthly to adjust schedules, budget replacements, and assure consistent performance and safety.
Safety Tips to Reduce Risk During Cleaning and Use
Safety practices minimize injury and equipment damage when cleaning and using a pipe deburring tool.
Recommended precautions include:
- Wear appropriate PPE and handle tools securely.
- Collect and dispose of metal shavings and contaminated cleaners safely.
- Follow lockout/tagout procedures and observe electrical safety for powered tools.
Adhering to these measures reduces risk and promotes a safer work environment.
Personal protective equipment and safe handling
Wear appropriate personal protective equipment and follow safe handling practices to minimize injury when cleaning or using a pipe deburring tool.
Operators should wear cut-resistant gloves, eye protection, and a dust mask if shavings are airborne.
Secure the tool and workpiece, avoid loose clothing, and use proper hand positions to prevent slips.
Inspect PPE and replace damaged items before resuming work.
Safe disposal of metal shavings and contaminated cleaners
Collect and contain metal shavings and used cleaning fluids immediately after maintenance to prevent injury, contamination, and environmental harm.
Place shavings in labeled, puncture‑proof containers; sweep with a brush to avoid hand contact.
Store contaminated rags and fluids in sealed, clearly marked receptacles for proper hazardous‑waste collection.
Follow local disposal regulations and use licensed waste handlers to minimize environmental and safety risks.
Lockout/tagout and electrical safety for powered tools
When performing maintenance or cleaning on powered deburring tools, lockout/tagout procedures and basic electrical precautions are essential to prevent unexpected energization and electric shock.
Isolate power sources, disconnect batteries or plugs, and verify zero energy with appropriate testing equipment before any work begins.
Trained personnel should apply locks/tags, follow manufacturer instructions, inspect cords and switches, wear insulated gloves, and store tools safely until reinstated.
Comparison of Cleaning Products and Tools
A concise comparison helps identify which cleaning agents and tools best restore a pipe deburring tool without harming its finish. Solvents, degreasers, and rust removers target chemical buildup, while abrasives, brushes, and ultrasonic cleaners address physical grime and residue. The following table summarizes typical uses, advantages, and cautions for each category.
| Category | Typical Use | Caution |
|---|---|---|
| Solvents/Degreasers | Removing oils and cutting fluids | Flammable; may affect coatings |
| Rust Removers | Eliminating corrosion | Can be corrosive to base metal |
| Abrasives/Brushes/Ultrasonic | Scrubbing, polishing, and deep cleaning | May remove material or require controls |
Solvents, degreasers, and rust removers
Choose cleaning agents based on the type of residue, metal, and tool construction: solvents dissolve oils and greases, degreasers lift and emulsify heavy contaminants, and rust removers chemically convert or dissolve oxidation.
Select mild, tool-safe formulations for aluminum or plated parts; stronger solvents suit hardened steel.
Verify compatibility, follow manufacturer instructions, ventilate workspaces, wear PPE, and neutralize or rinse residues to prevent corrosion or chemical damage.
Abrasives, brushes, and ultrasonic cleaners
Beyond chemical cleaners, mechanical methods remove stubborn debris and restore cutting edges: abrasives, brushes, and ultrasonic cleaners each address different soils and wear patterns.
Abrasive pads and fine files reshape dull edges; wire and nylon brushes dislodge scale and swarf.
Ultrasonic cleaners penetrate crevices, dislodging particles without mechanical abrasion.
Choose based on residue type, tool metallurgy, and desired finish.
Troubleshooting Guide: Quick Fixes on the Job
The troubleshooting section presents quick, practical cleaning hacks for emergency or field repairs.
It outlines steps to remove common obstructions, lubricate moving parts, and restore cutting edges using minimal tools.
Emphasis is placed on procedures that can return a pipe deburring tool to service in under ten minutes.
Fast cleaning hacks for emergency or field repairs
When a pipe deburring tool clogs or dulls during a job, quick, practical cleaning methods can restore function without a full teardown.
Use a stiff brush or toothbrush to remove debris, blow out chips with compressed air, and apply a drop of cutting oil to loosen grime.
Wipe with a clean rag, inspect blades for damage, and resume work cautiously.
How to get a tool back into service in under 10 minutes
Start by evaluating the problem quickly: identify whether the issue is debris build-up, a dull blade, loose parts, or a minor mechanical jam.
Then prioritize fixes that restore safe operation within ten minutes. Clear debris with compressed air or a brush, tighten fasteners, free jams with gentle taps, swap or hone blades, lubricate moving parts sparingly, and test briefly before resuming work.
Recommended Replacement Parts and Where to Buy
When parts wear, the choice between OEM and aftermarket blades and bits affects fit, lifespan, and cost.
Recommended options include a focus on compatibility, material quality, and supplier reputation:
- OEM blades for exact fit and warranty support.
- High-quality aftermarket bits for cost savings and performance.
- Authorized tool dealers and major industrial suppliers with clear return policies.
OEM vs aftermarket blades and bits
Choosing between OEM and aftermarket blades and bits hinges on priorities of fit, performance, and budget.
OEM parts typically guarantee exact fit and consistent quality, reducing risk of tool damage.
Aftermarket options often cost less and can offer comparable durability, but require careful selection for material and tolerance.
Users should weigh warranty implications, expected lifespan, and application-specific requirements when deciding.
Trusted suppliers and buying considerations
After weighing the pros and cons of OEM versus aftermarket blades and bits, attention turns to where to buy replacements and which suppliers earn consistent recommendations.
Trusted sources include manufacturer-authorized dealers, industrial distributors, and reputable online retailers with verified reviews.
Prioritize suppliers offering clear compatibility listings, warranty coverage, and return policies.
Buying considerations: material quality, delivery speed, bulk pricing, and availability of certified replacements.
Final Checklist Before Using the Tool Again
A brief functional test and safety check should confirm that the deburring tool operates smoothly and that guards and fasteners are secure.
Any maintenance performed ought to be recorded, with the tool labeled to show the date and nature of the work.
These steps guarantee safe use and clear documentation before returning the tool to service.
Functional test and safety confirmation
Begin the functional test by visually confirming the tool is clean, dry, and free of chips or burrs that could impede operation.
Then cycle the mechanism without material to verify smooth movement, proper blade alignment, and secure clamping.
Inspect safety guards, handles, and locking features for integrity.
Perform a short trial cut on scrap, listen for unusual noise, and confirm blades cut cleanly and consistently.
Documentation and labeling after maintenance
With functional checks complete and the tool confirmed safe to operate, the technician documents the maintenance actions taken, parts replaced, and any anomalies observed.
A concise entry is logged with date, technician name, and tool ID. Labels indicating next service date and any usage restrictions are affixed.
Records are stored per site protocol, enabling traceability, warranty compliance, and informed handover to the next user.
Conclusion
Regular cleaning keeps deburring tools safe and efficient. For example, a municipal plumber saved hours after routinely cleaning a rotary deburrer: buildup removal restored blade speed and prevented a costly on-site replacement during a winter emergency. Following the outlined checklist and material-specific methods reduces wear, improves cut quality, and lowers accident risk. Consistent inspection and timely swapping of worn parts guarantee faster, safer work and extend tool lifespan across projects.