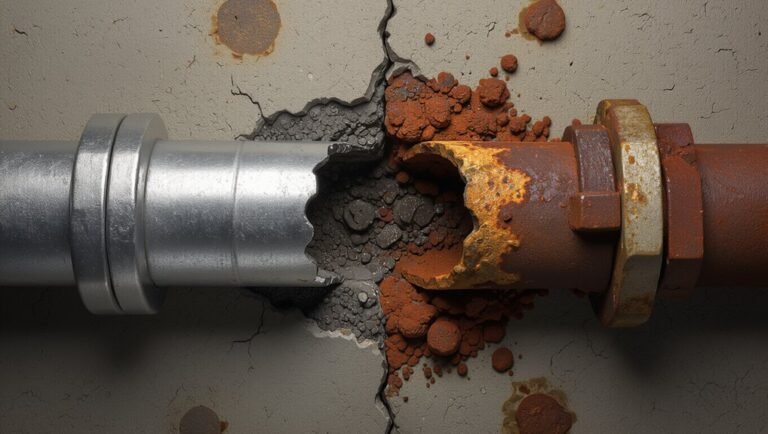
How to Clean a Generator Gas Tank Safely: Step-by-Step Guide for Removing Rust, Sediment & Old Fuel
To clean a generator gas tank safely, first cool the unit, shut off the fuel, and disconnect the spark plug to prevent accidental starts. Drain old fuel into approved containers, inspect and replace filters, and remove rust and sediment using brushes, commercial cleaners, or gentle media methods. Rinse and dry the tank thoroughly, then apply corrosion inhibitors or tank liners and reassemble components with new seals. Follow this step-by-step guide for precautions and disposal instructions to ensure a thorough and safe cleaning process.
What to Know Before You Start Cleaning a Generator Gas Tank
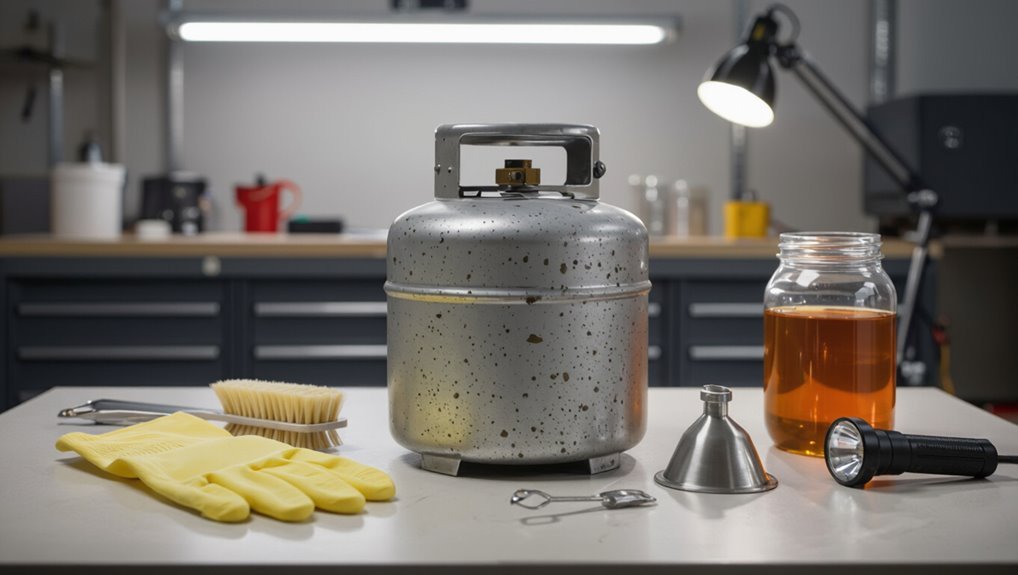
Before starting, the importance of cleaning is noted for maintaining generator performance and preventing safety hazards from contaminated fuel.
Signs that cleaning is needed include visible rust, sediment build-up, staleness or foul odor in old fuel, and recurring engine trouble.
Proper disposal of removed fuel and residues must follow legal and environmental rules to avoid fines and contamination.
Why cleaning matters for performance and safety
Cleaning a generator gas tank preserves engine performance and reduces safety risks by removing contaminants—old fuel, varnish, rust, and sediment—that can clog fuel lines, foul carburetors, and cause poor combustion.
Proper how to clean generator gas tank procedures prevent breakdowns, improve fuel efficiency, and lower fire or vapor hazards.
Routine cleaning also extends component life and guarantees reliable starts during emergencies.
When to clean signs of rust, sediment, or old fuel
When a generator shows slow starts, sputtering under load, or fuel odors, it may indicate old gasoline, sediment buildup, or rust in the tank; visible discoloration or particles in fuel and sluggish fuel flow at the petcock are clear signals that cleaning is needed.
Additional signs include extended storage over a season, recurring carburetor clogging, and fuel that smells sour or appears varnished.
Legal and environmental considerations for fuel disposal
If a tank contains old gasoline, it must be handled as a hazardous liquid and disposed of according to local regulations to prevent environmental harm and legal penalties.
Generators’ drained fuel should be stored in approved containers, labeled, and taken to hazardous waste collection or recycling centers.
Spills require immediate containment and reporting. Mixing fuel with water or sewer disposal is illegal and ecologically damaging.
Safety Precautions and Required Personal Protective Equipment
Before cleaning, the person should equip gloves, safety goggles, a respirator, and protective clothing to prevent chemical exposure and inhalation.
The work area must be well ventilated, cleared of ignition sources, and kept with a suitable fire extinguisher on hand.
A clear procedure for safe fuel handling and spill response should be established and communicated.
Required PPE: gloves, goggles, respirator, protective clothing
A minimum set of personal protective equipment (PPE)—chemical-resistant gloves, impact-rated goggles, an N95 or respirator with organic vapor cartridges, and flame-resistant protective clothing—should be worn while cleaning a generator gas tank to guard against fuel splashes, vapors, and accidental ignition.
Gloves must resist hydrocarbons; goggles must seal; respirators require correct cartridges and fit testing; clothing should be non-synthetic, cover arms and legs, and be removed after work.
Safe work area setup: ventilation, no ignition sources, fire extinguisher
Many work areas benefit from deliberate setup: assure ample ventilation, eliminate all ignition sources, and position an appropriate fire extinguisher within arm’s reach.
Establish a cleared perimeter, post warning signs, and confirm electrical tools and batteries are removed or isolated. Verify ventilation directs fumes away from occupants.
Confirm extinguisher type (ABC or BC) is charged and personnel know its location and basic operation before work begins.
Fuel handling and spill-response plan
When handling fuel, personnel should treat every container and transfer as potentially hazardous and follow a written spill-response plan that specifies responsibilities, communication procedures, and required equipment.
The plan must designate trained responders, PPE (chemical-resistant gloves, goggles, aprons), spill kits, absorbents, and fire suppression.
Procedures include immediate containment, notification, decontamination, waste disposal per regulations, and documentation of incidents and corrective actions.
Tools, Materials, and Replacement Parts You’ll Need
Before beginning tank work, assemble the necessary cleaning tools and chemicals: a siphon pump, brushes and scrapers, rags, fuel stabilizer, penetrating oil, tank cleaner, and rust remover.
Include replacement parts and consumables likely to be needed, such as a fuel filter, gasket, petcock, seals, and fuel lines.
Prepare proper waste containers and absorbents for old fuel, sludge, and contaminated materials.
Cleaning tools: siphon pump, brushes, scrapers, rags
Essential cleaning tools for a generator gas tank include a siphon pump for fuel removal, stiff- and soft-bristle brushes for scrubbing deposits, rigid scrapers for loosening stubborn varnish, and absorbent rags for wiping and drying surfaces.
Additional useful items are a flexible tube for reaching tight corners, a small wire brush for fittings, and a collection container to safely hold drained fuel and debris during cleaning.
Chemicals and cleaners: fuel stabilizer, penetrating oil, tank cleaner, rust remover
After gathering the siphon, brushes, scrapers, and rags, attention shifts to the chemicals that treat and preserve tank internals.
Recommended items include fuel stabilizer for storage, penetrating oil for stuck fittings, noncaustic tank cleaner to loosen varnish and sediment, and rust remover or converter for corrosion.
Choose products compatible with gasoline and follow manufacturer safety and disposal instructions strictly.
New parts and consumables: fuel filter, gasket, petcock, seals, fuel lines
Replace worn components to guarantee a clean, reliable fuel system: a new fuel filter, appropriate gaskets and seals, a functioning petcock, and fresh fuel lines are common consumables that should be on hand when servicing a generator tank.
Select OEM or compatible parts sized for the model, inspect fittings, choose fuel-resistant hose, and replace brittle or cracked items to prevent leaks, contamination, and flow restrictions.
Waste containers and absorbents for old fuel and sludge
Proper containment and absorption are critical when draining old gasoline and sludge from a generator tank to prevent spills, fire hazards, and environmental contamination.
Use approved gasoline jerry cans or DOT-rated waste drums, clearly labeled. Include fuel-safe absorbent pads, granular absorbents, and oil-only spill socks.
Provide sealed secondary containment trays and heavy-duty plastic bags for sludge. Dispose through licensed hazardous waste facilities.
Quick Overview of the Cleaning Process
The cleaning process begins with safely draining old fuel and disconnecting the tank from the generator.
Next, the tank is inspected, cleaned (mechanically and chemically), and rinsed before any rust treatment or sealing.
The procedure concludes with thorough drying, reassembly of components, and refilling with fresh fuel.
High-level sequence of steps from draining to reassembly
Begin by draining all fuel.
Then proceed through cleaning, inspection, repair, and reassembly in a single, logical sequence so each step prepares the tank for the next.
Remove tank, drain and capture fuel, flush and de-grease, mechanically remove rust and sediment, rinse and dry, inspect for leaks and corrosion, apply repairs or coatings, replace fittings and seals, reassemble, refill and test for leaks.
Detailed Step 1 Preparing the Generator and Draining Old Fuel
The generator should be shut down, allowed to cool completely, and disconnected from any power sources before work begins.
The technician then locates the fuel tank—removing it if removable or accessing it within the frame—and prepares for fuel removal.
Old fuel is drained using safe techniques such as a hand siphon pump into properly labeled, approved containers for storage and later disposal or recycling.
How to properly shut down and cool the generator
Power down the generator and allow it to cool until touch-safe to prevent burns and reduce pressure in the fuel system.
Shut off the fuel valve, turn the engine stop switch to OFF, and disconnect the spark plug wire to prevent accidental starts.
Work in a well-ventilated area, keep ignition sources away, and wait until exhaust and components reach ambient temperature before proceeding.
Locating and removing the fuel tank or accessing the tank in-frame
Locate the fuel tank visually and by consulting the generator’s manual to determine whether it is fastened on top of the frame or integrated into the frame itself.
If removable, identify and loosen mounting bolts, hoses, and wiring labels before lifting.
If integrated, clear surrounding components, disconnect vent and fuel lines, and create safe access panels.
Keep fasteners organized and note orientations for reassembly.
Safe fuel draining techniques and using a siphon pump
Begin by ensuring the generator is cool, parked on level ground, and the ignition is off with the spark plug disconnected to prevent accidental starts.
Place a certified fuel container beneath the tank, open the petcock or loosen the drain bolt, and use a manual siphon pump to transfer fuel.
Operate pumps by hand, avoid spills, and ventilate the area during transfer.
How to store and label drained old fuel for disposal or recycling
After draining the fuel, the emptied container and any recovered gasoline should be handled as hazardous liquid and prepared for proper disposal or recycling.
Store fuel in approved, clearly sealed metal or plastic safety containers with child‑proof caps. Label each container with “Used Gasoline,” date, and source.
Keep containers upright, ventilated, away from heat, and transport to an authorized disposal or recycling facility.
Detailed Step 2 Removing the Tank and Disassembling Components
The operator unbolts mounting fasteners and lifts the tank clear of the frame, using two people or a support to prevent strain or spills.
Next, the fuel cap, petcock, fuel lines, and any inline filters are removed and set aside for cleaning or replacement.
Tank mounts and hardware are inspected for corrosion or damage and documented for repair or replacement as needed.
Unbolting and lifting the tank safely
Carefully loosen all mounting bolts and fasteners while supporting the tank to prevent sudden shifts; a second person or a jack with soft blocking should steady the tank as hardware is removed.
Once bolts are backed off, lift evenly from opposite sides, keeping the tank level to avoid snagging wiring or brackets.
Set the tank on a padded, stable surface for further disassembly and inspection.
Removing fuel cap, petcock, fuel lines, and filters
With the tank resting on a padded surface and all mounting hardware removed, attention turns to clearing its serviceable components before cleaning.
The fuel cap is loosened and set aside.
Drain the petcock into a container, then remove fuel lines—label and photograph connections.
Extract inline and screen filters for disposal or inspection.
Seal openings to prevent contamination before further work.
Inspecting tank mounts and hardware for corrosion
Inspect the tank mounts and associated hardware for signs of rust, pitting, or metal fatigue before proceeding further.
Document corrosion, loose bolts, cracked brackets, or weakened welds. If fasteners are corroded, replace them with stainless or properly coated equivalents.
Assess mounting rubber or isolators for degradation. Confirm structural integrity before tank removal; unsafe mounts require repair to prevent failure during disassembly.
Detailed Step 3 Removing Rust, Sediment, and Sludge from Inside the Tank
The next step addresses removal of rust, sediment, and sludge from inside the tank, beginning with manual methods such as scraping, brushing, and flushing to dislodge loose deposits.
Chemical options—commercial tank cleaners and rust dissolvers—are discussed with guidance on safe use and neutralization, while media blasting or electrolysis are presented as escalation options for severe corrosion.
The section concludes with a rinsing procedure and inspection techniques to confirm all debris has been removed.
Manual methods: scraping, brushing, and flushing
Begin by draining any remaining fuel and allowing the tank to dry.
Then employ manual tools—scrapers, wire brushes, and flexible scrubbers—to dislodge rust flakes, sediment, and varnish buildup from interior surfaces.
Use a flashlight, inspect crevices, and repeat scraping until visible deposits loosen.
Flush repeatedly with clean solvent or fresh fuel, capture waste, and allow complete drying before reassembly.
Chemical methods: tank cleaners and rust dissolvers (safe use and neutralization)
Several commercially available tank cleaners and rust dissolvers can rapidly break down corrosion, varnish, and sludge when used correctly.
Users should follow manufacturer instructions, work outdoors or in ventilated areas, wear gloves and eye protection, and avoid mixing chemicals.
After treatment, neutralize residues per product guidance, thoroughly rinse with water, dry completely, and dispose of waste and contaminated rags per local hazardous-waste rules.
Using media blasting or electrolysis for severe rust (when to consider)
Consider media blasting or electrolysis when corrosion is extensive, interiors are heavily pitted, or chemical treatments and mechanical scrubbing fail to restore usable metal.
Media blasting rapidly removes scale and old coatings but risks thinning thin walls and producing dust; professional equipment and containment are recommended.
Electrolysis gently reduces rust without abrasive wear, requires proper setup, sacrificial anodes, and time; choose based on tank condition and access.
Rinsing procedure and checking for remaining debris
After media blasting or electrolysis has removed bulk corrosion, the next task is to flush the tank thoroughly to remove loosened scale, abrasive media, and chemical residues.
Rinse repeatedly with hot water and a biodegradable degreaser, agitating to dislodge particles.
Drain and inspect via flashlight and mirror; repeat until water runs clear.
Finish with compressed air blowout and tacked-on solvent wipe.
Detailed Step 4 Cleaning or Replacing Fuel System Components
Next, attention turns to the fuel delivery components, starting with cleaning or replacing the fuel filter and any mesh screens to guarantee unobstructed flow.
Fuel lines, seals, and the petcock should be inspected for cracks, stiffness, or leaks and replaced if compromised.
Finally, the carburetor and any inline components must be tested and cleaned or rebuilt if signs of varnish or debris are found.
Cleaning or replacing the fuel filter and mesh screens
Inspect the fuel filter and mesh screens visually and by touch to determine clogging, varnish buildup, or damage before deciding on cleaning or replacement.
Remove screens and filter; soak metal mesh in solvent, brush gently, rinse, and dry.
Replace paper or foam elements rather than attempt cleaning.
Reinstall new or cleaned components, ensuring proper orientation and secure fittings to prevent leaks and flow restriction.
Inspecting and replacing fuel lines, seals, and petcock
Begin by visually and physically checking fuel lines, seals, and the petcock for cracks, stiffness, swelling, leaks, or corrosion that indicate deterioration.
Replace brittle hoses, o‑rings, and aged clamps with fuel-rated, ethanol-resistant parts.
Remove the petcock, inspect internal seats and screen, and install a new unit if leaking.
Tighten fittings to spec and route lines to prevent chafing and kinks.
Testing carburetor and inline components for contamination
Confirm whether the carburetor and any inline filters or fuel valves contain varnish, debris, or water by performing a systematic flow and visual check:
Drain bowl(s), inspect float, jets, and passages under light; push fuel through inline filters and valves to confirm flow and clarity;
replace clogged filters, rebuild or replace carburetor if deposits or corrosion persist;
reassemble and test for leak-free operation.
Detailed Step 5 Drying, Treating, and Protecting the Tank Interior
Next, attention turns to thoroughly drying the tank interior to prevent flash rust, with methods such as compressed air, heat lamps, or desiccant packs evaluated for effectiveness and safety.
The discussion then compares corrosion inhibitors and fuel-safe tank sealers—outlining their benefits, limitations, and compatibility with fuels and filters.
Finally, criteria for choosing a tank liner or full replacement are presented, based on corrosion severity, cost, and long-term reliability.
How to properly dry the tank to prevent flash rust
Allow the tank to be completely dried immediately after rinsing to prevent flash rust forming on bare metal surfaces.
After draining, use compressed air to blow out remaining moisture, directing airflow into seams and fittings.
Wipe accessible areas with lint-free cloths.
Position the tank in a warm, ventilated area until no humidity remains.
Verify dryness with a moisture meter or visual inspection before reassembly.
Applying corrosion inhibitors or fuel-safe tank sealers (pros and cons)
Once the tank is fully dry, attention turns to protecting the bare metal from future corrosion; this can be done with corrosion inhibitors or with fuel-safe tank sealers, each offering distinct benefits and trade-offs.
Corrosion inhibitors coat surfaces, are reversible, simple to apply and allow inspections; sealers create durable liners, resist permeation and leaks but require careful prep and complicate future repairs or inspections.
When to apply a tank liner versus replacing the tank
Deciding whether to apply a fuel-safe tank liner or replace the generator tank depends chiefly on the extent of structural damage, contamination, and long-term use goals: minor surface rust, intact seams, and a desire to preserve the existing tank often favor a liner, whereas pervasive corrosion, pinholes, compromised welds, or deformation that threatens structural integrity require replacement.
Cost, access, expected service life, and safety standards guide the choice.
Detailed Step 6 Reassembly, Refilling, and Initial Start-Up Procedures
Reassembly begins with securely reinstalling the tank, fuel lines, filters, and hardware to specified torque values to prevent leaks and component damage.
Fresh gasoline mixed with the correct proportion of fuel stabilizer should be added, then the system primed and bled of air according to the manufacturer’s checklist before first run.
After startup, the unit must be monitored for leaks, fuel flow issues, unusual noises, or abnormal operation and adjusted or shut down immediately if problems appear.
Reinstalling tank, lines, filters, and hardware with torque tips
Begin by positioning the cleaned fuel tank on the generator frame and aligning mounting holes to their original locations, ensuring fittings and drain petcocks face the correct direction for connection.
Reattach fuel lines, replacing clamps and rubber hoses as needed.
Install new fuel filter, tighten fittings to manufacturer torque specs, secure mount bolts with threadlocker where specified, and verify leak-free connections before initial priming and start-up.
Using fresh gasoline and fuel stabilizer proportions
Select fresh, clean gasoline and mix in fuel stabilizer at the manufacturer’s recommended ratio—commonly 1 ounce of stabilizer per gallon of gasoline—to prevent varnish and ethanol-related corrosion;
pour the treated fuel into the tank after confirming drain plugs are closed and fittings are secure.
Use the correct octane, avoid overfilling, and note fuel capacity to measure additives accurately for reliable storage and operation.
Priming, bleeding air, and first-run checklist
At this stage, the operator must complete final assembly, refill the tank with treated fuel, and follow a systematic priming and bleeding routine before the first start to guarantee proper fuel flow and prevent air-bound components.
Open fuel petcock, prime carburetor per manufacturer steps, cycle choke and starter without spark if instructed, check for secure fittings, verify oil and coolant levels, then perform a controlled initial start.
Monitoring for leaks and abnormal operation after start-up
Inspect the generator closely for fuel, oil, coolant, or exhaust leaks and listen for unusual noises immediately after the initial start; any seepage, hissing, knocking, or irregular vibration warrants a controlled shutdown and recheck of fittings, clamps, gaskets, and hose routing.
After restart, monitor temperature, oil pressure, and RPM stability for several minutes; document anomalies and address them before prolonged operation.
How to Dispose of Old Fuel, Sludge, and Contaminated Materials Responsibly
Old or contaminated fuel should be stored in approved, clearly labeled containers and secured during transport to prevent leaks and vapor exposure.
Local hazardous waste facilities, recycling centers, or household hazardous waste collection events are the appropriate destinations for disposing of contaminated fuel and sludge.
Used rags, filters, and absorbent materials must be treated as hazardous waste—placed in sealed metal containers or double-bagged and taken to a proper disposal or recycling program rather than thrown in regular trash.
Safe storage and transport of contaminated fuel
Several types of contaminated fuel—stale gasoline, separated ethanol blends, and fuel with particulate sludge—require careful containment and labeling to prevent leaks, fire hazards, and environmental contamination.
Use approved, clearly marked fuel-rated containers with tight seals and secondary containment. Store in a cool, ventilated area away from ignition sources, upright and secured for transport.
Follow hazardous materials guidelines and use spill kits if needed.
Local disposal and recycling options
When disposing of stale gasoline, sludge, or other contaminated fuel and materials, individuals should use local hazardous waste programs, certified recycling centers, or approved collection events to guarantee safe, legal handling.
Many municipalities accept gasoline and oily wastes at household hazardous waste facilities, while auto shops and fuel retailers may take small quantities or contaminated filters for proper disposal.
Verify local regulations, label containers, transport safely, and document drop-off.
Handling and disposing of rags, filters, and absorbents
Collect and segregate used rags, fuel filters, and absorbent materials immediately after draining or cleaning to prevent accidental combustion and cross-contamination.
Store soaked items in sealed, labeled metal containers away from heat.
Treat filters and sludgy residues as hazardous waste; consult local hazardous waste facilities for drop-off.
Never discard contaminated materials in regular trash or drains.
Document disposal per local regulations and retain receipts.
Troubleshooting Common Problems After Cleaning
After cleaning, one common check is for persistent fuel smell, visible leaks, or vapor lock that indicate sealing or drainage issues.
The technician should note engine running rough, clogged jets, or poor starting as signs the carburetor or fuel lines still contain debris.
Remaining rust or contamination requires inspection and may call for further cleaning, media treatment, or parts replacement.
Persistent fuel smell, leaks, or vapor lock
Persistent fuel odors, visible leaks, or signs of vapor lock indicate residual contamination or compromised seals after tank cleaning and require immediate attention.
Inspect fittings, petcock, fuel lines, and primer bulbs for cracks or loose clamps. Replace degraded hoses and seals, tighten connections, and pressure-test the tank if feasible.
Drain remaining contaminated fuel, ventilate area, and avoid operation until leaks and vapor issues are resolved.
Engine running rough, clogged jets, or poor starting
Leaks and vapor issues can mask or accompany fuel-system contamination that later shows up as poor running. When a generator starts to sputter, hesitate, or require extended cranking following a tank cleaning, the most likely culprits are clogged carburetor jets, fouled passages, or residual varnish and debris in the fuel circuit.
Inspect and clean the carburetor, replace the fuel filter, flush lines, and use appropriate carburetor cleaner.
Signs that rust or contamination remains and next steps
When symptoms continue despite tank cleaning—such as fuel smelling stale, visible rust flakes in the bowl, intermittent stalling under load, or fuel flow that starts strong then diminishes—the technician should suspect remaining rust or contamination in the fuel system; these signs indicate particulate, varnish, or micro-rust still circulating and interfering with metering and valves.
Inspect lines, filter, carburetor, and petcock; replace filters, flush lines, and rebuild or clean carburetor jets.
Maintenance Schedule and Preventive Measures to Avoid Future Contamination
A clear maintenance schedule and simple preventive steps help keep a generator tank contaminant-free.
Recommended practices include using fuel stabilizers and winterizing before long storage, inspecting the tank and fuel lines regularly and with quick checks prior to storage, and favoring ethanol-free fuel in approved containers or using proper additives when necessary.
Consistent adherence to these routines reduces buildup, corrosion, and fuel-related failures.
Recommended fuel stabilization and winterization tips
Begin planning a seasonal maintenance routine that emphasizes fuel stabilization and winterization to prevent contamination and preserve generator reliability.
Add EPA-approved fuel stabilizer to fresh fuel, run briefly to circulate, and top off the tank.
Drain carburetor and fuel lines when long-term storage is expected.
Use corrosion-inhibiting additives, store fuel in labeled, sealed containers, and keep the generator in a dry, ventilated area.
Regular inspection frequency and quick checks before storage
Following stabilization and winterization steps, a simple inspection schedule helps catch fuel issues before they cause damage or downtime.
Inspect tanks monthly when in regular use and every 1–3 months during storage.
Quick checks: visual fuel clarity, smell for sourness, drain petcock for water/sediment, verify cap venting, and confirm seals.
Log findings and address anomalies promptly.
Best fuel practices: ethanol-free fuel, additives, and storage containers
Choose fuel and storage methods that minimize chemical degradation and contamination: prioritize ethanol-free gasoline when possible, use proven stabilizers and water-removal additives per manufacturer recommendations, and store fuel in tightly sealed, approved containers kept cool and dark.
Rotate stock every six months, label containers with dates, avoid long hoses or siphons that introduce moisture, and drain or treat remaining fuel before extended storage.
Cost, Time, and When to Call a Professional
Typical DIY cleaning of a small generator tank often takes one to three hours and costs primarily for cleaner, tools, and disposal supplies, while professional service or replacement can range from a few hundred to over a thousand dollars depending on complexity.
Professionals are recommended when corrosion, sediment-packed tanks, damaged fuel lines, or persistent contamination are present, or when the owner lacks tools, experience, or time.
A clear comparison of estimated time, cost, and risk helps determine whether to attempt a home cleaning or hire a technician.
Typical time and cost estimates for DIY vs professional service
A clear comparison of time and cost helps decide whether to tackle a generator tank cleaning as a DIY project or hire a professional. DIY: typically 2–6 hours, $20–$100 for materials; Professional: 1–3 hours, $100–$400 including labor and cleanup. Choose based on skill, tools, and risk tolerance.
| Option | Time | Cost |
|---|---|---|
| DIY | 2–6 hrs | $20–$100 |
| Pro | 1–3 hrs | $100–$400 |
Scenarios when professional cleaning or tank replacement is recommended
When is professional intervention or full tank replacement warranted? Severe corrosion, welded leaks, or collapsed internal baffles usually require replacement.
Extensive rust, persistent contamination after DIY attempts, or fuel-system damage merits professional cleaning.
Consider cost parity, time constraints, safety risks from fumes or pressurized systems, and warranty concerns.
If diagnostic uncertainty exists, consult a qualified technician to avoid costly engine damage.
Useful Checklists and Quick Reference Guides
A concise set of checklists helps guarantee safety and consistency before, during, and after tank cleaning.
The pre-cleaning safety checklist covers fuel isolation, ventilation, protective gear, and fire prevention steps.
A step-by-step quick checklist for the cleaning process and a post-cleaning inspection checklist standardize tasks and confirm the tank is safe to return to service.
Pre-cleaning safety checklist
Before any cleaning begins, the technician confirms the generator is fully powered down and isolated from all fuel sources, electrical circuits, and battery connections.
A concise pre-cleaning safety checklist guarantees hazards are controlled, ventilation is arranged, and tools are appropriate. The technician also verifies fire suppression readiness and personal protective equipment.
- Verify isolation and drain fuel.
- Guarantee ventilation and grounding.
- Confirm PPE and fire extinguisher nearby.
Step-by-step quick checklist for the cleaning process
Begin the cleaning sequence with a concise, ordered checklist that guides each task from tank access to final inspection.
The checklist condenses core actions into a rapid sequence for efficient, safe execution.
- Drain residual fuel, detach fittings, and collect waste in approved containers.
- Remove loose rust/sediment, apply solvent or rust remover, and agitate.
- Rinse thoroughly, dry, reassemble, and verify seals.
Post-cleaning inspection checklist
How thoroughly was the tank inspected after reassembly? A concise post-cleaning inspection verifies integrity, leak-free seals, proper venting, and clean fuel delivery before operation.
Checklist focuses on safety, function, and contamination prevention.
- Check seams, fittings, and petcock for leaks and secure seals.
- Verify fuel filter clarity and correct installation.
- Confirm vent and filler cap ventilation and absence of debris.
Conclusion
Like a seasoned sailor stowing a vessel after a storm, the careful technician secures the generator—clean tank, fresh fuel, and sealed fittings—ready for the next journey. With rust removed and sediment banished, routine checks become a quiet ritual that wards off future trouble. When challenges persist beyond basic care, calling a professional is the wise lighthouse in fog. The result: reliable power, preparedness, and peace of mind.