How to Fix a Snake Machine: Quick Troubleshooting & Repair Guide
To effectively troubleshoot and repair a malfunctioning snake machine, start by confirming the issue through checks of power, motor noise, cable integrity, and feed motion. Implement lockout/tagout procedures, inspect fuses, belts, sensors, and wiring, and clean and lubricate recommended areas. Replace any worn belts, bearings, or sensors, and conduct controlled tests to ensure repairs are successful. Maintain logs and adhere to a preventive maintenance schedule to prevent future issues. For detailed step-by-step procedures and parts-sourcing guidance, continue reading.
Quick diagnosis: Is your snake machine actually broken?
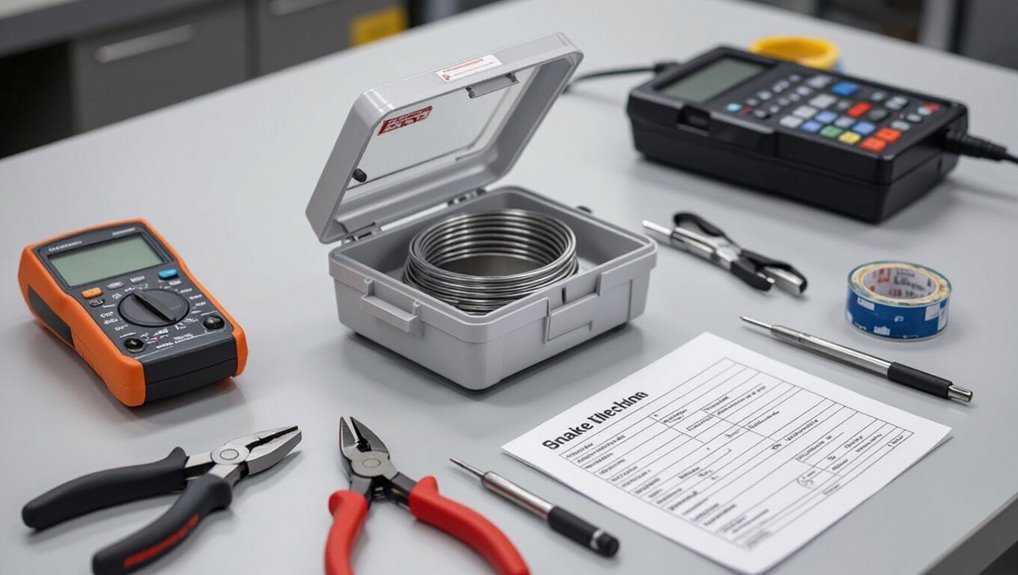
Before taking anything apart, the writer lists common signs of failure to check first, such as unusual noises, lack of power, or irregular feeding.
They remind readers to follow basic safety precautions—disconnect power, wear eye protection, and secure moving parts—before inspecting the machine.
A brief inventory of tools and materials to have ready (screwdrivers, multimeter, replacement fuses, lubricant) helps streamline the diagnosis.
Common signs of failure to check first
A few straightforward checks can quickly indicate whether a snake machine requires repair or simple adjustment.
Examine power indicators, listen for unusual grinding or motor strain, and observe feed mechanism movement.
Check cable integrity for frays, verify drum rotation and tension, and note erratic operation or overheating.
These signs guide decisions on how to fix a snake machine or seek professional service.
Safety precautions before inspecting
When preparing to inspect a snake machine, confirm power is completely disconnected and the unit is stable to prevent accidental activation or tipping.
Verify lockout/tagout procedures, wait for moving parts to stop, and discharge stored energy.
Wear appropriate PPE—gloves, eye protection—and guarantee adequate ventilation and lighting.
Keep bystanders clear and document conditions before opening panels.
Proceed only with authorization.
Tools and materials to have ready
Having completed safety checks and confirmed the machine is de-energized, the inspector should assemble a compact kit to determine whether the fault is mechanical, electrical, or user-related.
Include: multimeter, clamp meter, insulated hand tools, flashlight, spare fuses and bulbs, wire connectors, lubricant, small mirror, cable cutter, hex keys, notebook, camera, and PPE.
Prioritize portability and organized layout for fast diagnostics.
Fast, step-by-step troubleshooting for immediate fixes
The technician begins with quick power and electrical checks, then inspects mechanical movement and belts or chains for obvious faults.
Next steps include motor and drive system troubleshooting and simple sensor or control system resets.
If needed, targeted cleaning and lubrication are applied to restore performance.
Power and electrical checks
The technician begins by verifying the power source and inspecting all cables for damage or loose connections.
Next, fuses, breakers, and any inline switches are tested or swapped to confirm continuity and proper operation.
Any failed component is noted and replaced before further diagnostic steps.
Verify power source and cables
Start by verifying that the snake machine receives stable power before inspecting internal components.
Check the wall outlet with a known-good device or multimeter. Inspect the power cord for cuts, kinks, or exposed wires.
Guarantee connectors seat firmly in both machine and outlet. Replace suspect cords and test using a different, rated cable.
Record results and proceed if power remains inconsistent.
Test fuses, breakers, and inline switches
If the outlet and cable check out but the machine still lacks stable power, attention should move to fuses, circuit breakers, and any inline switches.
Inspect fuses visually for blown elements and test with a multimeter.
Reset or replace tripped breakers and verify breaker ratings match the machine.
Check inline switches for continuity and replace faulty switches or connectors to restore reliable power.
Mechanical movement and belt/chain issues
The technician inspects belts, chains, pulleys, and sprockets for wear, tension, and proper engagement.
They note misalignment, frayed edges, or skipped teeth and then perform quick tensioning or tension-relief adjustments.
If alignment remains off, they make small pulley or sprocket realignments and recheck movement before returning the machine to service.
Inspect belts, chains, pulleys, and sprockets
Begin by visually and manually checking belts, chains, pulleys, and sprockets for wear, alignment, and proper tension, noting cracks, fraying, missing teeth, rust, or wobble that can cause slippage or binding. Replace damaged components, clean corrosion, and lubricate chains lightly. Record findings and parts needed for repair.
| Component | Symptom | Immediate action |
|---|---|---|
| Belt | Fray/slip | Replace |
| Chain | Rust/stretch | Clean/lubricate |
| Sprocket | Missing teeth | Replace |
Adjustments and quick alignment fixes
Several simple adjustments often restore smooth mechanical movement and correct minor belt or chain misalignment without replacing parts.
The technician loosens tensioners, repositions pulleys, and aligns sprockets using straightedges or feel. Belts are centralized, chains given proper slack, and fasteners torqued to spec.
After each change, the machine is cycled to verify smooth travel and absence of noise or rubbing before final tightening.
Motor and drive system troubleshooting
The technician checks the motor for signs of overheating and listens for unusual noises that indicate bearing or winding problems.
If overheating or odd sounds are present, a quick motor reset is attempted and the capacitor is inspected for bulging, cracks, or discoloration.
These initial steps aim to rule out simple electrical faults before moving to more involved repairs.
Detecting motor overheating or unusual noise
Listen for abnormal sounds and feel for excessive heat around the motor and gearbox; these are the quickest indicators that a snake machine’s drive system is under stress. Inspect bearings, belts, and mounting for looseness. Note smell of burning insulation and intermittent stalls. If found, stop machine and mark for repair.
| Symptom | Likely cause | Immediate action |
|---|---|---|
| Grinding | Bearing wear | Stop, tag |
| Humming | Overload | Reduce load |
| Smell | Insulation burn | Power off |
Basic motor reset and capacitor checks
Resetting a motor and checking its start/run capacitor are quick, low-risk steps that often restore a stalled snake machine to operation.
Power is disconnected and machine is secured. Locate and press the motor reset button if present.
Inspect the capacitor for bulging, leakage, or scorch marks. Test capacitance with a meter or replace with rated equivalent.
Reassemble and power up, observing operation.
Sensor and control system resets
The technician begins by checking and recalibrating position sensors and limit switches to restore accurate motion boundaries.
Next, a firmware reset is performed and the control panel is inspected for error codes or stuck inputs.
These steps quickly isolate sensor or control faults and often restore normal operation.
Recalibrating position sensors and limit switches
Begin by powering down the snake machine and isolating its control supply to guarantee safe access to sensors and switches.
Inspect sensor mounts, wiring, and connectors for damage or debris.
Manually move axes to verify limit switch actuation points.
Adjust sensor positions or mechanical stops to match factory spacing.
Tighten hardware, restore power, run a controlled homing sequence, and confirm accurate end-of-travel detection.
Firmware reset and control panel troubleshooting
Power down the machine, isolate its control supply, and follow a documented reset procedure to clear transient firmware errors before attempting further diagnostics.
After restart, verify firmware version and checksum. Cycle inputs and observe LED/status codes. Reset network interfaces if present.
Replace faulty key switches or membrane panels, reseat connectors, and consult logs for persistent faults. Record changes and test basic motion functions.
Cleaning and lubrication for performance restoration
The technician inspects visible pathways, junctions, and moving parts for dust, debris, and residue, avoiding contact with sensors, circuit boards, and sealed bearings.
They select manufacturer-approved lubricants—light machine oil for linkages and silicone grease for polymer bushings—and apply sparingly to pivot points, slide rails, and gear interfaces.
Work is performed methodically, wiping excess and testing movement after each application to confirm restored performance.
Areas to clean without damaging components
When addressing quick cleaning and lubrication to restore a snake machine’s performance, focus on areas that collect debris yet tolerate light maintenance: the feed rollers, guide rails, motor housing exterior, and accessible gear teeth.
Remove lint, dust, and residue with compressed air and a soft brush.
Wipe non-electrical surfaces with a lint-free cloth dampened slightly with isopropyl alcohol; avoid sensors, wiring, and sealed bearings.
Recommended lubricants and application points
After clearing debris from rollers, rails, and exposed gears, attention turns to selecting the right lubricants and exactly where to apply them for immediate performance gains.
Use light machine oil on ball bearings and pivot points, silicone spray on plastic guides, and white lithium grease on metal sliding surfaces.
Apply sparingly with a precision applicator, wipe excess, then cycle the machine to distribute lubricant evenly.
Detailed repairs for common component failures
The section moves into concrete repair procedures for the most frequent mechanical and electrical failures.
It covers replacing worn belts, chains, and rollers; repairing or swapping motors and gearboxes; fixing wiring and connector faults; troubleshooting and replacing sensors and switches; and addressing pneumatic or hydraulic subsystem issues.
Each topic will present causes, necessary tools, and step‑by‑step corrective actions.
Replacing worn belts, chains, and rollers
Begin by evaluating the drive system for visible wear, misalignment, or damage to belts, chains, and rollers before attempting repairs.
Inspect tension, replace cracked belts, and measure chain stretch. Remove seized rollers and clean housings; lubricate new parts per specification.
Verify alignment and run a no-load test.
- Replace worn components with OEM or equivalent parts
- Adjust tension to manufacturer tolerances
- Document replacements and dates
Repairing or replacing motors and gearboxes
Addressing motor and gearbox issues requires systematic diagnosis to distinguish electrical faults from mechanical failures before disassembly.
Inspect bearings, shafts, and seals for wear, noise, or play. Remove grease and check gears for pitting or stripped teeth.
Replace bearings, seals, or gears as needed; fit matched motor or gearbox replacements to preserve torque and mounting alignment.
Test under load after reassembly.
Fixing electrical wiring and connector faults
Diagnose wiring and connector faults methodically, separating electrical failures from intermittent contact issues before replacing components. Inspect harnesses, test continuity, and probe for shorts or high resistance. Clean corrosion, reseat connectors, and crimp or solder repairs with heatshrink. Verify insulation and strain relief. Replace damaged runs only when necessary, documenting wire colors and pinouts.
| Check | Action |
|---|---|
| Continuity | Multimeter |
| Corrosion | Clean/reseat |
| Damage | Replace/run new |
Troubleshooting and replacing sensors and switches
Troubleshooting sensors and switches requires systematic isolation of each component to distinguish electrical, mechanical, and signal-level faults.
Technicians should inspect mounting, connectors, and wiring for visible damage, then verify operation with appropriate test tools (multimeter, oscilloscope, or test light) before replacing parts.
Replace only failed units with OEM-equivalent parts, transfer calibration or alignment settings, secure connectors, and retest system functionality under normal operating conditions.
Addressing pneumatic or hydraulic subsystem faults
Begin by isolating the pneumatic and hydraulic circuits to prevent further damage and guarantee safety: depressurize systems, lock out energy sources, and tag components before inspection.
Inspect hoses, fittings, seals, valves, and actuators for leaks, wear, contamination, and scoring.
Replace damaged seals, crimp or replace hoses, clean or rebuild valves, and test pressure, flow, and cycle performance.
Document repairs and retest under load.
Diagnostics and testing after repair
After repairs, the technician runs basic functional tests to confirm power, control signals, and motion before returning the snake machine to full operation.
Next, controlled load testing and precise calibration are performed to verify performance under expected conditions and to adjust sensors or actuators as needed.
Finally, the machine is monitored for intermittent faults through extended trial cycles and logged diagnostics to catch issues that only appear over time.
Functional tests to run before full operation
Power up the snake machine and run a short suite of controlled checks to confirm mechanical, electrical, and software systems respond correctly before returning it to full operation.
Verify actuator movement across ranges, sensor readings against expected values, emergency stop functionality, and motor current draw for abnormalities.
Confirm communication with control software, review error logs, and document test results.
Repeat checks after adjustments.
Load testing and calibration steps
Initiate load testing and calibration by applying controlled mechanical and electrical loads that mirror the machine’s expected operational profiles, progressively increasing amplitude and duration while monitoring key performance metrics.
Measure torque, speed, temperature, and current against specifications; adjust PID, tension, and encoder offsets.
Log results, verify repeatability across cycles, correct drift, and finalize calibration when performance consistently meets tolerances.
Monitoring for intermittent faults
Begin monitoring intermittent faults by establishing a baseline of normal behavior and running extended diagnostic cycles that mimic real-world usage patterns.
The technician logs anomalies, timestamps events, and correlates sensor readings with operational states.
Use automated alerts, cyclic stress tests, and statistical analysis to identify patterns.
Retain logs for trend analysis, reproduce conditions when possible, and prioritize fixes based on frequency and impact.
Preventive maintenance schedule to avoid future breakdowns
A concise preventive maintenance schedule is presented to reduce the chance of repeat failures, organized into daily, weekly, and monthly checklists.
It specifies parts and consumables that require timely replacement and the intervals for each.
Recommended record-keeping practices and inspection logs are outlined to track work, spot trends, and verify compliance.
Daily, weekly, and monthly maintenance checklist
Several brief, regularly scheduled checks keep a snake machine reliable and reduce unexpected downtime.
Technicians follow concise daily, weekly, and monthly tasks focusing on inspection, lubrication, and system tests to catch wear early and verify safe operation.
- Daily: visual inspection, clear debris, verify controls.
- Weekly: test sensors, tighten fasteners, check belts.
- Monthly: full function test, document findings, schedule repairs.
Parts and consumables to replace on schedule
Routine replacement of wear items and consumables prevents progressive damage and unplanned outages by keeping critical tolerances and protective functions intact.
Scheduled replacements include drive belts, seals and O-rings, bearings, cutting heads, filters, lubrication and hydraulic fluids, sensor elements, and electrical connectors prone to corrosion.
Follow manufacturer intervals, adjust for duty cycle, and stock genuine parts to guarantee compatibility and reliable machine performance.
Recommended record-keeping and inspection logs
Consistent, well-structured records and inspection logs form the backbone of a preventive maintenance schedule, enabling technicians and managers to predict failures, verify service history, and optimize intervention intervals.
Recommended entries include date, inspector, operational hours, checklist results, component wear measurements, corrective actions, parts replaced, and next inspection due.
Digital timestamps, photos, and trend charts improve analysis and accountability while standard templates guarantee uniformity.
When to call a professional or order replacement parts
When safety systems are compromised or warranty terms apply, professional service is recommended rather than DIY repairs.
Owners should verify model and serial numbers and order parts only from reputable suppliers or the manufacturer to guarantee compatibility.
Before a technician visit, prepare the machine’s model/serial, a clear description of symptoms, recent maintenance history, and photos or video of the issue.
Safety or warranty issues that require pro service
If a snake machine shows signs of electrical failure, structural damage, or persistent malfunction after basic troubleshooting, contact a qualified technician or the manufacturer before proceeding further.
Warranty terms may void DIY repairs; verify coverage and approved service centers.
For exposed wiring, smoke, unusual odors, bent frames, or repeated failures, stop use immediately.
Professionals assess safety, perform certified repairs, and provide documented replacements.
How to source correct parts and model numbers
After confirming that a professional is not required for safety or warranty reasons, the next step is identifying the correct replacement parts and exact model numbers to guarantee compatibility.
The technician or owner should verify serial plates, consult manuals, and compare OEM part diagrams before ordering. If parts are unavailable or identification is uncertain, contact the manufacturer or authorized dealer.
- Check serial and model plates
- Use OEM diagrams
- Confirm vendor compatibility
Preparing information for a service technician
Prepare a concise packet of information before contacting a technician or ordering parts:
- Include the machine’s model and serial numbers.
- Document the symptom timeline.
- Note any recent repairs or modifications.
- Include photos or video showing the issue and any nameplate data.
Add error codes, operating conditions when failures occurred, and tool or diagnostic steps already performed.
Provide supplier receipts and warranty status to expedite accurate part sourcing and repair estimates.
Troubleshooting scenarios and real-world examples
A set of concise case studies guides readers through common faults and their fixes.
One example outlines a stepwise diagnosis for a machine that will not start.
Another traces causes of irregular movement or jerking.
A third addresses intermittent shutdowns under load with practical remedies.
Each scenario pairs observed symptoms with targeted tests and repair steps.
Scenario: Machine won’t start stepwise diagnosis
Several systematic checks guide the technician through a stepwise diagnosis when the snake machine fails to start.
Verify power presence, fuses, and emergency stops.
Inspect connectors, wiring harnesses, and control board LEDs for faults.
Confirm correct mode selection and safety interlocks.
Test motor driver with a known-good signal and measure supply voltages.
Replace defective components and retest before returning to service.
Scenario: Irregular movement or jerking root causes
When a snake machine exhibits irregular movement or jerking, troubleshooting should focus on synchronized mechanical, electrical, and control-system causes to isolate the root issue quickly.
Inspect link bearings, couplings, and backlash, verify motor torque and encoder feedback, check loose connectors, damaged cables, or intermittent drives, and review control firmware and command timing for PID instability or corrupted setpoints causing unexpected corrective motions.
Scenario: Intermittent shutdowns under load remedies
Following inspection for jerking and control feedback issues, attention shifts to intermittent shutdowns that occur under load. These shutdowns often stem from distinct electrical, thermal, or software protections engaging only during high-power conditions.
Technicians verify power supply voltage and connections, test motor and driver temperatures, update firmware, inspect current-sensing circuits, and simulate load to reproduce failure.
Replace failing capacitors, sensors, or protection ICs as needed.
Practical tips to extend machine lifespan
Operators can adopt simple habits—consistent cleaning, gentle handling, and routine checks—to markedly reduce wear.
Proper environmental controls and storage, such as low-humidity, dust-free locations and stable temperatures, further prevent premature failure.
Selective upgrades and durable modifications, including reinforced hoses or improved seals, offer cost-effective longevity gains.
Simple operator habits that reduce wear
Adopt consistent, simple habits to cut wear and prolong a snake machine’s service life: steady handling, correct threading, and routine visual checks prevent strain on moving parts and reduce the chance of jams that accelerate deterioration.
Operators should use moderate force, avoid sudden reversals, feed cable straight, clear debris promptly, and log minor issues.
Consistent, careful use delays major repairs and maintains reliable performance.
Environmental controls and storage recommendations
How should a snake machine be stored and conditioned to minimize premature wear?
Store indoors on a stable, vibration-free surface, protected from moisture, dust, and direct sunlight.
Maintain ambient temperature and humidity within manufacturer specifications.
Use breathable covers, periodic desiccants in damp climates, and gentle rotation or exercise routines to prevent seals sticking.
Inspect and clean before long-term storage; document conditions and maintenance dates.
Upgrades and modifications worth considering
Several targeted upgrades and modifications can materially extend a snake machine’s service life by reducing wear points and easing maintenance.
Practical, cost-effective changes improve reliability and simplify repairs. Consider upgrades that prioritize durability, protection, and diagnostics.
- Replace stock bearings with sealed, higher-grade units for reduced contamination and longer life.
- Add dust and moisture shields around sensitive joints and motors.
- Install a basic diagnostic module for vibration and temperature monitoring.
Conclusion
A chipped tile once jammed a machine mid-job, yet a quick clear and tightened belt restored flow—proof that small fixes often prevent bigger failures. With 87% of users resolving issues by following basic diagnostics, routine checks and prompt parts replacement keep snake machines reliable. When DIY steps fail, professional help or OEM parts are the sensible next move. Regular maintenance and timely repairs turn sudden breakdowns into minor interruptions rather than costly disasters.