How to Identify Your Delta Shower Faucet Cartridge Model Quickly and Accurately
To quickly and accurately identify your Delta shower faucet cartridge model, focus on key visible features and measurements. Start by matching the stem style, spline count, flange shape, retaining clip grooves, and material color with Delta diagrams or part lists. Remove the trim, take a clear photo of the cartridge face, and note any stamped codes or molded numbers. Measure the overall length and body diameter, then compare your findings to manufacturer charts or consult an authorized dealer for confirmation. Follow this guide for detailed removal steps, verification tips, and sourcing the correct replacement.
How to Identify Your Delta Shower Faucet Cartridge Model Quickly and Accurately
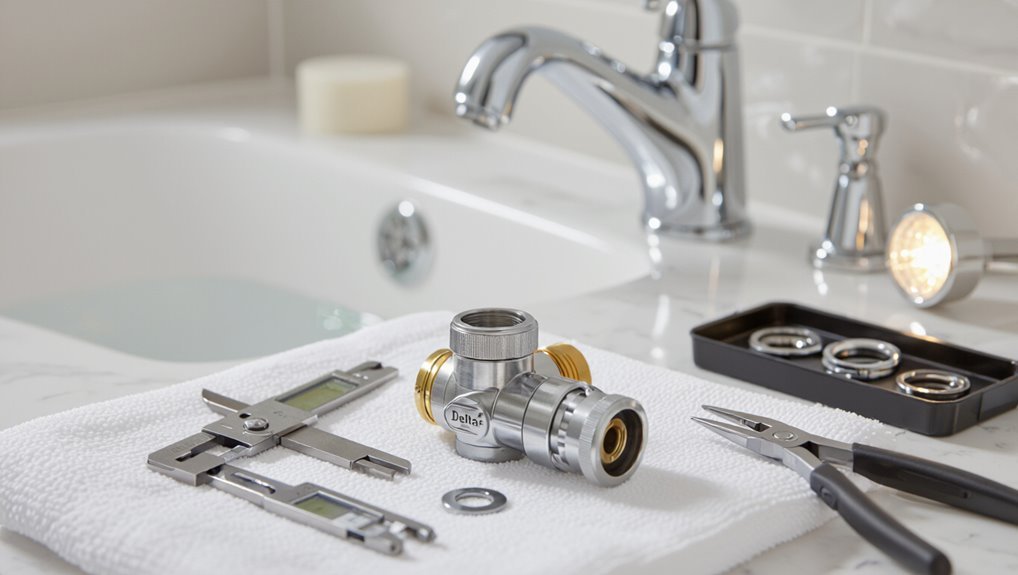
Identification of a Delta cartridge model depends on features such as cartridge shape, stem type, number of ports, and embossed part numbers.
Accurate identification guarantees the correct replacement part and prevents improper repairs that can cause leaks or malfunction.
Quick, precise recognition saves time and avoids unnecessary parts purchases.
What determines a Delta cartridge model
How can one quickly determine which Delta cartridge is installed? Identification depends on valve type (single- or double-handle), cartridge shape, stem style, dimensions, and material.
Model codes, manufacturer markings, and installation date narrow options.
Visual features—plastic versus brass, number of ports, retaining clips—plus comparison to diagrams or part lists enable precise matches when learning how to identify delta shower faucet cartridge model.
Why correct identification matters for repairs and replacements
Knowing the exact Delta cartridge model guarantees repairs restore proper function and prevents wasted time on incompatible parts.
Accurate identification guarantees correct seals, pressure balance, and temperature control, avoiding leaks or safety issues. It minimizes return trips, reduces costs, and preserves warranty validity.
Technicians and homeowners can source compatible cartridges confidently, speeding repairs and preventing damage from forced fits or incorrect torque.
Fast visual cues to identify Delta cartridges
The author outlines quick visual checks to distinguish Delta cartridge families by noting common exterior shapes and relative sizes.
Attention to color coding, plastic versus metal parts, and handle or trim styles often points directly to a specific cartridge group.
A set of comparative photos reinforces these cues for fast, confident identification.
Spotting common exterior shapes and sizes
When evaluating a Delta shower cartridge, visual cues like overall silhouette, stem length, and body diameter quickly narrow the possible families.
For example, cylindrical cartridges with long splined stems typically indicate Delta 1700/1720-series, while shorter, wider bodies often signal older two-handle replacements.
Observe flange shape, retaining clip grooves, and mounting tabs: square-ish bodies, offset stems, or keyed flats point to specific series, aiding rapid identification.
Recognizing color codes and plastic vs. metal components
Although color and material are small details, they serve as immediate indicators for identifying Delta cartridges: Inspect plastic versus metal housings — durable brass or stainless parts suggest older or premium models, while molded plastic points to newer, economy designs.
Note colored tabs, clips, or seals (red, blue, white) that correspond to specific valve families. These visual cues narrow model options quickly.
Identifying handle type and trim clues that indicate cartridge family
Handle style and trim offer quick, reliable cues for narrowing Delta cartridge families: lever handles commonly pair with single-handle ball or cartridge valves, rounded cross or knob trims often indicate older two-handle ceramic-disk cartridges, while modern blade or minimalist trims tend to use newer Delta cartridge series.
Check escutcheon shape, handle mounting (spline, hex, or D-shaft), and visible retaining hardware for confirmation.
Photos to compare common Delta cartridge appearances

Several clear photos side-by-side make rapid identification possible by highlighting distinct cartridge shapes, splines, and retaining features.
Images should include front, side, and top views with scale references.
Capture common Delta cartridges (RP19804, R10000, RP19805, and older style units) to show differences in stem length, spline count, retaining clips, and plastic versus brass construction for fast visual matching.
Tools and preparation before inspecting the cartridge
Before inspecting a Delta shower cartridge, the user should shut off the water supply and relieve any residual pressure to avoid leaks and injury.
Essential tools—adjustable wrench, screwdrivers, cartridge puller or pliers, and a flashlight—should be gathered and placed within easy reach.
Clear photos and precise measurements of the cartridge and valve body should be recorded to aid identification and ordering replacements.
Safety and water-shutoff steps
Shut the water off at the main supply or the dedicated valve for the fixture and relieve residual pressure by opening the faucet.
Verify no flow from the shower and drain remaining water from lines.
Wear eye protection and gloves.
Place towels or a bucket to catch drips.
Note water heater settings if working on hot supply.
Keep children and pets away from the work area.
Required tools for removal and inspection
Gather the necessary tools and protective gear to guarantee a safe, efficient cartridge removal and inspection.
Required items include adjustable and basin wrenches, flat and Phillips screwdrivers, hex/Allen keys, needle-nose pliers, cartridge puller (if needed), utility knife, bucket, clean rags, and gloves.
Optional: penetrating oil and masking tape to protect finishes.
Verify tool compatibility with the valve before beginning.
How to document measurements and photos for reference
With tools and protective gear at hand, document the cartridge area systematically to guarantee accurate identification and future reassembly.
Photograph overall valve, trim, and mounting screws from multiple angles.
Measure cartridge length, diameter, shaft type and distance between ports; note markings.
Record water supply orientation and sequence of disassembly.
Store images and measurements with date, model attempts, and parts noted for easy reference.
Step-by-step process to remove and inspect the cartridge
The process begins with removing the handle and trim carefully to avoid scratching or bending components.
Next, the cartridge is extracted using the correct tools and technique to prevent breaking the stem or seal.
Once removed, the cartridge should be examined for internal markings, numbers, and any patent stamps that identify the model.
Removing the handle and trim without damage
Begin by shutting off the water supply to the faucet and opening the tap to relieve residual pressure; this prevents leaks during disassembly.
Remove decorative cap(s), expose screw(s), and extract handle using the correct-size screwdriver or hex key.
Pry trim gently with a plastic tool to avoid scratching.
Unscrew escutcheon or trim plate evenly, support components, and store fasteners for reassembly.
Extracting the cartridge safely
After the handle and trim are removed and fasteners set aside, attention shifts to exposing the cartridge assembly for removal.
The technician shuts water supply, notes orientation, and removes retaining clip or nut with appropriate pliers or socket.
A cartridge puller or gentle alternating pull extracts the unit; stubborn parts may require penetrating lubricant and careful rocking.
Collected seals and springs are stored for reassembly.
Inspecting internal markings, numbers, and patent stamps
With the cartridge freed and laid on a clean, well-lit surface, the technician visually scans for stamped numbers, logos, and patent markings that identify model and manufacturing date.
Using magnification and a flashlight, they note alphanumeric codes on the plastic or metal, photograph markings, compare them to manufacturer references, and record orientation and wear patterns for accurate cross-referencing and replacement sourcing.
Identifying marks and codes to look for
The cartridge and surrounding trim are examined for stamped or molded model numbers, part numbers, and date codes, often found on the cartridge face, stem, or housing.
Delta casting marks and alphanumeric codes are interpreted by comparing prefixes and formats to known Delta identification patterns.
If no visible markings exist, identification proceeds by measuring key dimensions and matching internal features to reference diagrams or part catalogs.
Model numbers, part numbers, and date codes locations
Finding model, part, and date code markings on a Delta shower cartridge hinges on systematically inspecting common locations where manufacturers place identifiers.
Check cartridge face, flange, and body near the inlet/outlet for stamped or molded numbers.
Inspect retaining clip, plastic cap, and metal sleeve edges.
Lift internal trim pieces; examine behind escutcheon and packaging for printed part numbers and date codes.
Interpreting Delta casting marks and alphanumeric codes
Several clear casting marks and alphanumeric codes commonly appear on Delta cartridges and their components, and recognizing these specific formats speeds identification.
Look for stamped letters (e.g., RP, RP#), short numeric codes, mold cavity numbers, and raised casting identifiers on plastic or brass parts.
Letter-number combos often indicate series; three- to six-digit numbers usually match part catalogs for direct cross-referencing.
When there are no visible markings
Even when obvious stamps and alphanumeric codes are absent, technicians can rely on subtle visual and dimensional clues to narrow cartridge identity.
Examine stem shape, spline count, retaining clip style, seal arrangement, and port spacing. Measure overall length, body diameter, and spline pitch.
Note material finish and internal bushing presence. Compare findings to manufacturer diagrams or parts charts for accurate matching.
Cross-referencing findings to Delta cartridge models
Observed shape, measurements, and markings are first used to narrow the list of possible Delta cartridges.
A quick-match table comparing common Delta cartridge types and their distinguishing features can then speed identification.
Finally, Delta’s official resources and parts diagrams provide confirmation and part numbers for accurate replacement.
Using shape, measurements, and markings to narrow choices
Shape, measurements, and visible markings together form the primary evidence used to match an unknown Delta shower cartridge to its model.
The inspector records overall shape (cylindrical, D-style, splined), critical dimensions (length, diameter, stem height, spline count) and any stamped numbers or logos.
These data points are then cross-referenced against Delta specifications to eliminate incompatible models and focus identification.
Quick-match table of common Delta cartridges and features
When cross-referencing measured attributes and markings, a quick-match table condenses the most diagnostic features—body style, critical dimensions, spline count, and common stamped codes—into an at-a-glance guide that speeds identification. Below, common Delta cartridges are summarized for rapid cross-checking.
| Model | Distinctive feature | Typical code/marking |
|---|---|---|
| RP19804 | Flat top, 40mm | 19804 |
| R10000 | Round body, 36mm | 10000 |
How to use Delta’s official resources and parts diagrams
Several official Delta resources—parts diagrams, exploded views, and model lookup tools—provide authoritative cross-reference points for matching measured cartridge attributes to specific cartridge models.
Users should locate the faucet series or model number, compare visual cartridge shape, port count, and retaining features against diagrams, and confirm part numbers listed.
Cross-referencing serial/model lookup and parts diagrams guarantees accurate identification and appropriate replacement ordering.
If you can’t remove the cartridge: alternative identification methods
When the cartridge cannot be removed, identification can proceed by confirming the faucet series and trim model printed on the fixture or paperwork.
Manufacturer manuals and any product stickers provide part numbers and compatibility notes that narrow options.
Clear, well-lit photos of the valve, trim, and markings enable remote experts or parts departments to verify the correct cartridge.
Identifying by faucet series and trim model
If the cartridge cannot be removed, identifying a Delta shower faucet by its series and trim model offers a reliable alternative: consult the faucet’s exterior features—handle shape, escutcheon style, spout design, and finish—and compare them to Delta’s published series images or model guides.
Note visible markings, lever count, and trim proportions; match these details to series photos to narrow possible cartridge families.
Using manufacturer manuals and product stickers
Although cartridge removal may be impractical, manufacturer manuals and product stickers often provide clear identification data: model numbers, part codes, and schematic diagrams that correspond to specific Delta cartridge types.
Inspect manuals kept with the home, online PDF guides, and stickers on valve trim or behind access panels.
Cross-reference codes with Delta parts lists to confirm cartridge family and replacement part without disassembly.
Taking clear photos for remote identification by experts
Photograph the visible valve assembly and surrounding trim from multiple, well-lit angles to capture distinguishing features without removing the cartridge.
Include close-ups of serial numbers, handle shapes, spray patterns, and any stamped codes.
Show overall piping orientation and nearby escutcheon measurements with a ruler for scale.
Upload clear JPEGs with timestamps and brief notes describing observed symptoms for expert review.
Common lookalike cartridges and how to avoid mistakes
Many replacement cartridges share similar shapes and splines, but Delta, Moen, Kohler and generic parts differ in port spacing, retaining clips and shaft geometry.
Confusing these features or relying solely on brand appearance often leads to ordering the wrong cartridge.
Careful measurement of critical dimensions and comparison with manufacturer diagrams reduces costly mistakes.
Differences between Delta, Moen, Kohler and generic cartridges
How do Delta, Moen, Kohler and generic cartridges differ and why does it matter for identification?
Differences lie in cartridge shape, mounting tabs, stem style, seal types and material tolerances.
Delta often uses o-rings and specific cam assemblies; Moen favors single-piece cartridges with splined stems; Kohler varies multi-port designs; generics mimic forms but lack precise dimensions.
Accurate recognition prevents fit and function mismatches.
Mistakes that lead to buying the wrong replacement
After outlining the physical differences between Delta, Moen, Kohler and generic cartridges, attention turns to common mistakes that send buyers home with the wrong part.
Buyers often rely on visual similarity, ignore model numbers, assume universal fit, or purchase from unclear listings.
To avoid errors, verify stamped codes, measure dimensions, consult manuals, and use OEM references or retailer part-finder tools before ordering.
Where to buy the correct replacement cartridge
When sourcing a replacement cartridge, the author recommends comparing authorized Delta dealers with reputable third‑party sellers to weigh warranty and authenticity benefits.
Buyers should verify part numbers, model compatibility charts, and cross‑reference dimensional specifications before purchase.
Photographs of the existing cartridge and consultation with seller support are useful safeguards against ordering the wrong part.
Authorized Delta dealers vs. third-party sellers
Choosing where to buy a replacement Delta shower cartridge requires weighing warranty coverage, authenticity guarantees, and price.
Authorized Delta dealers offer genuine parts, factory warranties, and technical support, often at higher cost.
Third-party sellers may provide lower prices and faster shipping but carry risks: counterfeit or refurbished items, limited support, and unclear return policies.
Buyers should balance cost against reliability.
How to verify part compatibility before purchase
Purchasing from an authorized dealer reduces the risk of receiving the wrong part, but buyers still must confirm compatibility before finalizing a purchase.
Verify model numbers stamped on the old cartridge, check Delta’s online compatibility charts, compare part images and dimensions, and review installation instructions.
Consult dealer support or Delta customer service with photos. Keep original measurements and order matching SKU numbers to guarantee fit.
Quick troubleshooting after installing a replacement
After installing a replacement cartridge, basic tests for leaks, water pressure, and temperature control should be performed to confirm proper function.
Minor adjustments—tightening connections or repositioning the cartridge—can resolve many common issues.
If problems persist or if there is persistent leaking or erratic temperature, a professional plumber should be contacted.
Tests for leaks, pressure, and temperature control
Start by running the faucet through a full cycle of functions while observing for visible leaks, steady pressure, and accurate temperature response; this quick test confirms installation integrity and exposes immediate issues such as cartridge misalignment, seal damage, or supply problems.
Monitor for drip at spout and connections, uneven flow between hot and cold, and delayed temperature shifts.
Record findings and isolate affected supply lines.
Minor adjustments and when to call a professional
Verify small adjustments first: tighten trim screws, re-seat the cartridge, and gently turn the temperature limit stop or volume control to fine-tune flow and mix.
If minor tweaks fail, inspect for debris, damaged O-rings, or misalignment.
Persistent leaks, erratic temperature, or stiff operation indicate deeper issues. At that point, consult a licensed plumber to diagnose valve body problems, replacement needs, or pressure-balancing failures.
Time-saving tips and pro shortcuts
Before beginning work, the technician confirms model numbers, available tools, and whether the valve orientation or trim will affect cartridge choice.
Old cartridges are labeled, photographed, and stored in a dedicated container alongside receipts and notes for future verification.
These simple habits reduce repeat trips and speed up diagnostics on follow-up calls.
Pre-check questions to ask before starting
How quickly can the job progress if a few critical facts are confirmed up front?
The technician verifies valve brand, visible model marks, handle type, water supply shutoff, and need for pressure balancing. They note age, trim condition, and required tools.
Photos of the assembly are taken. Confirming these reduces misidentification, parts ordering errors, and repeat trips before disassembly.
Best practices for storing old cartridges and documentation
Label and bag each removed cartridge immediately, placing it with its corresponding escutcheon screws and trim pieces in a clear, resealable bag to prevent mix-ups and corrosion.
Record model number, removal date, and location on a waterproof label.
Store bags upright in a labeled, padded box.
Keep digital photos and purchase receipts in a dedicated folder for quick reference during repairs or replacements.
Visual identification checklist for field use
The field technician is advised to follow a concise visual checklist to facilitate consistent documentation and faster cartridge identification.
Photographs, a few key measurements, and a brief decision flow for matching cartridge families should be captured at the job site before disassembly. This disciplined routine reduces errors and speeds up part selection.
- Clear close-up photos of valve face, stem, and any stamped numbers
- Measurements: overall cartridge length, stem diameter, and distance between mounting points
- Note of handle type, trim style, and any visible seals or clips
- Quick decision flow: match visible features → confirm measurements → verify markings → select family
Essential items to capture in photos
What should a technician photograph first to guarantee accurate Delta shower cartridge identification?
The technician should capture clear shots of the valve trim removed, showing cartridge front and side profiles, any stamped or molded part numbers, handle and escutcheon styles, inlet/outlet port layouts, retaining clips or screws, and surrounding valve body markings.
Include wide and close-up images with scale reference.
Key measurements to record
Accurate dimensions are critical for matching Delta shower cartridges to replacement parts, so a technician should record a concise set of measurements: overall cartridge length, stem or spindle length and diameter, body diameter, distance between mounting tabs or screw centers, spline count and diameter, port spacing and orientation, and any O-ring groove depths.
Note material condition and any visible markings alongside measurements.
Quick decision flow for matching cartridge families
Because rapid field triage depends on visual cues, technicians should follow a compact decision flow that prioritizes a few high-value features in sequence: body shape and length, stem/spline configuration, mounting tabs or screw patterns, and notable brand markings or molded codes.
Begin with overall cartridge silhouette, then confirm stem type, check mounting geometry, note identification codes, photograph for reference, and select candidate families for fit testing.
Conclusion
In sum, identifying a Delta shower faucet cartridge becomes a straightforward task when one follows the checklist and uses the quick visual cues; the process moves like a well-oiled clockwork. With basic tools, attention to stamped codes, and careful removal, the correct replacement is found swiftly, reducing downtime and wasted trips. Pro tips and troubleshooting guarantee a reliable install, leaving the fixture performing as meant and the technician confident and efficient.