How to Temporarily Stop a Leaking Pipe Fast: Easy DIY Fixes You Can Do Now
To quickly stop a leaking pipe, first ensure safety by shutting off the nearest valve or main water supply and cutting off electricity if water is near outlets. Dry the affected area and apply self-fusing silicone tape, epoxy putty, or a rubber patch secured with a clamp for a temporary fix. For larger holes, consider using short fittings or repair kits. After the repair, test the fix slowly and monitor for any leaks. If the problem persists or is severe, contact a plumber for professional assistance. Detailed steps and tool lists are available for those needing a comprehensive plan.
What to do first when you find a leaking pipe
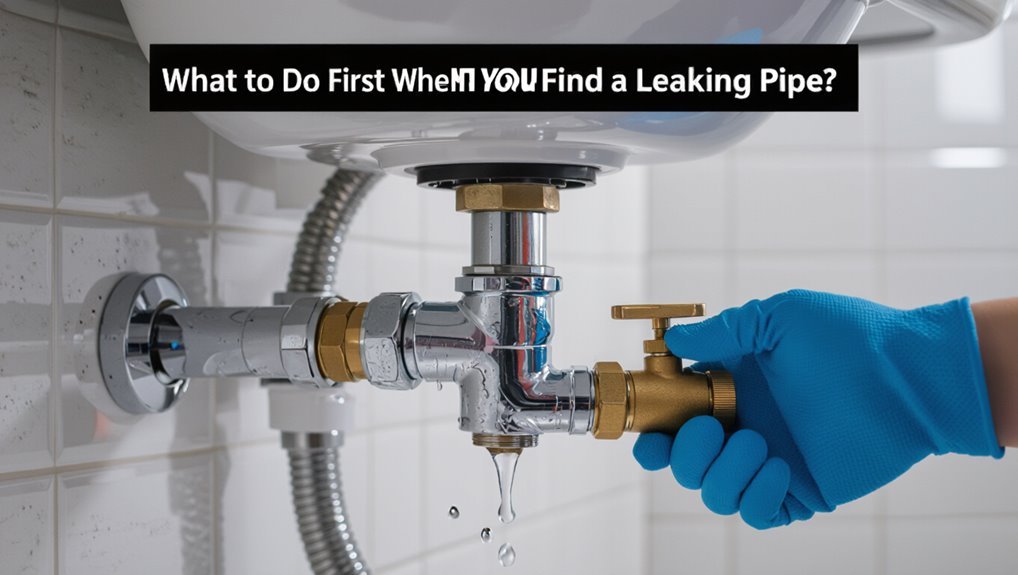
On discovering a leaking pipe, the first action is a quick, safety-focused assessment: identify visible hazards, check for electrical outlets or gas smells, and determine if occupants must evacuate.
Next, shut off water at the nearest localized valve or the main shut-off if the leak cannot be isolated.
If water is pooling near electrical panels or appliances, switch off electricity and, if a gas leak is suspected, turn off the gas and call professionals.
How to assess the leak safely (tools, hazards, when to evacuate)
Whenever a pipe is discovered leaking, the immediate priority is to assess the situation calmly and safely before attempting any repair.
The observer should note leak size, water type, electrical risks, nearby valuables, and structural signs. Use flashlight, gloves, bucket, and wrench.
If flooding, gas smell, or structural collapse risk exists, evacuate and call professionals.
This guides how to temporarily stop a leaking pipe.
How to shut off water quickly (main shut-off vs. localized valves)
After evaluating the leak for hazards and gathering basic tools, the next immediate action is to stop the water supply to prevent further damage.
Locate and turn off the nearest localized shut-off valve (under sinks, behind toilets, at appliances).
If the source is unclear or multiple fixtures are affected, close the main shut-off at the meter or where the supply enters the building.
Verify flow has stopped.
When to turn off electricity and gas near water leaks
What should be shut off first depends on the leak’s location and immediate hazards.
If water contacts electrical panels, outlets, or appliances, cut power at the main breaker immediately to prevent shock or fire.
If a gas smell is present or a line is compromised, evacuate, avoid switches or flames, and shut the gas at the meter only if safe; otherwise call the gas company.
Fast temporary fixes you can do now (materials and step-by-step)
A range of rapid, temporary fixes can stop or slow most pipe leaks until a permanent repair is made. Common options include wrapping pipe repair tape or self-fusing silicone tape, kneading and applying plumber’s epoxy putty to small holes, or clamping a rubber patch in place with a hose clamp.
For larger or joint leaks, emergency repair kits, pipe repair clamps, or a rubber sleeve secured with zip ties offer quick, effective containment.
Using pipe repair tape or self-fusing silicone tape
Wrap a leaking pipe quickly with repair tape or self-fusing silicone tape to halt drips and buy time until a permanent fix is made.
Clean and dry the area, stretch and overlap tape tightly around the leak, extending several inches each side.
Smooth to seal gaps. Monitor for continued seepage and replace with a durable repair or professional service as soon as possible.
Applying plumber’s epoxy putty for small holes and cracks
Mix plumber’s epoxy putty and press it into small holes or hairline cracks to form a hard, water-resistant seal that serves as a short-term repair.
Clean and dry the area, roughen metal or PVC for adhesion, knead putty per instructions, mold firmly over the defect, and smooth edges.
Allow full cure before restoring pressure; inspect later for permanent repair planning.
Clamping with a rubber patch and hose clamp
Clamp a rubber patch over the leak and tighten a hose clamp to create an immediate, waterproof temporary seal.
Materials needed:
- rubber (from inner tube or gasket)
- adjustable hose clamp
- scissors
- sandpaper.
Clean and dry pipe, cut patch larger than hole, roughen surface, hold patch in place, tighten clamp firmly but not excessively.
Monitor for drips and replace with permanent repair soon.
Using a pipe repair clamp or emergency repair kit
If a rubber patch and hose clamp do not fully stop the leak or a quicker solution is preferred, a pipe repair clamp or an emergency repair kit provides a sturdier temporary fix.
Select a clamp sized to the pipe, clean and dry the area, position the gasket over the hole, tighten the band evenly.
For kits, follow resin/tape cure instructions.
Monitor and replace with a permanent repair.
Quick use of a rubber sleeve and zip ties for joint leaks
For quick joint leaks, a temporary rubber sleeve secured with zip ties creates an immediate, watertight barrier until a permanent repair can be made.
Gather a rubber patch or automotive hose section, clean and dry the area, slide the sleeve over the leak, and cinch multiple heavy-duty zip ties evenly.
Check for seepage and replace ties if they loosen; seek permanent repair promptly.
Temporary solder-less repair for copper with compression fittings
Install a compression fitting to stop a copper pipe leak without soldering when time and tools are limited.
Shut water, cut pipe square, deburr, slide on compression nut and ring, then insert fitting body.
Tighten nut hand‑tight plus a quarter turn with wrench until snug.
Restore water slowly, check for drips.
This is a temporary, reliable stopgap until permanent repair or soldering.
Tools and materials to have on hand for emergency pipe repairs
For quick emergency pipe repairs, one should be familiar with a compact set of reliable supplies and tools.
Recommended items include a small repair kit and waterproof tapes, basic hand tools, and safety/containment gear:
- Repair kits and tapes (silicone, epoxy, rubber patch).
- Pliers, pipe cutter, adjustable wrench, utility knife.
- Gloves, goggles, towels and buckets.
These essentials enable immediate temporary fixes while awaiting professional service.
Recommended repair kits and tapes
When a pipe begins to leak, having a compact set of repair kits and tapes on hand can turn a slow disaster into a manageable temporary fix.
Recommended items include silicone self-fusing tape, rubber repair tape, epoxy putty sticks, and pipe repair clamps sized for common diameters.
Choose waterproof, heat-resistant products and keep instructions, gloves, and a small roll of plumber’s tape nearby for sealing threads.
Basic tools: pliers, pipe cutter, adjustable wrench, utility knife
A small, well-chosen kit of basic tools makes emergency pipe repairs faster and more reliable.
Essential items include slip-joint or tongue-and-groove pliers for gripping, a compact pipe cutter for clean cuts, an adjustable wrench for fittings, and a sharp utility knife for tape, sealant, and insulation.
Store these tools together for quick access during leaks.
Safety gear: gloves, goggles, towels and buckets
Personal protective equipment prevents injury and limits water damage during emergency pipe repairs.
The writer recommends chemical-resistant gloves, impact-resistant goggles, and sturdy footwear to avoid cuts, burns, and debris.
Absorbent towels, microfiber cloths, and disposable rags control leaks; plastic buckets and pans collect runoff.
Having a tarp and a respirator for mold or solvent exposure adds protection during prolonged or messy fixes.
Step-by-step: How to apply each temporary fix safely
The section outlines concise, safety-focused procedures for each emergency repair, beginning with pipe preparation such as drying, cleaning, and surface prep.
It then presents step-by-step instructions for tape repair, epoxy putty, clamp-and-rubber patch methods, and quick compression fitting installation.
Emphasis is placed on precautions, tool use, and verifying the repair before restoring water pressure.
Preparing the pipe (drying, cleaning, and surface prep)
Before applying any temporary fix, guarantee the pipe area is thoroughly dried and cleaned so sealants and tapes adhere properly; this requires shutting off water, removing standing moisture with cloths or a wet/dry vacuum, and wiping the metal or plastic surface free of dirt, oil, and corrosion.
Next, sand or abrade lightly to remove loose scale, degrease with appropriate solvent, and let the surface air dry before proceeding.
Detailed steps for tape repair
Start by gathering the correct materials and ensuring safety: a self-fusing silicone or plumber’s tape rated for the pipe material, utility gloves, eye protection, and clean rags.
Dry and clean the leak area.
Stretch and wrap tape tightly beginning upstream, overlapping by half each pass. Extend wraps beyond the leak.
Press layers to bond firmly.
Inspect for sealing and test slowly under pressure.
Detailed steps for epoxy putty application
After securing the tape repair or deciding that a stronger temporary seal is needed, attention turns to epoxy putty for a more rigid, moldable patch.
Wear gloves, clean and dry the pipe surface, and roughen with sandpaper. Knead equal portions until uniform, press firmly over the leak, smooth edges, and allow specified cure time before restoring water pressure.
Check for remaining seepage.
Detailed steps for clamp and rubber-patch repair
Select the appropriate clamp or rubber-patch kit based on pipe diameter and leak type, then gather gloves, a wrench, a cloth, and sandpaper.
Shut water supply, dry and sand area. Position rubber sleeve over hole, center clamp, tighten evenly until leak slows.
For small pinholes, wrap rubber with hose clamp; for larger splits use full pipe clamp.
Test under low pressure, recheck tightness.
How to install a quick compression fitting
Prepare by turning off the water supply and relieving pressure before fitting a quick compression coupling; this guarantees a safer, drier work area and prevents further leakage while the repair is made.
Clean and dry the pipe, measure and cut squarely, deburr edges. Slide nut and ferrule on, align coupling over damage, tighten nuts evenly to compress ferrules.
Test slowly for leaks, retighten if needed.
When a temporary fix is sufficient and when you need a professional
A clear set of criteria helps determine whether a temporary repair is acceptable: expected duration, system pressure, and the leak’s location relative to structural or finished areas.
Immediate professional help is warranted for large leaks, leaks under pressure, visible structural damage, contamination risk, or if the homeowner cannot stop the flow.
Comparing costs and timelines shows that DIY temporaries are cheaper and faster short-term but professionals provide reliable, permanent fixes that often save money and disruption over time.
Criteria for acceptable temporary repairs (duration, pressure, location)
When a temporary repair is considered, it must meet clear limits for duration, operating pressure, and location so that safety and property protection are not compromised.
Temporary measures should be short-term (hours to a few days), tolerate expected water pressure, and be applied where access and containment are adequate.
If uncertainty about pressure, corrosion, structural risk, or prolonged need exists, a professional is required.
Signs you must call a plumber immediately
How severe is the leak and what immediate risks does it pose?
If water gushes, cannot be isolated, or contacts wiring, call a plumber immediately.
Persistent pressure loss, visible pipe rupture, sewage backup, or structural wetting beyond a small area also require professional response.
Temporary fixes suit slow, contained drips with accessible shutoffs; anything escalating, unsafe, or uncontrollable demands expert intervention.
Cost and time comparison: DIY temporary vs. professional permanent repair
Why choose a temporary patch over a professional repair? A temporary DIY patch is faster and cheaper for urgent, minor leaks; a professional repair costs more but guarantees permanence and code compliance for major damage.
| Option | Typical outcome |
|---|---|
| DIY temporary | Low cost, minutes–hours |
| Professional permanent | Higher cost, hours–days |
| When to choose | Severity determines choice |
Common mistakes to avoid during temporary repairs
Common temporary repairs often fail because surfaces are not cleaned and dried, preventing tape or putty from adhering.
Ignoring system pressure or failing to relieve it can dislodge or overwhelm a patch.
Applying materials that are incompatible with the pipe type accelerates failure and can cause damage.
Improper surface prep and reasons tape/putty fails
Three frequent mistakes undermine temporary repairs: inadequate surface preparation, relying on tape or putty beyond their limits, and ignoring compatibility with pipe materials.
Surfaces left dirty, wet, or corroded prevent adhesion, causing immediate failure. Stretching tape over threaded joints or using non-curing putty on high-temperature lines leads to gaps.
Proper cleaning, drying, and selecting products rated for the pipe material and conditions are essential.
Overlooking water pressure and not relieving system pressure
Having cleaned and selected the right materials, a repair can still fail if system pressure is ignored.
Failure to shut off and bleed the line leaves residual pressure forcing leaks past patches or displacing temporary seals.
Tests should follow pressure relief and slow re-pressurization to confirm integrity.
Neglecting this risks wasted effort, water damage, and sudden seal failure when service resumes.
Using incompatible materials for different pipe types
Mixing patch materials without matching them to the pipe substrate often causes temporary repairs to fail.
Repairers may apply epoxy to flexible hoses, rubber tapes to corroded steel, or mismatched adhesives to PVC.
Chemical incompatibility, poor adhesion, and differing thermal expansion create leaks or damage.
Use materials specified for copper, PVC, PEX, or rubber; consult labels to guarantee compatibility and avoid worsening the problem.
Preventing future leaks and making temporary fixes last longer
Preventative steps include lowering water pressure and isolating the affected section to reduce stress on temporary repairs.
Repaired areas should be monitored regularly and their condition documented to track deterioration and spot repeat leaks early.
When damage is beyond temporary measures, sections of pipe should be replaced promptly using appropriate materials and techniques to guarantee a permanent fix.
Reducing water pressure and isolating affected sections
Lowering water pressure and isolating the affected section are immediate steps that reduce stress on a damaged pipe and extend the effectiveness of temporary repairs.
The homeowner should partially close the main valve or install a pressure-reducing valve, shut individual fixture valves, and use isolation valves to limit flow.
Reduced pressure minimizes seepage and prevents repair failures until permanent fixes are completed.
Monitoring repaired areas and documenting condition
After pressure has been reduced and flow isolated, the next step is to monitor repaired areas and document their condition to guarantee temporary fixes hold and to spot signs of recurring leaks.
Inspect regularly, note time, location, and appearance of dampness, corrosion, or shifting tape/patches.
Photograph changes, record measurements, and log interventions.
Promptly address deterioration and notify professionals if issues progress.
When and how to replace sections of pipe permanently
Decide to replace a pipe section when repeated temporary repairs fail, corrosion advances, or material and age indicate imminent failure; doing so restores system integrity and reduces long-term costs.
Assess extent, shut water, drain, and cut out damaged portion. Match replacement material and diameter, deburr ends, use proper fittings or soldering, pressure-test before restoring service, and dispose of old pipe per local codes.
Quick troubleshooting after applying a temporary fix
After a temporary repair is in place, the person should test the patch by restoring water slowly and observing for steady drips or slow seepage.
If the fix fails suddenly, they must shut off the supply immediately, contain the flow, and prepare for a faster, more robust repair or professional help.
Once flow is controlled, the area should be dried, disinfected, and inspected for water damage to prevent mold and structural issues.
How to test for leaks and check for slow seepage
How can one quickly confirm that a temporary patch is holding?
Observe the patched area for visible drips and wetness for several minutes.
Run water through the system at normal pressure, then inspect for new moisture, stains, or bubbling tape.
Dry surrounding surfaces, mark wetness, and recheck after one hour and again overnight to detect slow seepage.
What to do if the temporary fix fails suddenly
If the temporary patch gives way, stop using the affected system immediately and isolate the water source by shutting off the nearest valve or the main supply to prevent further damage.
Assess leak severity, contain escaping water with buckets or towels, and relieve pressure by opening nearby taps.
Replace makeshift seals with stronger clamps or pipe repair kits if safe; otherwise, call a plumber and document the issue.
How to dry and sanitize areas affected by leaks
Begin by removing standing water and drying surfaces promptly to prevent mold and structural damage. Use towels, wet vacuums, and fans; open windows if weather permits.
Discard saturated porous materials like drywall and insulation. Clean hard surfaces with detergent, then sanitize using a bleach solution (1 cup bleach per gallon water) or EPA-registered disinfectant.
Monitor for lingering moisture and odor; consider a dehumidifier.
Useful scenarios and tailored fixes
Different leak locations call for different immediate actions and longer-term repairs.
Common scenarios to evaluate include:
- Leaking joint under a sink
- Burst pipe in an exposed basement
- Leaks inside wall cavities, ceilings, or outdoor hose/irrigation lines
The following section outlines quick containment steps and appropriate permanent fixes for each situation.
Leaking joint under a sink
Diagnose the leak location beneath the sink before applying a fix, since joints fail for specific, identifiable reasons—loose slip nuts, deteriorated washers, cracked compression fittings, or worn-out solder on copper connections.
Tighten slip nuts, replace rubber washers, or swap compression rings.
For soldered copper, dry and apply flux and a quick solder repair only if trained; otherwise isolate water, use a basin wrench and call a plumber.
Burst pipe in an exposed basement
A burst pipe in an exposed basement presents a more urgent and visible problem than a leaking sink joint, demanding immediate isolation of the water supply and rapid assessment of damage and accessibility.
The homeowner should shut mains, drain lines, and contain flooding with buckets and towels.
For temporary repair, apply pipe clamps, rubber-and-hose-clamp wraps, or epoxy putty; call a plumber for permanent repair.
Leaks inside wall cavities or ceilings
Many household leaks originate within wall cavities or ceilings, where slow drips or pinhole failures can go unnoticed until staining, musty odors, or sagging drywall appear.
Locate source by inspecting attic, ceilings, and trim for wet spots.
Temporarily stop flow by shutting nearest shutoff, applying pipe clamp or rubber patch accessible via small access hole, and drying area; call a plumber for permanent repair.
Outdoor hose bib or irrigation line leaks
Stop outdoor water loss quickly by evaluating whether the leak stems from a hose bib spigot, exposed piping, or buried irrigation lines, since each location demands a different immediate tactic.
For spigots, shut supply and use pipe repair tape or a hose bib repair kit.
For exposed pipes, apply rubber patch and hose clamps.
For buried lines, excavate, clamp, or use a compression repair coupling.
Helpful resources and product recommendations
The article then points readers to trusted emergency repair kits and reliable brands for quick fixes and temporary patches.
It also highlights links to concise instructional videos and official manufacturer guides for step‑by‑step procedures.
Readers are encouraged to consult these resources before attempting repairs and to keep recommended kits on hand.
Trusted emergency repair kits and brand suggestions
A compact emergency kit can turn a household plumbing crisis into a manageable repair by combining temporary sealing materials, basic tools, and clear instructions.
Recommended kits and brands focus on reliability, ease, and availability.
- SharkBite patch and coupler kit — push-fit and rubber repair options.
- RectorSeal epoxy putty — quick moldable seals for metal/plastic.
- Gorilla Waterproof Patch & Seal tape — flexible, pressure-resistant wrap.
Links to instructional videos and manufacturer guides
When a swift, temporary fix is needed, concise instructional videos and manufacturer guides provide step‑by‑step demonstrations and product‑specific tips that reduce guesswork and risk.
Recommended resources focus on safe procedures, correct part sizing, and compatible sealants. Quick links save time and prevent damage.
- Official manufacturer repair videos
- Short tutorial clips from certified plumbers
- PDF installation and safety guides
Conclusion
Like a hand pressed to a small rain, the temporary fix holds back the pulse of the leak while time and skill marshal a quieter solution. The homeowner watches the steady drip become a pause, measuring patience against need. Tools rest like sentries, materials ready for the next summons. When urgency ebbs, professional hands can replace the bandage with certainty; until then the provisional repair keeps the house whole, a brief concord between haste and care.