
How to Clean a Carbon Filter Quickly and Safely: Step-by-Step Guide
How to Clean a Carbon Filter Quickly and Safely: Step-by-Step Guide
To clean a carbon filter effectively, power down the unit, wear protective gear, and follow these steps:
- Remove the Filter: Detach the carbon filter from the appliance.
- Dust Removal: Use a brush to remove loose dust.
- Rinse or Vacuum: Rinse the filter under cool to lukewarm water for 2–5 minutes, or vacuum it for a dry-cleaning option.
- Air-Dry: Allow the filter to air-dry completely in a well-ventilated area before reinstalling.
For built-in filters, clean the access panels and use a soft brush or vacuum for maintenance. Follow these steps for optimal performance and to address any airflow issues or persistent odors.
What a Carbon Filter Is and When It Needs Cleaning
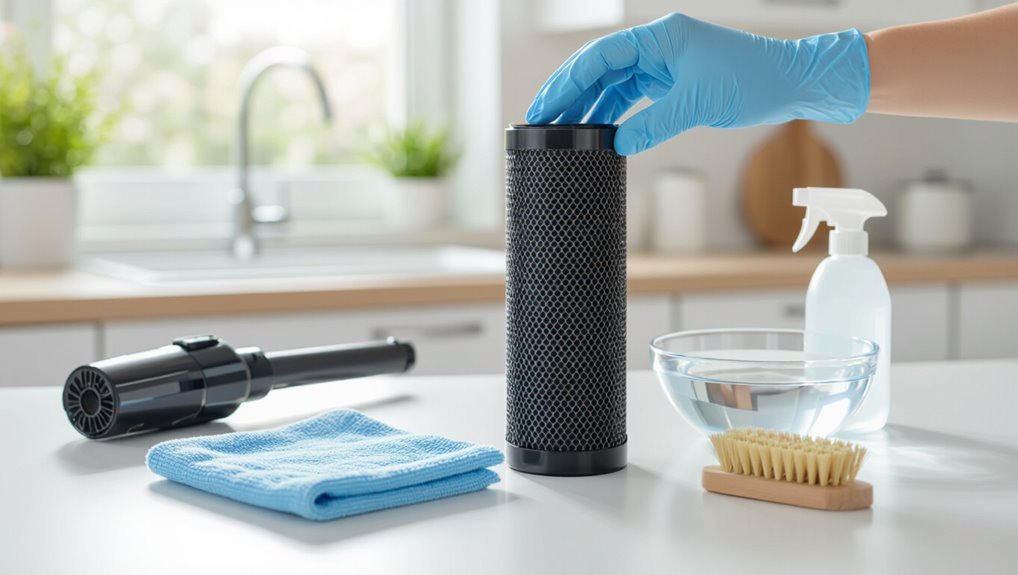
A carbon filter uses activated carbon to adsorb odors, gases, and many organic compounds from air or water as it passes through a porous surface.
Indicators that a filter needs cleaning or replacement include persistent odors, reduced airflow or flow rate, and visible contamination or saturation of the media.
Cleaning can restore performance in some cases, but heavily saturated or damaged filters require replacement because adsorption capacity is limited.
How activated carbon filters work
Many household and industrial air and water purifiers rely on activated carbon filters, which use highly porous charcoal to adsorb contaminants onto its large internal surface area.
Activated carbon captures gases, odors, chlorine, and organic molecules via adsorption rather than absorption. Flow rate, contact time, and particle size determine efficiency.
Routine maintenance instructions like how to clean carbon filter focus on preventing channeling and preserving adsorption capacity.
Signs a carbon filter needs cleaning or replacement
After explaining how activated carbon captures contaminants, attention shifts to recognizing when a filter no longer performs effectively.
Indicators include diminished airflow, persistent odors, visible discoloration or saturation, and increased system runtime.
Measurable signs are higher pressure drop or reduced adsorption of target compounds.
Regular monitoring, manufacturer interval checks, and unusual taste or smell in treated air or water prompt cleaning or replacement.
Limitations: when cleaning isn’t enough
Although cleaning can restore some surface activity, carbon filters have intrinsic limits that make replacement necessary when capacity is exhausted or the structure is compromised.
Adsorption sites saturate, pore blockage accumulates, and physical breakdown or microbial growth reduce effectiveness.
Once breakthrough odors, persistent contaminants, or increased pressure drop occur, cleaning is insufficient; documented lifespan and manufacturer guidance should dictate prompt replacement to guarantee safety and performance.
Safety Precautions Before You Start
Before beginning, the user should equip protective gloves, a mask, and eye protection to prevent skin contact and inhalation of dust or residues.
Power should be disconnected and appliances allowed to cool, with any electrical components handled only after confirming they are de-energized.
Collected dust and filter debris must be contained, sealed, and disposed of according to local waste guidelines to avoid contamination.
Personal protective equipment to use
Personal protective equipment (PPE) minimizes exposure to dust, activated carbon fines, and cleaning chemicals when servicing a carbon filter.
Recommended items include N95 or P100 respirator, chemical-resistant gloves (nitrile or neoprene), safety goggles, and a long-sleeved coverall.
Closed-toe, slip-resistant shoes protect feet.
Confirm proper fit, inspect for damage, and discard contaminated disposable PPE per local regulations before resuming normal operation.
Electrical and appliance safety steps
Several basic electrical and appliance checks reduce the risk of shock, fire, and equipment damage when servicing a carbon filter.
Make certain the unit is unplugged and power switched off at the outlet.
Inspect cords, plugs, and switches for damage or overheating.
Verify that any hardwired units are isolated by a qualified electrician.
Confirm surrounding area is dry and well-lit before proceeding.
Safe handling and disposal of collected contaminants
Wear appropriate PPE and assume collected material may contain irritants, pathogens, or adsorbed chemicals; gloves, eye protection, and a respirator appropriate for particulates and volatile organics should be used when removing and handling the filter or its contents.
Collected debris must be sealed in labeled, puncture‑resistant bags, stored away from living areas, and disposed of per local hazardous waste regulations or via licensed waste handlers.
Quick Tools and Materials Checklist
A concise list of essential household tools and materials prepares the reader to clean a carbon filter safely and effectively.
Optional professional-grade supplies are noted for tougher jobs or prolonged maintenance.
The following checklist separates must-haves from nice-to-haves to streamline preparation.
Essential tools and household materials
Basic tools and common household materials simplify cleaning a carbon filter and help prevent damage during the process.
Essential items include gentle dish soap, soft brush, clean towels, and a basin for soaking.
Protective gloves and a mask reduce exposure to dust.
Recommended list:
- Dish soap
- Soft brush
- Towels/basin
- Gloves and mask
Optional professional-grade supplies
Consider professional-grade supplies when frequent cleaning, heavy soiling, or commercial equipment demands greater durability and efficiency.
Recommended items include industrial wet/dry vacuums, high-pressure air blowers, reinforced filter cages, non-corrosive cleaning racks, ultrasonic cleaners for small cartridges, and commercial-grade degreasers.
Personal protective equipment—respirators, chemical-resistant gloves, and eye protection—should accompany these tools to guarantee safety and compliance with workplace standards.
Fast Step-by-Step Cleaning Method for Detachable Carbon Filters
First, the device should be powered down and the detachable carbon filter removed to begin cleaning.
Next, loose debris is brushed away and a choice is made between dry-cleaning or a gentle rinse, with rinsing guidelines covering water temperature, pressure, and duration.
Finally, the filter must be fully dried according to recommended methods before being reinstalled.
Step 1 Power down and remove the filter
Shut off the appliance and unplug it before attempting removal to eliminate electrical and mechanical risks.
The technician locates the filter access panel, consults the manual for model-specific latches, and releases fasteners carefully.
Handle the carbon filter by its frame to avoid contact with media.
Place the removed filter on a clean surface or into a sealed bag for transport, minimizing disturbance and cross-contamination.
Step 2 Remove loose debris and dust
Using a soft brush or low‑suction vacuum, the technician gently removes loose dust and debris from the exposed face and frame of the detachable carbon filter, taking care not to compress or damage the carbon media.
Attention focuses on edges, seals, and corners where buildup concentrates. Dislodged particles are captured in a filter bag or tray, and the area is inspected for embedded residue before proceeding.
Step 3 Rinse vs. dry-clean: choosing the right method
Decide whether rinsing or dry-cleaning is appropriate by evaluating the filter’s type, condition, and manufacturer’s guidance: rigid, sealed carbon blocks and filters labeled “non-washable” require dry-cleaning, while loose-granule or washable-rated cartridges can tolerate gentle rinsing.
Heavily soiled or oil-contaminated media typically benefits from dry-cleaning methods to avoid driving contaminants deeper into the carbon.
Choose dry-cleaning for fragility; rinse when safe.
Step 4 Gentle rinsing procedure (water temperature, pressure, and duration)
Begin rinsing with cool to lukewarm water (not exceeding 30°C/86°F), applying a gentle, steady flow that mimics a light shower rather than a focused jet; this temperature prevents thermal shock to binders and avoids dissolving adsorbed compounds, while low pressure prevents dislodging the carbon bed or forcing debris deeper into the media.
Rinse for 2–5 minutes, rotating and tapping gently to flush trapped particles.
Step 5 Drying the filter properly before reinstallation
Allow the filter to dry completely before reinstalling to prevent mold growth, channeling inefficiency, and premature media degradation.
After gentle rinsing, place the filter in a well-ventilated, dust-free area away from direct sunlight and heat sources.
Allow several hours to fully air-dry; confirm no residual moisture by gently shaking or tapping.
Only reassemble once thoroughly dry to protect performance and longevity.
Step 6 Reinstall and test performance
Reinstall the dry carbon filter into its housing, ensuring it seats evenly and that any gaskets or clips align correctly to prevent air bypass.
Secure fasteners, close access panels, and restore power.
Run the unit at low speed for several minutes, then at normal operating conditions.
Monitor airflow, odor reduction, and unusual noises.
Document performance and schedule the next inspection.
Cleaning Method for Non-Detachable or Integrated Carbon Filters
For non-detachable or integrated carbon filters, the article outlines safe procedures for accessing the filter compartment, emphasizing power disconnection and manufacturer guidelines.
It then reviews cleaning tools—vacuuming loose dust, gentle brushing, and controlled bursts of compressed air—while noting limits of each method.
Finally, it identifies signs that cleaning is insufficient and recommends contacting a technician for inspection or replacement.
Accessing the filter compartment safely
Begin by powering down the appliance and unplugging it from the mains to eliminate electrical risk before any access attempt.
Then consult the manufacturer’s manual for panel locations and retention clips.
Use appropriate tools—nonconductive pry tools or screwdrivers—to remove covers slowly, supporting panels to prevent snapping.
Note fastener types and cable connections; avoid forcing parts.
Keep small components organized for reassembly.
Using vacuum, brushes, and compressed air
With covers removed and parts organized as described previously, cleaning can proceed using a combination of vacuuming, brushing, and bursts of compressed air to dislodge surface dust from an integrated carbon filter.
Use a soft brush attachment and low-suction vacuum to avoid media damage. Apply short, angled air bursts from a safe distance to clear remaining debris.
Inspect visually; repeat gently if needed.
When to call a technician
When should a technician be contacted for a non‑detachable or integrated carbon filter?
A technician is needed when the filter is inaccessible, sealed, or integrated into critical equipment, when odors persist after basic cleaning, when electrical connections or sensors are involved, or when damage, leaks, or unusual noises are present.
Professional service prevents voiding warranties and guarantees safe, effective replacement or deep cleaning.
Deep Cleaning and Rejuvenation Techniques (When Quick Cleaning Isn’t Enough)
When routine rinsing fails, options such as controlled chemical soaking can restore adsorption capacity but require strict handling, correct concentrations, and thorough rinsing to avoid residual contaminants.
Thermal rejuvenation can desorb trapped compounds but is generally discouraged for home use due to high temperatures, risk of damaging filter structure, and potential release of hazardous fumes.
The choice between attempting DIY regeneration and outright replacement hinges on cost, safety, expected lifespan recovery, and the criticality of maintaining full filter performance.
Chemical soaking options and safety considerations
Consider chemical soaking as a targeted method for restoring heavily contaminated carbon filters that resist simple rinsing; it uses solvents or oxidizers to dissolve oils, grease, and biofilms lodged in the media.
Common options include surfactant solutions, diluted hydrogen peroxide, and ammoniated cleaners.
Emphasize compatibility with the carbon matrix, thorough rinsing, proper ventilation, chemical-resistant gloves, eye protection, and correct disposal of contaminated washings.
Thermal rejuvenation and why it’s rarely recommended at home
Thermal rejuvenation uses high heat to desorb adsorbed contaminants and restore activated carbon’s adsorption capacity, typically by heating the media to several hundred degrees Celsius to drive off oils, VOCs, and accumulated organics.
It requires controlled furnaces, inert atmospheres, and precise temperature profiles; household environments lack safety controls, risk fire, toxic off‑gassing, structural damage, and often yield inconsistent restoration, so professional service is advised.
Pros and cons of DIY regeneration vs. replacement
Although DIY regeneration can seem cost‑effective and empowering, homeowners should weigh tangible benefits against practical limitations and risks.
DIY can save money, reduce waste, and restore modest adsorption with proper techniques.
However, incomplete reactivation, safety hazards (heat, chemicals), time investment, and uncertain lifespan often make replacement the safer choice for reliable performance and warranty compliance.
How Often to Clean or Replace Carbon Filters
Recommended maintenance intervals vary by appliance—air purifiers often need attention every 3–12 months, range hood filters typically every 3–6 months, and water filter cartridges on manufacturer schedules or municipal guidelines.
Environmental factors such as heavy pollutant loads, high humidity, or continuous use can shorten filter life considerably.
Immediate replacement is warranted if filters show persistent odors, visible saturation or damage, reduced airflow, or fail performance tests.
Typical schedules by appliance type (air purifiers, range hoods, water filters)
Different appliances demand distinct carbon filter care schedules based on usage intensity, exposure to contaminants, and filter capacity. Air purifiers: replace every 6–12 months. Range hoods: replace or clean every 3–6 months. Water filters: replace cartridges every 3–12 months per flow and quality.
| Appliance | Typical Interval | Notes |
|---|---|---|
| Air purifier | 6–12 months | Moderate use |
| Range hood | 3–6 months | Heavy cooking |
| Water filter | 3–12 months | Depends on water quality |
Factors that shorten filter life
Having outlined typical replacement intervals for various appliances, attention turns to the conditions that shorten carbon filter life and force more frequent cleaning or replacement.
High pollutant loads, continuous heavy use, smoky or oily environments, high humidity, inadequate prefiltration, and exposure to chemical vapors accelerate adsorption saturation and physical clogging.
Poor maintenance and improper installation further reduce service life, necessitating earlier intervention.
Signs indicating immediate replacement
A sudden sour or chemical odor that persists despite running the system is a clear sign the carbon filter must be replaced immediately.
Other indicators include visible saturation or discoloration, unusually rapid pressure drop, persistent taste issues in water systems, and recurring allergy or respiratory symptoms.
If multiple signs coincide or performance does not improve after cleaning, replacement is warranted without delay.
Common Mistakes and Risks to Avoid
Common mistakes when cleaning carbon filters include incorrect rinsing, using pressure washing, or aggressive scrubbing that can damage the media.
Reinstalling a damp filter risks mold growth and reduced effectiveness.
Ignoring manufacturer instructions may void warranties or shorten filter life.
Incorrect rinsing, pressure washing, or scrubbing
Mistakenly rinsing, pressure washing, or vigorously scrubbing a carbon filter can severely damage its fragile structure and reduce adsorption effectiveness.
High-pressure water or abrasive action dislodges activated carbon, tears support media, and compacts pores, lowering surface area and causing channeling.
Cleaning should avoid forceful methods; gentle surface clearing and manufacturer-approved techniques preserve integrity and prolong functional life without introducing structural harm.
Reinstalling damp filters
Having just emphasized that aggressive cleaning can harm carbon media, attention must turn to another frequent error: reinstalling filters before they are fully dry.
Moisture trapped in the cartridge promotes microbial growth, reduces adsorption efficiency, and can corrode housings. Always allow complete drying per recommended time; use gentle airflow if needed.
Reinstalling damp filters risks odors, shortened lifespan, and compromised air or water quality.
Ignoring manufacturer instructions
Follow the manufacturer’s instructions precisely to preserve filter performance and safety. Ignoring guidelines risks voiding warranties, damaging media, reducing adsorption capacity, and creating safety hazards from improper cleaning agents or temperatures.
The manufacturer’s procedures specify compatible solvents, drying times, and replacement intervals; deviating can cause insufficient contaminant removal, structural harm, or exposure to trapped pollutants.
Adherence guarantees longevity and safe operation.
Maintenance Tips to Extend Filter Life
Effective maintenance extends carbon filter life through simple, proactive measures.
Using pre-filters and routine vacuuming removes larger particles before they reach the carbon, while controlling humidity and air contaminants reduces overall load.
Spare filters should be kept in clean, sealed packaging and stored in a cool, dry place to preserve adsorption performance.
Pre-filtration and regular vacuuming
Install a pre-filter and vacuum it regularly to remove dust and hair before particles reach the carbon layer. A washable or replaceable pre-filter captures large debris, reducing clogging and preserving adsorption efficiency.
Schedule vacuuming every 1–4 weeks depending on environment. Inspect for tears and replace when worn. Proper pre-filtration decreases maintenance frequency and prolongs overall filter lifespan.
Environmental controls that reduce load
When indoor conditions are managed to limit pollutant sources and humidity, the carbon filter encounters a lighter contaminant load and retains adsorption capacity longer.
Implement source control (no smoking, low-VOC products), maintain consistent ventilation rates, control humidity below 50%, and use localized exhaust for cooking and chemicals.
These measures reduce adsorption demand, slow saturation, and extend effective filter life without altering cleaning procedures.
Storing spare filters correctly
Several simple storage practices can greatly preserve a spare carbon filter’s adsorption capacity and structural integrity.
Store filters sealed in original packaging or airtight containers with desiccant packs to prevent moisture.
Keep them in a cool, dry, dark location away from chemicals, heat, and UV exposure.
Rotate stock using first-in, first-out and label dates to guarantee timely use before adsorption degrades.
Cost and Environmental Considerations
A cost comparison between cleaning and replacing a carbon filter helps determine when continued maintenance is economical versus when purchase of a new unit is justified.
The analysis should include labor, cleaning materials, and expected remaining service life after restoration.
Proper disposal or recycling pathways for spent carbon filters must also be considered to minimize environmental impact.
When cleaning is cost-effective vs. replacement
How should one decide whether to clean a carbon filter or replace it outright? Factors include remaining adsorption capacity, age, visible degradation, and cleaning effectiveness.
If performance is largely intact and contaminants are removable, cleaning can extend life and save money.
However, heavily saturated, damaged, or expired filters warrant replacement to guarantee air or water quality and avoid false economy.
Proper disposal and recycling options for spent carbon filters
When replacement is chosen over cleaning, proper disposal and recycling of spent carbon filters becomes the next priority to minimize cost and environmental impact.
Municipal waste rules, hazardous-waste programs, and manufacturer take-back services determine options. Used filters with contaminants may require special handling.
Consumers should consult local recycling centers, follow labeling and containment guidelines, and prioritize certified recyclers to reduce landfill burden and potential contamination.
Troubleshooting After Cleaning
After cleaning, a brief diagnostic checklist can help identify why odors persist or airflow remains weak, including checks for channeling, incomplete contact, or damaged media.
If cleaning restored some function but problems continue, further inspection of seals, housing fit, and pre- or post-filters is recommended.
When recurring issues or higher contaminant loads are present, upgrading to a higher-grade carbon filter should be considered.
Continued odors or poor performance: diagnostic checklist
Why are odors persisting or performance still lacking despite cleaning?
Check filter saturation—activated carbon may be exhausted and no longer adsorbs contaminants.
Inspect for channeling, damaged media, or bypass seals allowing untreated air through.
Verify correct filter type and airflow direction, and confirm housing and ducts are clean.
Consider replacement if adsorption capacity or physical integrity is compromised.
When cleaning improved performance but issues remain
If cleaning reduced odors or restored some airflow but problems persist, further troubleshooting should focus on residual system issues rather than the cleaning process alone.
Inspect ductwork for leaks, blockages, or collapsed sections; verify fan speed, motor function, and seals; check for source-contamination (mildew, VOCs) upstream; confirm filter seating and housing integrity; monitor airflow and concentrations after any repairs to validate effectiveness.
When to upgrade to a higher-grade filter
When is a higher-grade carbon filter warranted? The user notices persistent odors, reduced airflow despite cleaning, or contaminants beyond typical VOCs.
If environmental demands increase—larger space, stronger pollutants, or health sensitivities—a higher adsorption capacity or specialized media (e.g., impregnated carbon for formaldehyde) is appropriate.
Upgrading prevents repeated maintenance and guarantees target contaminant removal meets required efficiency.
Quick Reference: Fast Cleaning Checklist for Busy Users
A concise checklist gives busy users a rapid, step-by-step routine to refresh a carbon filter without unnecessary tools or downtime.
It outlines essential checks, safe handling, brief cleaning, and quick reassembly to restore performance.
- Inspect filter and seals.
- Remove dust and debris.
- Rinse gently if washable; air dry fully.
- Reinstall and test airflow.
Conclusion
By following these rapid, safe cleaning steps, the carbon filter springs back to life like a caffeinated superhero—ready to battle odors, dust, and malodorous invasions. Routine care becomes a tiny ritual that prevents catastrophe-level air quality failures and saves money. Even stubborn, integrated units can be coaxed into renewed performance with patience and the right tools. Regular maintenance stretches filter lifespan, reduces waste, and keeps indoor air blissfully manageable.
