How to Connect a Barbecue to a Gas Line Safely: Step-by-Step Guide and Checklist
To connect a barbecue to a gas line safely, follow these essential steps: verify the gas type and pressure, install a visible shutoff valve, use approved piping or flexible connectors, apply gas-rated sealant, torque fittings properly, and perform leak tests with soap bubbles. Ensure burners are purged and ignited according to the manufacturer’s instructions, and conduct routine inspections afterward. For a comprehensive step-by-step guide and checklist, continue reading.
Quick Answer Can You Safely Connect a Barbecue to a Gas Line?
A quick answer: connecting a barbecue to a gas line carries leak and fire risks, may be subject to local codes and permits, and should be handed to a professional if the installer lacks plumbing or gas experience.
Essential safety items include a certified shutoff valve, appropriate-rated flexible connector, leak-detection solution, and a post-installation pressure test.
If any component is missing or local regulations require it, hire a licensed gas technician.
Short summary of risks, legality, and when to hire a pro
Consider potential hazards, legal requirements, and the limits of DIY skill before attempting a hard‑piped barbecue hookup.
A homeowner researching how to connect barbecue to gas line should weigh leak, fire, and carbon‑monoxide risks, local code and permit needs, and warranty voiding.
Hire a licensed gas professional for complex lines, fused or concealed piping, unclear codes, or any uncertainty to guarantee compliance and safety.
Quick checklist of safety must-haves
One clear checklist item list outlines the essential safety must-haves for a barbecue hard‑pipe hookup: confirmed fuel type and pressure compatibility, a clearly labeled shutoff valve within sight of the grill, properly sized and rated piping or flexible connector, gas‑rated thread sealant or tape, leak testing with soapy water or a manometer, adequate ventilation and clearance from combustibles, electrical bonding if required, visible compliance with local codes and permits, and immediate professional inspection if any uncertainty exists.
- Verify materials and connections.
- Perform certified leak and pressure tests.
- Confirm permits, labels, and emergency shutoff access.
Basic Understanding What Connecting a Barbecue to a Gas Line Means
Connecting a barbecue to a gas line involves selecting the correct fuel—typically natural gas or propane—and using an appropriate connection method such as a flexible hose, hard-piped line, or quick-disconnect.
It also requires compliance with local codes, permits, and the barbecue manufacturer’s installation requirements. Understanding these elements guarantees a safe, code-compliant installation.
Types of gas used (natural gas vs. propane)
Fuel choice—natural gas or propane—determines how a barbecue is plumbed, the fittings required, and performance characteristics such as heat output and burn efficiency. Natural gas is lower pressure, cheaper if piped; propane stores higher energy per volume and requires cylinders. Select appropriate regulator and orifice sizes for each fuel and verify local codes.
| Fuel | Pressure | Typical source |
|---|---|---|
| Natural gas | Low | Municipal line |
| Propane | High | Cylinder/propane tank |
Common connection methods (flex hose, hard-piped, quick-disconnect)
Several common methods are used to join a barbecue to a gas supply: flexible hose assemblies, permanent hard-piped connections, and quick-disconnect fittings.
Flexible hoses provide mobility and easier installation but require periodic inspection and proper-rated materials.
Hard-piped setups offer durability and reduced leak risk when correctly installed.
Quick-disconnects allow convenient removal while ensuring secure seals; compatibility and maintenance remain essential.
Relevant codes, permits, and manufacturer requirements
After outlining common connection methods, attention turns to the regulatory and manufacturer framework that governs safe installation.
Local building codes, gas utility rules, and the International Fuel Gas Code commonly dictate routing, materials, and pressure limits. Permits and inspections are often mandatory.
Manufacturer instructions and warranty conditions require specified fittings, clearances, and installation by qualified personnel; noncompliance risks voiding warranties and creating hazards.
Tools, Materials, and Safety Equipment Needed
The next section lists the mandatory tools and fittings required for a safe barbecue-to-gas connection, including wrenches, pipe tape, and appropriate adapters.
It also outlines recommended testing and safety devices such as a shutoff valve, regulator, and leak detector.
Finally, it covers necessary personal protective equipment and simple site preparation steps to minimize hazards.
Mandatory tools and fittings
Before starting work, gather the specific tools, fittings, and safety gear required for a permanent or quick-connect gas-barbecue installation to guarantee each component matches the local code and the appliance’s inlet specifications.
Essential items include:
- Proper-sized flare or compression fittings and approved flexible gas hose.
- Adjustable wrenches, pipe thread sealant rated for gas, pipe cutters.
- Safety gloves, eye protection, and a fire extinguisher.
Recommended testing and safety devices (shutoff valve, regulator, leak detector)
With tools and fittings at hand, attention turns to devices that verify and control gas flow for safety and compliance.
Recommended items include a full‑flow shutoff valve, a compatible regulator sized to the grill and supply pressure, and a reliable leak detector solution or electronic sensor.
Regular testing and correct installation guarantee safe operation and code conformance.
- Shutoff valve
- Regulator
- Leak detector
Personal protective equipment and site preparation
Gather appropriate personal protective equipment and prepare the site to minimize hazards during connection work: flame-resistant gloves, safety glasses or a face shield, hearing protection if using power tools, and a respirator rated for organic vapors when working in confined or poorly ventilated areas.
Confirm ventilation, clear flammable materials, and secure the barbecue.
- Inspect PPE
- Ventilate area
- Remove ignition sources
Step-by-Step Guide to Connecting a Barbecue to a Gas Line
The procedure begins with planning and verification of gas type, line capacity, location, and any required permits.
After shutting off and depressurizing the supply, the installer should confirm or fit a shutoff valve and regulator before selecting the correct connector—flexible hose or fixed pipe.
Connections are completed using proper fittings and approved thread sealant to guarantee a secure, leak-free joint.
Step 1 Plan and verify: gas type, line capacity, location, and permits
Before any physical work begins, a clear plan must confirm the gas type, line capacity, installation location, and required permits.
The installer verifies propane versus natural gas, measures pipe sizing and BTU demand, assesses safe distances and ventilation, and checks local codes.
Documentation and permit applications are secured, and any utility notifications or inspections are scheduled before proceeding with physical connections.
Step 2 Shut off supply and depressurize the line
Shut off the gas supply at the appliance shutoff or main valve and confirm the line is depressurized by opening a downstream test port or appliance valve until flow stops; this prevents accidental gas release during fitting and reduces fire or asphyxiation risk.
Verify zero pressure with a gauge or soapy-water check at a known outlet.
Wear protective gear and ventilate the area before proceeding.
Step 3 Install or verify shutoff valve and regulator
Inspect and install a dedicated gas shutoff valve and the correct regulator to guarantee safe, code-compliant operation. The valve provides a local means to isolate the barbecue, while the regulator controls outlet pressure to match the appliance’s requirements.
Confirm valve location is accessible, right-handed or approved type, and that regulator output equals appliance spec.
Leak-test all connections after installation and note service dates.
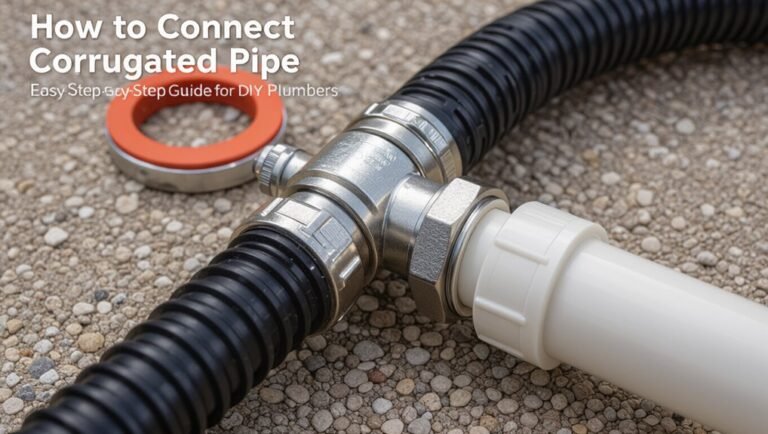
Step 4 Choose and install appropriate connector (flex hose vs. fixed pipe)
Select a connector type based on permanence, local code, and appliance requirements: flexible gas hose offers ease of movement and quick disconnection for portable or built-in grills with access panels, while rigid pipe provides a more permanent, tamper-resistant connection for fixed installations.
Consider material compatibility, pressure rating, length, routing to avoid kinks, and protective sleeves; verify local approval and replace aged connectors.
Step 5 Make connections using proper fittings and thread sealant
Begin by ensuring all gas supply valves are closed and the work area is well-ventilated before making any connections.
Select fittings rated for the gas type and match thread types (NPT, BSP).
Apply approved thread sealant or gas-rated PTFE tape correctly—wrap male threads clockwise.
Hand-tighten, then finish with a wrench per torque recommendations.
Keep connections clean and supported to prevent stress.
Step 6 Pressure test the connection and perform a soap/leak test
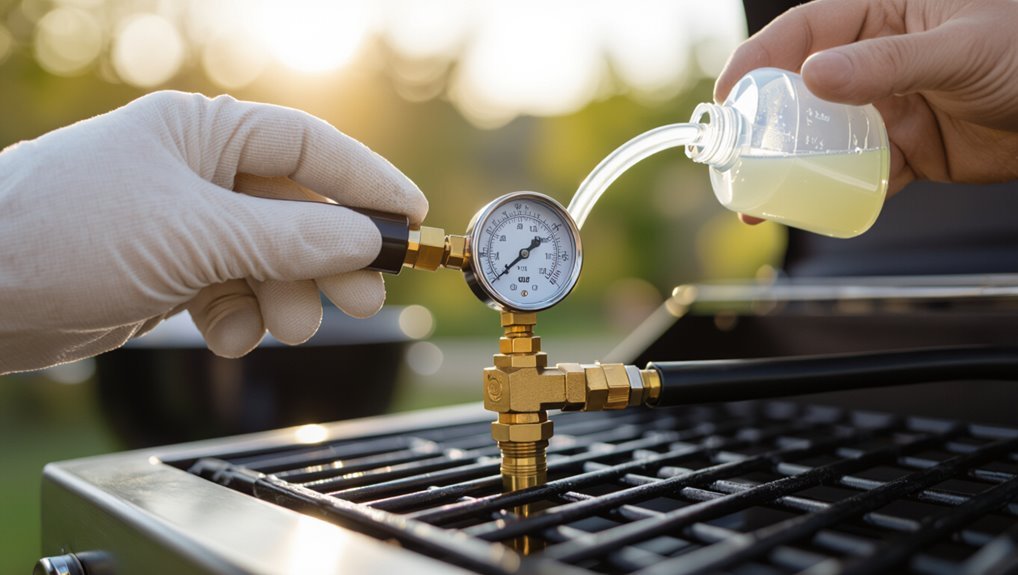
With fittings tightened and supported, the installer must verify the integrity of the gas line by performing a pressure test followed by a soap/leak test.
Isolate the barbecue, pressurize the line to the specified test pressure, monitor for drops, then apply a soap solution to all joints and valves.
Bubbles indicate leaks; correct and retest until no leakage is detected.
Step 7 Purge air and relight burners safely per manufacturer instructions
Purge the line of trapped air and relight the burners exactly as the appliance manufacturer prescribes to prevent sputtering, flare-ups, or ignition failures.
Follow specified valve sequences and wait times, use the built‑in ignitor or manual lighting method outlined by the maker, keep the lid open, monitor each burner for steady ignition, and stop immediately if unusual noises, odor, or inconsistent flames occur.
Step 8 Final checks: burner operation, flame color, and odour test
After successfully clearing air and verifying burners ignite as the manufacturer prescribes, the final checks focus on consistent burner operation, correct flame color, and an odour test to confirm there are no leaks.
Inspect each burner for steady blue flames with minimal yellow tips. Test all controls for smooth adjustment. Apply a soap solution to fittings to reveal bubbles, and recheck for gas smell before use.
Common Problems and Mistakes to Avoid
Common errors during barbecue gas line installation include choosing the wrong gas type or regulator, using improper fittings, tapes, or sealants, and ignoring line capacity and pressure drop.
Poor hose support or kinking and failing to perform leak tests or obtain required permits further increase safety risks.
Addressing these issues up front prevents malfunctions, gas leaks, and code violations.
Incorrect gas type or regulator selection
Which gas is being used and whether the regulator matches it are critical decisions when connecting a barbecue to a gas line.
Using the wrong gas type or incompatible regulator can cause poor performance, leaks, or unsafe pressure.
Verify appliance rating (propane vs natural gas), confirm regulator outlet pressure, and replace regulators when changing fuel types.
Consult manufacturer specifications and a qualified technician for correct selection.
Using improper fittings, tapes, or sealants
Choose fittings, tapes, and sealants specifically designed for gas service and compatible with the appliance and piping materials; improper or generic products can deteriorate, fail to seal, or react chemically with pipe metals, creating leaks and unsafe conditions.
Use approved thread sealant or gas-rated PTFE tape, matched brass or stainless fittings, and avoid pipe dope not certified for gas.
Inspect joints and pressure-test after assembly.
Overlooking line capacity and pressure drop
Failing to account for line capacity and pressure drop can leave a barbecue starved for gas even when fittings and valves are correctly installed.
Insufficient pipe diameter, excessive run length, or multiple appliances on one feed reduce pressure at burners, causing weak flames and uneven cooking.
Calculate demand, consult capacity charts, and size the line and regulator appropriately to maintain required inlet pressure under peak load.
Poorly supported or kinked hoses
After sizing lines and regulators correctly, attention must turn to the flexible hose that carries gas from the fixed line to the barbecue.
Poor support or kinking restricts flow, stresses fittings, and accelerates wear. Hoses should follow gentle curves, be anchored at intervals, kept clear of heat and sharp edges, and replaced if creased or cracked.
Proper routing preserves seal integrity and safety.
Skipping leak tests or permits
Many homeowners underestimate the importance of leak tests and permits, treating them as optional steps rather than safety requirements.
Skipping these checks risks undetected gas leaks, explosions, fines, and insurance denial.
Proper leak-testing with soap solution or detector, plus securing required permits and inspections, guarantees compliance and safety.
Always document results and follow local codes before using the barbecue.
When to Call a Professional
If the installation involves complex piping, connections for multiple appliances, or alterations to existing gas lines, the task typically exceeds DIY scope and warrants professional intervention.
Situations that require a licensed plumber or certified gas fitter include suspected leaks, permits or inspections, and any work inside walls or under the home.
Homeowners should verify credentials, request references and proof of insurance, and obtain written estimates before hiring.
Signs the job is beyond DIY (complex piping, multi-appliance lines)
When a job involves complex piping layouts, multiple appliances, or changes to the main supply, it exceeds typical DIY scope and should prompt consideration of a licensed professional.
Additional signs include unclear pipe routing, required permits, crossover of gas zones, hard-to-access connections, and integrated appliance manifolds.
If testing, balancing, or system reconfiguration is needed, hire a qualified technician to guarantee safety and code compliance.
Situations requiring licensed plumber or gas fitter
Recognize situations that require a licensed plumber or certified gas fitter to confirm safety and code compliance.
Call a professional for natural gas main taps, pressurized line modifications, concealed or hard-to-access routing, municipal permit requirements, multi-appliance manifolds, unusual fittings or corrosion, gas odor with uncertain source, failed leak tests, or when local codes mandate certification.
Professionals guarantee proper materials, testing, and documentation.
How to vet and hire a qualified pro
Start by verifying credentials and experience to guarantee the job is handled safely and to code.
Check licenses, insurance, and local certifications; confirm recent gas-work experience.
Request written estimates, timelines, and warranty terms.
Verify references and online reviews.
Use this vetting checklist:
- License and insurance verification
- Written estimate and warranty
- References and recent gas-work reviews
Best Practices and Maintenance Checklist
A concise maintenance checklist helps guarantee safe, reliable barbecue connections to a gas line.
It should cover a routine inspection schedule with specific items to check, clear seasonal start-up and winterization steps, and procedures for safe storage and handling of spare parts and hoses.
Following these practices reduces leak and damage risks while preserving equipment longevity.
Routine inspection schedule and what to inspect
Several simple, regular checks keep a barbecue gas connection safe and reliable:
Weekly visual inspection for leaks, hose cracks, burner obstructions, and corrosion.
Monthly function test of valves and regulator under low flame.
Annual professional pressure test and hose replacement if aged or damaged.
- Visual and soap-bubble leak checks
- Operational valve/regulator tests
- Certified annual pressure inspection
Seasonal start-up and winterization steps
Prepare the barbecue for seasonal use or storage by following a concise checklist that protects the gas system, prevents damage, and guarantees safe operation.
Inspect valves, regulators, and fittings for leaks. Clean burners and grease traps; remove debris. Disconnect or secure fuel supply per local codes.
- Test for leaks after reconnecting.
- Drain or purge lines if idle.
- Cover and ventilate storage area.
Safe storage and handling of spare parts and hoses
After winterization and leak checks, attention should turn to spare parts and hoses to maintain system integrity and safety.
Store replacements in a cool, dry, ventilated area away from direct sunlight and chemicals.
Inspect hoses before and after each season for cracks, stiffness, or corrosion.
Label parts, keep manufacturer manuals, rotate stock to prevent aging, and dispose of compromised components per local regulations.
Comparison: Flexible Hose vs. Hard-Piped Connection
A concise comparison highlights the trade-offs between a flexible hose and a hard-piped connection for a barbecue gas supply.
The flexible hose offers ease of installation and lower upfront cost but can require more frequent replacement and has greater risk of damage.
In contrast, a hard-piped connection is more durable and secure but typically costs more to install.
Considerations of cost, longevity, and safety should guide the choice based on usage patterns and local code requirements.
Pros and cons of flexible hose
Weighing flexible hose against hard-piped connections highlights trade-offs in installation ease, durability, and safety: flexible hoses offer quick, low-cost hookup and vibration tolerance but can be more susceptible to wear, accidental damage, and improper installation, while hard-piped systems require more labor and fittings yet provide greater long-term robustness and reduced leak risk.
| Advantage | Disadvantage | Typical Use |
|---|---|---|
| Quick install | Damage risk | Temporary setups |
| Vibration tolerance | Aging/UV | Portable grills |
| Cost-effective | Requires inspection | Rental properties |
Pros and cons of hard-piped connection
Although requiring more labor and fittings, a hard-piped connection delivers superior long-term durability and a lower likelihood of leaks compared with flexible hose runs. It resists UV, abrasion, and accidental kinking but needs precise installation and rigid anchoring. Periodic inspection for corrosion and joint integrity remains essential.
| Feature | Advantage | Consideration |
|---|---|---|
| Durability | High | Installation skill |
| Leak risk | Low | Fixed position |
| Maintenance | Inspect joints | Corrosion check |
Cost, longevity, and safety trade-offs
Having outlined the durability and leak-resistance benefits of hard-piped connections, the comparison now shifts to costs, lifespan, and safety trade-offs between flexible hose and hard-piped setups.
Flexible hoses are cheaper and easier to install but wear, crack, and require periodic replacement.
Hard-piped systems cost more up front, last longer, minimize vibration risks, and reduce leak potential when installed by a qualified professional.
Troubleshooting Guide
The troubleshooting guide outlines common issues such as no flame or a weak flame, explaining likely causes like blocked burners, low pressure, or regulator faults and offering corrective steps.
It also describes yellow or sooty flames as indicators of incomplete combustion and recommends cleaning burners, checking air shutter settings, or seeking professional service.
For intermittent gas flow or any detectable gas odor, it instructs immediate shutoff, ventilation, evacuation of the area, and contacting the gas supplier or emergency services.
No flame or weak flame probable causes and fixes
Diagnose common causes methodically when a barbecue produces no flame or only a weak flame: check the gas supply and valve positions, inspect regulator and hose condition for kinks or damage, confirm the gas tank has adequate fuel and is turned on, clean clogged burner ports and orifices, and verify the igniter and control knobs operate correctly.
Addressing these areas in sequence typically identifies and resolves most low- or no-flame issues. Inspect and replace faulty regulators, tighten connections, purge trapped air, and clear debris from pilot assemblies; if problems persist, consult a qualified technician.
Yellow or sooty flame what it indicates and corrective actions
After checking supply, valves, regulators, and burners for weak or absent flames, attention should turn to flame color and residue: a yellow or sooty flame signals incomplete combustion and can indicate air-fuel mixture problems, dirty burners, or incorrect gas pressure.
Clean burners and ports, adjust air shutter or mixture screw per manufacturer, verify regulator pressure, and consult a qualified technician if discoloration persists.
Intermittent gas flow or smell of gas emergency steps
If intermittent gas flow occurs or a gas odor is detected, immediate, calm steps are essential to prevent fire or explosion:
evacuate people and pets,
avoid sparks or open flames,
do not operate electrical switches,
shut off the main gas supply if safe,
ventilate the area,
call the gas utility or emergency services from a safe location,
and arrange qualified technician inspection before returning.
Safety Regulations, Codes, and Liability Considerations
Before beginning any gas-line connection, attention must be paid to typical local codes and where to verify them with municipal building departments or utility providers.
The permit and inspection process should be outlined, including who must perform the work and when an inspection is required.
Consideration of liability, homeowner insurance, and manufacturer warranty implications is essential to avoid voiding coverage or accepting undue risk.
Typical local code requirements and where to check
Where can homeowners find the rules that govern connecting a barbecue to a gas line?
Local building departments, municipal codes, and state plumbing or fuel gas codes set requirements—clearances, pipe materials, shutoff valve placement, and appliance connections.
Utility companies and local fire departments provide guidance.
Official websites, code offices, or printed code books are primary sources; verify the edition and any local amendments before proceeding.
Permit and inspection process overview
1 key step in connecting a barbecue to a gas line is steering through the permit and inspection process, which guarantees installations comply with safety regulations, local codes, and liability requirements.
Applicants submit plans, pay fees, and schedule inspections; work often must be performed or certified by licensed contractors.
Inspectors verify proper materials, connections, ventilation, and shutoffs before final approval and gas activation.
Liability, insurance, and manufacturer warranty implications
When homeowners or contractors connect a barbecue to a gas line, liability, insurance coverage, and manufacturer warranties intersect to determine who bears responsibility for damage, injury, or code violations.
Understanding these interactions is essential to avoiding financial and legal exposure. Insurance may deny claims if installation violates code or lacks permits.
Manufacturer warranties often void with improper hookup. Clear contracts, permits, inspections, and licensed installers reduce risk.
FAQ
A concise FAQ addresses common practical concerns such as whether a propane grill can be converted to natural gas and the safe distance for a gas line from the meter to the grill.
It also clarifies the appropriateness of quick-disconnects for permanent installations, recommended replacement intervals for hoses and fittings, and the immediate steps to take if gas is smelled.
Readers are directed to follow manufacturer guidance and local codes and to consult a licensed professional for installation or emergency situations.
Can I convert a propane grill to natural gas safely?
Can a propane grill be converted to natural gas safely?
Conversion is possible but requires manufacturer-approved conversion kits, correct orifice sizes, pressure regulators, and adherence to local codes.
A licensed gas technician should perform or inspect the work. Unsupported modifications void warranties and increase the risk of leaks, poor combustion, or fire.
Always obtain permits and follow safety testing procedures before use.
How far can the gas line run from the meter to the grill?
How far the gas line can run from the meter to the grill depends primarily on pipe sizing, gas pressure, and local code limits; longer runs require larger-diameter piping or higher allowable pressure to maintain adequate flow and safe operation.
Installers calculate length-equivalent based on fittings, appliance BTU demand, and pressure drop.
Local codes or utility companies set maximum distances and required permits; consult them and a licensed professional.
Is a quick-disconnect safe for permanent installations?
Given the variables that determine acceptable pipe run and pressure, homeowners and installers often consider quick-disconnect fittings for convenience; whether they are appropriate for a permanent barbecue connection depends on code, fitting type, and installation intent.
Many jurisdictions restrict quick-disconnects to flexible or temporary connections. Approved permanent installations typically require fixed piping, shutoff valves, and listed fittings installed per manufacturer instructions and local code.
How often should gas hoses and fittings be replaced?
When should gas hoses and fittings be replaced?
Hoses and fittings should be inspected before each season and replaced every 5–10 years or sooner if showing cracks, hardening, blistering, corrosion, leaks, or loose connections.
Replace immediately after any physical damage, exposure to excessive heat, or failed leak tests.
Follow manufacturer recommendations and local codes for specific intervals and approved replacement parts.
What emergency steps should I take if I smell gas?
If someone detects the distinct smell of gas—rotten eggs or a strong chemical odor—they should immediately stop any flame or spark sources, avoid using electrical switches or phones indoors, and evacuate the area while warning others.
From a safe distance, call the gas company or emergency services. Do not re-enter until professionals declare it safe, and seek medical attention for exposure symptoms.
Final Safety Checklist Before First Use
Before lighting, a concise pre-ignition checklist confirms tight connections, that valves and regulators are set correctly, and that no gas odors are present.
The checklist also verifies proper ventilation and that ignition controls function as designed.
An emergency shutdown procedure and a clearly posted contact list for gas service and emergency responders are required before first use.
Pre-ignition checklist
A final safety checklist verifies that the installation is secure and all systems are ready for ignition: The technician checks connections, inspects burners, and verifies ventilation.
Follow these steps before lighting:
- Check all fittings and hose for leaks with soapy water; tighten or replace as needed.
- Confirm propane/gas supply valve is closed, regulator properly seated.
- Verify burner control knobs are off and igniter functions.
Emergency shutdown and contact list
With fittings confirmed secure and burners inspected, attention turns to emergency shutdown procedures and assembling a contact list for rapid response.
The user should note shutoff valve locations, assign roles, and store contacts visibly.
Recommended entries:
- Local gas utility and emergency number
- Fire department and medical services
- Licensed gas technician or installer for inspection and repairs
Conclusion
Careful connectors craft calm confidence: conscientious cooks choose compatible components, check fittings, and confirm combustion conditions. Methodical measures mitigate mishaps—measuring, monitoring, and making mindful maintenance musts. Steady, secure seals stop suspicious smells, spark safety, and sustain satisfaction. Regularly review regulations, retain records, and rely on reputable repair resources. Ultimately, precise preparation prevents problems, promoting peaceful, pleasurable grilling experiences that prioritize protection, proficiency, and predictable performance.