How to Fix a Shower That Won’t Turn Off: Quick DIY Repairs and When to Call a Plumber
If your shower won’t turn off, start by fully operating both handles or the single handle. If that doesn’t work, shut off the supply valves or the main water supply to prevent further leaks. Contain any water with towels or buckets while you assess the situation. Check for handle play, temperature changes, visible corrosion, or a faulty diverter. You can often resolve the issue by replacing cartridges, washers, or O-rings, or by cleaning mineral buildup with basic tools. For urgent situations, temporary packing or tape may provide a quick fix. If you encounter seized valves, significant corrosion, or water damage, it’s best to call a plumber. Follow the step-by-step fixes and part guidance for more detailed assistance.
What to do immediately when a shower won’t turn off
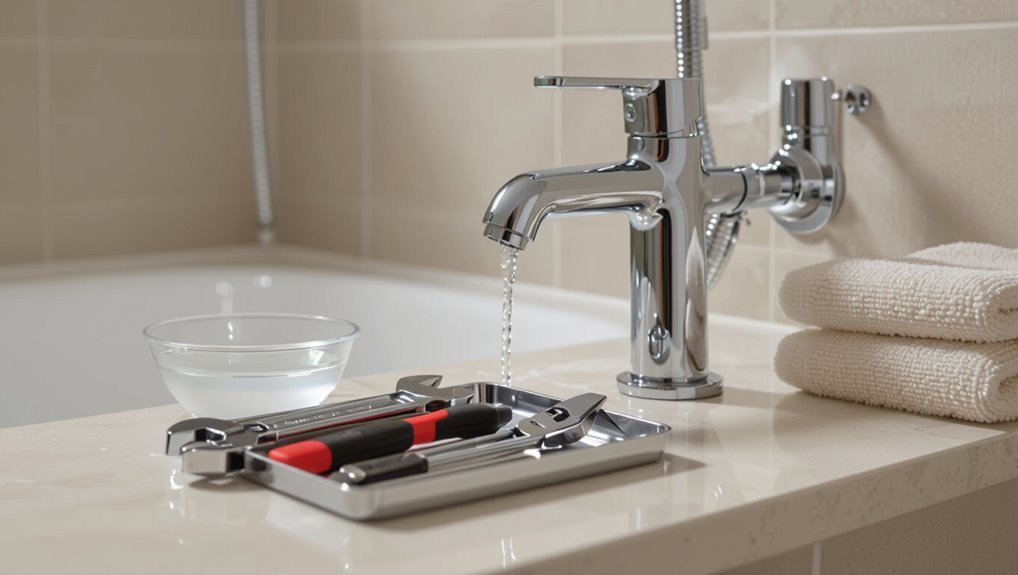
When the shower will not stop, the first action is to turn the handle(s) correctly—single‑handle faucets are pushed or rotated to the off position, while double‑handle setups require both hot and cold to be closed.
If the leak continues, shut off the water to the bathroom at the supply valves or, if those are inaccessible or ineffective, locate and close the main house shutoff.
While addressing valves, take quick safety steps such as placing towels or a bucket to catch water, turning off nearby electrical circuits if flooding is likely, and moving valuables away from the area.
Turn off the shower handle(s) correctly (single-handle vs. double-handle)
Begin by shutting off the visible controls: single-handle valves require a firm turn or push back to the off position, while double-handle setups need each hot and cold handle closed fully.
If water continues, wiggle handles gently to seat valves.
Document handle positions and note resistance or looseness.
This step is the immediate response when learning how to fix a shower that won’t turn off.
Shut off water to the bathroom at the supply valves
If shutting the handles fully and gently seating the valves does not stop the flow, the next immediate step is to close the bathroom’s supply shutoff valves to isolate water to the fixture.
Locate the hot and cold shutoffs near the shower access panel or behind the vanity.
Turn each clockwise until snug; use pliers gently if stiff.
Confirm flow has stopped before proceeding.
Locate and use the main house water shutoff if needed
At the first sign that local shutoff valves fail to stop the water, locate and close the main house shutoff to prevent further flooding and damage.
Identify its typical locations (utility room, basement, near water meter, or exterior wall).
Turn the valve clockwise or use the meter key.
After closing, verify water flow has stopped at the shower and notify household members.
Temporary safety steps to prevent flooding and water damage
When a shower refuses to shut off, act quickly to minimize flooding and damage: close the nearest shutoff valve or main water supply, divert water with buckets or pans, mop and blot soaked areas, move valuables and electronics away, and lay down towels or waterproof barriers at thresholds.
Turn off electricity to affected bathrooms if water is near outlets, then call a plumber if flow continues.
Quick diagnostic checklist to identify the cause
A quick checklist helps narrow whether the issue lies in the handle, the cartridge/valve, the diverter, or the supply system.
Look for a stuck cartridge or bent valve stem (hard-to-turn handle, continuous flow), a failed tub/shower diverter (water keeps flowing from showerhead when tub is selected), or signs of external pipe or pressure problems (fluctuating flow, other fixtures affected).
Following these indicators directs the next inspection steps and needed repairs.
Determine whether the problem is the handle, cartridge/valve, or diverter
Begin by isolating the symptom: water that won’t shut off can stem from three main components—the handle mechanism, the cartridge/valve, or the diverter—and a focused checklist helps pinpoint which one is failing.
Test handle movement and wobble; observe whether hot/cold selection changes flow; lift or rotate the diverter to see if flow diverts.
Note audible leaks, residual trickle, and whether shutting main stops flow.
Signs of a stuck cartridge or valve stem
Several clear indicators point to a stuck cartridge or valve stem: persistent flow despite handle movement, uneven or unresponsive temperature control, and a steady drip or trickle that continues after the handle is returned to the off position.
Additional signs include grinding or stiff handle rotation, water only stopping when supply shutoffs are closed, and visible mineral buildup or corrosion around the valve access.
Signs of a failed diverter (tub/shower combo)
When a shower in a tub/shower combo won’t direct water properly, a failed diverter is a common culprit and presents distinct, diagnosable signs.
Water continues flowing from the tub spout when the shower is engaged, partial flow switches inconsistently, visible mineral buildup or corrosion around the diverter, difficulty moving a pop-up or knob, and sudden changes in diversion after minor adjustments all indicate diverter failure.
Evidence of external pipe or water pressure issues
A brief checklist helps distinguish external pipe or water-pressure problems from internal valve or diverter faults.
Check other fixtures: simultaneous high flow or constant running suggests main supply issues.
Listen for banging or hissing in walls indicating pressure surges or loose pipes.
Inspect visible piping for leaks, corrosion, or freezing.
Note municipal notices or sudden pressure changes before attempting valve repairs.
Tools and materials you’ll need for DIY repairs
Before starting work on a shower that won’t shut off, a clear list of tools and spare parts helps prevent delays and repeated trips to the hardware store.
The following items cover the basics for most DIY fixes and a few temporary solutions to stop leaks while sourcing replacements:
- Adjustable wrench, flathead and Phillips screwdrivers, pliers, set of Allen keys
- Common replacement parts: cartridges, washers, O‑rings, diverter assemblies
- Thread seal (PTFE) tape for sealing connections
- Clean cloths and rags for cleanup and grip
- Bucket to catch water during disassembly
Basic tools (wrench, screwdriver, pliers, Allen keys)
Grab basic hand tools—an adjustable wrench, a set of screwdrivers (flat and Phillips), slip-joint pliers, and a few Allen keys—as the foundation for most shower repairs.
These tools enable cartridge or handle removal, nut loosening, and fastener access. Choose quality, correctly sized pieces to prevent damage.
Keep a rag and small container nearby to catch screws and protect finishes.
Replacement parts to consider (cartridges, washers, O-rings, diverters)
Identify the small replacement parts that commonly fail in shower valve assemblies—cartridges, rubber washers, O-rings, and diverter cartridges—since swapping these often resolves leaks or a shower that won’t shut off.
Carry matched cartridges or rebuild kits for the specific valve model, assorted-size washers and O-rings, and diverter spares.
Inspect parts for wear, order exact replacements, and keep small containers to organize components during disassembly.
Materials for temporary fixes (thread seal tape, cloth, bucket)
Prepare a small set of temporary materials that let a homeowner stop leaks and manage water while a proper repair is arranged:
- thread seal (Teflon) tape for sealing threaded connections,
- assorted cloths or rags to absorb drips,
- a bucket to catch and measure runoff,
- and waterproof tape or a hose clamp for short-term hose or pipe patches.
Include rubber gloves, basic pliers, and a flashlight.
Step-by-step repairs for common shower types
The following section outlines concise, step-by-step repair procedures for the most common shower assemblies.
It covers replacing cartridges in single-handle faucets, rebuilding two-handle (compression) valves, servicing diverter valves on tub/shower combos, and troubleshooting pressure-balance and thermostatic valve issues.
Each subsection provides the typical tools, disassembly sequence, common failure points, and safe reassembly tips.
Repairing a single-handle cartridge faucet
The procedure begins with safely removing the handle and trim plate to expose the cartridge assembly.
Next, the cartridge is inspected and removed for cleaning, lubrication, or replacement as needed.
Finally, the faucet is reassembled and tested to confirm the shutoff function and check for leaks.
How to remove the handle and trim plate safely
Begin by shutting off the water supply to the shower and testing the handle to confirm no flow; this prevents surprises when removing the trim.
Then pry off any decorative cap, remove the handle screw, and slide the handle free.
Unscrew the trim plate screws, loosen caulk if present, and gently pull the trim plate away from the wall.
Keep screws and parts organized for reassembly.
Inspecting and removing the cartridge
With the trim plate removed and handle set aside, inspect the cartridge for obvious damage, mineral buildup, or misalignment before attempting removal.
Shut water supply, open valve to relieve pressure, then note cartridge type and orientation.
Remove retaining clip or nut with appropriate tool, and pull cartridge straight out using pliers or a cartridge puller.
Photograph assembly for reinstallation reference.
Cleaning, lubricating, or replacing the cartridge
After the cartridge is removed and photographed for reference, the next step is to assess whether it can be cleaned and lubricated or requires replacement.
Inspect for mineral buildup, worn seals, or scoring. Soak in vinegar or CLR for mineral deposits, rinse thoroughly, and apply silicone-based faucet grease to O-rings and sliding surfaces.
Replace the cartridge if damage or persistent leaks remain.
Reassembly and testing
Reassemble the single-handle cartridge faucet by reversing the disassembly steps and testing for proper operation at each stage.
Seat the cartridge, secure retaining clips, replace trim and handle, and tighten screws to recommended torque.
Restore water supply slowly, check for leaks around the cartridge and plumbing joints.
Operate handle through full range to confirm smooth, drip-free performance, and adjust or retighten as needed.
Fixing a two-handle (compression) shower valve
For a two-handle compression shower valve, the usual causes of a continuous flow are worn washers and corroded seats that no longer seal.
Repair typically involves removing the handles and stems to inspect and replace washers and seats, or replacing valve stems and rebuilding the packing if leaks persist.
After reassembly, the valve should be tested at normal water pressure and inspected for drips to confirm the repair.
Identifying and replacing worn washers and seats
Begin by shutting off the water supply to the shower and opening both handles to relieve pressure; this prevents flow while the valve is inspected.
Remove handles and packing nut, extract stem, and inspect rubber washer and seat for grooves or deformation.
Replace hardened or flattened washers and seat (or seat insert) with exact matches.
Reassemble and test for leaks and proper shutoff.
Replacing valve stems and rebuilding packing
After confirming that worn washers and seats have been addressed, attention turns to the valve stems and packing, which commonly cause leaks when corroded or worn.
Remove handles and escutcheons, extract stems, inspect for corrosion or scoring.
Replace stems with matching parts.
Remove old packing, install new packing or O-rings and a new packing nut.
Verify smooth stem operation before proceeding.
Reassembly and leak testing
Reassemble the compression valve by reinstalling stems, packing nuts, escutcheons, and handles in the reverse order of disassembly, tightening fittings to manufacturer torque recommendations and using new seat washers where specified.
Turn water on slowly, check for leaks at stems, packing nuts, and supply connections.
Operate handles to verify proper shutoff and temperature.
Retighten minor drips; replace components if leaks persist.
Repairing a diverter valve on tub/shower combos
The section outlines how to access the diverter, whether through the spout or by removing trim, and what tools are typically required.
It then covers procedures for cleaning mineral buildup or replacing a worn cartridge or spout-style diverter.
Finally, it explains correct reinstallation and simple functional tests to confirm the valve now redirects water properly.
Accessing the diverter (spout vs. trim access)
Identify how the diverter is accessed before attempting repairs, because tub/shower combos use one of two common designs: a diverter built into the tub spout or a valve located behind the trim plate.
For spout-style, remove the spout (set-screw or threaded) to expose the mechanism.
For trim-access, remove handle and trim plate to reach the valve.
Note needed tools and inspect mounting before disassembly.
Cleaning or replacing the diverter
Begin by confirming the water supply is shut off and the diverter is fully exposed—either by removing the tub spout or the trim plate and handle—so the internal parts are accessible for inspection.
Clean mineral buildup with vinegar or a descaling solution, brush and rinse components, then inspect seals and springs.
Replace worn cartridges or pop-up diverters with matching parts to restore proper function.
Reinstalling and functional testing
With the diverter cleaned or replaced and all internal parts inspected, reassembly can proceed methodically to guarantee proper operation.
Reinstall seals, springs, and the diverter in original orientation, snugging screws and retaining clips evenly.
Restore trim and handle, then turn on water and cycle between tub and shower multiple times, checking for leaks and smooth engagement.
Adjust or re-seat parts if flow persists.
Addressing problems with pressure-balance and thermostatic valves
Next, the focus shifts to pressure-balance and thermostatic valves, where failures either originate in the cartridge or in the internal balance mechanism.
The reader is guided to differentiate cartridge problems—such as worn seals or stuck components—from balance mechanism faults that affect pressure regulation.
Clear replacement steps for pressure-balancing cartridges are provided, including isolation, cartridge removal, inspection, and correct reinstallation.
Diagnosing cartridge vs. internal balance mechanism issues
Diagnosing whether a shower’s refusal to shut off stems from a worn cartridge or a failing internal pressure-balance/thermostatic mechanism requires systematic observation and simple tests: inspect handle movement and water behavior, note whether the problem affects hot, cold, or both supplies, and check for temperature fluctuations when other fixtures run.
Tight, gritty handle feel and uneven shutoff suggest cartridge wear; abrupt temperature shifts or imbalance point to internal mechanism failure.
Replacement steps specific to pressure-balancing cartridges
After identifying signs that the cartridge or pressure-balance mechanism is at fault, attention shifts to replacing pressure-balancing cartridges. These cartridges differ from simple single-handle cartridges in their internal spool and spring assembly that regulates pressure.
Shut water, remove trim, extract retaining clip/bolt, and pull cartridge straight. Match model, install new cartridge with correct orientation, secure clip, reassemble trim, restore water, and test for pressure balance and leaks.
Quick temporary fixes to stop water until a full repair is possible
When immediate repair is not possible, the article outlines temporary methods to stop water flow until a professional fixes the valve.
Options include closing nearby supply or appliance shutoff valves, packing the handle or stem to reduce leakage, and safely blocking a faulty diverter with a soft, nonabrasive material as a last resort.
Each measure is presented as a short-term stopgap with cautions about safety and the need for permanent repair.
Using supply shutoff valves and appliance shutoffs
Several simple shutoff points can stop water flow quickly, buying time until a permanent repair is made.
Locate the shower’s inline stop valve, basement or crawlspace supply valves, and nearby appliance shutoffs.
Close the nearest cold and hot supply valves gently to avoid damage. Use valve handles or pliers with a rag for grip.
Label shutoffs and test the fixture to confirm flow cessation.
Packing the handle or stem for short-term sealing
Stuff the packing around the handle or stem to create a temporary seal that reduces or stops leaking while a permanent repair is arranged.
Use plumber’s packing, Teflon tape, or a folded cloth inserted carefully to compress around the stem.
Tighten retaining nuts modestly to compress packing. Monitor for seepage.
This is a short-term measure; arrange proper cartridge or valve replacement promptly.
Improvised diverter blockage options (when safe)
After packing the stem to limit seepage, attention can shift to the diverter as an alternative temporary stopgap.
Small blockages may be created using a folded plastic bag, plumber’s tape wedge, or cotton wrapped in waterproof tape to partially obstruct flow from tub spout or valve.
These improvised fixes are short-term, inspected frequently, and removed before permanent repair; call a plumber if unsure.
When repairs may require a plumber: warning signs and complex scenarios
Persistent leaking after replacing parts or evidence of corrosion and seized valves that cannot be accessed or freed are clear signs a professional is needed.
Repeated failures or unusually high water pressure suggest systemic issues best diagnosed with proper tools and experience.
Visible damage to walls or floors, or signs of mold, requires remediation beyond typical DIY repairs.
Persistent leaking after part replacement
When a shower continues to drip or run despite installing new cartridges or seals, it indicates the problem may extend beyond a single worn part.
Persistent leaking can signal damaged valve bodies, misaligned stems, hidden pipe fractures, or installation errors.
A plumber should assess complex diagnostics, pressure tests, and replacement of integral components; DIY attempts risk worsening damage or causing leaks within walls.
Corroded or seized valves and inaccessible plumbing
Corroded or seized shower valves and plumbing tucked behind walls or under slabs present repair challenges that typically exceed basic cartridge or seal swaps.
Corrosion, mineral buildup, or frozen fittings can make removal impossible without heat, specialized tools, or section replacement.
Inaccessible lines may require wall demolition or slab cutting. These tasks risk structural or system damage, so hire a licensed plumber for diagnosis, safe extraction, and proper restoration.
Repeated failures indicating systemic water pressure issues
If routine fixes keep failing, the problem may lie beyond the fixture in the home’s water supply or pressure regulation systems.
Persistent valve failure, surging flow, or simultaneous issues in multiple outlets suggest mains pressure spikes, failing pressure-reducing valves, or municipal supply problems.
These scenarios require diagnostic equipment, pressure testing, and potential regulator replacement or coordination with the water utility—hire a licensed plumber.
Damage to walls, floors, or mold risk requiring professional remediation
Hidden damage from prolonged leaks can compromise wall studs, subfloors, and tile beds and create conditions for mold growth that exceed simple DIY remedies.
Affected structures may harbor rot, warped framing, or concealed mold behind finishes.
Professional assessment, moisture mapping, and licensed remediation guarantee safe removal, structural repair, and mold remediation.
Homeowners should hire contractors when damage is extensive, recurring, or poses health risks.
Cost and time estimates for DIY vs. professional repair
Typical DIY repairs often require inexpensive parts and a few hours of labor, while professional work adds call-out fees and skilled time; comparing both clarifies real cost trade-offs.
Below is a quick reference for common scenarios and cost/time ranges to guide decision-making.
| Repair type | Typical DIY parts & time | Typical professional range |
|---|---|---|
| Cartridge/seat replacement | $15–$60; 1–3 hours | $100–$350 total (call-out + labor/parts) |
| Stem/valve rebuild | $20–$80; 2–4 hours | $150–$500 depending on complexity |
| Full valve/fixture replacement | $50–$200 parts; 3–6+ hours | $300–$1,200+ including new valve and installation |
Typical part costs and labor time for DIY
One or two common replacement parts and an hour of work often resolve a running or stuck shower valve when tackled as a DIY project.
Cartridge or O-ring kits typically cost $10–$60; escutcheon screws and trim parts run $5–$30. Basic tools are usually already owned.
Total DIY time ranges 30–90 minutes; expect occasional extra time for corroded fittings or tight access.
Average plumber call-out fees and repair ranges
When a homeowner opts for a professional, a plumber’s call-out fee commonly ranges from $50 to $150 depending on time of day and region.
Total repair bills for a stuck or running shower valve typically fall between $120 and $450. More complex jobs involving cartridge replacement, valve body repairs, or extensive access work can push costs to $600 or more.
DIY attempts often cost $20–$100 in parts and one to three hours.
Professionals add expertise, warranties, and higher hourly rates (typically $75–$150).
When replacement of the entire valve or fixture is more cost-effective
Many homeowners find that replacing the entire shower valve or fixture becomes the most economical choice when recurring leaks, extensive corrosion, or obsolete parts complicate repairs.
DIY replacement can cost $50–300 in parts and several hours for competent homeowners; professional installation ranges $300–1,200 depending on valve complexity and wall access.
When repair recurrence, time, or code compliance risks rise, professional replacement often saves money and stress.
How to choose the right replacement parts and read model numbers
Identifying the faucet or trim brand and locating the stamped or printed model number are the first steps to getting the correct replacement.
Cartridges, stems, and diverters should be matched by manufacturer and part number rather than by appearance to guarantee fit and function.
When purchasing, choose verified OEM or high-quality aftermarket parts and confirm compatibility and warranty before buying.
Finding brand and model info on your faucet or trim
Where is the model information on a faucet or trim, and why does it matter for repairs?
Typically found on the escutcheon, behind decorative caps, under the handle, or stamped on the valve body, model and brand markings identify compatible parts and correct repair procedures.
Photographs and measurements aid identification. If markings are absent, consult purchase records or manufacturer catalogs before ordering replacements.
Matching cartridges, stems, and diverters by manufacturer
Once brand and model cues are located on the escutcheon, behind caps, or stamped on the valve body, the next step is matching cartridges, stems, and diverters to the manufacturer’s specifications.
Consult OEM part diagrams, note part numbers and revision codes, and compare dimensions and spline counts.
Cross-reference with manufacturer catalogs or support to guarantee exact fit, avoiding generic substitutes that may mismatch seals or operation.
Buying tips for compatible and durable parts
A few careful choices at purchase guarantee a replacement part fits and lasts.
Buyers should record brand, model number and stamped codes from trim and valves, photograph the assembly, and cross-check parts diagrams.
Prioritize OEM or high-rated aftermarket parts, corrosion-resistant materials, and included seals.
Verify return policies and warranty coverage.
When unsure, consult manufacturer support or carry the old part to the store.
Preventive maintenance to avoid a shower that won’t turn off
Preventive maintenance can greatly reduce the risk of a shower failing to shut off by combining routine cleaning, periodic lubrication, and scheduled inspections.
Homeowners are advised to watch for early signs of valve wear—such as stiffness, leaks, or unusual noises—and address them before failure occurs.
Controlling water quality with softeners or filters helps limit mineral buildup that accelerates wear and impedes valve operation.
Regular cleaning and lubrication schedule
Establishing a regular cleaning and lubrication schedule keeps valve components moving freely and reduces the risk of a shower that won’t shut off.
Recommended: clean mineral deposits and debris every 3–6 months, inspect seals, and apply plumber-approved silicone or lithium grease to stems and O-rings.
Use mild descaler for buildup, avoid petroleum oils, and log maintenance dates to guarantee consistent preventive care.
Detecting early signs of valve wear
Listen for taps, drips, or squeaks and watch for slow temperature response—these subtle symptoms often precede valve failure.
Inspect handle movement for stiffness or looseness, note difficulty maintaining set temperature, and observe intermittent leaks after shutoff.
Track gradual changes over weeks rather than isolated events. Early detection enables timely cartridge replacement or seals renewal, preventing sudden inability to stop flow and costly emergency repairs.
Managing water quality to reduce mineral buildup
Many homeowners can limit mineral buildup by managing water quality through targeted measures: using a water softener or point-of-use filters, installing a sediment trap, and scheduling periodic descaling of fixtures.
Regular testing identifies hardness and contaminants; treatment selection depends on results. Routine filter replacement and flushing of lines prevent deposits.
These steps extend valve life, maintain flow, and reduce emergency repairs attributable to calcification.
Troubleshooting examples and mini-case scenarios
The section presents three concise troubleshooting examples that illustrate common causes and fixes: a single-handle valve that shuts off then drips, a shower that remains on after trim replacement, and an intermittent diverter failure.
Each mini-case outlines likely diagnoses and the stepwise repairs or checks to resolve the issue. Readers are guided to match symptoms to the appropriate procedure before attempting repairs or calling a professional.
Case 1: Single-handle shuts off then drips diagnosis and repair
Begin by identifying a common single-handle symptom: the valve appears to close—the handle returns to the off position—but water continues to drip from the showerhead.
Inspect cartridge for worn seals or mineral buildup. Remove trim, extract cartridge, and check O-rings and seats.
Clean with vinegar, replace damaged seals or cartridge. Reassemble and test; if drip persists, consult a plumber for deeper valve issues.
Case 2: Shower stays on after replacing trim likely causes
Investigate situations where a shower continues to run immediately after trim replacement, since improper reassembly or incompatible parts often cause the handle to fail to engage the valve stop.
Check screw alignment, spacer or adapter presence, trim depth, and stem engagement. Confirm cartridge orientation and any missing retention clips.
Test operation before finishing. If parts mismatch or valve damage is suspected, consult manufacturer specs or hire a plumber.
Case 3: Intermittent failing diverter stepwise approach
Address intermittent diverter failures by following a systematic, stepwise diagnostic approach that isolates root causes with minimal parts replacement.
Inspect external trim and operate diverter repeatedly to replicate fault.
Check cartridge or rotary mechanism for wear, limescale, or debris.
Clean, lubricate, or replace the diverter if symptoms persist.
Verify piping pressure and check for valve conflicts before concluding repairs or calling a plumber.
Step-by-step safety checklist before attempting repairs
Before attempting any repair, the reader should verify electrical, hot-water, and structural safety to minimize risk.
They should confirm the availability of proper tools and personal protective equipment, such as gloves and eye protection.
If hazards exceed basic precautions or the problem is inaccessible, the reader should stop and call a licensed professional.
Electrical, hot-water, and structural safety considerations
When preparing to repair a shower that won’t turn off, a focused safety checklist helps prevent electrical shocks, scalding, and structural damage; it should be completed before any tools are used or panels removed.
Verify power to nearby outlets and lighting is off, shut off water main or shower valve, relieve pressure, test water temperature, inspect surrounding grout, tile, and supports for compromised integrity before proceeding.
Proper tools and protective equipment
Gather the correct tools and protective gear and confirm each item is in good condition before any repair begins.
Required tools: adjustable wrench, screwdriver set, plumber’s grease, replacement cartridges/seals, bucket and towels.
Protective equipment: safety glasses, nitrile gloves, knee pads, non-slip shoes.
Verify lighting, accessible shutoff, and a phone nearby.
Inspect tools for wear and secure workspace before proceeding.
When to stop and call a professional
With tools checked and protective gear in place, the homeowner should run a brief safety checklist to decide whether to proceed or stop and call a professional.
Verify main water shutoff works, confirm electrical isolation if applicable, assess visible corrosion or pipe damage, and test for leaks after partial repairs.
If unsure, smell gas, or encounter complex valve assemblies, contact a licensed plumber immediately.
Conclusion
When a shower won’t turn off, prompt action prevents water damage and costly repairs. Homeowners can often diagnose cartridge, valve, or handle issues using basic tools; temporary fixes like shutting the main valve or applying a clamp stop loss immediately. If unsure, call a plumber. Notably, according to industry data, leaking fixtures and valves cause roughly 10% of household water waste—highlighting both the environmental and financial payoff of timely DIY fixes and regular maintenance.