How to Clean a Fiberglass Sink: Step-by-Step Guide for Streak-Free Results
To clean a fiberglass sink effectively and maintain its gelcoat finish, follow these simple steps for a streak-free shine. Start by removing any debris and rinsing the sink with lukewarm water. Next, use a mild detergent solution or a baking soda paste for tougher stains, scrubbing gently with a soft sponge or microfiber cloth in circular motions. Rinse thoroughly to remove all cleaning agents, then dry the sink using overlapping strokes to prevent mineral spots. Finish by buffing with a microfiber cloth for a polished look. Remember to avoid abrasive cleaners and steel wool to protect the surface. For additional tips on stain removal and repairs, keep reading.
Quick overview: What cleaning method works best for fiberglass sinks
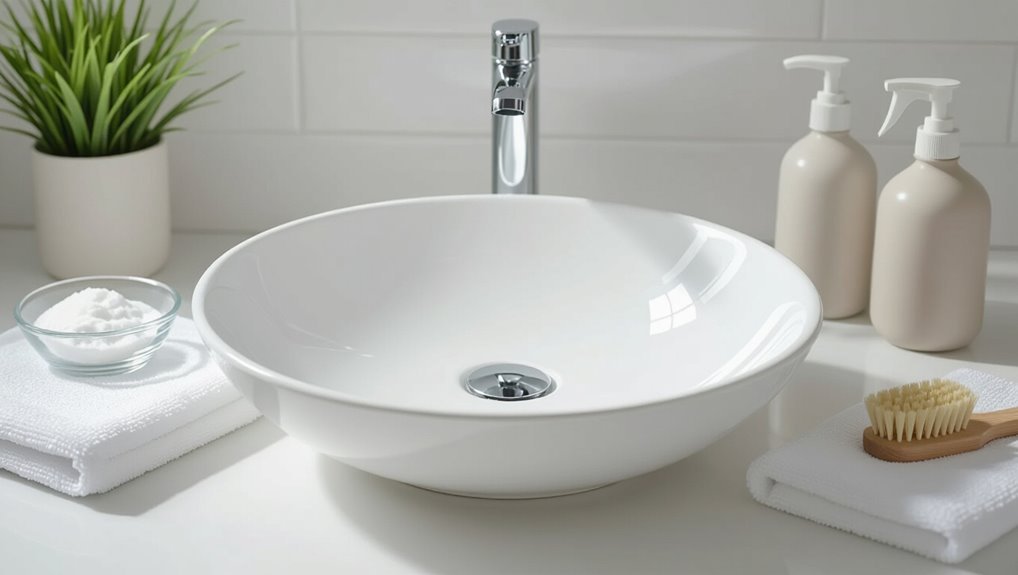
For streak-free results, a soft cloth or nonabrasive sponge with a mild, pH-neutral cleaner and a final wipe with a microfiber cloth is recommended.
Abrasive pads, strong bleach mixtures, and harsh solvents should be avoided to prevent scratching and dulling of the fiberglass surface.
The following sections explain the best products and when to steer clear of aggressive cleaners.
One-sentence recommended approach for streak-free results
Use a soft nonabrasive cleaner (mild dish soap or a gentle all-purpose cleaner) with a microfiber cloth for gentle scrubbing.
Then rinse thoroughly and dry immediately with a clean microfiber towel to prevent streaks and water spots.
For best results, the person follows this routine each use, applying light pressure, working with the sink’s contours, and buffing dry to maintain shine when learning how to clean a fiberglass sink.
When to avoid harsh cleaners
Although fiberglass is durable, it is vulnerable to harsh chemicals and abrasive tools that can dull, etch, or crack the finish; consequently, avoid bleach-based cleaners, oven cleaners, scouring powders, and steel wool.
Instead, choose mild, nonabrasive products and soft cloths to preserve the sink’s surface.
Use gentle detergents, diluted vinegar for mineral deposits, and baking soda paste sparingly; rinse and dry to prevent residue.
Understanding fiberglass sinks: materials and common issues
Fiberglass sinks are made from a fiberglass-reinforced plastic core with a gelcoat or enamel-like finish that provides the visible surface.
Common problems include streaks, scratches, discoloration, soap scum, and surface staining that mostly affect the finish rather than the core.
Strong abrasives and harsh chemicals can erode the gelcoat, dull the shine, or worsen scratches, so gentler, finish-safe cleaners are recommended.
What fiberglass is and how sinks are finished
A composite material made from glass fibers embedded in a resin matrix forms the basis of most fiberglass sinks, combining light weight with impact resistance and ease of molding into various shapes.
Finishes vary: gelcoat or pigmented topcoats provide color and UV protection, while clear coatings add gloss and chemical resistance.
Edges are trimmed and sanded for a smooth, uniform appearance.
Typical stains and damage types (streaks, scratches, discoloration, soap scum)
Recognize that sinks made from glass-fiber-reinforced resin commonly show a handful of recurring blemishes: streaks from hard water, fine surface scratches from utensils or scouring, yellowing or uneven discoloration from sunlight, cleaners or staining agents, and soap scum buildup that appears filmy.
Each issue alters gloss and color differently, guiding appropriate cleaning or minor restoration steps without suggesting aggressive interventions.
Why aggressive abrasives and chemicals can harm fiberglass
After identifying common blemishes like scratches and soap scum, it’s important to understand why harsh abrasives and strong chemicals worsen those issues on glass-fiber-reinforced resin sinks.
Abrasives abrade the gelcoat, exposing fibers and creating micro-scratches that trap dirt. Strong solvents dissolve or dull the protective finish, causing discoloration and weakening adhesion, accelerating staining and structural degradation over time.
Supplies and tools you’ll need
A concise set of safe cleaners and gentle tools makes effective fiberglass sink care straightforward.
Recommended cleaners include mild dish soap, baking soda, vinegar alternatives, or a commercial non-abrasive cleaner, while essential tools are microfiber cloths, a soft sponge, a soft-bristle brush, a plastic scraper, a bucket, and a spray bottle.
For persistent stains, optional products such as an oxy-based cleaner, melamine foam, or a light automotive polish can be used with caution.
Safe cleaners (mild dish soap, baking soda, vinegar alternatives, commercial non-abrasive cleaners)
Gather essential mild, non-abrasive cleaning options and a few basic tools before beginning care of a fiberglass sink.
Recommended cleaners include mild dish soap for daily grime, a baking soda paste for gentle scouring, and diluted hydrogen peroxide or rubbing alcohol as vinegar alternatives for stain treatment.
Use commercial non-abrasive cleaners labeled safe for fiberglass; avoid bleach, ammonia, or abrasive powders to prevent damage.
Tools and materials (microfiber cloths, soft sponge, soft-bristle brush, plastic scraper, bucket, spray bottle)
With cleaning agents selected, attention turns to the tools that make gentle care effective.
Microfiber cloths remove residue without scratching; a soft sponge handles everyday washing.
A soft-bristle brush loosens grime in curves and seams.
Use a plastic scraper for stuck-on debris, a bucket for mixing solutions, and a spray bottle for even application.
Store tools dry between uses.
Optional products for tough stains (oxy-based cleaner, melamine foam, automotive polish)
Consider keeping a small kit of specialty items on hand for stubborn discoloration: an oxy-based cleaner for organic stains, melamine foam (white eraser sponge) for scuffs and surface marks, and a fine automotive polish for restoring gloss after abrasion.
Use oxy cleaners per label, test melamine foam in an inconspicuous spot, and apply polish sparingly with a soft cloth to avoid thin spots or haze.
Preparation steps before cleaning
Before cleaning, the sink should be cleared of dishes and rinsed to remove loose debris.
Adequate ventilation and basic protective measures, such as gloves and eye protection, should be arranged to limit fumes and skin contact.
Any cleaner should be spot-tested on an inconspicuous area to confirm compatibility with the fiberglass finish.
Clearing and rinsing the sink
Clear the basin of dishes, toiletries, and any debris so the entire surface is exposed and accessible.
Run warm water to loosen grime, then use a soft cloth or sponge to rinse all corners and the drain area.
Remove loose particles with a gentle wipe, checking seams and faucet bases.
Finish with a clear, lukewarm rinse to prepare for cleaning.
Ventilation and protective measures
With the basin emptied and rinsed, attention turns to ventilation and protective measures to safeguard both the room and the cleaner.
Open windows and run an exhaust fan to disperse fumes. Don nitrile gloves and eye protection.
Lay down drop cloths or towels to protect counters and floors.
Remove pets and children from the area until cleaning is complete and air has cleared.
Spot-testing cleaners on an inconspicuous area
Begin by selecting a small, hidden section of the sink—such as the underside of the rim or the area behind the faucet—to test any cleaner.
Apply a tiny amount, wait the manufacturer’s recommended time, then blot and inspect for discoloration, dulling, or surface softening.
If no damage appears after 24 hours, proceed with full cleaning; otherwise choose a gentler product and retest.
Step-by-step cleaning process for everyday maintenance
The routine cleaning sequence for a fiberglass sink follows a simple, repeatable order to keep the surface clear and glossy.
It begins with rinsing and debris removal, progresses through mild detergent application and gentle scrubbing, and finishes with a thorough rinse, drying, and optional polish. Following these steps regularly prevents buildup and minimizes the need for harsher treatments.
- Rinse and remove debris; apply mild detergent briefly
- Gently scrub with a soft sponge, then rinse thoroughly
- Dry with a microfiber cloth and apply a final polish if desired
Step 1 Rinse and remove debris
Start by running lukewarm water over the sink to loosen soap scum and food particles.
Then use a soft cloth or sponge to sweep debris toward the drain for removal.
Inspect corners and the rim for trapped residue, rinsing the cloth frequently.
Remove stuck bits with a soft-bristled brush or plastic scraper, taking care not to scratch the fiberglass surface.
Step 2 Apply mild detergent and let sit briefly
Apply a mild, nonabrasive detergent diluted in lukewarm water over the sink surface, using a soft sponge or cloth to spread it evenly.
Allow the solution to sit for two to five minutes to loosen light grime and soap scum without harming the finish.
Avoid acidic or bleach-based cleaners.
After soaking, proceed to the next step for gentle agitation and rinsing.
Step 3 Gently scrub with a soft sponge or cloth
Gently scrub the sink with a soft sponge or microfiber cloth, working in small circular motions to lift loosened grime without scratching the fiberglass.
Focus on stained areas, applying slightly firmer pressure as needed while monitoring the surface. Rinse the sponge frequently to avoid redepositing dirt.
For persistent spots, repeat application of mild detergent and continue gentle scrubbing until the surface appears uniformly clean.
Step 4 Rinse thoroughly and dry with microfiber to prevent streaks
Rinse the sink thoroughly with warm water to remove all soap residue and loosened grime, directing the flow from the rim toward the drain to carry particles away.
After rinsing, shake off excess water and immediately dry the surface with a clean microfiber cloth using overlapping strokes.
Microfiber absorbs moisture without scratching and prevents mineral spots and streaks for an even, matte finish.
Step 5 Final polish for shine (if needed)
If a brighter finish is desired, a light polishing step can restore gloss without risking damage.
Use a non-abrasive, fiberglass-safe polish applied sparingly with a soft cloth. Work in small circular motions, then buff with a clean microfiber until uniform shine appears.
Avoid harsh compounds or power buffers. Inspect for streaks and repeat gently only if necessary.
Removing specific stains and problems
Specific stains and common problems require targeted treatments to avoid damaging the fiberglass surface.
The following sections address soap scum and hard water deposits, rust and mineral buildup, ink or dye marks, grease and food stains, and yellowing or general discoloration with appropriate cleaners and techniques.
Each recommendation prioritizes safety for the sink finish and effectiveness for the stain type.
Soap scum and hard water deposits
Soap scum and hard water deposits build up from soap residue and mineral-rich water, leaving dull, filmy layers and whitish crusts on fiberglass sinks.
To remove them, apply a vinegar-water solution or a gentle nonabrasive cleaner, let sit briefly, then scrub with a soft cloth or nylon pad.
Rinse thoroughly and dry to prevent recurrence; repeat for stubborn areas.
Rust stains and mineral buildup
When exposed to iron-rich water or metal objects, fiberglass sinks can develop reddish-brown rust stains and hard, mineral-encrusted patches that cling to the surface and dull the finish.
Address stains promptly: apply a paste of baking soda and water or a diluted white vinegar solution, let sit, gently scrub with a soft cloth or nylon brush, rinse thoroughly, then dry to prevent recurrence.
Ink, dye, and permanent marker
Ink, dye, and permanent marker can leave dark, stubborn marks on fiberglass that resist ordinary cleaners and can penetrate the gelcoat if left too long.
Treat promptly with isopropyl alcohol or acetone on a soft cloth, blotting gently. Rinse thoroughly and neutralize solvents.
For residual staining, try a mild abrasive paste (baking soda + water) applied gently, then polish and protect the surface.
Grease and food stains
Grease and food stains require prompt, targeted action because oils and pigments can bond with fiberglass gelcoat and darken over time.
Blot excess; apply a mild degreasing dish soap with a soft sponge, rubbing gently in circular motions.
For stubborn spots, use a paste of baking soda and water or a diluted vinegar spray, rinse thoroughly, and dry to prevent residue and water spots.
Yellowing or general discoloration
After treating grease and food stains, attention shifts to yellowing or general discoloration, a common issue caused by age, ultraviolet exposure, or mineral buildup.
Address by applying a mild bleach solution or hydrogen peroxide paste, allowing dwell time, then rinsing thoroughly.
For mineral deposits, use diluted white vinegar.
Repeat treatments sparingly and always test an inconspicuous spot first to verify color stability.
Small scratches and surface dullness
Addressing small scratches and surface dullness calls for gentle, controlled techniques that restore shine without damaging the fiberglass gelcoat.
Light scratches can be buffed with a non-abrasive polishing compound and a soft cloth or foam pad, progressing from fine to superfine grit.
For dull areas, use a dedicated fiberglass polish and finish with a microfibre buff to revive gloss and protect the surface.
Tackling tough stains: step-by-step advanced methods
For particularly stubborn marks, the guide moves on to targeted, step-by-step techniques that balance cleaning power with surface safety.
Recommended approaches include gentle abrasives like a baking soda paste and careful use of oxy-based cleaners, along with controlled application of melamine foam.
Guidance also covers when to escalate to automotive or fiberglass polishing compounds to restore finish without causing damage.
- Baking soda paste + gentle scrubbing for surface stains; test inconspicuous area first.
- Oxy-based cleaners and melamine foam used carefully to avoid dulling or over-sanding.
- Reserve automotive/fiberglass polish for finish restoration after other methods fail.
Using baking soda paste and gentle scrubbing
Begin by mixing baking soda with just enough water to form a thick, spreadable paste; this mild abrasive lifts embedded grime without scratching the fiberglass when used with gentle pressure.
Apply paste to stains, let sit 5–10 minutes, then scrub with a soft nylon brush or microfiber cloth in circular motions.
Rinse thoroughly, repeat if needed, and dry to prevent watermarks.
Applying oxy-based cleaners safely
Mixing and applying oxygen-based cleaners requires care to remove stubborn stains without damaging the fiberglass finish.
The person should dissolve powder per label, test on an inconspicuous area, and apply with a soft cloth or sponge.
Allow dwell time as directed, scrub gently, rinse thoroughly, and dry.
Ventilate, wear gloves and eye protection, and avoid prolonged contact or concentrated mixtures.
Safe use of melamine foam (magic eraser) without over-sanding
After using oxygen-based cleaners, attention may turn to stubborn marks that resist chemical treatment; melamine foam can abrade away surface soils but must be handled to prevent dulling the fiberglass finish.
Use light pressure, test an inconspicuous spot, keep the pad damp, avoid circular scrubbing, and limit passes.
Rinse frequently and stop if sheen changes; follow with gentle cleaner and soft cloth.
When to use automotive polish or fiberglass polishing compounds
Assess whether mechanical polishing is warranted by evaluating the mark’s depth and the sink’s finish: light surface stains and mild etching often respond to cleaners or a fine melamine pad, while deeper scratches, oxidation, or stubborn embedded stains may require an automotive polish or a dedicated fiberglass polishing compound.
Use fine enough abrasives to avoid clearcoat removal, test in an inconspicuous area, and finish with a protective wax.
Avoiding damage: cleaners and tools to never use
When cleaning a fiberglass sink, certain cleaners and tools should be avoided because they can scratch, etch, or weaken the surface.
Abrasive powders, steel wool, and metal scouring pads abrade the gelcoat, while strong acids, undiluted bleach, and harsh solvents can discolor or chemically damage the fiberglass.
High-pressure washers and aggressive mechanical methods can crack or delaminate the sink if used improperly.
Abrasive powders, steel wool, and metal scouring pads
Scrubbing with abrasive powders, steel wool, or metal scouring pads will quickly strip the gelcoat and leave visible scratches on a fiberglass sink; these materials are too harsh for the thin resin surface and can cause permanent dulling or expose underlying fiberglass.
Instead, soft nonabrasive sponges, microfiber cloths, or nylon brushes gently remove grime without marring finish.
Immediate rinsing removes residues that might abrade over time.
Strong acids, undiluted bleach, and harsh solvents
After warning against abrasive scrubbing tools, attention turns to chemical hazards that can similarly ruin a fiberglass sink: strong acids, undiluted bleach, and harsh solvents.
These substances can etch, discolor, or soften the gelcoat. Use only mild, pH-neutral cleaners and diluted bleach when necessary.
Rinse thoroughly after cleaning and test any new product on an inconspicuous spot first.
High-pressure washers and aggressive mechanical methods
Avoid using high-pressure washers or other aggressive mechanical methods on a fiberglass sink; the concentrated force and abrasive attachments can strip the protective gelcoat, cause cracks, and create uneven surfaces that trap dirt and stain.
Mechanical scrubbing with wire brushes, power sanders, or rotary tools similarly risks abrasion and heat damage.
Gentle hand cleaning with nonabrasive pads and mild detergents preserves finish and prevents costly repairs.
Preventive care and routine maintenance tips
A simple weekly cleaning routine keeps a fiberglass sink streak-free and prevents grime buildup.
Immediate, gentle treatment of heavy stains—rinsing, applying a mild cleaner, and soft scrubbing—reduces the need for aggressive fixes.
A seasonal deep-clean checklist of nonabrasive cleaners, stain treatments, seal inspection, and hardware tightening preserves finish and function.
Weekly cleaning routine for streak-free appearance
Several simple steps keep a fiberglass sink looking streak-free with minimal effort.
Once weekly, remove debris, rinse thoroughly, and apply a mild, nonabrasive cleaner with a soft cloth or sponge.
Rinse again and dry immediately with a microfiber towel to prevent water spots.
Finish by wiping fixtures and checking drain areas for buildup.
Repeat consistently to maintain shine and prevent dulling.
Quick actions after heavy staining incidents
After completing the weekly routine, immediate attention is required when heavy stains occur to prevent permanent discoloration.
Blot spills, rinse with cool water, then apply a mild nonabrasive cleaner. Let it sit briefly, gently agitate with a soft sponge, and rinse thoroughly.
For persistent marks, repeat once more before scheduling deeper treatment; avoid harsh abrasives or bleach that can etch fiberglass.
Seasonal deep-clean checklist
When seasonal maintenance is due, a focused deep-clean checklist guarantees the fiberglass sink remains stain-free, structurally sound, and properly sealed.
Inspect for chips and scratches; repair with compatible filler.
Descale with vinegar solution, rinse thoroughly.
Apply nonabrasive cleaner and microfiber buffing.
Check and reseal seals and caulking.
Clean drains and strainers, polish hardware, and note any recurring stains for targeted treatment.
When to repair or replace rather than clean
If stains, deep gouges, or structural cracks persist after cleaning, the sink may need repair or replacement rather than further cleaning.
Simple fixes such as filler kits or refinishing can restore appearance at low cost, but extensive damage can make professional refinishing or replacement more economical.
Homeowners should weigh repair costs and expected lifespan before deciding whether to call a refinisher or replace the unit.
Signs that cleaning won’t restore the sink (deep gouges, structural cracks)
Examine the surface for damage that cleaning cannot fix: deep gouges, chips that expose the fiberglass mat, hairline or through-thickness cracks, and areas where the sink’s shape is deformed or delaminated.
Such defects compromise structural integrity, trap moisture, and promote further deterioration.
If damage is widespread, reaches the reinforcing layer, or affects mounting and drainage, cleaning alone won’t restore function or safety.
Simple repair options (filler kits, refinishing) and cost considerations
Consider simple repairs before deciding on full replacement: epoxy or polyester-based filler kits can patch chips and shallow gouges, while professional or DIY refinishing (gelcoat touch-ups or spray-on acrylic coatings) can restore color and gloss over larger worn areas.
Costs vary: filler kits run $10–40; DIY refinishing supplies $30–150; professional refinishing typically $200–600.
Replace if structural damage or repeated failures occur.
When to call a professional refinisher
Engage a professional refinisher when damage goes beyond surface grime, stains, or minor chips that household kits can handle.
A pro is appropriate for deep scratches, structural cracks, delamination, extensive discoloration, or failed previous repairs. They assess salvageability, recommend refinishing versus replacement, guarantee proper adhesion and color match, and provide warranty-backed results.
Consider replacement if plumbing, underlying substrate, or cost-effectiveness favors it.
Comparison of common cleaning products and methods
A concise comparison of common cleaners and methods helps determine what is most effective, safe for fiberglass, and cost‑efficient. Below is a quick reference table summarizing effectiveness, safety for fiberglass, and recommended use by cost tier.
| Product/Method | Effectiveness | Recommended Use |
|---|---|---|
| Mild dish soap & soft cloth | Gentle, moderate | Routine cleaning; low cost |
| Baking soda + vinegar paste | Moderate, abrasive risk | Stains and buildup; use sparingly |
| Commercial non‑abrasive cleaner | High, varies by formula | Heavy stains; follow label instructions |
Effectiveness, safety for fiberglass, cost, and recommended use
Choosing the right cleaner for a fiberglass sink requires balancing effectiveness at removing stains and grime, compatibility with the gelcoat surface, cost, and the planned frequency of use.
Common options include mild dish soap, baking soda, non-abrasive commercial bathroom cleaners, diluted bleach solutions, and specialty fiberglass polishes, each with distinct trade-offs in cleaning power, risk of dulling or etching, expense, and recommended application.
Mild soap is safest for daily use; baking soda gently removes scuffs; commercial cleaners offer stronger stain removal but check labels for non-abrasive formulas; diluted bleach disinfects but risks discoloration if overused; polishes restore shine at higher cost and should be used sparingly.
Troubleshooting common cleaning problems
Common post-cleaning issues include persistent streaks after drying, residues or haze left by cleaners, and a dulled surface that needs restoring.
The causes—improper rinsing, incorrect product choice, or abrasive scrubbing—are identified and matched with practical fixes.
Clear steps for rinsing, residue removal, and gentle polishing are provided to return the sink to a uniform, glossy finish.
Persistent streaks after drying causes and fixes
When streaks remain after drying, they typically indicate residue left by cleaning agents, hard water minerals, or improper rinsing and drying techniques.
To fix this, rinse thoroughly with warm water, wipe dry with a microfiber cloth, and buff gently.
For mineral buildup, use a diluted white vinegar rinse, then neutralize and dry.
Repeat only as needed to avoid surface dulling.
Cleaner left residue or haze how to remove
If a cleaner leaves a filmy haze on a fiberglass sink, it usually signals residue from soap, waxes, polishers, or improperly rinsed cleaners.
Removing it requires neutralizing the residue, gentle agitation, thorough rinsing, and careful drying to restore shine without damaging the finish.
Use a diluted vinegar solution or a pH-neutral cleaner, soft cloth or nonabrasive pad, rinse thoroughly, and dry with a microfiber towel.
Surface becomes dull after cleaning restoring shine
Restore gloss by identifying the cause of dulled fiberglass—harsh cleaners, abrasives, mineral deposits, or degraded protective coatings—and then select a targeted, low-abrasion approach.
Rinse thoroughly, apply a nonabrasive cleaner or diluted vinegar for minerals, gently polish with a microfiber or white polishing pad, and remove residues.
If coating is worn, apply a compatible fiberglass polish or protective wax following manufacturer instructions.
Test in an inconspicuous area first.
Quick checklist before finishing the job
Before wrapping up, a concise checklist guarantees the sink is spotless, dry, and protected.
The final rinse and a careful inspection reveal any missed residue or soap scum. Proper drying, buffing, and applying a protective measure help preserve the finish.
- Final rinse and inspection for missed spots or residue
- Drying and buffing to restore shine and remove watermarks
- Stain protection and simple tips for longer-lasting results
Final rinse and inspection
Perform a thorough final rinse to remove all cleaner residue and loosened debris.
Then inspect the sink systematically for streaks, spots, or missed areas.
Check edges, corners, and around the drain under bright light.
Use fingers or a soft cloth to feel for remaining grit.
Note any stubborn stains for targeted retreatment.
Confirm all cleaner is gone before proceeding to drying steps.
Drying and buffing steps
Once the sink is confirmed free of residue, the drying and buffing phase begins with a quick checklist to guarantee a streak-free finish:
- Wipe with a clean microfiber cloth.
- Pat dry all contours.
- Allow a few minutes for trapped moisture to evaporate.
- Buff in small circular motions with a dry microfiber or soft cotton pad until uniform sheen appears.
Inspect under good light.
Stain protection and tips for longer-lasting results
Seal and protect the surface with a light, appropriate barrier to repel stains and extend the sink’s finish: apply a non-abrasive, fiberglass-safe polish or wax following the manufacturer’s directions, wipe away excess, and allow the product to cure fully.
Recommend routine maintenance: rinse after use, avoid harsh chemicals, use soft cloths, and address stains promptly.
Reapply protection every few months for durable results.
Conclusion
Regular cleaning preserves fiberglass sinks, yet many homeowners overlook proper care: studies show up to 40% of sink damage stems from abrasive cleaners. Maintaining a gentle routine—mild detergent, nonabrasive sponge, periodic vinegar rinse—prevents stains and scratches and extends sink life. When chips, deep gouges, or persistent discoloration appear, consider repair kits or replacement. With consistent, appropriate maintenance, fiberglass sinks remain durable and attractive for years, minimizing costly repairs.