How to Change a Water Filter Cartridge Under the Sink: Step-by-Step Guide for Beginners
How to Change a Water Filter Cartridge Under the Sink
Replacing an under-sink water filter cartridge typically takes 15–30 minutes. Follow these steps for a successful replacement:
- Shut Off the Water: Locate the shut-off valve and turn off the water supply.
- Relieve Pressure: Open a nearby faucet to release any pressure in the system.
- Prepare Your Space: Place towels and a bucket under the filter to catch any spills.
- Remove the Housing: Use a wrench to unscrew the filter housing.
- Inspect and Replace O-Rings: Check the O-rings for wear and replace them if necessary.
- Insert the New Cartridge: Place the new cartridge in the housing, ensuring it’s the correct model.
- Reseal the Housing: Screw the housing back on securely.
- Reopen the Supply: Slowly turn the water supply back on and check for leaks.
- Flush the System: Run the water for several minutes to clear out any air and contaminants.
Always follow the manufacturer’s guidelines for model compatibility and proper disposal. This concise process ensures your water filter is replaced efficiently and effectively.
What to Expect When Replacing an Under-Sink Water Filter Cartridge
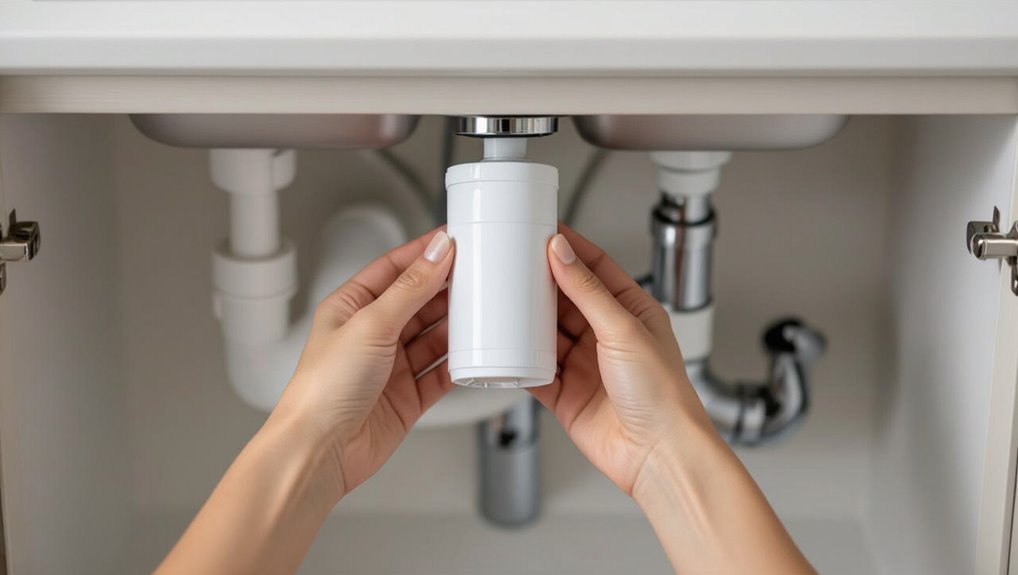
Replacing an under-sink water filter cartridge typically takes 10–30 minutes and involves shutting off the water, removing the old cartridge, and installing the new one.
Basic tools and materials often include an adjustable wrench or filter wrench, a bucket or towel, replacement O‑rings, and the correct cartridge model.
Common filter types—sediment, carbon block, and reverse osmosis stages—are usually housed in a single canister or a stacked multi-stage assembly under the sink.
Quick overview of the process and time required
Although the exact steps vary by model, replacing an under-sink water filter cartridge generally involves shutting off the water, relieving pressure, removing the old cartridge, installing the new one with proper seals, and flushing the system.
The entire process typically takes 15–30 minutes for someone with basic tools and familiarity. This concise overview of how to change water filter cartridge under sink sets realistic time expectations.
Typical tools and materials needed
A handful of basic tools and a few consumable materials typically cover most under-sink water filter cartridge changes: an adjustable wrench or channel-lock pliers, a flathead screwdriver, a bucket or towel for drips, replacement O-rings or lubricant (if not included with the cartridge), and the correct replacement cartridge itself.
Additional helpful items include replacement tubing clips, plumber’s tape, gloves, and a rag for cleanup.
Common filter types and where they are located
After gathering the tools and materials, the next step is to identify the type of under-sink filter in use and its mounting location.
Common types include cartridge housings, inline filters, and reverse-osmosis (RO) membranes.
Cartridge housings mount vertically beneath the sink; inline filters attach to supply lines; RO units sit on the cabinet floor with separate pre- and post-filters.
Check fittings and shutoff valves.
Safety Precautions Before You Begin
Before starting, the water supply under the sink should be turned off and the shutoff valve tested to prevent leaks.
Surfaces and cabinet interiors should be protected and a basin or towels placed to catch any spills.
Electrical outlets and nearby plumbing should be considered to avoid shocks and accidental water damage.
How to shut off water supply under the sink
Locate and close the cold-water shutoff valve beneath the sink to stop flow to the faucet and filter housing.
Confirm closure by turning on the faucet until water stops. If no individual valve exists, shut off the home’s main water supply.
Have a towel ready for residual drips.
Note valve types—angle, stop, or ball—and operate them gently to avoid damage.
Protecting cabinets and catching spills
Several layers of protection should be placed under and around the sink area to prevent cabinet damage and contain spills:
a thick towel or absorbent pad directly beneath the filter housing,
a waterproof tray or shallow pan to catch larger leaks,
and a plastic sheet or cardboard to shield cabinet bottoms and adjacent shelves.
Secure edges with tape, keep a bucket nearby, and remove stored items to avoid contamination.
Electrical and plumbing safety considerations
Turn off the water supply and power sources to the area and verify both are fully deactivated before touching any components. Inspect nearby outlets, cords, and pipe joints for damage. Use insulated tools, wear gloves and eye protection, and place a bucket under fittings. If uncertain, consult a licensed plumber or electrician.
| Item | Risk | Action |
|---|---|---|
| Outlet | Shock | Cover |
| Pipe joint | Leak | Tighten |
| Cord | Fray | Replace |
| Valve | Stiff | Lubricate |
| Panel | Unknown | Call pro |
Identifying Your Filter System and Cartridge Model
The technician first checks the unit for a manufacturer label or stamped model number, usually on the housing or mounting bracket, to determine the correct replacement cartridge.
They note whether the system is a single-housing inline filter or a multi-stage assembly, since cartridge size and connections differ.
If the housing is cracked, threaded connections are damaged, or a retrofit is required, the housing should be replaced rather than only changing the cartridge.
How to locate model numbers and manufacturer labels
When preparing to replace a water filter cartridge, locating the system’s model number and manufacturer label is the essential first step.
These identifiers—usually printed on the filter housing, head assembly, or a sticker on the unit—ensure the correct replacement part is selected.
Check under the sink, along inlet/outlet pipes, and inside access panels.
Photograph labels, note serials, and consult manuals or manufacturer websites for verification.
Distinguishing between single-housing and multi-stage systems
Distinguishing single-housing from multi-stage systems is a key step in identifying the correct cartridge: single-housing units contain one filter canister and perform a single treatment, while multi-stage systems stack two or more housings or use a manifold with separate chambers to target different contaminants in sequence.
Check number of canisters, inlet/outlet plumbing, and label markings; note filter sizes and connection types for replacement.
When to replace the whole housing versus just the cartridge
If a filter system shows signs of physical damage, persistent leaks, or repeated performance issues despite timely cartridge changes, the entire housing should be considered for replacement rather than only the cartridge.
Replacement is also advised when threads are stripped, seals are warped, or materials are degraded.
Replace housing if model incompatibility prevents proper cartridge fit or when age compromises structural integrity.
Step-by-Step Cartridge Replacement Guide
The replacement process begins with shutting off the water supply and relieving system pressure to prevent spills and injury.
Next, towels and a bucket are placed and the workspace prepared before the filter housing is removed and the spent cartridge disposed of according to local guidelines.
Finally, the housing and O-rings are inspected and cleaned to guarantee a proper seal for the new cartridge.
Step 1 Turn off water and relieve pressure
Shut off the water supply to the filter housing and open a nearby faucet to relieve residual pressure before beginning the cartridge change. The technician confirms valves are closed, listens for flow stop, then slowly opens the faucet until the water runs minimal. This prevents spills and eases housing removal.
| Task | Action | Check |
|---|---|---|
| Valve | Close | No flow |
| Faucet | Open | Pressure released |
| Visual | Inspect | Dry fittings |
Step 2 Place towels and a bucket; prepare workspace
Lay towels around the filter housing and position a bucket beneath it to catch drips and dislodged water as the cartridge is removed.
Clear the surrounding area of clutter, guarantee adequate lighting, and place a flashlight or headlamp nearby.
Keep pliers, a wrench, and replacement cartridge within reach on a dry surface.
Wear gloves and safety glasses to protect hands and eyes.
Step 3 Remove filter housing safely
Begin by relieving system pressure: have the faucet open and any pressure-relief valve depressed so residual pressure escapes.
Wearing gloves, position the bucket and towels.
Use the housing wrench to turn the filter housing counterclockwise; stabilize the head with the other hand.
Loosen slowly to control drips.
Inspect O-ring and seating for damage before lifting the housing away from the filter assembly.
Step 4 Dispose of old cartridge properly
Once the housing is removed and any excess water drained, the used cartridge should be handled as potentially contaminated and removed by grasping its ends to avoid touching the central media.
Place it directly into a sealable plastic bag or container to contain residual water and particulates.
Label the bag with removal date, dispose per local regulations, and avoid mixing with household recycling unless manufacturer guidance permits.
Step 5 Inspect and clean filter housing and O-rings
Inspect the filter housing and O-rings carefully before installing a new cartridge to guarantee a proper seal and prevent leaks.
The person visually examines the housing for cracks, mineral buildup, or debris. They remove loose sediment with a soft cloth and mild detergent, rinse thoroughly, and dry.
O-rings are checked for cuts, flattening, or misplaced grooves; damaged parts are noted for replacement.
Step 6 Replace O-rings and lubricate correctly
Replace any worn or damaged O-rings and apply the correct lubricant to secure a watertight seal and smooth installation of the new cartridge.
Select food-grade silicone grease, avoid petroleum-based products, and choose the proper O-ring size.
Seat rings evenly in their grooves, inspect for cuts, and replace if needed.
Lightly coat O-rings to prevent pinching and maintain proper compression without excess lubricant.
Step 7 Insert new cartridge and reseal housing
Align the new cartridge with the housing inlet, ensuring orientation marks match the head assembly, and gently lower it into place without forcing.
Seat the cartridge fully against the O-ringed seal.
Verify alignment visually and by feeling a slight click or stop.
Reposition the housing cover, engage threads or bayonet fittings, and hand-tighten evenly until snug.
Do not overtighten.
Step 8 Turn water back on and check for leaks
Open the main supply valve slowly to restore water flow while watching the filter housing and connections.
Observe for drips at seals, inlet/outlet fittings, and mounting brackets. If leaks appear, shut the valve immediately, relieve pressure, and tighten or reseat O-rings and fittings.
After repairs, reopen the valve gradually and recheck. Confirm no moisture remains before replacing any access panels.
Step 9 Flush the new filter and test water quality
Flush the new cartridge by running water through the system for several minutes to purge trapped air and manufacturing particulates; this prevents cloudy water and protects downstream fixtures.
Observe flow and check for steady, clear output.
Collect a sample, compare smell/taste, and, if desired, use a TDS or chlorine test strip to verify performance.
Record installation date and next replacement interval.
Visual Aids and Measurement Tips
Before disassembly, the technician photographs each connection and label to preserve alignment and hose orientation for reassembly.
Measurements of cartridge length, diameter, and O-ring thickness are recorded with calipers or a ruler to guarantee correct replacements.
Clear photos paired with precise dimensions reduce errors and speed the swap process.
How to photograph and document connections before disassembly
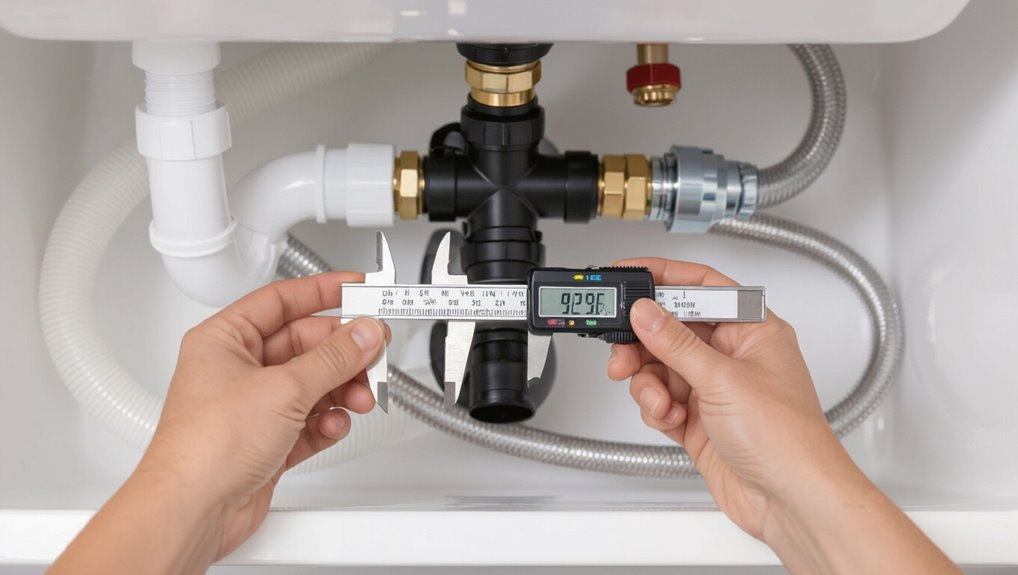
Photograph and label every connection and fitting before disassembly to guarantee accurate reassembly: capture wide shots showing component orientation and close-ups of threaded joints, O-rings, and hose clamps. The technician documents angles, distances, and label positions; notes water flow direction and part IDs. Store photos with matching labels and brief timestamps to simplify reassembly and parts replacement.
| Photo | Label | Notes |
|---|---|---|
| Wide | A1 | Orientation |
| Close | B2 | Thread detail |
| Hose | C3 | Clamp side |
| Seal | D4 | O-ring view |
Measuring cartridge size and O-ring dimensions
Accurate measurements of the cartridge and O-ring are essential for selecting compatible replacements and ensuring a leak-free fit.
The guide recommends using digital calipers to record cartridge length, outer and inner diameters, and thread type. Measure O-ring cross-section and inner diameter.
Photograph measurements beside a ruler for reference. Note manufacturer codes stamped on the cartridge for precise matching.
Troubleshooting Common Problems
The troubleshooting section addresses common issues such as leaks at the housing or fittings and methods for safe removal when the housing will not unscrew.
It covers causes and fixes for low water pressure after a cartridge change and steps to eliminate unusual tastes or odors following installation.
Each problem is paired with clear diagnostic checks and practical remedies.
Resolving leaks at the housing or fittings
Inspecting the housing and fittings is the first step when a filter system develops a leak: common causes include loose connections, worn O-rings, cracked housings, or improperly seated cartridges.
Tighten fittings, replace damaged O-rings with correct-size seals, and reseat or replace cracked housings. Use plumber’s tape on threaded joints if needed.
Repressurize and check for persistent leaks; replace the unit if leaking continues.
Filter housing won’t unscrew safe removal techniques
When tightening or replacing seals and fittings does not free the housing, a stuck filter bowl requires careful, controlled methods to avoid damage or injury.
Turn off water and relieve pressure.
Apply penetrating lubricant to threads, wait, then use a strap wrench for even force.
Tap gently with a rubber mallet around the base to break corrosion.
If still stuck, consult a professional.
Low water pressure after replacement and how to fix it
Check for common causes of reduced flow after cartridge replacement by systematically verifying valve positions, inlet strainers, and proper cartridge seating.
Inspect for trapped air—bleed via faucet or purge port. Clean or replace clogged pre-filters and inlet screens.
Confirm tubing connections are unobstructed and fittings fully open.
If pressure remains low, test supply pressure and consult manufacturer specifications or a plumber for flow-restrictor or membrane issues.
Strange taste or odor after installing new cartridge
Noticeable taste or odor after installing a new cartridge often signals residual manufacturing compounds, trapped air, or incomplete flushing rather than a defective filter.
The remedy: run several gallons of water through the system, vent trapped air, and follow manufacturer flushing instructions.
If odor persists, sanitize the housing, check seals and lines for contamination, and replace the cartridge or contact the supplier for guidance.
Maintenance Schedule and When to Replace Filters
Manufacturer-recommended replacement intervals provide the baseline schedule for filter changes and should be consulted first.
Visible signs like reduced flow, bad taste or odor, and discoloration indicate the cartridge may need replacement sooner than the schedule.
Usage patterns and seasonal factors (e.g., heavy summer use or spring runoff) should prompt adjustments to the replacement frequency.
Manufacturer-recommended replacement intervals
Most manufacturers provide a clear replacement interval—typically expressed in months or gallons filtered—to guide routine maintenance and confirm peak performance.
Users should follow those specifications closely, noting variations by filter type and household water usage. Records of installation dates and meter readings help facilitate timely swaps.
Ignoring recommended intervals can void warranties or reduce contaminant removal, so adherence is advised.
Signs you should replace the cartridge sooner
Watch for clear performance and water-quality cues that indicate a cartridge needs replacing ahead of schedule.
Reduced flow rate, cloudy or discolored water, unusual tastes or odors, and visible sediment signal declining filtration.
Frequent pressure drops, recurring contaminants on test strips, or system alerts (if present) also warrant immediate replacement.
Address these signs promptly to maintain water safety and appliance longevity.
Seasonal and usage-based adjustments to replacement frequency
Beyond obvious performance failures, seasonal changes and user habits also affect how often cartridges should be replaced. High usage, summer algal blooms, well-water sediment spikes, and holiday guests may shorten intervals. Conversely, low winter use can permit slight extension. Regular testing and monitoring flow provide objective triggers for replacement.
| Factor | Adjustment |
|---|---|
| High use | Shorten interval |
| Seasonal bloom | Replace sooner |
| Sediment | Pre-filter |
| Low use | Slightly extend |
| Testing | Guide timing |
Buying the Right Replacement Cartridge
Choosing the correct replacement cartridge requires comparing OEM parts with compatible aftermarket options for fit, performance, and warranty implications.
Buyers should verify key specifications—model number, filter media, flow rate, and micron rating—before purchasing.
Reputable retailers, manufacturer websites, and verified sellers help guarantee authenticity through serial numbers, packaging seals, and return policies.
Matching OEM vs. compatible aftermarket cartridges
Decide whether to buy an OEM (original equipment manufacturer) cartridge or a compatible aftermarket replacement by weighing cost, warranty, and performance.
The choice hinges on trust in maker, validated filtration claims, and long‑term value.
Consider these factors:
- Compatibility with existing housing
- Manufacturer warranty terms
- Independent testing or certifications
- Price versus expected lifespan and performance
Key specifications to check before purchase
Before purchasing a replacement cartridge, the buyer should verify a handful of specifications that determine fit, function, and service life: exact model or thread size to guarantee housing compatibility, micron rating and media type for filtration performance, flow rate and pressure range to match system requirements, expected capacity or lifespan, and any required certifications or test results that substantiate contaminant reduction claims.
| Specification | Example |
|---|---|
| Model/Thread | 10″ standard |
| Micron/Media | 5 µm activated carbon |
| Flow/Pressure | 0.5 GPM / 20–80 psi |
| Capacity/Lifespan | 6 months |
Where to buy and how to verify authenticity
Where can a replacement cartridge be purchased and how can its authenticity be confirmed?
Replacement cartridges are available from manufacturer websites, authorized dealers, major retailers, and reputable online marketplaces.
Verify authenticity by checking model numbers, holograms or security seals, lot codes, packaging quality, and seller credentials.
Compare against manufacturer photos and contact customer support for serial verification.
Retain receipts and warranty information.
Cost Estimates and Time-Saving Tips
Typical costs for cartridges and common replacement parts are outlined to help plan a budget.
Simple steps to speed future changes—such as keeping spare cartridges on hand and noting filter size—are recommended.
Guidance is provided on when a professional plumber should be called for complex or persistent issues.
Typical costs for cartridges and replacement parts
Cost considerations for water filter cartridges and replacement parts vary by system type, brand, and filter media—basic sediment or carbon cartridges commonly range from $10 to $40 each.
Specialty options (reverse osmosis membranes, ion-exchange resins, or long-life ceramic filters) can cost $50 to $200 or more.
Housing O-rings, brackets, and shutoff valves typically add $5–$30.
Warranty and OEM versus third-party choices affect final expense.
Simple ways to speed up future replacements
Plan ahead to shave time and expense from future cartridge swaps by stocking compatible replacements, keeping spare O-rings and basic tools on hand, and scheduling changes before performance drops.
Label dates on filters, store instructions and receipts near the unit, and buy multi-packs for cost savings.
Use a simple checklist to speed the process and set calendar reminders to avoid rushed or missed replacements.
When to call a professional plumber
Call a professional when a cartridge change reveals leaks, damaged housings, inaccessible fittings, or persistent performance issues that simple troubleshooting hasn’t resolved.
A plumber assesses damage, replaces or repairs fittings, guarantees proper water pressure, and verifies seals.
Ask for a written estimate covering labor, parts, and any permit fees.
Hiring a pro can prevent costly water damage and save time on complex repairs.
Environmental and Disposal Considerations
The article addresses proper end-of-life handling for used filter cartridges, including local recycling options, manufacturer take-back programs, and safe landfill disposal when no recycling exists.
It also highlights ways to reduce waste by choosing long-life filters, following maintenance schedules, and selecting replaceable elements rather than entire housings.
Readers are encouraged to check product documentation and local regulations to match disposal choices to the specific filter type.
How to recycle or dispose of used filter cartridges responsibly
Dispose of used water filter cartridges in a way that minimizes environmental impact by identifying their materials and following local recycling or hazardous-waste guidelines.
Check manufacturer take-back programs, local recycling centers, or household hazardous waste collections for proper processing.
Remove excess water and seal samples in bags if required.
Label cartridges when necessary.
Never discard untreated filters in regular curbside recycling if composed of mixed materials.
Reducing waste with long-life filters and maintenance
Choose longer-life filter options and maintain them properly to cut waste and extend service life: high-capacity cartridges, media designed for backwashing, and reusable housings reduce replacement frequency, while regular cleaning, timely gasket checks, and following manufacturer service intervals prevent premature failures.
Selecting certified durable filters, documenting maintenance, and prioritizing repair over replacement minimize landfill contributions and long-term costs.
Quick Reference Checklist for Cartridge Replacement
A concise checklist helps guarantee cartridge replacement proceeds safely and efficiently.
The checklist summarizes essential steps, tools, and safety checks for swift execution.
- Turn off water and relieve pressure
- Prepare replacement cartridge, O-rings, and lubricant
- Inspect housing, clean seals, and seat cartridge correctly
- Restore water, check for leaks, and note replacement date
Conclusion
Replacing an under-sink water filter cartridge restores clean water flow and peace of mind. Like a lighthouse guiding a ship, clear instructions, proper safety, and the correct replacement part illuminate the process, preventing mistakes. With basic tools, modest time, and attention to measurements and disposal, the task becomes manageable even for beginners. Following the outlined steps guarantees reliable performance, cost efficiency, and reduced environmental impact for household water filtration.