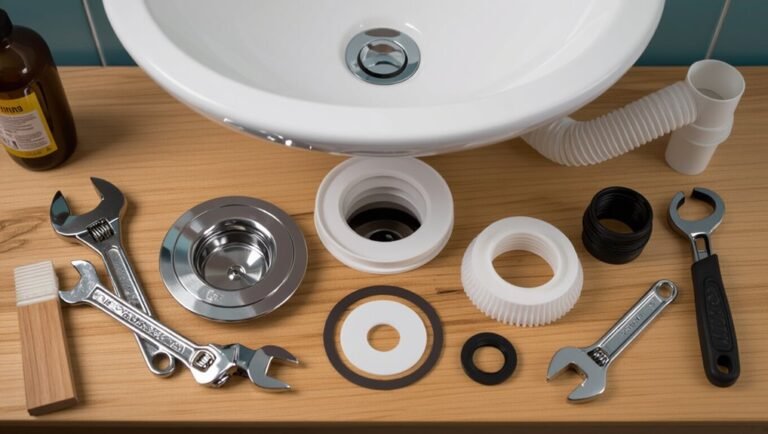
How to Remove an Infinity Drain Cover: Step-by-Step Guide for Easy DIY Removal
To remove an infinity drain cover, first identify how it’s attached—either with screws, clips, or adhesive. Use the appropriate tools to carefully detach it, ensuring to support the cover while lifting to avoid damage. Protect the surrounding tile during the process. Clean and inspect the flange and gasket before reinstalling or replacing any parts. Follow the detailed step-by-step techniques and troubleshooting tips for a successful removal and reassembly.
What an infinity drain cover is and when you should remove it
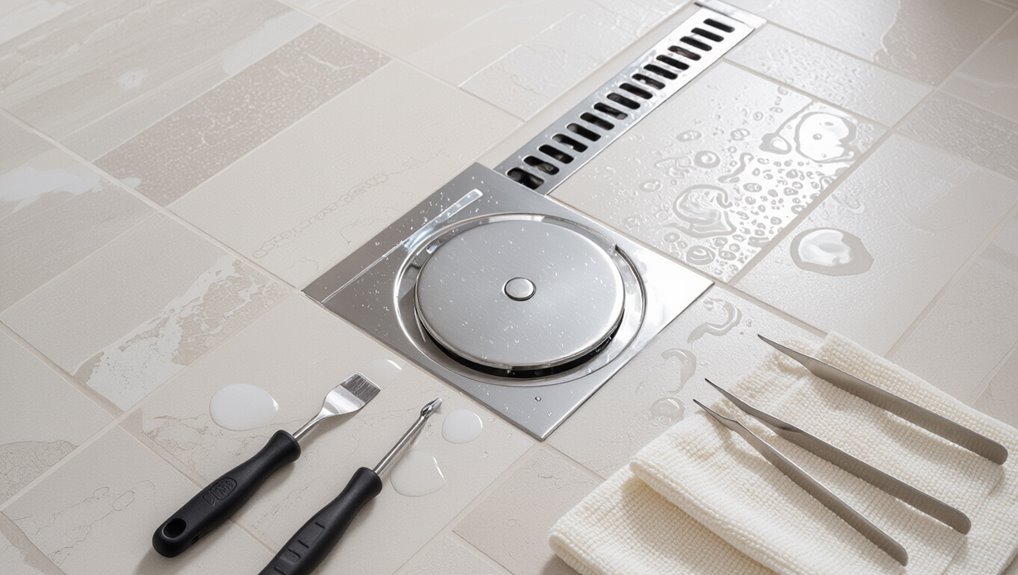
An infinity drain cover is the visible grate or plate that fits over a linear or slot drain, commonly made from stainless steel, aluminum, or tile-insert styles.
It should be removed for routine inspection, cleaning of trapped debris, or for replacement and repair when corrosion or damage is present.
Before removal, water should be shut off if applicable and personal protective equipment used, with care taken on wet or slippery surfaces.
Definition and common types of infinity drain covers
Although often mistaken for a simple grate, an infinity drain cover is a flush-mounted plate that conceals the channel of a linear or slot-style drain, providing a seamless passage between floor surface and drain opening.
Types include stainless steel slotted, tile-insert, perforated, and decorative solid covers.
Readers seeking how to remove infinity drain cover should identify type before proceeding to proper removal steps.
Reasons to remove a drain cover (inspection, cleaning, replacement, repair)
Inspecting, cleaning, repairing, or replacing an infinity drain cover becomes necessary whenever water flow slows, odors develop, visible debris accumulates, tiles need resetting, or components show corrosion or damage.
Routine inspection prevents clogs and hidden leaks. Cleaning restores proper drainage and hygiene.
Replacement addresses worn finishes or mismatched aesthetics. Repair fixes minor seal or fastener issues before they escalate into larger plumbing problems.
Safety considerations before removal (water shutoff, PPE, slippery surfaces)
Before starting, every person should confirm what an infinity drain cover is—a low-profile, linear grate that conceals the channel where water exits a shower or wet room—and understand the specific reasons for removal, such as clog clearing, odor elimination, tile work, or part replacement.
Verify water supply is off, wear gloves and non-slip footwear, use eye protection, secure tools, and mark slippery areas to prevent falls.
Tools and materials needed for removing an infinity drain cover
The following items prepare one for safely removing an infinity drain cover.
- Essential tools: screwdrivers, hex keys, pry tools, pliers.
- Optional aids and spares: rubber mallet, heat gun, penetrating oil; plus replacement parts and cleaning supplies on hand.
Essential tools (screwdrivers, hex keys, pry tools, pliers)
Gather a set of basic hand tools to remove an infinity drain cover efficiently: flathead and Phillips screwdrivers for common fasteners, hex (Allen) keys for recessed bolts, a thin pry tool or plastic spudger to lift trim without scratching, and slip-joint or needle-nose pliers for gripping and turning small parts.
Use appropriately sized drivers and keys; keep tools clean and rust-free to prevent damage.
Optional tools for stubborn covers (rubber mallet, heat gun, penetrating oil)
If basic hand tools fail to free a stuck infinity drain cover, a few optional implements can make the job quicker and safer: a rubber mallet for gentle persuasion, a heat gun to soften sealants or adhesives, and a penetrating oil to loosen corroded fasteners.
Use low heat, short bursts, and protective gloves; apply oil sparingly, allow dwell time, then tap progressively to avoid damage.
Replacement parts and cleaning supplies to have on hand
Several small replacement parts and a handful of cleaning supplies should be kept nearby to guarantee a smooth infinity-drain cover removal.
Include extra screws, gaskets, O-rings, and a replacement trim ring matched to the drain model.
Prepare mild detergent, vinegar, rubbing alcohol, soft brushes, microfiber cloths, and a nonabrasive cleaner.
Have plumber’s grease and thread sealant for reassembly.
How to identify your specific drain cover attachment method
Before attempting removal, one should inspect the drain cover for visible screws or bolts, hidden clips or snap-in systems, signs of adhesive or caulk, and whether the cover is a grate or linear channel style.
A close visual and tactile check around the edges will usually reveal the attachment method. Identifying the method first prevents damage and guides the correct tools and technique.
Visible screws or bolts
When a drain cover is secured with visible screws or bolts, the attachment points are plainly exposed around the perimeter or center of the cover, making identification straightforward.
The technician notes screw heads (flat, Phillips, hex) or bolt nuts; spacing and count indicate removal order.
Corrosion, decorative caps, or rubber washers are observed to determine required tools and whether gentle penetrating oil is advisable before unscrewing.
Hidden clips or snap-in systems
If no visible screws or bolts are found around the perimeter, the cover may be held by hidden clips or a snap-in system that secures the grate from beneath.
Inspect the rim for slight gaps, notches, or access slots.
Use a thin pry tool to test for flex at multiple points.
Listen for clicks when gently lifting to confirm clip release.
Adhesive or caulk-secured covers
Identify adhesive- or caulk-secured drain covers by examining the joint between the cover and the rim for a continuous bead of sealant, visible residue, or a slightly raised edge where material has been applied.
Look for hardened or discolored lines, gaps filled with sealant, or smudges indicating previous sealing.
Absence of screws or clips further suggests adhesive attachment.
Grate or linear channel styles
Although often mistaken for single-piece plates, grate and linear channel drain covers are distinguished by long slots or parallel bars set into a frame, indicating a different attachment than screw-down or fully sealed styles.
The inspector should check for hidden clips along the frame edge, recessed screws beneath end caps, or snap-in retainers.
Identification guides removal method and required tools.
Step-by-step removal process for common attachment types
The following steps outline how to remove common infinity drain covers based on how they are attached.
Readers should reference the appropriate method for their cover type and gather the needed tools before starting.
- Removing covers with exposed or hidden/set screws;
- Removing snap-in or clip-in covers and adhesive/caulk-sealed covers;
- Lifting heavy or recessed covers safely.
Removing covers secured with exposed screws
Most infinity drain covers secured with exposed screws can be removed using a few basic hand tools and a straightforward sequence:
First, loosen each screw with the correct screwdriver, keeping screws organized.
Lift the cover gently; if resistance occurs, check for missed screws.
Clean the flange and inspect the gasket or seal.
Replace screws and test alignment when reinstalling.
Removing covers with hidden screws or set screws
Begin by locating the hidden fasteners: inspect the drain cover’s perimeter and underside for small set screws, recessed caps, or access plugs that conceal attachment points.
Use appropriate hex or flat drivers to loosen set screws, removing caps with a thin pick if needed. Support the cover while loosening to prevent dropping.
Once fasteners are removed, lift straight up, clearing any sealant or debris.
Removing snap-in or clip-in covers
For snap‑in or clip‑in infinity drain covers, removal follows a simple, noninvasive sequence: locate retention points around the perimeter, gently pry at one clip using a plastic trim tool or flat screwdriver wrapped in tape, then work clockwise to release each clip.
Lift the cover once all clips disengage. Inspect clips for damage and clean the flange before reinstalling or replacing the cover.
Removing adhesive- or caulk-sealed covers
Removing an adhesive- or caulk-sealed infinity drain cover requires careful, methodical work to avoid damaging the flange or surrounding tile.
Score the sealant with a utility knife, soften remaining adhesive with a heat gun or solvent safe for tile, then pry gently with a thin putty knife.
Clean residue with solvent, scrape softly, and dry the flange before resealing or replacement.
Lifting heavy or recessed covers safely
After loosening sealant and cleaning the flange as outlined above, attention shifts to lifting heavy or recessed covers, which often require more deliberate procedures and tools.
Use two people for bulky pieces, protect surrounding tile with padding, and employ suction cups or lifting handles.
Insert thin pry bars at opposing points, lift slowly to break remaining bonds, and set the cover on a padded surface.
Troubleshooting common problems during removal
When screws strip or fasteners corrode, the removal approach shifts from simple unscrewing to extraction or cutting methods.
The guide outlines techniques for removing stripped screws, when to apply penetrating oil or resort to saws or grinders for seized hardware, and how to evaluate damage to the flange or surrounding tile.
It also covers steps to protect the drain finish and tile edges to minimize repair needs.
Stripped screws and how to extract them
Encountering stripped screws on an infinity drain cover is common and can halt progress if not addressed methodically. Proper extraction starts with evaluating the screw head type and the extent of damage to choose the least invasive technique.
Start with a rubber band for extra grip. Try a screw extractor set if needed, or drill a small pilot hole for extractor insertion. Protect surrounding finish.
Corroded fasteners and when to use penetrating oil or cutting tools
If stripped screw techniques fail because corrosion has seized the fastener, assess the degree of rust and surrounding finish before choosing a remedy.
Apply penetrating oil, allow soaking time, then retry with appropriate drivers.
For heavily corroded heads, cut a slot for a flathead, use a rotary cutter or bolt extractor, and protect adjacent surfaces with tape and steady clamps to prevent damage.
Damaged drain flange or surrounding tile stop and assess
Any visible deformation of the drain flange or cracked tile stop should be evaluated before proceeding with removal to avoid worsening leaks or destabilizing the surrounding tile.
Inspect for hairline cracks, bends, or gaps. Document damage, photograph for reference, and determine whether temporary shims, sealant, or full flange replacement is required.
If instability is present, stop and consult a plumber or tiler.
Preventing damage to finish and tile edges
Several simple precautions can prevent chipping or scratching of the finish and tile edges when removing an infinity drain cover.
Use thin plastic shims or painter’s tape around the perimeter, protect exposed tiles with a soft cloth, and work slowly with non‑marring tools.
Apply even pressure to lift sections, keep a small container for fasteners, and inspect edges frequently to stop damage early.
Cleaning, inspection, and maintenance after removal
With the cover removed, attention turns to cleaning the drain channel and the cover itself using a soft brush and mild detergent to remove grime and mineral buildup.
The exposed channel should be inspected for clogs, mold growth, and any signs of corrosion or structural damage.
Decisions on repair versus replacement hinge on the severity of damage, cost of parts, and whether cleaning restores full function.
How to clean the drain channel and cover
After removal, the drain channel and cover should be cleaned promptly to prevent buildup and to allow a thorough inspection for damage or corrosion.
Use a soft brush and mild detergent to remove surface debris, rinse with warm water, and dry with a lint-free cloth.
For stubborn residue, apply a nonabrasive cleaner sparingly.
Reassemble only after all parts are fully dry.
Inspecting for clogs, mold, or structural damage
Inspect the exposed drain channel and cover for signs of clogs, mold, or structural damage by systematically examining grooves, seams, and the surrounding substrate under good light.
Look for trapped debris, soft or discolored material indicating mold, cracked or warped metal or plastic, and any loose fasteners or sealant gaps that could compromise drainage or allow leaks.
Note odor, moisture stains, and biofilm accumulation.
When to repair versus replace components
When deciding whether to repair or replace components removed from an infinity drain, evaluate the extent of damage, the part’s material and age, and the cost-effectiveness of restoration versus replacement.
Minor corrosion, debris, or worn seals often merit cleaning, descaling, and seal replacement. Cracks, warped metals, or extensive pitting justify replacement.
Prioritize safety, long-term performance, and warranty coverage when choosing.
How to reinstall or replace an infinity drain cover
Reinstalling or replacing an infinity drain cover begins with preparing the mating surfaces and applying a new sealant or gasket to guarantee a proper seal.
Fasteners should be tightened in the specified sequence to the correct torque to prevent warping or leaks. Upgraded or alternate-style covers may require adapter plates or different hardware.
After assembly, the drain must be tested for proper flow and a watertight seal before finalizing the job.
Preparing surfaces and applying new sealant or gasket
Clear, contaminant-free surfaces are essential before fitting a new gasket or applying sealant to an infinity drain cover.
Remove old sealant and debris with a scraper and solvent; dry thoroughly.
Inspect mating faces for damage and replace any warped components.
Apply a continuous, even bead of plumber’s-grade silicone or place the pre-cut gasket, ensuring full contact and alignment to prevent leaks.
Correct torque and fastening sequence for screws/bolts
Begin by hand-starting all screws or bolts to guarantee proper alignment and avoid cross-threading; this sets the stage for an even clamping force across the infinity drain cover.
Tighten in a crisscross or star pattern, advancing each fastener incrementally to specified torque. Use a calibrated torque wrench, follow manufacturer torque values, and recheck after initial water exposure for settling or loosening.
Replacing covers with upgraded or different styles
When replacing an infinity drain cover with an upgraded or different style, the installer should first verify compatibility of the new cover with the existing flange dimensions, screw pattern, and drainage profile to guarantee a proper seal and fit.
Next, align the cover, use appropriate gasket or sealant per manufacturer instructions, secure fasteners in the specified sequence and torque, and trim or shim as needed for flush installation.
Testing for proper drainage and watertight seal
After the new cover is aligned, sealed, and fastened, the installer should verify both flow performance and watertight integrity before leaving the job.
Run multiple water tests at typical and peak flow rates, observe drainage speed, and check for pooling.
Inspect seams and surrounding grout for leaks. Re-torque fasteners if needed.
Document results and address any seepage immediately.
Time, difficulty, and cost expectations
Typical DIY removal and reinstallation of an infinity drain cover can take 30 minutes to a few hours depending on access and corrosion.
Basic hand tools and moderate mechanical skill suffice for most homeowners, but a plumber should be called for seized fasteners, damaged drains, or unsure operators.
Parts and simple tools are usually under $50, while professional service can range from $100 to $300 or more depending on location and scope.
Estimated time for DIY removal and reinstallation
Expect the full DIY process of removing and reinstalling an infinity drain cover to take roughly 30 minutes to 2 hours depending on experience and any unexpected complications; a straightforward removal and replacement by someone with basic tools usually falls under an hour, while corroded fasteners, mineral buildup, or atypical drain designs can extend the job.
Typical costs: minimal for basic tools and sealant, higher if parts or specialty tools are needed.
Skill level and when to call a professional
Skill level for removing and reinstalling an infinity drain cover ranges from basic DIY competence to experienced plumbing work: a homeowner comfortable with simple hand tools and following instructions can usually complete a straightforward job in under an hour, whereas someone facing corroded fasteners, hidden clips, or unusual drain assemblies may require advanced tools, time, and expertise.
Call a professional when leaks, stripped parts, or uncertainty arise.
Typical costs for parts, tools, and professional service
When planning removal and replacement of an infinity drain cover, homeowners should budget for a modest range of parts and tools and a wider range for professional labor depending on complexity. Typical costs: parts $10–$75, basic tools $0–$60, pro service $100–$500+. Time: 30–120 minutes DIY; difficulty: low–moderate; pros vary by scope.
| Item | Typical Cost | Notes |
|---|---|---|
| Parts | $10–$75 | Cover, screws, sealant |
| Tools | $0–$60 | Pry bar, driver, sealant tools |
| Professional | $100–$500+ | Labor, possible tile work |
Preventive care to minimize future removal needs
A regular cleaning schedule using nonabrasive cleaners and a soft brush helps prevent buildup that necessitates frequent cover removal.
Protective measures—such as applying appropriate marine-grade polish or corrosion inhibitors and drying metal finishes after use—reduce tarnish and rust.
Marking access points and labeling fasteners improves future access and shortens any necessary removal time.
Regular cleaning schedule and recommended products
Establishing a consistent cleaning schedule greatly reduces buildup around an infinity drain and minimizes how often the cover must be removed for deep maintenance.
Weekly wiping with a soft cloth and mild pH-neutral cleaner prevents soap scum and grime.
Monthly gentle scrubbing with a soft brush and diluted vinegar solution tackles mineral deposits.
Avoid harsh abrasives; rinse thoroughly and dry to deter residue accumulation.
How to protect metal finishes and prevent corrosion
Regular cleaning habits also create the best foundation for protecting metal finishes and preventing corrosion.
After cleaning, surfaces should be dried, inspected for scratches, and treated with a light film of non-abrasive, corrosion-inhibiting protectant or wax formulated for metal.
Avoid harsh acids or chlorides.
Guarantee proper ventilation to reduce moisture buildup and promptly repair chip or sealant damage to limit oxidation and surface pitting.
Tips to make future removal easier (access points, labeling fasteners)
Plan access points and labeling from the start to save time and prevent damage during future drain-cover removal.
The homeowner should map fastener locations, note tool sizes, and keep parts organized.
Recommended actions:
- Mark access edges with removable tape.
- Label screws and clips in containers by position.
- Photograph assembly and store instructions with hardware.
Conclusion
Removing an infinity drain cover is a straightforward task when the right tools and approach are used. For example, a homeowners’ association member in Seattle replaced a corroded grate by identifying a hidden set screw, using a hex key and gentle prying, then cleaning the channel before reinstalling a new cover—finishing in under an hour. With attention to attachment type, safety, and regular maintenance, owners can manage drains themselves and avoid costly professional calls.