How to Safely Adjust or Replace an Anti-Scald Valve Without Voiding Plumbing Codes
To safely adjust or replace an anti-scald valve without violating plumbing codes, start by verifying the valve type and reviewing the manufacturer’s instructions and local plumbing regulations. Isolate the water supply, wear appropriate personal protective equipment (PPE), and measure the outlet temperature using a calibrated thermometer. Make incremental adjustments or replace the valve with a certified, code-listed unit, ensuring you use approved fittings. Document all permits, test results, and technician credentials to maintain compliance and warranty. Follow these steps for detailed procedures, troubleshooting, and documentation tips.
What an Anti-Scald Valve Is and Why It Matters
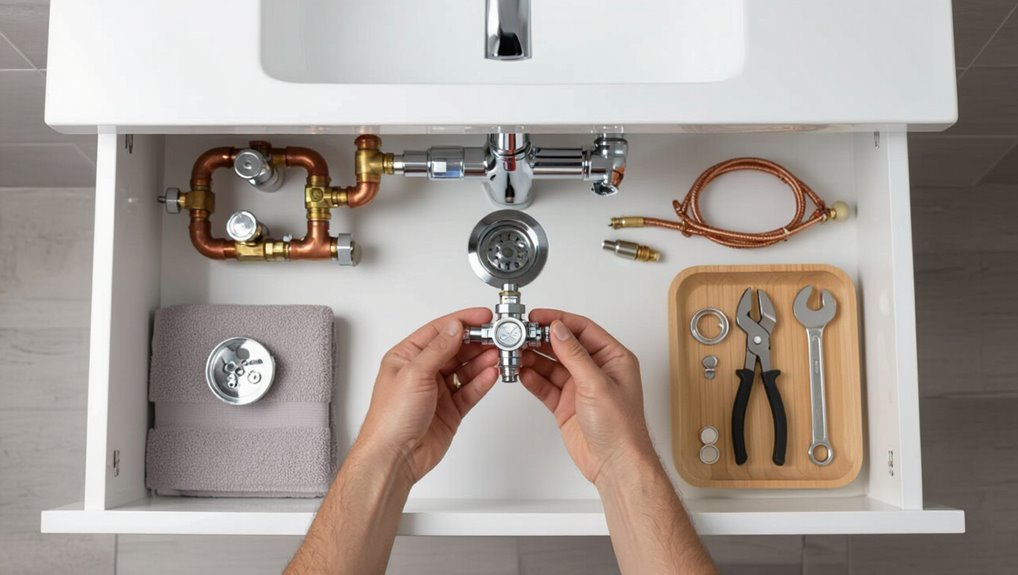
An anti-scald valve—either thermostatic or pressure-balancing—regulates hot and cold water to keep delivery temperature steady despite fluctuations in supply.
Incorrect settings or malfunction can produce sudden high temperatures, causing burns, and are often triggered by water heater set too hot, failing valves, or rapid pressure changes.
Plumbing codes consequently require anti-scald protection at fixtures and specify maximum outlet temperatures and testing/installation standards to reduce burn risk.
How anti-scald (thermostatic and pressure-balancing) valves work
Because sudden changes in water temperature can cause serious burns, anti-scald valves are engineered to maintain safe, consistent output by automatically adjusting hot-and-cold water proportions.
Thermostatic valves sense temperature and modulate flow to hold setpoint; pressure-balancing valves react to inlet pressure shifts, rebalancing mix.
Instructions or searches about how to bypass an anti-scald valve undermine safety and code compliance.
Risks of incorrect temperature settings and common causes of scalding
Scalding injuries occur when water temperatures exceed safe thresholds, often in milliseconds at very high heat, making precise control essential.
Incorrect settings raise risk for children, elderly, and disabled; sudden pressure changes or faulty thermostats cause spikes.
Cross-connection, stagnant hot water, and improper maintenance also contribute.
Regular testing and calibrated anti-scald valves minimize injury potential and reveal underlying system faults.
Plumbing code goals and typical requirements for anti-scald protection
Plumbing codes aim to prevent thermal injuries and secure safe hot-water delivery by specifying when and how anti-scald devices must be installed and maintained.
Codes set maximum delivery temperatures, require thermostatic mixing valves or pressure-balancing fixtures in vulnerable occupancies, mandate regular testing and labeling, and define installation locations.
Compliance preserves occupant safety, reduces liability, and guarantees uniform performance across residential and commercial systems.
Quick Compliance Checklist Before You Start
Before beginning any adjustments, the technician confirms the valve type and manufacturer model to guarantee correct procedures and replacement parts.
Next, applicable local plumbing codes and maximum temperature limits are verified to maintain compliance and occupant safety.
Finally, the required tools and appropriate personal protective equipment are assembled to prevent injury and damage during the work.
Determine valve type and manufacturer model
When preparing to adjust an anti-scald valve, identify the valve type and manufacturer model to guarantee correct parts, tools, and procedures.
Inspect exposed trim, markings on the body, and documentation. Photograph serial numbers and inlet/outlet orientations.
Cross-reference model numbers with manufacturer guides for adjustment ranges, replacement cartridges, and torque specs.
Confirm availability of OEM parts before disassembly to prevent improper substitutes.
Verify local plumbing code references and temperature limits
How should local code and preset temperature limits shape the adjustment process?
The technician cross-checks municipal plumbing codes, national standards (IPC, UPC), and facility-specific requirements to confirm maximum safe outlet temperatures and required thermostatic control settings.
Adjustment stays within documented limits; any deviation triggers recorded justification, manufacturer approval, or permit updates.
Compliance guarantees safety, inspection acceptance, and warranty validity without guessing or ad hoc changes.
Tools and safety gear required
A concise kit of tools and personal protective equipment (PPE) guarantees the technician can adjust an anti-scald valve safely and in compliance.
Required items include adjustable wrench, screwdriver set, hex keys, temperature probe, pressure gauge, thread sealant, and replacement cartridges.
PPE: safety glasses, heat-resistant gloves, and non-slip footwear.
A lockout tag and small flashlight complete the checklist for safe, code-compliant work.
How to Safely Adjust an Anti-Scald Valve
Before adjusting an anti-scald valve, the technician isolates the water supply and prepares the fixture to prevent system damage.
They then remove trim and any protective parts to access the adjustment mechanism and follow the specific procedure for either thermostatic or pressure‑balancing valves.
After making incremental changes, the technician verifies outlet temperature with a calibrated thermometer to confirm safe operation.
Shutoff and preparation: isolating water supply without damaging system
Turn off the main or local shutoff valve and relieve pressure in the lines before attempting any work on an anti-scald valve; this prevents accidental flow and reduces the risk of damaging cartridge seals or nearby plumbing.
Verify isolation by testing fixtures, drain residual water, and use low-pressure caps or supply stops.
Protect adjacent fittings, note orientations, and gather tools to minimize repeated disturbance.
Accessing the adjustment mechanism: trim removal and protective parts
Begin by removing the decorative trim and any escutcheons to expose the control assembly, taking care to note screw locations and trim orientation for accurate reassembly.
Next, detach handles and stop caps, keeping small parts organized.
Locate the protective bonnet or clip; unclip or unscrew it to reveal the adjustment stem.
Inspect seals and note any corrosion before proceeding.
Making temperature adjustments: procedure for thermostatic valves
Adjust the thermostat cartridge incrementally, using the manufacturer’s adjustment screw or dial to raise or lower outlet temperature in small steps.
Verify water reaches target temperature between adjustments, allowing system to stabilize for several minutes.
Make no more than one quarter-turn increments.
Record settings, then reassemble trim.
Test hot and cold extremes and confirm check stops and seals remain leak-free before completing the job.
Making temperature adjustments: procedure for pressure-balancing valves
For pressure-balancing anti-scald valves, temperature adjustments require careful, incremental changes to the internal spool or thermostat mechanism to maintain safe mixed-water output while preserving balance between hot and cold supply pressures.
The technician isolates supplies, makes small indexed turns per manufacturer guidance, cycles the valve under normal flow, and rechecks balance by inducing brief pressure changes.
Record settings and restore trim per code.
Verifying outlet temperature with a calibrated thermometer
After completing pressure-balance adjustments and restoring trim, the technician must verify outlet temperature with a calibrated thermometer to confirm the valve delivers the specified mixed-water setpoint under expected flow conditions.
Measure temperature at the fixture outlet with steady flow, record readings, compare to code or manufacturer limits, and adjust if needed.
Repeat at multiple flow rates to guarantee consistent protection.
Reassembly, leak check, and documentation for code compliance
Once temperature verification and any final trim settings are complete, the technician reassembles the valve and fixture components in the reverse order of disassembly, following manufacturer torque and sealant specifications to guarantee proper fit and orientation.
After reassembly, a pressure and leak test is performed at operating pressure; adjustments are documented, temperature readings recorded, and compliance labels and paperwork completed per local code for inspection.
Replacing an Anti-Scald Valve Without Voiding Codes
When a valve proves beyond repair, replacement should be chosen and the proper code-compliant model selected to match flow, pressure, and connection specifications.
The installer must prepare the site, shut off and drain the water, and remove the old valve carefully to preserve adjacent plumbing and fittings.
The new valve is then aligned and connected per manufacturer and local code requirements, with attention to correct sealing, orientation, and any required anti-backflow devices.
When replacement is required vs. repair
Deciding between repair and replacement hinges on diagnostic findings, parts availability, and code requirements.
If the cartridge leaks, fails thermostatic response, or is obsolete with no certified replacement, full valve replacement is required.
Repair suits minor blockages, adjustable settings, or available OEM parts that restore function and compliance.
Document actions and verify temperature performance per applicable plumbing codes before closing the job.
Selecting a code-compliant replacement valve and matching specifications
Selecting a code-compliant replacement valve requires matching the new unit to the existing system’s performance requirements, certification standards, and local plumbing codes to avoid voiding warranties or inspections.
The technician verifies ANSI/ASSE/NSF listings, flow rates, inlet/outlet sizes, pressure and temperature ratings, and anti-scald setting ranges.
Compatibility with fixture type and manufacturer instructions guarantees code conformity and preserves warranty coverage.
Preparing the installation site and shutting off water
Begin by securing the work area and verifying system conditions before any valve removal; this includes isolating the branch or main water supply, relieving trapped pressure by opening downstream fixtures, and confirming shutoff effectiveness with a gauge or test port.
Clear surrounding space, protect finishes, gather required tools and replacement parts, and place leak containment (bucket, towels).
Label shutoff locations and notify occupants before proceeding.
Removing the old valve safely (preserving surrounding plumbing)
Shut down tools and proceed methodically to remove the anti-scald valve, taking care to protect adjacent fittings, trim, and finish surfaces.
The technician should first verify that water is isolated and pressure relieved, then support piping near the valve to prevent stress when loosening connections.
Use the correct wrenches to avoid rounding flats, and catch residual water in a bucket while keeping parts labeled for reassembly to preserve the existing plumbing and maintain code compliance.
Installing the new valve: alignment, connections, and anti-backflow considerations
With the old valve removed and fittings preserved, the technician aligns the replacement so inlet and outlet ports match the existing hot, cold, and mixed-water piping orientation. Proper alignment prevents stress on soldered or threaded joints and guarantees trim will seat correctly.
Connections are made using approved fittings, sealing methods, and correct torque. An approved check valve or built-in backflow prevention is installed per code before restoring supply.
Setting and testing the new valve to meet temperature limits
After the valve is secured and supplies are restored, the technician calibrates the temperature limit stop and verifies outlet temperature against code-required setpoints using a calibrated thermometer or thermocouple.
Adjustments are made incrementally to the internal limit screw or cartridge until the mixed-water temperature does not exceed the maximum allowed at the most remote fixture.
Verification includes hot/cold isolation tests, flow-rate checks, and re-measurement after stabilization.
Final inspections, permits, and record-keeping to satisfy inspectors
Who verifies compliance once the valve functions correctly? A licensed inspector or plumbing official conducts the final inspection, confirms temperature limits, and signs off. Required permits must be obtained and closed through the local authority. The installer retains copies of permits, test results, adjustment records, and model documentation. Clear, accessible records expedite future inspections and protect against code disputes or warranty issues.
Common Mistakes That Violate Codes and How to Avoid Them
Common violations often stem from using non-listed or mismatched components and from skipping required permits or inspector notifications.
Technicians also risk code breaches by performing improper thermometer testing, omitting records, or bypassing safety features and adjustment limits.
Awareness of these specific errors helps guide compliant procedures and documentation.
Using non-listed or mismatched components
Using non-listed or mismatched components undermines the safety and compliance of anti-scald valve installations because such parts may not meet the performance, compatibility, or testing standards required by plumbing codes.
Installers should only use manufacturer-specified, certified parts.
Substitutions can impair pressure balancing, thermal cutoff, or corrosion resistance, creating failure risks and code violations.
Document parts and retain certificates for inspections.
Improper thermometer testing and record omission
Mistakes with components often coincide with lapses in testing and documentation, since accurate verification requires correct parts and clear records.
Improper thermometer placement, uncalibrated probes, and inconsistent ambient conditions yield misleading temperature readings. Omitted test logs and missing signatures prevent traceability and code compliance.
Technicians must use calibrated instruments, document procedures and results, and retain records to demonstrate corrective action and maintain regulatory adherence.
Bypassing safety features or disabling adjustments
Deliberately bypassing an anti-scald valve or disabling its adjustment mechanisms compromises both occupant safety and regulatory compliance.
Such actions remove temperature limits, increase burn risk, and create code violations subject to penalties.
Repairs must preserve factory settings and tamper-resistance features; documented, approved adjustments should be performed by qualified personnel.
Temporary workarounds are unacceptable—use compliant replacement parts and follow manufacturer and code requirements.
Failing to obtain permits or notify inspectors
Failing to obtain required permits or notify inspectors before modifying plumbing or anti-scald devices can turn a routine repair into a code violation, costly rework, or legal exposure.
Homeowners or contractors who skip permits risk fines, enforced undoing of work, and invalidated warranties.
Always check local jurisdiction requirements, submit appropriate permit applications, schedule inspections, and retain documentation to demonstrate compliance and avoid penalties.
Comparing Valve Types and Code Implications
A concise comparison of thermostatic, pressure‑balancing, and manual mixing valves clarifies performance differences and relevant code requirements. The table below highlights key features, typical applications, and common code notes to prompt careful selection and adjustment. Readers should use this overview to match valve type to installation demands and compliance obligations.
| Valve Type | Typical Performance | Code Implications |
|---|---|---|
| Thermostatic | Precise temperature control, compensates for supply pressure/temperature shifts | Often required where exact delivery temp is critical; periodic testing/maintenance recommended |
| Pressure‑balancing | Maintains temperature by equalizing pressure drops | Common in residential settings; may not meet stricter hospital/eldercare standards |
| Manual mixing | Simple, user‑set blend with no automatic compensation | Simpler code allowances but higher scald risk; often paired with additional safeguards |
Thermostatic vs pressure-balancing vs manual mixing valves
Home plumbing systems use three common approaches to scald protection—thermostatic, pressure-balancing, and manual mixing valves—each with distinct operating principles, performance characteristics, and code requirements. Thermostatic maintains set temperature; pressure-balancing reacts to supply shifts; manual mixing relies on user adjustment. Codes often favor thermostatic or pressure-balancing for fixtures.
| Type | Action | Code note |
|---|---|---|
| Thermostatic | Maintains temp | Preferred |
| Pressure-balancing | Equalizes pressure | Common |
Practical Scenarios and Solutions
Practical scenarios highlight common failure modes and targeted fixes for anti-scald valves.
Consider these focus areas when diagnosing problems:
- Single fixture with intermittent scalding — likely fixes.
- Whole-house recirculation and anti-scald interactions — troubleshooting.
- Older homes with incompatible lines — retrofit strategies.
A technician can prioritize tests and interventions based on which item matches the observed symptoms.
Single fixture with intermittent scalding: likely fixes
Begin troubleshooting by confirming the pattern: intermittent scalding at a single fixture usually points to localized issues rather than a whole-house problem.
Inspect cartridge, check for mineral buildup or worn seats, and clean or replace as needed.
Verify separate shutoff valves, pressure-balancing function, and correct temperature limiter settings.
Test supply pressures and consider replacing the fixture valve if problems persist.
Whole-house recirculation and anti-scald interactions: troubleshooting
When diagnosing interactions between whole-house hot-water recirculation systems and anti-scald devices, consider how continuous flow, return temperatures, and check-valve arrangements alter pressure and temperature at fixtures.
Mismatches can cause frequent throttling, false activations, or delayed hot response. Inspect recirculation pump timing, mixing-valve setpoints, and return-line thermostats.
Balance flow rates, add bypass or thermostatic control at source, and verify non-return valves aren’t creating unintended pressure differentials.
Older homes with incompatible lines: retrofit strategies
Because older plumbing often combines mixed materials, undersized runs, and legacy thermostatic or pressure-balancing fixtures, retrofitting anti-scald solutions requires targeted strategies rather than blanket replacements.
Assess pipe materials, diameters, and water heater output.
Prioritize isolating problematic runs, adding tempering valves, or replacing fixture cartridges compatible with existing lines.
Document changes, follow local code, and consult a licensed plumber for complex conversions.
Maintenance Schedule and Long-Term Compliance Tips
A clear maintenance schedule should specify regular testing intervals and temperature logging to verify setpoints and detect drift.
Observable signs such as persistent leaks, inconsistent temperatures, or slow response indicate a valve may need replacement.
Working with licensed plumbers and keeping records protects warranties and demonstrates compliance with local codes.
Regular testing intervals and temperature logging
Consistency in testing and systematic temperature logging form the backbone of effective anti-scald valve maintenance.
Establish fixed intervals—monthly for high-risk settings, quarterly for typical residences—and record inlet and outlet temperatures, ambient conditions, and test dates.
Maintain logs for compliance and trend analysis, enabling early detection of drift.
Retain records per local code requirements and review annually to adjust testing frequency.
Signs a valve needs replacement
When should an anti-scald valve be replaced depends on observable performance losses and documented test trends.
Indicators include persistent temperature drift despite calibration, slow or fluctuating response to tap changes, visible corrosion or sediment buildup, leaks at body joints, and repeated activation failures during routine tests.
Replacement is warranted when repairs no longer restore stable setpoints or when age exceeds manufacturer service life.
Working with licensed plumbers and documentation to protect warranties and compliance
Several routine interactions with licensed plumbers and thorough documentation practices are essential to preserve manufacturer warranties and demonstrate regulatory compliance.
Records should include service dates, technician credentials, parts used, and signed invoices.
Scheduling periodic inspections, retaining installation manuals, and filing permits guarantees traceability.
When repairs exceed routine adjustments, obtain written estimates and warranty-safe authorization to prevent voiding coverage or violating local codes.
Resources and References for Code Requirements
Relevant national and international standards (for example, ASME A112, ANSI, and EN/ISO plumbing standards) and links to their texts provide the baseline requirements for anti-scald valves.
Local code amendments and enforcement agency websites should be checked to confirm any jurisdiction-specific changes or permitting requirements.
Manufacturer installation guides and online certification lookup tools offer model-specific installation details and proof of compliance.
Common national and international standards (examples and links)
Because anti-scald valves affect health and safety across plumbing systems, designers and installers must reference widely used standards that define performance, testing, and installation criteria.
Key references include ASSE/ASME 1016 and CSA B125.3 for thermostatic and pressure-balancing devices, ANSI A112.18.1 for fittings, ISO 9001 for manufacturing quality, and relevant IAPMO/UPC and EN standards; links vary by jurisdiction.
How to read local code amendments and where to check
Local amendments to plumbing codes can alter national or model requirements for anti-scald devices, so practitioners should first identify the governing authority—municipal, county, or state/provincial—responsible for code enforcement in the project area.
Consult local government websites, building department bulletins, and municipal code databases for amendment texts.
Verify effective dates, applicability clauses, and required permits, and document findings for compliance and inspections.
Manufacturer installation guides and certification lookup
Where can installers find the exact procedures and performance data necessary for correct anti-scald valve installation?
Manufacturer installation guides and certification listings provide model-specific torque, adjustment ranges, flow limits, and testing protocols.
Verify certifications against recognized bodies.
Recommended steps:
- Download OEM installation manual.
- Check UPC/ASME/NSF listings.
- Confirm model and serial.
- Document compliance for inspection.
Conclusion
To summarize, the process of adjusting or replacing an anti-scald valve must be approached with care, like a steady hand guiding fragile glass. Observing local codes, documenting work, using approved parts, and involving licensed professionals when required protects occupants and preserves compliance. Following checklist steps, avoiding common pitfalls, and keeping up with maintenance guarantees safety and code adherence over time, reducing liability and preventing dangerous temperature fluctuations in plumbing systems.