How to Remove a Rusty Pipe Plug Safely: Step-by-Step Methods That Work
To safely remove a rusty pipe plug, use penetrating oil, the right tools, and controlled heat to prevent damage. Start by cleaning the area and soaking the threads in penetrating oil. Apply steady leverage with a matching socket and breaker bar. If the plug remains stuck, use short bursts of heat to help loosen it. As a last resort, consider extractor sockets, impact methods, or cutting and welding. Always wear appropriate PPE and ensure pressure is isolated before proceeding. For detailed steps, tool recommendations, and safety checks, follow the complete guide.
What to Know Before You Start Removing a Rusty Pipe Plug
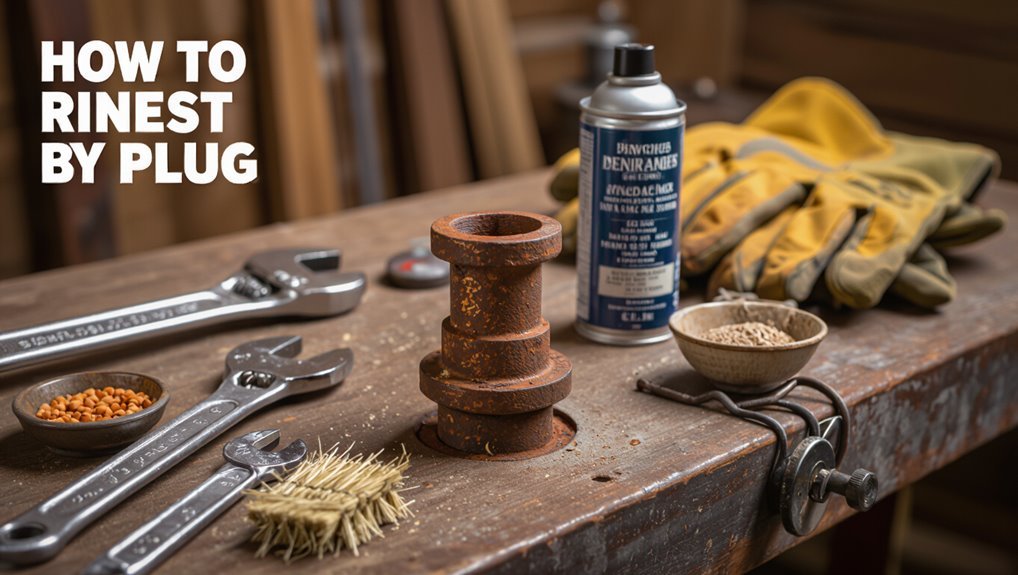
Before attempting removal, the article explains common causes of seized pipe plugs and typical failure modes so the reader can assess the likely difficulty.
It outlines safety hazards, indicators that a professional is warranted, and a concise tools-and-materials checklist.
It also specifies required personal protective equipment and simple workspace-preparation steps to reduce risk.
Why pipe plugs seize and common failure modes
Seized pipe plugs result from a combination of chemical corrosion, mechanical locking, and contamination: iron oxide builds between mating threads, galvanic reactions accelerate deterioration where dissimilar metals meet, and mineral deposits or old sealants harden into abrasive barriers that wedge parts together.
Common failure modes include thread stripping, head rounding, and brittle fractures; understanding these helps plan how to remove rusty pipe plug without causing further damage.
Safety risks and when to call a professional
Assess the risks carefully: attempting to remove a rusty pipe plug can expose workers to sharp metal, pressurized fluids, toxic residues, and sudden part failures that can cause cuts, eye injuries, burns, or flooding.
If corrosion is severe, pipes are pressurized, chemical contamination suspected, or structural integrity uncertain, stop and contact a licensed plumber or industrial technician to prevent injury, environmental damage, or code violations.
Tools and materials checklist
A concise checklist of tools and materials helps guarantee the job proceeds safely and efficiently:
- Penetrating oil, rust remover, and thread lubricant for loosening and protection.
- Assorted wrenches, adjustable spanner, pipe plug extractor, and locking pliers for grip and removal.
- Wire brush, rags, replacement plug or cap, thread sealant, and a small container for removed debris.
Personal protective equipment and workspace preparation
Before beginning work, the operator should don appropriate personal protective equipment—gloves rated for chemical and cut resistance, eye protection with side shields, and a respirator if rust removers or solvents will be used—and arrange the workspace to guarantee good lighting, stable footing, and adequate ventilation.
- Isolate the area and remove trip hazards.
- Prepare spill containment and absorbents.
- Keep a fire extinguisher and first aid kit nearby.
Quick answer: The safest overall method to remove a rusty pipe plug
The safest overall method is to apply penetrating oil, allow time to soak, then use the correct-sized wrench or extractor with steady, controlled force.
This approach minimizes damage to the fitting and reduces the risk of sudden breakage or injury.
Alternative techniques—heat, impact tools, or cutting—are reserved for plugs that remain seized after repeated soaking and careful extraction.
Recommended single best approach summary
Use penetrating oil, heat, and a torque-limiting tool in combination as the safest overall method: apply penetrating oil and allow it to soak,
heat the surrounding pipe (not the fitting) to expand metal and break corrosion bonds,
then remove the plug with an adjustable torque-limiting wrench or breaker bar fitted with a proper-sized socket while supporting the pipe to prevent stress.
This sequence maximizes control and minimizes damage.
When to use alternative methods
Sometimes circumstances call for alternatives to the recommended penetrating-oil–heat–torque method. When heat is prohibited, surrounding materials are delicate, or access prevents proper leverage, safer options are justified.
Choose methods minimizing risk: chemical rust dissolvers for confined spaces, controlled mechanical extraction for damaged threads, or professional assistance when structural failure, pressurized systems, or hazardous contents are present.
Evaluate risk before proceeding.
Step-by-step primary method: Penetrating oil + breaker bar + heat
The primary method combines penetrating oil, steady mechanical leverage, and controlled heat to free a seized pipe plug.
First, the area is cleaned and oil applied, then allowed to soak while tools are prepared and surrounding piping protected.
Heat is applied safely and a breaker bar with measured force is used to turn the plug, backing it out slowly and reapplying oil if resistance persists.
Step 1 Clean the area and apply penetrating oil
Begin by clearing dirt, oil, and corrosion from around the plug so penetrating oil can reach the threads. A stiff brush and solvent remove loose debris, while compressed air or a rag clears residues.
Wear gloves and eye protection.
Apply penetrating oil generously to the exposed threads and seating area, ensuring coverage without pooling. Allow contact time before any mechanical force is attempted.
Step 2 Let oil penetrate and prepare tools
Allow the penetrating oil to work for at least 15–30 minutes while assembling the necessary tools: a correctly sized socket or plug wrench, a long breaker bar for leverage, an adjustable or pipe wrench for backup, and heat source (propane torch) with safety gear.
During dwell time, inspect fittings, clear rust debris, confirm socket fit, check breaker bar pivot, and position wrenches for ideal torque without applying force yet.
Step 3 Protect surrounding piping and heat the plug safely
Protect surrounding piping and nearby components with heat-resistant cloths or flame-retardant shields, and clear a safe workspace before applying a torch to the plug.
Heat evenly, avoiding prolonged direct flame on seals or fittings. Monitor adjacent materials and use a heat sink or wet rags on nearby joints.
Allow metal to expand gently, watch for odd smells, and ventilate fumes for safety.
Step 4 Use a breaker bar or cheater pipe with controlled force
Loosen the plug by applying steady, controlled torque with a breaker bar or a cheater pipe fitted to the wrench, using the penetrating oil and even heat from the previous steps to reduce seizure.
Maintain body alignment, grip firmly, and apply slow, increasing force—avoid sudden jerks.
If resistance peaks, hold torque for a moment to let oil and heat work before cautiously reapplying pressure.
Step 5 If it budges, back it out slowly and reapply oil as needed
If the plug begins to turn, the technician should continue backing it out slowly, pausing after each partial turn to reapply penetrating oil into the threads and let it soak.
This controlled, incremental approach minimizes the risk of snapping the plug or stripping the threads while allowing trapped rust to be progressively broken down.
Each pause permits heat redistribution and further penetration until the plug clears the pipe.
Step 6 How to remove a rounded or damaged plug during this method
When the hex or square on a pipe plug is rounded or the head is otherwise damaged, the technician must switch to extraction tactics that avoid relying on the original flats. This involves selecting gripping or cutting tools that bite or shear without imposing sudden torque spikes.
Applying penetrating oil and heat as before, and proceeding slowly to prevent further thread damage or breakage is crucial. Use extractor sockets, vise grips, bolt extractors, or carefully drilled-and-screwed studs, tapping progressively larger extractors while protecting surrounding metal and reapplying lubricant and heat between attempts.
Alternative methods for stubborn plugs
When the primary method fails, several alternative tactics can be considered based on access and risk tolerance.
These include impact wrenches or drivers, mechanical extractors and bite‑and‑turn tools, cutting the plug with rotary or reciprocating tools or plunge cutters, and welding a nut or bolt to gain purchase.
Chemical and electrochemical rust removal options may also assist but require attention to compatibility and safety.
Using an impact wrench or impact driver (when appropriate)
Apply an impact wrench or impact driver only after penetrating oil and manual leverage have failed to budge a stubborn, rusted pipe plug.
Select correct socket size, use impact-rated tools and PPE, and secure the fitting to prevent torsion on surrounding piping.
Use short bursts, steady positioning, and controlled torque.
Stop if movement risks damage; revert to extraction tools or professional help.
Mechanical extraction with extractor sockets and bite-and-turn tools
For plugs that resist both penetrating oil and impact tools, mechanical extraction offers targeted options: extractor sockets bite into or reverse-grip the plug head, while bite-and-turn tools clamp and rotate fragments out in small increments.
Choose socket size to maximize contact, apply steady torque to avoid rounding, and alternate tightening with back-off strokes.
Wear eye protection and secure surrounding fittings before extraction.
Cutting out the plug: rotary tools, reciprocating saws, and plunge cutters
Cutting out a stubborn rusty plug is often the most direct solution when extraction tools fail; this approach uses rotary grinders, reciprocating saws, or plunge cutters to remove the plug or create access for replacement.
Operators should secure the pipe, use appropriate cutting discs or blades, control sparks, and protect surrounding material.
Work slowly in short passes, clear debris, and inspect the opening for corrosion before fitting a new plug.
Welding a nut or bolt to the plug for leverage
Weld a hex nut or bolt head to the exposed face of a seized pipe plug to create a solid turning point when standard extractors cannot get purchase.
Use appropriate welding gear, clean metal surfaces, and tack welds to avoid heat distortion.
Allow cooling, then apply a wrench or socket.
If welding is unsuitable, stop and consult a professional to prevent damage or injury.
Chemical and electrochemical rust removal considerations
Consider chemical and electrochemical options when mechanical methods fail to free a seized pipe plug: penetrating oils, acid-based rust removers, and electrolysis each have specific benefits and hazards.
Penetrants soften corrosion; acids dissolve rust but can pit metal and damage seals; electrolysis reduces oxides safely but requires setup and electrical precautions.
Select methods compatible with pipe material, fittings, and surrounding finishes; follow safety and disposal rules.
Comparing methods: effectiveness, risk, and best use cases
Weighing methods for removing a rusty pipe plug requires evaluating effectiveness, risk, and appropriate contexts. Each technique balances torque, corrosion removal, and damage risk; choices depend on material, access, and safety. Mechanical and chemical options vary in speed and hazard, while thermal or cutting methods are last resorts.
| Method | Best use |
|---|---|
| Penetrant + wrench | Light rust, accessible |
| Heat | Stubborn, metal-safe |
| Cutting | Seized, sacrificial |
| Electrolysis | Delicate parts |
| Chemical soak | Moderate corrosion |
How to handle special scenarios
Different materials and installation conditions call for tailored approaches: cast iron and galvanized fittings demand more torque and corrosion care, copper and PVC-adjacent plugs require gentler methods, and tight or inaccessible locations may need specialized tools.
Procedures for live systems must prioritize isolation, pressure relief, and proper draining before any removal attempt.
For stripped, rounded, or broken-off remnants, extractors, cutting tools, or professional intervention should be considered based on risk and access.
Cast iron, galvanized steel, copper, and PVC-adjacent plugs
Many plumbing materials demand distinct approaches when removing a rusty pipe plug: cast iron and galvanized steel require penetrating oils and careful heat or impact methods to break corrosion bonds.
Copper fittings call for gentler torque and protection against work-hardening.
PVC-adjacent plugs must be insulated from heat and solvent exposure to avoid melting or chemical damage.
Use appropriate tools, avoid excessive force, and protect surrounding materials.
Tight spaces and inaccessible plugs
When corrosion, fixture layout, or surrounding structures prevent a wrench or extractor from fitting, removing a plug in a tight or inaccessible spot requires alternate strategies.
Use compact tools (stubby sockets, right-angle adapters), heat with a small torch or heat gun to break rust bonds, apply penetrating oil patiently, and tap gently to loosen.
If needed, fabricate access with cutting or use specialized micro-extractors.
Live systems with fluids or pressure isolation and draining steps
Assess the system before attempting plug removal: identify whether the pipe is live, trace isolation points, and confirm the presence of fluids or pressure.
Then de-energize and lock/tag isolation valves, vent trapped pressure at designated vents, and drain into appropriate containers.
Wear suitable PPE, monitor for residual pressure, and verify zero-energy state before loosening the plug.
Document actions and restore seals after work.
Stripped, rounded, or broken-off plug remnants
Several common failure modes—stripped threads, rounded hex flats, or broken-off plug remnants—require different extraction strategies and tools.
For stripped threads, use internal/external extractors or expanders with penetrating oil.
Rounded flats respond to gripping tools, pipe-wrench wraps, or slotting for a screwdriver.
Broken-off remnants may need carbide burs, left-hand drill bits, or hydrogen-safe extractor kits; protect surrounding threads and retap afterward.
Repair and prevention after removal
Once the plug is removed, the area should be cleaned and the threads inspected for damage to determine whether repair or replacement is necessary.
Selection of a replacement plug and sealing method should prioritize compatible materials, correct thread form, and the use of anti-seize or appropriate sealant.
Final installation must follow proper torque and technique to guarantee a tight fit and minimize future corrosion or seizure.
Cleaning threads and inspecting for damage
Begin by removing loose rust and debris from the plug and mating threads using a stiff wire brush and compressed air to expose the underlying condition; this clears surfaces for a proper inspection and prevents contaminants from causing leaks.
Then clean with solvent or rust remover, dry thoroughly, and inspect threads, seat, and bore for pitting, cross-threading, or deformations.
Document damage and determine reparability.
Choosing the right replacement plug and sealing options
After documenting the condition of the threads, seat, and bore, attention turns to selecting a replacement plug and an appropriate sealing method to restore a reliable joint.
Match plug material and thread standard to the system (brass, stainless, or plated steel; NPT, BSP).
Choose sealant based on service (PTFE tape, anaerobic compound, or joint paste), and replace damaged fittings or use thread inserts when needed.
Proper torque and installation technique to prevent future seizure
Apply controlled torque and correct assembly technique to ascertain a secure seal while minimizing the risk of future seizure.
The installer should follow manufacturer torque specs, tighten progressively in stages, and use proper wrench contact to avoid rounding.
Ascertain clean mating surfaces, correct thread engagement, and verify alignment.
Final torque checks after pressure testing confirm integrity and reduce mechanical stress that leads to binding.
Anti-seize compounds and corrosion-resistant materials
Select appropriate anti-seize compounds and corrosion-resistant materials to minimize future seizure and extend component life.
After cleaning threads, apply a compatible anti-seize to mating surfaces and choose materials or coatings that resist galvanic corrosion.
Consider environment, temperature limits, and media compatibility.
- Use copper, nickel, or ceramic-based anti-seize per application
- Prefer stainless or brass fittings where suitable
- Apply sparingly and recheck periodically
Common mistakes and how to avoid them
Common errors in rusty pipe plug removal include applying excessive heat or force, which can warp or crack piping, using incorrect tools or poor tool positioning that strip threads or round fittings, and skipping safety steps when systems remain pressurized.
Each mistake carries a predictable consequence and can be prevented with proper technique, correct tool selection, and strict pressure-isolation procedures.
The following section explains specific avoidance measures for these risks.
Applying excessive heat or force that damages piping
Using excessive heat or brute force when removing a rusty pipe plug can easily warp threads, crack fittings, or compromise nearby seals and joints.
Operators should apply measured, incremental heat and controlled torque, monitoring metal color and resistance.
When resistance remains high, stop and seek alternative methods—penetrating lubricants, tapping, gradual back-and-forth motion, or professional assistance—to prevent irreversible damage and leaks.
Using incorrect tools or poor tool positioning
When excessive heat or force has been ruled out, attention shifts to the tools and how they are applied; improper tool choice or poor positioning is a frequent cause of rounded flats, stripped threads, and damaged fittings.
Use correctly sized wrenches, quality gripping tools, and align force along the plug axis. Secure adjacent components, avoid cheater bars, and re-evaluate grip before increasing torque.
Skipping safety steps around pressurized systems
Neglecting pressure-isolation checks and bypassing bleed procedures before working on a plugged line can turn a routine removal into a hazardous event. Sudden releases of trapped air, steam, or fluid can cause injury, equipment damage, and contamination.
The author recommends verifying isolation, venting and testing zero pressure, locking/tagging valves, wearing PPE, and using pressure-rated fittings and gauges to prevent accidents.
Troubleshooting: What to try if the plug won’t move
If the plug refuses to budge, a clear escalation plan is recommended, beginning with gentle tapping and penetrating oil.
Then progressing to heat, longer levers, or extraction tools as needed.
Each step should be tried only until a reasonable effort has been made without forcing or damaging surrounding piping.
If the plug remains stuck after moderate mechanical attempts or if the work risks leaks or structural damage, a licensed plumber should be contacted.
Sequential escalation plan from least to most invasive
Begin with the least invasive methods and progress only as needed, so the smallest interventions are attempted first and damage is minimized.
Try penetrating oil and wait, gentle tapping, and increased leverage with proper tools.
If stuck, apply heat cautiously, repeat lubricant, then use extractor attachments.
Reserve cutting, drilling, or forceful impact for last, always protecting surrounding pipework and fittings.
When to stop and call a licensed plumber
Recognize the point at which continued effort risks damage or injury and shift to calling a licensed plumber.
If penetrating oil, heat, controlled impacts, and extractor tools fail, stop.
Persistent corrosion, visible pipe cracking, stubborn fittings, active leaks, or worsening leaks warrant a professional.
A plumber assesses structural risk, uses specialized extraction equipment, and guarantees code-compliant repairs to prevent further damage or safety hazards.
Quick reference: Tool sizes, torque ranges, and safety limits
When preparing to remove a rusty pipe plug, a concise reference of wrench and socket sizes, recommended torque ranges, and clear safety limits helps prevent tool damage and personal injury.
Recommended quick reference:
- Wrench/socket sizes: 1/2″–1″ (pipe thread adapter fit), hex plugs vary.
- Torque ranges: 20–60 ft·lb for hand tools; 5–15 ft·lb for delicate fittings.
- Safety limits: stop if slippage, cracking, or >60 ft·lb.
Conclusion
In the end, the guide likens removing a rusty pipe plug to freeing a lodged cog from an antique clock: patience, the right leverage, and careful coaxing restore function without breaking delicate parts. One plumber recalled using penetrating oil and steady heat for ten minutes before a stubborn plug yielded, saving a $300 replacement. That image—gentle persistence releasing seized metal—captures the balance of technique, safety, and prevention emphasized throughout the article.