How to Fix an Air Lock in Toilet Quickly: Simple Steps for Fast Drainage
How to Quickly Fix an Air Lock in Your Toilet
An air lock in your toilet can disrupt water flow and cause drainage issues. To resolve this quickly, first, shut off the water supply. Then, use a plunger or pour 2–4 liters of hot water into the bowl from waist height to dislodge the trapped air. If the problem persists, consider using a hose or an auger for more stubborn blockages. Always wear gloves and check for leaks during the process. For detailed step-by-step methods and prevention tips, continue reading.
What Causes an Air Lock in a Toilet
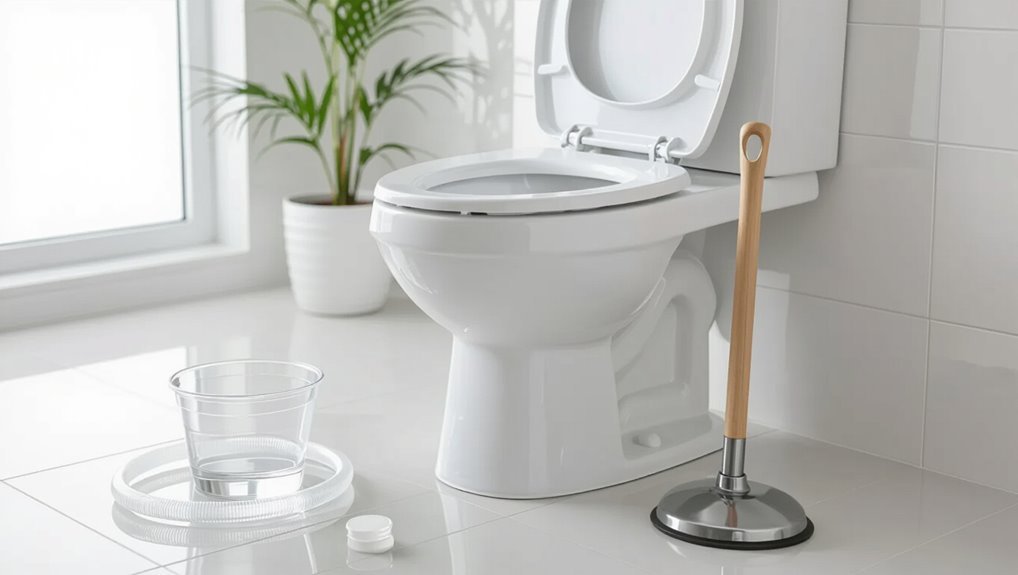
Air locks in household toilets form when trapped air prevents normal water flow through the supply or flush lines.
They commonly occur after repairs, new installations, or when water levels drop and allow air to enter the plumbing.
Indicators that a toilet has an air lock—such as weak or intermittent filling and gurgling sounds—differ from other issues like blockages or valve failures by their pattern and response to venting.
How plumbing air locks occur in household toilets
Occurring when trapped pockets of gas interrupt normal water flow, an air lock in a household toilet happens after air becomes confined within the supply line or trap and prevents water from filling or moving as planned.
Plumbing layouts, high points, poor venting, or loosened fittings can trap air.
Understanding how to fix air lock in toilet guides targeted actions to release trapped gas and restore proper flow.
Common triggers after repair, installation, or low water levels
After explaining how trapped gas in supply lines or traps stops normal flow, attention turns to the specific events that commonly introduce those pockets of air.
Common triggers include recent repairs that left lines open, new installations with incomplete priming, drained or low water levels allowing air ingress, frozen or siphoned lines, and rapid pressure changes from nearby fixture use or main supply interruptions.
Signs your toilet is affected by an air lock vs other issues
An abrupt gurgling or a weak flush often signals that trapped gas is disrupting normal water flow, but similar symptoms can stem from blockages, clogged jets, or a failing fill valve.
Distinguish air lock by intermittent gurgles, sudden restoration after siphon or venting, and lack of persistent debris.
Persistent slow drain, sewage odor, or continuous refilling point toward clogging or mechanical failure instead.
Quick Safety and Tools Checklist
Before attempting repairs, basic safety measures such as turning off the water supply, wearing gloves and eye protection, and ensuring proper ventilation should be followed.
Essential tools like an adjustable wrench, plunger, bucket, and towels are useful to have on hand.
Work should stop and a professional contacted if leaks worsen, fittings are corroded, or the cause cannot be identified after initial checks.
Safety precautions before attempting fixes
Several simple precautions and the right tools can prevent injury and property damage when addressing a toilet air lock.
The person should shut off the water supply, ventilate the area, and wear gloves and eye protection.
Electrical devices must be kept dry.
Clear surrounding floor space to avoid slips.
If unsure about plumbing complexity or contamination, contact a professional rather than risking damage or injury.
Essential tools and items to have on hand
When preparing to clear an air lock in a toilet, assemble a compact kit of essential tools and safety items so the job proceeds efficiently and with minimal risk.
Necessary items include protective gloves, a reliable plunger, and basic hand tools.
Recommended compact checklist:
- Rubber gloves and eye protection
- Cup or small bucket and plunger
- Adjustable wrench and screwdriver set
When to stop and call a professional
Recognize early signs that a DIY approach has reached its limits—persistent gurgling, sewage smell, repeated backups after plunging, or water continuing to siphon despite basic interventions—and stop to call a professional if these occur.
A plumber should be contacted for suspected mainline blockages, damaged seals, cracked porcelain, or when tools fail.
Prioritize safety: avoid chemical overload and electrical exposure; document issues for technician diagnosis.
Fast Methods to Clear an Air Lock
Several quick techniques can restore normal flow when an air lock forms, ranging from a rapid tank-to-bowl flush to creating a temporary pressure differential with a garden hose.
Each method—using a plunger for pressure equalization, pouring hot (not boiling) water while pumping, or carefully operating a toilet auger—targets trapped air in different ways and carries specific precautions.
The following steps outline when to choose each approach and how to perform them safely.
Method 1 Rapid tank-to-bowl flush technique
Start by shutting off the water supply at the valve and flushing to drain most of the tank; this isolates the system so a controlled rapid refill can force trapped air from the bowl back through the trap.
Reopen the valve briefly to let a fast surge of water enter the tank, then close it immediately.
Repeat short surges until normal siphon action returns.
Method 2 Using a plunger for pressure equalization
Using a plunger applies controlled pressure to dislodge trapped air and restore normal siphoning between the bowl and drain.
The person seals the plunger over the outlet, primes it with water if needed, then pumps firmly several times and releases to cycle pressure.
Repeat until water drains smoothly. This technique equalizes pressure without chemicals and is fast, safe, and reusable.
Method 3 Pour-and-pump with hot (not boiling) water
After attempting pressure equalization with a plunger, the pour-and-pump method offers a quick alternative that uses hot (not boiling) water to move trapped air and restore flow.
The procedure: heat water until very hot, pour steadily into the bowl from waist height, then quickly use a plunger or toilet brush to agitate.
Repeat once or twice until drainage resumes.
Method 4 Creating a temporary pressure differential with a garden hose
Create a temporary pressure differential by feeding a garden hose into the toilet bowl and briefly running water to force air down the trap and into the drain line.
Secure the hose to prevent movement, control flow to avoid overflow, and monitor drainage.
Stop once water flows freely.
If resistance persists, allow settled water to drain and repeat cautiously to prevent backflow or splashing.
Method 5 Using a toilet auger or snake carefully
Reach for a toilet auger or plumbing snake when water won’t move despite other attempts, as these tools can break up trapped air pockets and clear partial blockages in the trap or outlet.
Insert the cable gently, crank the handle clockwise to navigate bends, and push through resistance to release air or debris.
Retract slowly, flush to confirm flow, and sanitize the tool afterward.
Detailed Stepwise Procedure for Each Method
The article now outlines precise, step-by-step procedures for each fast method to clear an air lock, covering tank-to-bowl flushing, correct plunger technique, hot water pour-and-pump, garden hose options, and auger use.
Each section lists required materials, clear actions, expected outcomes, and safety or equipment precautions.
Readers are guided through practical details such as seal technique, water volume and temperature limits, hose connections, and ways to avoid damage when using an auger.
Step-by-step: Tank-to-bowl flush (materials, steps, expected result)
Begin by gathering the necessary materials: a bucket or large container, a hose or funnel (optional), rubber gloves, and a towel to catch spills.
Close the tank’s water supply, remove the lid, and transfer water from tank to bowl swiftly using the bucket or hose.
Restore supply and observe full siphon; repeat if air lock persists.
Clean up any spills.
Step-by-step: Plunger technique (how to create a seal and stroke pattern)
Prepare a flange or cup plunger suited to the toilet and don rubber gloves before starting.
Position the plunger over the drain, ensuring a tight seal around the hole. Push down gently to expel air, then pull up sharply without breaking the seal.
Repeat steady 10–15 thrusts: slow compressions followed by quick pulls.
Test flush; repeat until drainage clears.
Step-by-step: Hot water pour-and-pump (volume, temperature, safety)
Pour a large volume of hot (not boiling) water directly into the bowl to displace trapped air, then follow with alternating plunges to force remaining air through the trap.
Use about 2–4 liters at roughly 60–70°C. Pour steadily from waist height, wait 30 seconds, then plunge 6–10 firm strokes.
Wear gloves, avoid thermal shock to porcelain, and ventilate the room.
Step-by-step: Garden hose procedure (connection options, precautions)
Attach a garden hose to either a nearby outdoor faucet or a washing machine/utility sink connection, then feed the other end into the toilet bowl to deliver a steady column of water that displaces trapped air in the trap and drain.
Open the valve slowly, monitor flow, seal around the hose to prevent splashing, and stop if leaks, cracks, or backflow appear.
Step-by-step: Auger use (how to avoid damage)
Carefully feed the auger into the toilet trap and operate it methodically to clear an air lock without damaging porcelain or seals.
Hold the bell securely against the bowl, advance cable slowly, and rotate handle clockwise.
When resistance eases, retract gently while maintaining tension.
Avoid forcing, sharp angles, or metal-on-porcelain contact.
Inspect seals afterward and flush to confirm restoration.
Troubleshooting When Quick Fixes Fail
When quick fixes do not resolve the problem, it becomes necessary to diagnose symptoms such as partial drainage, gurgling, or recurring air locks to identify whether the issue is in the fill valve, flapper, or the venting system.
A focused inspection of the tank components and vent lines helps pinpoint the source.
Meanwhile, temporary workarounds—such as manually controlling the fill valve or using a bucket flush—can restore basic function until permanent repairs are completed.
Diagnosing partial drainage, gurgling, or recurring air locks
If a toilet repeatedly drains only partway, emits gurgling noises, or develops air locks despite basic plunging and vent checks, the problem likely lies deeper in the drain, venting system, or hidden trap seals.
Diagnosing these symptoms requires systematic testing—observing water levels during flushes, checking multiple fixtures for linked gurgling, isolating vent access, and considering sewer line obstruction or a compromised vent stack—before moving on to more invasive remedies.
Inspect for slow drains, scent of sewage, and intermittent backups; document occurrences, test with controlled flushes, and consult a plumber if multiple fixtures or outdoor drains show similar signs.
Inspecting the fill valve, flapper, and venting system
Having ruled out external vent blockages and main-line obstructions, the next step is to inspect internal tank components—particularly the fill valve, flapper, and the toilet’s venting path—to identify malfunctions that cause partial drains, gurgling, or recurrent air locks.
Check fill valve for slow closure or leaks, confirm flapper seating and seal integrity, and trace vent piping for kinks, partial collapses, or improper connections at roof penetrations.
Temporary workarounds to restore function until repairs are made
Apply short-term measures to keep the toilet usable and minimize air-lock symptoms until proper repairs are completed:
flush several times with the tank lid off to release trapped air,
pour a bucket of water directly into the bowl to force flow,
use a hand pump or wet/dry vacuum for stubborn blockages,
and temporarily reduce water level to prevent siphoning.
Monitor performance and schedule permanent fixes.
Preventing Future Air Locks
Preventing future air locks centers on regular vent pipe maintenance, prompt attention when vents freeze or clog, and following best practices after any toilet repair or replacement.
Careful inspection of roof vents and use of insulated or heated venting in cold climates reduce the risk of blockage.
Additionally, adopting seasonal and usage routines—such as running water through seldom-used fixtures and avoiding abrupt shutoffs—helps prevent air entrapment.
Proper vent pipe maintenance and when vents freeze or clog
Inspecting and maintaining the plumbing vent pipe keeps air flowing freely through the drain system and reduces the chance of future air locks.
Regular checks remove debris, bird nests, and leaves; clear blockages with a plumber’s snake or garden hose.
In cold climates, insulate exposed sections or use heat tape to prevent freezing.
Schedule professional inspections if airflow remains restricted or problems recur.
Best practices after toilet repair or replacement
After repair or replacement, the fixture should be tested and adjusted to guarantee water and air move freely through the trap and vent; this includes several flush cycles, checking for slow drains or gurgling, and confirming the fill and flush valves operate correctly.
Additionally, seals and connections should be inspected for leaks, traps kept clear, and vent paths verified open to minimize recurrence of air locks.
Seasonal and usage tips to avoid air entrapment
Once the system has been tested and adjusted, attention turns to seasonal and usage habits that reduce the chance of trapped air.
Regularly run fixtures after seasonal inactivity, insulate exposed pipes to prevent temperature-related contraction, maintain modest water pressure, avoid simultaneous heavy draws, and purge lines after maintenance.
Scheduled checks and user awareness minimize recurrence and prolong smooth drainage performance.
When to Call a Plumber and Expected Repairs
When simple troubleshooting fails, a professional plumber should assess the situation to identify underlying causes and provide cost estimates.
- Persistent blockage or repeated loss of water pressure
- Visible leaks, damaged valves, or inaccessible pipework
- Complex repairs such as line re-routing, valve replacement, or air release installation (costs vary by region and scope)
A prompt call can prevent escalation and higher repair bills.
Signs that professional intervention is needed
How can a homeowner tell if an air lock problem requires a professional?
Persistent blockage after basic attempts, recurring air locks, water backing into other fixtures, unusual noises in pipes, visible leaks, or reduced water pressure indicate deeper issues.
If multiple fixtures are affected or DIY remedies fail, a licensed plumber should be contacted to diagnose underlying causes and prevent property damage.
Common professional fixes and likely costs
If DIY attempts fail or multiple fixtures are affected, a plumber will typically begin with diagnostic steps—pressure testing, inspection of vent stacks, and checking trap and supply lines—for pinpointing the cause. Common fixes: vent clearing, snake/drain cleaning, valve replacement, trap repair, or main line work. Costs vary by complexity.
| Repair | Typical Range | Time |
|---|---|---|
| Vent clearing | $75–$200 | 0.5–1 hr |
| Drain snaking | $100–$300 | 0.5–2 hr |
| Valve/trap repair | $120–$400 | 1–2 hr |
| Main line work | $500–$2,000+ | 2+ hr |
Quick Reference: Choose the Best Method Based on Situation
A brief guide helps the reader match remedy to circumstance and urgency.
- Best option for immediate home remedies
- Best option when tools are limited
- Best option for avoiding risk to older fixtures
Practical recommendations follow to aid quick decision-making.
Best option for immediate home remedies
Start by evaluating symptom patterns and access: rapid gurgling or weak flush with visible air bubbles suggests a trapped air pocket, while complete blockage indicates a broader vent or sewer issue.
For immediate remedies, try a water thrust: fill the bowl quickly from a bucket to force air through the trap. Follow with a few firm flushes; repeat once if needed.
Best option when tools are limited
When tools are limited, select the simplest method that matches the symptom pattern and available materials: use gravity and basic household items first.
Try repeated quick flushes, a bucket of water poured from waist height, or a plastic bottle suction trick to dislodge trapped air.
If these fail after a few attempts, pause and reassess before escalating to improvised plungers or professional help.
Best option for avoiding risk to older fixtures
Several careful, low-force techniques best protect older fixtures while addressing a toilet air lock.
Gentle methods—manual siphoning with a bucket, using a soft-rim plunger, or gently pouring measured warm water—minimize stress on seals and porcelain.
Avoid chemical drain cleaners, metal tools, or excessive force.
If resistance persists, consult a plumber experienced with vintage plumbing to prevent cracks, leaks, or damaged fittings.
Conclusion
An air lock, trivial yet stubborn, interrupts the ordinary rhythm of a household — a silent bubble halting a routine flush. The guide juxtaposes quick fixes with cautious diagnostics, offering simple tools alongside stepwise care. By balancing immediate methods and preventive habits, readers gain brisk remedies and long-term resilience. When DIY limits are met, professional help remains pragmatic. This synthesis empowers action: swift drainage now, fewer interruptions later, serene plumbing restored.