
How to Use a Pipe Cleaning Brush: Step-by-Step Tips for Fast, Safe Results
To effectively clean your pipes using a pipe cleaning brush, follow these simple steps for fast and safe results. A pipe cleaning brush helps remove scale, hair, and residue from drains and pipes. Choose the right bristle type—wire for metal pipes and nylon for plastic—and ensure it matches the pipe diameter.
Before starting, wear gloves and eye protection, then remove any nearby fixtures. Gently insert the brush into the pipe and use short, controlled strokes while flushing with warm water or a suitable cleaner. After cleaning, inspect the pipe for any damage and repeat if necessary. Dispose of any waste properly. Additional tips and material-specific advice are provided below.
What a Pipe Cleaning Brush Is and When You Need One
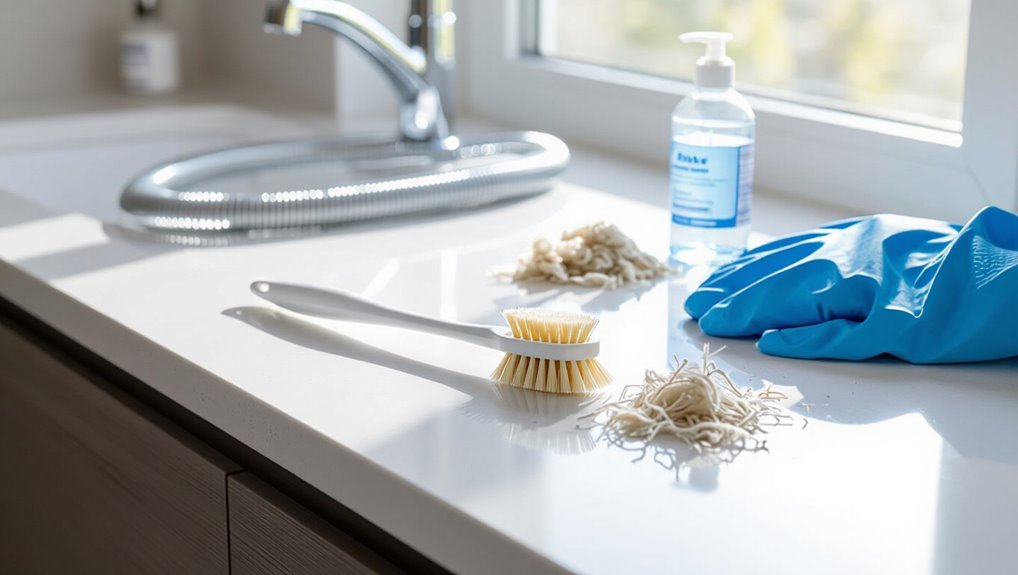
A pipe cleaning brush is a tool with variations in size, bristle material, and shape designed for specific pipe diameters and debris types.
It is used both in households for sinks, drains, and appliances and by professionals for maintenance and restoration.
Visible slow drainage, recurring clogs, foul odors, or residue buildup indicate pipes likely need brushing.
Types of pipe cleaning brushes and how they differ
Brushes for cleaning pipes come in several distinct types—wire, nylon, bottle, and tube brushes—each engineered for specific materials, diameters, and soil types.
Selection affects performance and safety; manuals often explain how to use a pipe cleaning brush for each type.
Consider:
- Wire: tough scale removal, metal pipes
- Nylon: gentler, plastics
- Bottle: narrow bulbs, fixtures
- Tube: long, flexible runs
Common household and professional uses
Many households and professionals rely on pipe cleaning brushes to remove scale, debris, and buildup from plumbing, appliances, and HVAC components.
Typical household tasks include clearing sink and shower drains, cleaning dishwasher and washing machine hoses, and maintaining water heater and coffee machine fittings.
Tradespeople use brushes for residential and commercial pipe maintenance, HVAC coil and duct access, and pre-flushing new installations to guarantee clear flow.
Signs your pipes need brushing
Routine maintenance tasks described above often reveal early signs that pipes need more than a quick flush; recognizing those signs determines when to use a pipe cleaning brush.
Indicators include slow drainage, recurring clogs, gurgling noises, foul odors, visible residue at drain openings, discolored water, or decreased water pressure.
Timely brushing prevents buildup progression and reduces need for chemical cleaners or professional intervention.
Quick Overview: Best Way to Use a Pipe Cleaning Brush (Direct Answer)
The fastest, safest method is to insert the correctly sized brush onto a flexible rod, apply mild detergent, and push and pull with steady, controlled strokes while avoiding excessive force.
Required tools and materials include a pipe cleaning brush of the right diameter, a flexible rod or auger, gloves, eye protection, mild detergent or pipe-safe cleaner, and a bucket or cloth to catch debris.
This concise approach minimizes damage and maximizes cleaning efficiency.
One-sentence summary of the fastest, safest method
Use a stiff-bristled brush sized to the pipe. Apply a mild detergent or solvent if needed. Insert the brush straight and rotate while moving it back and forth.
Then flush thoroughly with water to remove loosened debris. The fastest, safest method keeps brush alignment steady, uses controlled pressure to avoid damage, limits chemical exposure, and rinses thoroughly to guarantee no residues or dislodged particles remain.
Tools and materials required for the quick method
One compact kit suffices: a stiff-bristled pipe brush sized to the pipe diameter, protective gloves and eye protection, a bucket or hose for flushing, a mild detergent or appropriate solvent, and lint-free cloths or rags for drying and containment.
- Stiff-bristled brush matched to pipe size
- Chemical-resistant gloves and safety glasses
- Bucket/hose for flush and waste capture
- Mild detergent or solvent plus lint-free rags
Step-by-Step Guide to Cleaning Pipes with a Brush
The following step-by-step guide outlines practical actions for cleaning pipes with a brush, starting with preparing the workspace and observing safety precautions.
It covers selecting the correct brush size and material, removing fixtures or obstructions safely, and inserting and maneuvering the brush to dislodge buildup.
The guide also explains appropriate cleaning solutions and rinsing techniques to finish the job effectively.
Prepare the workspace and safety precautions
Before beginning, clear and well-lit workspace should be established so tools, replacement parts, and waste containers are within easy reach and trip hazards are removed.
Protective gloves, eye protection, and appropriate clothing must be worn. Ventilation should be guaranteed if using chemical cleaners.
Turn off water supply and isolate the section being worked on. Keep a flashlight and first-aid kit nearby.
Choose the right brush size and material
Several factors determine the correct pipe-cleaning brush: pipe diameter, material, level of buildup, and access angle.
Select a brush whose bristles fit snugly without forcing; too large risks damage, too small cleans poorly.
Choose bristle material—nylon for delicate finishes, brass for moderate deposits, stainless steel for heavy corrosion.
Match handle length and flexibility to reach bends and maintain control.
Remove fixtures or obstructions safely
Start by turning off water supply and relieving line pressure to prevent spills and injury.
Inspect the area, removing readily detachable fixtures—valves, aerators, flanges—using appropriate tools. Protect finished surfaces and catch small parts.
Clear visible debris and obstructions with picks or pliers. For stubborn blockages, loosen connections gradually to avoid pipe damage.
Label removed components for correct reassembly.
Insert and maneuver the brush effectively
With fixtures removed and obstructions cleared, the technician positions the brush at the pipe entrance, ensuring the bristle size matches the pipe diameter and the handle or rod is securely attached.
The brush is advanced slowly, rotated and rocked to dislodge deposits, and pushed past bends with steady, controlled force.
Periodic withdrawals check progress and prevent snagging; replace or adjust as needed.
Use cleaning solutions and rinsing techniques
Apply an appropriate cleaning solution after mechanical scrubbing to dissolve remaining grime and sanitize the interior; choose a product compatible with pipe material (e.g., mild detergent for PVC, descaler for mineral buildup, enzymatic cleaners for organic residue) and dilute it per manufacturer instructions.
Allow dwell time, then flush thoroughly with warm water until runoff is clear. Use low-pressure rinsing to protect seals and prevent erosion.
Inspect, repeat if needed, and reassemble fixtures
Carefully inspect the cleaned pipe and fittings for remaining deposits, leaks, or damage using good lighting and, if available, a flashlight or inspection camera; pay particular attention to joints, seals, and threaded connections where residue and wear commonly hide.
If buildup or defects persist, repeat brushing and rinsing until clear.
Reassemble fixtures using proper alignment and torque, replacing compromised seals or hardware as needed.
Proper drying and final checks
Once brushing and rinsing are complete, the pipe should be dried and inspected systematically to prevent corrosion, mold, or trapped moisture from compromising performance.
Wipe interior and exterior with lint-free cloths or use compressed air to expel residual water.
Check joints, seals, and access points for leaks or debris.
Allow full air-dry before reassembly and run a brief flow test to confirm proper function.
Matching Brush Types and Techniques to Pipe Material
Different pipe materials require specific brush types and handling to avoid damage and guarantee effective cleaning.
For example, stiff wire brushes suit steel and galvanized pipes while softer nylon or non-abrasive brushes are better for PVC, ceramic, enamel, and flexible tubing.
The following section outlines recommended brushes and techniques for metal, plastic, coated, and specialty lines.
Metal pipes (copper, galvanized, steel)
For metal pipes—copper, galvanized, and steel—selecting the correct pipe cleaning brush and technique depends on the metal’s hardness, surface finish, and susceptibility to corrosion.
Use soft brass or nylon brushes for copper to avoid scratching; stainless-steel or tempered wire brushes suit heavily corroded steel and galvanized surfaces.
Apply moderate pressure, short strokes, and corrosion inhibitors afterward to protect cleaned metal.
PVC and plastic piping
Plastic piping, such as PVC, CPVC, and polyethylene, requires brushes and techniques that prioritize softness and chemical compatibility to avoid scratching, cracking, or leaching.
Use nylon or soft polypropylene brushes, avoid metal bristles, and choose noncaustic cleaners safe for plastics.
Apply gentle pressure, short back-and-forth strokes, and rinse thoroughly.
Inspect for stress or solvent damage before reassembly.
Ceramic and enamel-coated surfaces
Moving from softer plastics to harder, glazed materials requires a change in brush selection and handling to protect the finish and remove deposits effectively.
For ceramic and enamel-coated pipes, use soft- to medium-bristled brushes or non-abrasive nylon pads.
Employ gentle pressure, short strokes, and circular motions to dislodge grime without scratching.
Rinse thoroughly and inspect for chips or wear after cleaning.
Flexible tubing and specialty lines
Flexible tubing and specialty lines demand brushes and techniques matched to their flexibility, wall thickness, and chemical compatibility.
Use soft nylon or PTFE‐covered brushes for silicone, PVC, or thin-walled hoses to prevent collapse and abrasion.
For fuel, chemical, or food-grade lines, select chemically resistant bristles and solvent-compatible cores.
Employ gentle, controlled motion, minimal force, and appropriate drying to preserve integrity and safety.
Tools, Cleaning Solutions, and Accessories to Improve Results
Selecting the right brushes, cleaners, and accessories can greatly improve cleaning efficiency and protect pipe materials. Recommendations should cover bristle type and size, safe chemical options and natural alternatives, and useful accessories for tougher clogs.
Safety gear and proper tools reduce risk and prolong both pipe and tool life.
- Recommended brushes and why to choose them (nylon, stainless, wire sizes)
- Safe chemical cleaners and natural alternatives (enzyme cleaners, vinegar/baking soda)
- Accessories for clearing and access (augers, snakes, extension rods)
- Personal protective equipment and containment (gloves, goggles, buckets)
Recommended brushes and why to choose them
A compact selection of brushes makes the difference between a surface that is merely rinsed and one that is truly clean: stiff nylon for stubborn residue, soft-bristled options for delicate glassware, and tapered or cone-shaped heads for reaching bends and tight joints.
Metal-core brushes suit heavy build-up; flexible-shaft models access long runs.
Pick brush size to match pipe diameter and replace worn bristles promptly to maintain effectiveness.
Safe chemical cleaners and natural alternatives
Many cleaners balance effectiveness with material safety, so users should choose solutions that remove residue without damaging pipes or finishes.
Mild enzymatic cleaners, baking soda with vinegar, and diluted citric acid dissolve organic buildup safely.
Avoid harsh drain acids on older or PVC plumbing.
Test finishes first, follow manufacturer instructions, ventilate work areas, and rinse thoroughly after cleaning to prevent corrosion or residue.
Accessories: augers, snakes, gloves, goggles, buckets
Complementing brushes with the right accessories improves efficiency and reduces risk when clearing pipes.
Augers and snakes reach deep clogs; select lengths and coil diameters for the pipe.
Protective gloves and goggles prevent chemical and debris injuries.
Sturdy buckets collect waste and hold solutions safely.
Match tool choice to blockage type and pipe material for ideal, safe results.
Common Problems and How to Handle Them
Common problems include stubborn clogs that brushing alone cannot clear, risks of scratching or dislodging pipe walls and fixtures, and brushes becoming lodged in tight fittings.
The text should explain safe techniques for freeing a stuck brush, criteria for stopping efforts, and when professional assistance is required.
Practical tips and warning signs will help readers avoid damage and escalate appropriately.
Stubborn clogs that brushing won’t remove
When a pipe cleaning brush fails to clear a blockage, the obstruction is often more than surface grime—solidified grease, mineral scale, hair mats, or a lodged foreign object can resist bristled agitation and require alternative methods.
Professionals may employ augers, hydro-jetting, chemical descalers, or manual removal. Assess pipe material and access, choose an appropriate technique, and consider calling a plumber for persistent, inaccessible, or hazardous clogs.
Avoiding damage to pipe walls and fixtures
If brushing fails and stronger measures are considered, care must be taken to protect pipe walls and fixtures from unintended damage.
Professionals recommend selecting nonabrasive tools, using protective sleeves or tape over fittings, applying minimal force, and testing methods on inconspicuous sections.
Chemical alternatives should match material compatibility.
Inspect frequently during work and stop if scoring, deformation, or leaks appear to prevent costly repairs.
What to do if brush gets stuck
Remain calm and assess the situation before applying force: a lodged pipe cleaning brush can usually be freed with careful, deliberate steps rather than brute strength.
Gently retract and rotate the handle to change angle. Apply penetrating lubricant or warm water to loosen debris.
Use a flexible retrieval tool or a reverse-pull technique if available. Inspect bristles for damage before continuing.
When to stop and call a professional
How long should one attempt a repair before seeking professional help?
Typically, after 15–30 minutes of safe, logical effort with no progress, or after repeated clogs, leaks, damaged fittings, persistent odors, or tools causing resistance, stop.
If water damage, corrosion, or uncertain pipe materials are present, contact a licensed plumber.
Prioritize safety and preventing costly mistakes.
Maintenance Schedule and Prevention Strategies
The recommended brushing frequency varies by system type—kitchen drains and shower lines may need weekly attention, while main sewer lines typically require monthly to quarterly care.
Simple daily habits, such as running hot water after use and avoiding grease down drains, help reduce buildup between brushings.
A seasonal and annual checklist for more thorough inspections and professional servicing completes a preventative maintenance plan.
How often to brush different systems
Different systems require brushing at distinct intervals based on usage, material, and exposure to debris.
Residential sink and faucet lines: monthly to quarterly.
Shower and tub drains: monthly.
Kitchen grease-prone lines: biweekly to monthly.
HVAC condensate and appliance hoses: quarterly.
Industrial or high-debris systems: weekly to monthly.
Adjust frequency after inspections, seasonal changes, or following minor clogs.
Daily habits that reduce buildup
Regular, small habits can greatly limit pipe buildup by preventing debris accumulation and minimizing moisture that encourages deposits.
Daily rinsing with hot water, disposing of food scraps properly, using strainers, and running short water flows after use reduce residue.
Avoid pouring grease or harsh chemicals down drains.
Promptly address slow drainage and schedule brushings based on observed buildup to maintain clear pipes.
Seasonal and annual maintenance checklist
Several key tasks, scheduled seasonally and annually, keep pipe systems functioning and prevent costly clogs.
Inspections, brush cleanings, and preventive treatments reduce buildup and detect issues early. Records guarantee consistent care and timing.
- Inspect exposed pipes and drains for leaks or corrosion.
- Brush main lines and traps thoroughly.
- Flush with safe enzymatic cleaner.
- Schedule professional camera inspections annually.
Safety Tips and Best Practices
The section outlines essential personal protective equipment and safe handling procedures for any chemicals used during cleaning.
It also covers proper disposal of debris and spent cleaning solutions to prevent contamination.
Finally, it discusses strategies to minimize risk when working in tight or overhead spaces.
Personal protective equipment and chemical handling
Wear appropriate personal protective equipment and follow chemical-handling protocols whenever using a pipe cleaning brush to prevent injury and exposure.
Users should don chemical-resistant gloves, eye protection, and respiratory protection if fumes are present. Confirm long sleeves and closed-toe shoes.
Store and label cleaning agents safely, mix only as directed, work in ventilated areas, and keep spill kits and first-aid supplies readily available.
Safe disposal of debris and used cleaning solutions
After completing cleaning tasks and handling contaminants, attention should shift to proper disposal of debris and used solutions to minimize environmental harm and health risks.
Collect solids in sealed, labeled bags; neutralize or dilute cleaning solutions per manufacturer guidelines.
Do not pour hazardous fluids down drains; use designated hazardous-waste containers.
Arrange disposal through approved municipal or commercial waste services and document disposal actions.
Minimizing risk in tight or overhead spaces
Inspect confined or overhead work areas before starting to guarantee stable footing, clear access, and adequate lighting; identify pinch points, low-clearance hazards, and potential falling debris so appropriate controls—such as head protection, fall arrest, or work platforms—can be selected and positioned.
Use long-handled brushes to reduce reach, maintain three points of contact, ventilate spaces, secure tools and hoses, and communicate with a spotter for emergency support.
Cost, Time Estimates, and When to Hire a Pro
Typical DIY pipe brushing takes 15–60 minutes and costs mostly for the brush and cleaners, while a professional service often runs from $100–$300+ and may take 1–3 hours depending on diagnostics. The table below summarizes common time/cost ranges and clear indicators to hire a plumber. If pipes show recurring clogs, slow drains despite brushing, leaks, or signs of corrosion, professional help is recommended.
| DIY (time/cost) | Pro service (time/cost) |
|---|---|
| 15–60 minutes; brush + supplies <$30–$50 | 1–3 hours; $100–$300+ |
| Suitable for single clogs and routine maintenance | For persistent clogs, leaks, odors, or pipe damage |
Typical time and cost for DIY cleaning vs professional service
Costs and time for cleaning pipes can vary widely depending on the fixture, level of buildup, and chosen method.
DIY using a pipe brush typically takes 15–60 minutes and costs $5–30 for brushes and cleaners.
Professional drain cleaning often requires 1–3 hours and costs $100–400 or more for service and equipment.
DIY suits minor clogs; professionals handle complex or recurring issues.
Indicators that justify hiring a plumber
While simple clogs can be handled with a brush and basic cleaners, certain signs indicate that hiring a plumber will save time and money.
Persistent backups, multiple drains affected, foul odors, slow drainage despite repeated cleaning, visible pipe damage, or recurring issues justify professional evaluation.
Expect higher upfront cost but faster diagnosis, repair warranties, and prevention of costly water damage or emergency replacements.
Troubleshooting Quick Reference
A concise troubleshooting quick reference lists fast fixes for common brush and blockage issues, such as loosening stuck debris, adjusting brush size, or clearing brush bristles.
It also presents a decision flow to determine when continued brushing is appropriate versus when to call an expert.
The goal is to enable safe, efficient resolution while preventing wasted time or further damage.
Fast fixes for common issues
Refer to this quick troubleshooting guide when common problems arise during pipe-brushing tasks: brushes that snag, bristles that shed, handles that loosen, or debris that resists removal.
- Rotate gently; reverse direction to free snags.
- Trim loose bristles; replace if shedding persists.
- Tighten or secure handle with tape or a clamp.
- Use penetrating solvent and repeated short strokes to dislodge stubborn debris.
Decision flow: brush more vs call an expert
Decide quickly whether further brushing is likely to resolve the issue or whether a professional is needed by evaluating progress, effort required, and risk.
If blockage clears with modest effort, continue cautiously; stop if resistance, damage risk, persistent odor, repeated clogs, or visible corrosion occur.
Escalate to a plumber when tools, access, or safety limits are reached to prevent costly repairs or health hazards.
Visual Guide and Step Sequence
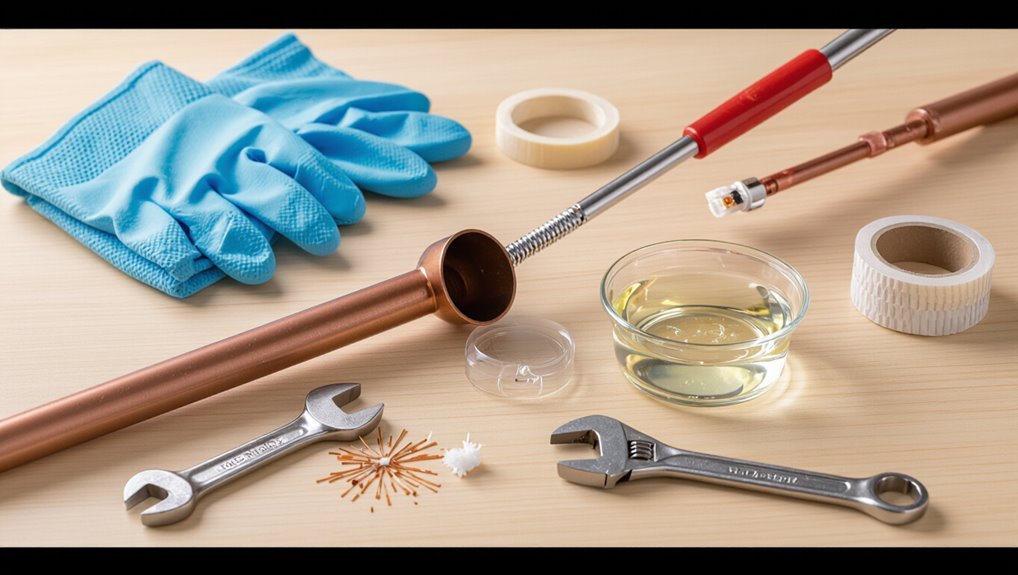
Begin by laying out the pipe cleaning brush, any adapters, and suitable safety gear on a clean work surface to establish a clear visual reference for each component and its role.
Then photograph or sketch components, note brush size and pipe diameter.
Sequence steps: inspect, secure fittings, insert brush, rotate and withdraw, flush, and reinspect.
Label each step with expected time and safety checks.
Conclusion
Regular pipe-cleaning with a brush reduces clogs and prolongs plumbing life; studies show household drains treated with mechanical cleaning experience 40% fewer recurring blockages than chemical-only maintenance. Using the correct brush and technique prevents abrasion and buildup, saving time and money. Homeowners adopting routine inspection and brushing every 6–12 months typically avoid emergency calls and costly repairs, making simple brush-based care an efficient, low-risk strategy for maintaining reliable pipe performance.
