
How to Add Freon to a Mini Split: Step-by-Step DIY Guide for Safe Recharging
To safely recharge a mini split, confirm the correct refrigerant type and ensure you have the necessary certifications and safety gear. Begin by isolating power and inspecting for leaks. Connect a manifold gauge, vacuum pump, and scale. Slowly add the precise weight-based charge as vapor through the suction line while monitoring pressures and temperatures. Be cautious—overcharging, using the wrong refrigerant, or missing leaks can harm the compressor and breach regulations. For comprehensive guidance, including detailed steps, tools, diagnostics, checklists, and advice on when to consult a professional, continue reading.
What You Need to Know Before Adding Refrigerant to a Mini Split
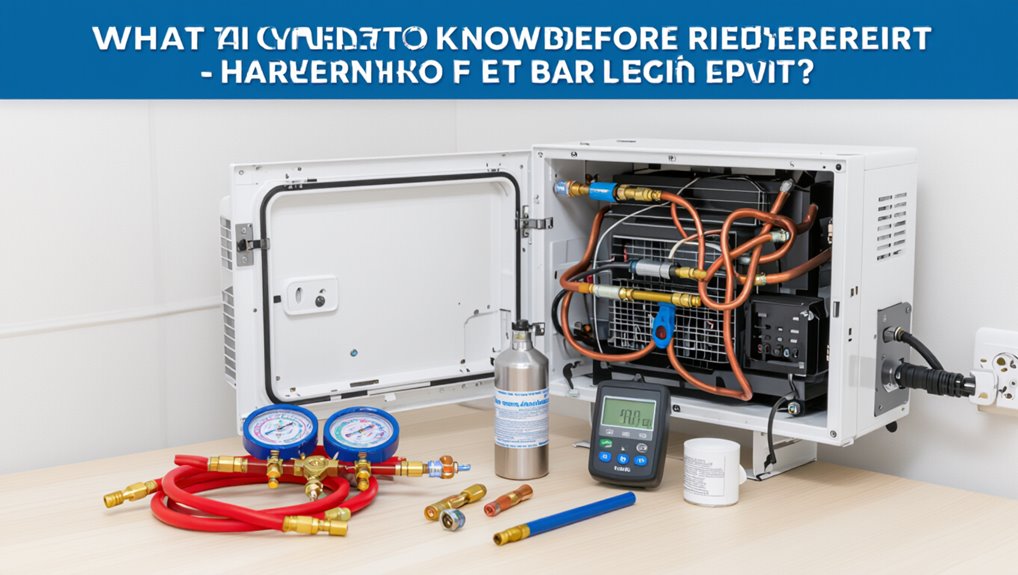
Before attempting any refrigerant service, the reader should recognize legal restrictions and safety protocols that often limit DIY charging.
They should verify a true low-charge condition through measured pressures and performance signs rather than assumptions, and understand the hazards of overcharging or using an incompatible refrigerant.
If uncertainty exists or repairs beyond simple checks are required, a certified HVAC technician should be contacted.
Legal and safety considerations for DIY refrigerant charging
Because refrigerants are regulated substances that can harm people and the environment, anyone considering adding refrigerant to a mini split must understand both legal requirements and safety risks.
Guidance on how to add freon to mini split should note certification requirements, EPA rules, proper PPE, leak detection, correct tools, and safe disposal.
Unlicensed charging may be illegal and hazardous; hire a certified technician when in doubt.
How to determine if your mini split actually needs more refrigerant
How can one tell if a mini split actually needs more refrigerant? Observable signs include reduced cooling or heating capacity, longer run times, and ice buildup on coils.
Measured indicators are low suction pressure, abnormal temperature differentials across the evaporator, and system fault codes indicating low charge.
Confirm by inspecting for leaks and consulting pressure/temperature charts before adding refrigerant.
Risks of overcharging or using the wrong refrigerant type
Having confirmed whether a mini split is low on refrigerant, attention must turn to the risks of overcharging or using the wrong refrigerant type.
Excess refrigerant raises pressure, reduces efficiency, damages the compressor and can cause leaks.
Incorrect refrigerant chemistry impairs lubrication, voids warranties and risks component failure.
Proper charge and exact refrigerant match are essential to safe, reliable operation.
When to call a certified HVAC technician
When should a certified HVAC technician be called? A technician is needed for suspected leaks, unfamiliar refrigerant types, failed pressure diagnostics, or when charging requires recovery and reuse.
Also call when electrical issues, compressor problems, warranty concerns, or local regulations prohibit DIY charging.
Certified professionals guarantee correct refrigerant handling, accurate diagnostics, safe repairs, and compliance with environmental and safety standards.
Tools, Materials, and Parts Required
The section lists the essential tools—manifold gauge set, vacuum pump, refrigerant scale, and appropriate wrenches—needed to service a mini split.
It explains common refrigerants (R-410A, R-32, etc.), how to identify the system’s charge type from the nameplate, and why compatibility matters.
Optional items like a nitrogen tank, leak detector, and access valve kits that can simplify or speed the job are also noted.
Essential tools list
A concise kit of tools, materials, and parts is required to add refrigerant to a mini-split safely and effectively.
The list below covers essential items for diagnosis, charging, and safety; selection depends on unit specifications and local regulations.
- Manifold gauge set with hoses
- Refrigerant cylinder with correct valve
- Vacuum pump
- Leak detector and dye
- Safety gloves and goggles
Types of refrigerant used in mini splits and how to identify yours
Which refrigerant does a mini-split use depends on its model, manufacture date, and regional regulations; identifying it correctly is essential before charging. Inspect the unit nameplate, owner manual, or service panel sticker for codes (R410A, R32, R22). If unclear, consult manufacturer support. Use only labeled replacement refrigerant.
| Source | Label | Common Codes |
|---|---|---|
| Nameplate | Sticker | R410A |
| Manual | R32 | |
| Support | Confirmation | R22 |
Optional tools that make the job easier
Gathering a handful of optional tools can streamline charging a mini-split, reduce mistakes, and improve safety.
Useful extras include a digital manifold gauge for precise pressures, a vacuum pump for evacuation, a refrigerant scale for accurate charging, and a micron gauge for leak checks.
Refrigerant leak detector, thermal clamp thermometer, flare kit, and safety gloves enhance accuracy and operator protection.
Preparing Your Mini Split and Work Area
Before adding refrigerant, the technician powers down and isolates the mini split at the breaker and service disconnect to guarantee electrical and system safety.
They then locate the outdoor and indoor service ports, gauges, and any access panels needed for charging.
Finally, a brief inspection for oil stains, frost, or damaged components is performed to identify leaks or other pre-existing issues.
Powering down and isolating the system safely
Shut off power to the mini split at the outdoor unit’s disconnect and the indoor unit’s breaker, then lock or tag the breakers to prevent accidental re-energization.
Verify power is off with a non-contact voltage tester at both units.
Wait several minutes for capacitors to discharge.
Wear insulated gloves and eye protection.
Keep bystanders clear and post warning signage until work is complete.
Locating service ports, gauges, and access panels
With power confirmed off and the work area secured, the technician next identifies the mini split’s service points and access panels.
They locate the outdoor unit’s low and high‑side service ports, noting cap types and valve orientations.
Then, they open the indoor unit’s service cover to expose refrigerant lines and electrical terminals.
Gauges and hoses are staged nearby for immediate connection.
Inspecting for leaks and other pre-existing issues
A thorough inspection for leaks and other pre-existing issues begins at the outdoor and indoor units, where a technician visually examines fittings, access panels, and refrigerant lines for oil stains, corrosion, or physical damage that could indicate leakage.
They use a UV dye or electronic leak detector, check electrical connections, confirm proper drain function, and document findings before any refrigerant service proceeds.
Step-by-Step Guide to Adding Refrigerant to a Mini Split
The technician begins by correctly connecting gauges and vacuum lines, ensuring all fittings are tight and leak-free before any service.
They verify or recover existing refrigerant amounts as required, then choose between charging from a can or a cylinder based on system size and refrigerant type.
Charging proceeds by appropriate method—weight measurement is preferred, with pressure and temperature checks for validation—and is performed slowly and carefully to prevent liquid slugging.
Connecting gauges and vacuum lines correctly
Begin by verifying all service ports, manifold gauges, and vacuum hose fittings are clean, undamaged, and correctly matched to the mini split’s low- and high-side ports.
Securely attach low-side (blue) and high-side (red) hoses, tighten hand-tight plus quarter turn, and connect the center service hose to the vacuum pump or refrigerant source.
Purge air from hoses before opening valves; check for leaks.
Recovering or verifying existing refrigerant levels (if applicable)
Before recovering or verifying refrigerant, technicians confirm whether the system requires service by consulting records, inspecting operating pressures, and noting symptoms like reduced cooling or unusual noises.
They use calibrated gauges and scales to measure charge, capture refrigerant into approved recovery equipment when required, and compare measured mass and pressures to manufacturer specifications.
Documenting findings and any leaks before proceeding with repair or recharge is also essential.
Charging from a can vs. charging from a cylinder: when and how to choose
When should a technician choose a disposable can over a refillable cylinder? A disposable can suits small top‑offs, single‑room mini splits, or emergency add‑ins where precise charging isn’t critical.
Refillable cylinders are preferred for full system charges, multiple units, or where refrigerant recovery and accurate metering are required.
Consider cost, quantity needed, leak risk, and access to proper gauges and scales.
Charging procedure by weight vs. charging by pressure and temperature
Although both weight-based and pressure/temperature methods aim to achieve proper refrigerant charge, they differ in accuracy, required equipment, and applicability to various service scenarios.
Weight-based charging uses a scale to match manufacturer-specified refrigerant mass, offering high precision for system fills.
Pressure/temperature charging estimates charge from measured pressures and ambient conditions, useful for diagnostics or field adjustments when weighing is impractical.
How to add refrigerant safely and avoid liquid slugging
Having chosen the appropriate charging method—by weight for accuracy or by pressure/temperature for field adjustments—the technician must follow a controlled procedure to add refrigerant while preventing liquid slugging.
Add refrigerant as vapor to the suction line, use slow, measured charging, monitor oil return and suction temperature, avoid overcharging, and pause to allow system stabilization.
Use proper service valves and follow safety protocols.
Balancing indoor and outdoor unit pressures during charging
Begin by isolating and stabilizing both indoor and outdoor circuits so pressure readings reflect steady-state conditions before adding refrigerant.
The technician compares measured suction and discharge pressures to manufacturer specifications, accounting for ambient temperature and metering device type.
Adjustments are made incrementally: add small refrigerant amounts, allow stabilization, recheck pressures, and verify pressure differential matches expected superheat/subcooling targets without overshooting.
Final system checks and restoring normal operation
One final series of checks confirms the system is stable and safe before returning it to normal operation.
Technicians verify refrigerant charge, pressures, temperatures, and leak-free connections.
Electrical connections, condensate drainage, and airflows are inspected.
Control settings and timers are restored.
System is monitored briefly for consistent cycling and cooling/heating performance.
Documentation of readings and actions is completed for future reference.
Diagnosing Problems During and After Charging
A technician checks common pressure and temperature readings to interpret system condition and compare them to expected values.
Signs of undercharge (low pressures, poor cooling, ice on the evaporator) and overcharge (high head pressure, reduced efficiency, liquid slugging) guide corrective action.
If readings remain abnormal after charging, the technician inspects for refrigerant leaks and repairs or retests as needed.
Common pressure and temperature readings and what they mean
Interpreting pressure and temperature readings during and after charging reveals whether the mini split’s refrigerant cycle is operating correctly or signaling faults; technicians compare gauge readings, sight-glass/cloud point, and superheat/subcooling values against expected ranges for the system’s refrigerant and ambient conditions. Typical interpretations: low suction pressure with high superheat indicates restriction or underfeeding; high head pressure suggests overcharge or condenser issues.
| Measurement | Meaning |
|---|---|
| Low suction | Possible restriction/low charge |
| High head | Overcharge/condenser problem |
| High superheat | Insufficient liquid to evaporator |
Symptoms of undercharge and overcharge
After comparing gauge, sight‑glass, and superheat/subcooling readings to expected ranges, technicians look for observable symptoms that confirm undercharge or overcharge conditions.
Undercharge: weak cooling, warm suction line, frosting at indoor coil, high compressor discharge temperatures, and short cycling.
Overcharge: reduced cooling efficiency, liquid slugging risk, low suction pressure with cold liquid at compressor, and elevated head pressure.
How to detect and address refrigerant leaks after charging
Inspecting for leaks after charging requires a systematic approach that combines pressure and temperature checks with visual and electronic detection methods to confirm system integrity.
Technicians monitor static and operating pressures, verify temperature differentials, apply electronic leak detectors or UV dye, and inspect joints and coils.
If leaks are found, isolate, repair or replace faulty components, evacuate, then recharge to specified charge and recheck.
Common Mistakes and How to Avoid Them
Common errors in DIY refrigerant charging include incorrect pressure readings, overfilling, and using the wrong refrigerant type.
Improper handling or storage of refrigerant cylinders and fittings can create safety hazards and equipment damage.
Some faults—such as sealed-system leaks, compressor failure, or electronic control issues—require professional diagnosis and repair.
Top DIY errors when adding refrigerant
Several frequent mistakes recur when DIYers add refrigerant to a mini-split—incorrect charge, using the wrong refrigerant, failing to evacuate the system, and misreading pressure gauges among them—and each can reduce efficiency, damage components, or create safety hazards.
Other common errors include overcharging, charging without fixing leaks, improper hose connections, skipping oil level checks, and neglecting manufacturer specifications; each error increases repair risk and costs.
Safe handling and storage mistakes to avoid
Handle and store refrigerants with care to prevent accidents, equipment damage, and regulatory violations.
Store cylinders upright, secured, and away from heat or direct sunlight. Avoid mixing refrigerant types or using damaged containers.
Use labeled, approved cylinders and keep valve caps on when not in use.
Guarantee proper ventilation and follow local disposal and transport regulations to minimize leaks and legal issues.
Mistakes that require professional repair
Improper storage or mishandling can quickly escalate into problems that go beyond DIY fixes; certain errors damage system components or violate refrigerant laws and consequently require a licensed technician.
Common irreparable mistakes include puncturing coils, mixing refrigerant types, contaminating the system with moisture or air, and bypassing service valves.
Such faults need professional diagnosis, evacuation, repair, and proper refrigerant reclaiming.
Maintenance and Follow-Up After Recharging
After recharging, the technician recommends a monitoring schedule (e.g., checks at 1 week, 1 month, and quarterly) to confirm pressures, temperatures, and system performance.
Regular preventive maintenance—filter changes, coil cleaning, and leak inspections—helps reduce the chance of future refrigerant loss.
A concise service record should note date, amount and type of refrigerant added, measured pressures/temps, observed issues, and recommended follow‑up.
Recommended monitoring schedule after a recharge
Consistent monitoring preserves system performance and helps catch issues early; following a clear schedule for checks after a refrigerant recharge guarantees the mini split remains efficient and safe.
Inspect pressures and temperatures daily for three days, then weekly for a month.
Perform monthly visual inspections and airflow checks for three months.
Log readings, note anomalies, and arrange professional service if persistent deviations or leaks appear.
Preventive maintenance to minimize future refrigerant loss
Implementing routine preventive maintenance reduces the risk of future refrigerant loss and extends system lifespan.
Technicians should inspect fittings, service valves, and check for oil stains indicating leaks. Clean coils and filters, guarantee proper airflow, and verify line insulation.
Tighten electrical connections and confirm correct pressure/temperature readings during operation.
Scheduled inspections and prompt repairs prevent small issues escalating into refrigerant loss.
Record-keeping: what to document after service
When a technician completes a refrigerant recharge, clear and concise records guarantee traceability and support future maintenance decisions.
Document date, technician name and license, equipment model and serial number, refrigerant type and quantity added, baseline and post-service pressures/temperatures, leak tests and findings, work performed, parts replaced, and customer authorization.
Retain digital and physical copies for warranty, regulatory compliance, and trend analysis.
Cost Considerations and When Professional Service Is Worth It
Typical DIY refrigerant kits and gauges often cost under a couple hundred dollars, while a professional recharge with diagnostics can range from several hundred to over a thousand dollars depending on parts and labor.
Hiring a technician becomes more cost-effective when leaks, compressor issues, warranty concerns, or refrigerant recovery requirements are present.
Readers should weigh upfront DIY savings against potential repeat work, safety risks, and long-term system damage.
Typical costs for DIY supplies vs. professional recharge
Weigh costs carefully: DIY refrigerant recharge for a mini split usually runs $50–$200 for supplies (refrigerant cans, manifold gauge set, hoses, leak sealant), while hiring a certified HVAC technician typically costs $150–$600 or more depending on travel, diagnosis, and labor.
DIY saves labor but may require tool investment and entails risk; professionals add diagnostic accuracy, warranty protection, and proper refrigerant handling.
Situations where hiring a technician is more cost-effective
Consider engaging a certified HVAC technician whenever the situation involves complex diagnostics, significant refrigerant loss, or potential system damage that DIY attempts could worsen.
Professionals save money when leaks require repair, system evac/recharge is necessary, or warranty and environmental regulations apply. Their expertise avoids repeated costs from misdiagnosis, incorrect charge, or component damage, making upfront labor fees more economical than recurring DIY errors.
Quick Reference Checklists
A set of concise checklists guides technicians through pre-charge safety, step-by-step charging, and post-charge verification tasks.
The pre-charge checklist highlights leak checks, PPE, and correct manifold and tank handling.
The charging and post-charge lists cover meter readings, refrigerant amounts, system pressures, and final performance verification.
Pre-charge safety checklist
Before introducing refrigerant, technicians should complete a concise pre-charge safety checklist that verifies personal protective equipment, proper ventilation, and emergency shutoff access; confirm that gauges and hoses are rated for the refrigerant type and pressure; guarantee electrical power to the mini split is locked out and service valves are in the correct position; and verify leak detection equipment and recovery systems are on hand and functional.
- PPE inspected and worn
- Ventilation confirmed
- Lockout/tagout applied
- Gauges and hoses rated
- Leak detection ready
Step-by-step charging checklist
When ready to introduce refrigerant, the technician follows a concise, numbered charging checklist that guarantees correct pressures, temperatures, and refrigerant quantities are achieved while maintaining system and personal safety.
Follow steps precisely: verify valve positions, connect gauges, purge hoses, meter refrigerant by weight, add slowly while monitoring pressures and superheat.
- Confirm system is at operating temperature
- Use proper PPE
- Zero manifold readings
- Weigh refrigerant cylinder
- Introduce refrigerant gradually
Post-charge verification checklist
After charging is complete and pressures, temperatures, and refrigerant mass have been brought to target values, the technician performs a concise post-charge verification checklist to confirm stable operation and system integrity.
The checklist verifies system pressures, superheat/subcooling, leak-free fittings, electrical load and fan operation, and correct thermostat response.
- Verify static and running pressures
- Confirm superheat/subcooling
- Inspect for refrigerant leaks
- Check electrical currents and connections
- Observe blower and compressor behavior
Conclusion
Recharging a mini split requires care, the right tools, and adherence to safety and legal guidelines. Technicians recommend professional service when unsure: about 60% of HVAC refrigerant-related callouts involve incorrect DIY charging. Proper diagnosis, leak repair, and correct refrigerant amounts prevent damage and inefficiency. With proper preparation and follow-up, a competent DIYer can safely top up systems, but when in doubt, hiring a certified technician reduces risk and guarantees long-term performance.
