How to Install a Urinal: Step-by-Step Guide for Homeowners and Plumbers
Installing a urinal involves several key steps to ensure proper function and compliance. Start by selecting the appropriate type—either wall-hung or floor-mounted—and check local plumbing codes and ADA requirements. Next, take accurate measurements and prepare for necessary reinforcements, water supply and waste connections, and any electrical work for sensors. For wall-mounted units, install carrier frames; for floor-mounted options, ensure the waste flange is correctly aligned. Proceed by mounting the unit, connecting the water supply and flush or sensor modules, and conducting leak tests. Regular maintenance and access to replacement parts will help keep your urinal in good working order. Follow this guide for detailed instructions and tips.
What a Urinal Is and When to Install One
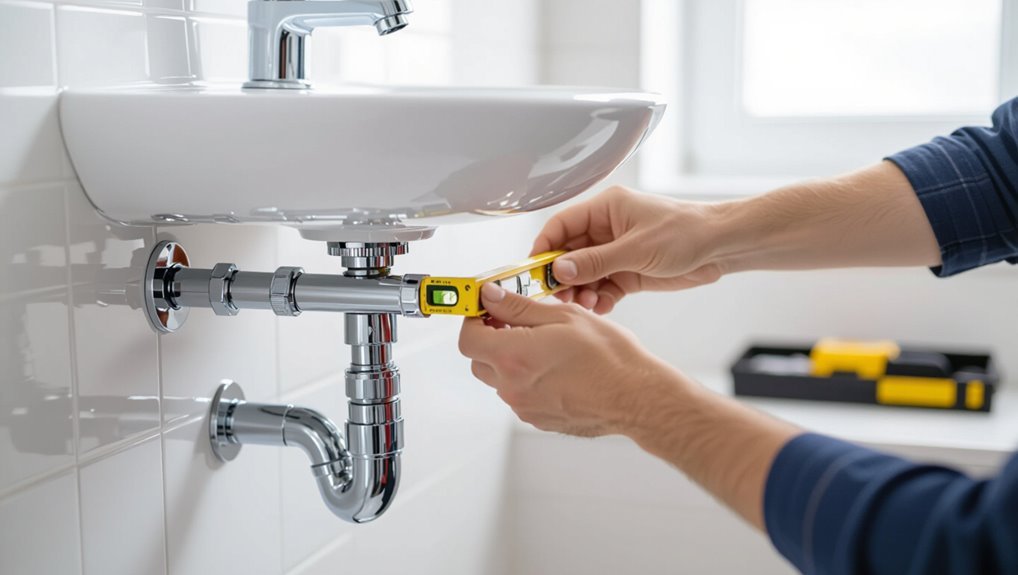
A urinal is a plumbing fixture available in several forms—wall-hung, floor-mounted, waterless, and sensor-operated—each suited to different installation and maintenance needs.
It is commonly used in commercial settings for high-traffic restrooms and occasionally installed in homes for convenience or space-saving reasons.
Home installations can offer water savings and faster use but may present drawbacks such as plumbing complexity, limited use cases, and potential resale considerations.
Types of urinals (wall-hung, floor-mounted, waterless, sensor-operated)
Urinals come in several configurations—wall-hung, floor-mounted, waterless, and sensor-operated—each tailored to different spaces, maintenance needs, and water-efficiency goals.
Wall-hung saves floor space; floor-mounted offers stability and simpler drain alignment. Waterless models eliminate flush plumbing; sensor-operated reduce water use and touchpoints.
Consider fixture choice, rough-in dimensions, and plumbing access when planning how to install a urinal.
Common residential and commercial use cases
Following consideration of fixture types and installation needs, the discussion moves to where and why a urinal is installed.
Urinals suit single-family homes with limited restroom space, garages, and guest bathrooms for convenience.
Commercial applications include offices, restaurants, schools, and stadiums for high-traffic efficiency.
Selection depends on user volume, maintenance capacity, plumbing layout, and local codes.
Benefits and drawbacks of installing a urinal at home
Considered as space-saving and water-efficient fixtures, urinals can offer homeowners faster use and lower water bills while also introducing layout, odor, and privacy challenges; whether to install one depends on household habits, bathroom size, plumbing access, and willingness to maintain venting and surface cleanliness.
Benefits include reduced flush volume and convenience; drawbacks involve retrofitting costs, potential odors, limited user preference, and cleaning demands.
Key Regulations, Codes, and Accessibility Requirements
Before beginning a urinal installation, applicable building codes and required plumbing permits must be identified to guarantee compliance.
Accessibility regulations, including ADA guidelines for fixture height, clearances, and at least one accessible fixture or alternative, govern placement in public facilities.
Local plumbing inspectors typically expect permit documentation, approved plans, and readiness for rough‑in and final inspections.
Building codes and plumbing permit overview
Although local plumbing codes and permitting processes vary, compliance with model codes (such as the International Plumbing Code or the Uniform Plumbing Code), municipal amendments, and accessibility standards (notably the ADA and equivalent state regulations) is mandatory when installing a urinal.
Permit requirements typically cover fixture type, drainage, venting, water supply, backflow prevention, and inspections; installers must obtain permits, submit plans, and schedule inspections per local authority having jurisdiction.
ADA and accessibility considerations for urinal placement
Address key ADA and accessibility requirements when planning urinal placement to confirm facilities serve all users and comply with federal and local regulations.
Ensure at least one accessible urinal or alternate fixture: rim height not exceeding 17 inches, clear floor space 30×48 inches, knee and toe clearance where applicable, and grab bar locations per ADA.
Maintain proper signage and circulation paths for wheelchair users.
Local plumbing inspector expectations and documentation
Many jurisdictions require clear documentation and proactive coordination with the local plumbing inspector to confirm urinal installations meet applicable codes and accessibility standards.
Inspectors typically expect permit records, compliant fixture specifications, installation diagrams, waste and vent plans, and proof of ADA clearances when relevant.
Timely inspections, recorded approvals, and corrective documentation confirm legal occupancy, avoid fines, and verify water-conservation and backflow prevention compliance.
Tools, Materials, and Parts Required
The section lists the essential tool checklist needed for urinal installation, from wrenches and drills to level and sealant tools.
It also catalogs typical parts and fittings for different urinal types, including wall-hung or floor-mounted carriers, supply lines, traps, and mounting hardware.
Finally, it outlines optional upgrade materials such as water-saving fixtures and sensor-operated flush valves.
Essential tools checklist
A concise list of the tools, materials, and parts required helps guarantee the urinal installation proceeds efficiently and without unexpected trips to the supply store.
Essential items include measuring and cutting tools, fastening hardware, sealing materials, and plumbing tools.
Recommended checklist:
- Tape measure, level, hole saw, hacksaw
- Anchors, bolts, mounting bracket, backplate
- Plumber’s putty, PTFE tape, silicone sealant
- Adjustable wrench, basin wrench, pipe cutter
Typical parts and fittings for different urinal types
Different urinal designs require specific parts and fittings that guarantee proper mounting, water supply, and waste removal; wall-hung, floor-mounted, and trough urinals each have distinct connector types, mounting hardware, and trap requirements.
- Wall-hung: carrier frame, flush valve, spud, wall flange.
- Floor-mounted: floor flange, trap primer, waste outlet.
- Trough: multiple spuds, central waste, support brackets.
- Universal: gaskets, hangers, isolation valves.
Optional materials for upgrades (water-saving fixtures, sensors)
Consider upgrading with water-saving fixtures and sensor-operated controls to reduce consumption and improve hygiene; these optional materials typically include low-flow flush valves, dual-flush converters, infrared or capacitive sensors, solenoid valves, and compatible power sources or battery packs.
Additional items include mounting brackets, wiring harnesses, isolation valves, anti-siphon vacuum breakers, and retrofit kits tailored to wall-hung or floor-mounted urinals for straightforward installation and maintenance.
Pre-Installation Assessment and Planning
Before beginning work, the installer measures the available space, checks wall framing for adequate support, and confirms the urinal will fit the planned location.
They locate existing water supply and waste lines and determine the ideal drain height to match the fixture and trap.
If the unit is sensor-operated, electrical requirements are noted, and a model is selected that is compatible with the plumbing layout and service access.
Measuring the space and determining wall support
A careful assessment of the installation area guarantees the urinal will fit securely and function correctly; measure wall width, height, and distance to adjacent fixtures, note floor drain and waste pipe locations, and verify clearances required by the chosen model.
Inspect wall framing, locate studs or blocking, evaluate load-bearing capacity, and plan for reinforcement or backing.
Confirm mounting hardware compatibility with wall construction.
Locating supply and waste lines; identifying ideal drain height
With wall framing and support confirmed, attention shifts to locating existing water supply and waste lines and determining the ideal trap and outlet elevation for the urinal.
Inspect stud cavities, chase walls, and floor penetrations for cold-water feed and soil stack alignment.
Measure from finished floor to proposed outlet, usually matching manufacturer trap arm height, and mark locations for rough-in plumbing.
Electrical needs for sensor-operated units
Several key electrical considerations determine whether a sensor-operated urinal can be integrated without layout changes.
Determine proximity to a dedicated grounded outlet, required voltage (typically low-voltage or 110–120V), and power source type (battery vs. hardwired).
Verify conduit routing, GFCI protection if near plumbing, compliance with local electrical code, and allowance for future access to control modules and wiring junctions.
Selecting a compatible urinal based on plumbing layout
Often the correct urinal choice hinges on the existing plumbing layout, so an installer should first map drain locations, supply lines, and wall backing to confirm compatibility with wall-hung, floor-mounted, or slab-mounted units.
The installer then verifies rough-in dimensions, trap type, and venting, selects models matching inlet/outlet positions, and plans any rerouting or reinforcement to avoid costly modifications during installation.
Step-by-Step Installation for Wall-Hung Urinals
The following steps cover preparing the wall and reinforcing framing, completing rough-in plumbing for the supply shutoff and waste outlet, and installing and leveling the mounting bracket.
It then addresses connecting the supply line and installing the flush valve or sensor module before attaching the urinal.
Final tasks include sealing around the fixture and setting the trap seal to guarantee a watertight, code-compliant installation.
Preparing the wall and framing reinforcements
Begin by confirming the wall type and locating studs, since proper support and access to waste and supply lines determine the framing strategy.
Reinforce studs with blocking or install a steel carrier frame rated for urinal loads.
Verify mounting height and anchor points align with fixture template.
Add backing behind finished wall material and check clearance for trap access and future maintenance before closing the wall.
Rough-in plumbing: installing supply shutoff and waste outlet
Once studs and backing are confirmed, the rough-in plumbing phase positions the supply shutoff and waste outlet to match the urinal carrier and fixture template.
Install a recessed shutoff box or valve at specified height, run copper or PEX supply to it, and rough-in the waste drain stub to align with carrier outlet.
Test fittings for leaks and secure piping within wall cavity.
Mounting bracket installation and level alignment
With supply and waste stubs confirmed and secured, attention shifts to installing the mounting bracket and achieving precise level alignment for the wall-hung urinal.
The bracket is positioned on wall studs or backing, fastened with specified anchors and bolts, and checked with a spirit level.
Shim adjustments guarantee true vertical and horizontal alignment; torque specifications are followed and bracket rigidity verified before proceeding.
Connecting supply line and flush valve or sensor module
Attach the supply line and flush mechanism next, ensuring all components match the urinal’s inlet specifications and the building’s water pressure requirements.
Install shutoff valve, supply tubing, and pressure-rated fittings.
For sensor units, mount control module, wire per manufacturer, and verify power source.
Tighten connections with appropriate torque, apply thread sealant where specified, then perform a pressure test to check for leaks and proper valve operation.
Attaching the urinal, sealing, and setting trap seal
Position the urinal onto its wall carriers and inlet alignment, ensuring hangers engage fully and the fixture sits level and plumb.
Secure mounting bolts with recommended torque.
Connect waste spud and compress gasket to the trap primer or P-trap inlet.
Apply a continuous bead of sanitary-grade silicone around the back rim.
Wipe excess, allow cure time, and verify trap seal depth visually.
Pressure testing supply and checking for leaks
After the urinal is secured, the installer moves on to pressure testing the supply and inspecting for leaks to confirm a watertight installation.
The supply line is pressurized per code using a gauge and cap or test ball; fittings, shutoff, and fixture connections are observed for drops.
Any leak is isolated, tightened or rethreaded, then retested until pressure holds and no moisture appears.
Final adjustments and cosmetic finishing
With the plumbing confirmed watertight and mounting hardware secure, the installer completes final adjustments and cosmetic finishing to guarantee proper function and a clean appearance.
Level and test flush mechanism, adjust sensor or manual valve sensitivity if present, and set water flow.
Apply silicone sealant around fixture edges, tuck trim plates, tighten caps, and wipe grout and surfaces for a polished, sanitary result.
Step-by-Step Installation for Floor-Mounted Urinals
The installer first prepares the floor flange and aligns the waste connection to guarantee a proper seal.
Next, the urinal is secured to the floor and the base is sealed before the water supply and flushing mechanism are connected.
Finally, thorough leak testing and final checks confirm correct function and watertight joints.
Floor flange and waste connection preparation
Begin by locating the floor waste outlet and confirming its alignment and elevation relative to the urinal’s outlet spud; accurate placement of the flange and waste connection is essential for a watertight, code-compliant installation.
Inspect flange condition, choose correct diameter and trap adapter, dry-fit components, mark final positions, cut and deburr pipe as needed, apply appropriate sealant or gasket, and tighten connections per manufacturer torque.
Securing the urinal to the floor and sealing base
Position the urinal over the floor flange, aligning the mounting holes and outlet spud so the fixture sits square to surrounding walls and drain piping.
Fasten anchor bolts through base holes, tighten evenly to prevent rocking, and trim bolt shanks.
Apply a thin bead of plumber’s grade silicone or epoxy around the base perimeter, tool smooth to create a watertight seal, and wipe excess for a neat finish.
Connecting water supply and flushing mechanism
Connect the supply by first shutting off the building water and confirming there is no residual pressure at the valve.
The installer mounts the shutoff, fits a supply line (copper, PEX, or braided stainless), installs a vacuum breaker if required, and connects to the urinal’s inlet with appropriate fittings and thread sealant.
Adjust flushometer or valve settings per manufacturer instructions.
Leak testing and final checks
With the water restored and the shutoff accessible, the installer systematically inspects all joints, fittings, and seals for leaks while cycling the flush mechanism through several complete operations.
Visual and tactile checks confirm dryness; dye or paper tests verify trap integrity. Mounting hardware and wall/floor seals are tightened.
Final adjustments guarantee correct flush volume, stable mounting, and unobstructed access to the shutoff and service points.
Installing Waterless and Sensor-Operated Urinals
The installation of waterless and sensor-operated urinals requires attention to different components and upkeep compared with conventional fixtures.
For waterless units, this includes correct drain cartridge selection and odor-control measures, while sensor models demand decisions about power—battery versus hardwired—and precise sensor placement.
Maintenance routines and long-term considerations vary accordingly, influencing service intervals and replacement parts.
Specific considerations for waterless units (drain cartridges, odor control)
Many waterless urinals rely on specialized drain cartridges and careful odor-control strategies to function reliably. Installers should prioritize correct cartridge selection, proper seal orientation, and routine maintenance to prevent leakage and smells.
Technicians must follow manufacturer cartridge replacement intervals, guarantee traps remain unobstructed, use approved enzymatic cleaners sparingly, and document service schedules.
Proper ventilation and immediate odor troubleshooting preserve hygiene and performance.
Sensor unit installation and power options (battery vs. hardwired)
When installing sensor-operated or waterless urinals, technicians must accurately determine power needs and mounting locations before fitting the sensor housing and control module.
Battery-powered units offer simple installation, minimal wiring, and easy replacement, while hardwired systems require junction boxes, conduit and compliance with electrical codes.
Choice depends on reliability, traffic, maintenance access and retrofit complexity; guarantee proper sealing and secure connections.
Maintenance differences and long-term considerations
Choosing between battery and hardwired sensors naturally leads to different upkeep regimes and lifespan expectations for waterless versus sensor-operated urinals.
Waterless units demand periodic trap insert replacement, enzyme treatments, and odor monitoring; sensor models require sensor calibration, battery changes or electrical checks, and occasional solenoid/valve servicing.
Long-term choices hinge on maintenance frequency, parts availability, total cost of ownership, and site hygiene priorities.
Common Problems During Installation and How to Fix Them
Common installation problems include misaligned drains or incorrect rough-in heights, which prevent proper connection and drainage.
Leaks at supply or waste fittings, mounting instability or vibration, and sensor or electrical faults are frequent causes of malfunction and premature failure.
Each issue requires targeted troubleshooting—realignment, resealing or tightening connections, reinforcing mounts, or testing and correcting sensor wiring and power—to guarantee reliable operation.
Misaligned drain or incorrect rough-in height
Misaligned drains or incorrect rough-in heights can prevent a urinal from sealing properly, cause leaks, or make mounting impossible without costly adjustments.
The installer should measure wall centerline and outlet elevation before ordering. Small offsets can be corrected with offset flanges or corrective fittings; larger misalignments require repositioning the waste or using a recessed carrier.
Verify fit with a dry mock-up prior to final anchoring.
Leaks from supply or waste connections
Inspecting supply and waste connections for leaks is essential, as even small drips can indicate faulty seals, loose fittings, or misaligned components that will worsen over time.
Verify tightness of compression nuts, thread sealant on tapered threads, and correct flange/gasket seating.
Pressure-test supply and flush cycles, observe waste trap for seepage, and replace damaged washers, gaskets, or corroded fittings promptly to prevent water damage.
Mounting instability or vibration issues
After confirming supply and waste fittings are leak-free, attention should turn to how securely the urinal is mounted: loose anchors, uneven wall backing, or improper bolt torque can allow movement, noise, and accelerated wear.
Inspect anchors and backing, shim where needed, replace stripped bolts, and torque fasteners to manufacturer specs.
Verify no play after mounting and recheck after initial use to guarantee stability.
Sensor malfunctions and electrical faults
Address sensor malfunctions and electrical faults promptly, as they can render hands-free urinals inoperative or cause erratic flushing that wastes water.
Technicians should verify power supply, wiring connections, and battery condition; inspect sensor alignment, lens cleanliness, and interference sources.
Replace faulty control modules or sensors, guarantee proper grounding and GFCI protection, and reprogram timing settings.
Test thoroughly and document repairs for future maintenance.
Post-Installation Testing, Commissioning, and Maintenance
A concise functional testing checklist verifies flush performance, drainage integrity, and sensor response to guarantee the urinal operates as designed.
A routine maintenance schedule and clear cleaning recommendations preserve hygiene and prevent buildup that can impair function.
Guidance on replacing cartridges, seals, valves, and sensors completes commissioning by outlining common part failures and service intervals.
Functional testing checklist (flush performance, drainage, sensor response)
Begin inspection by verifying that each urinal meets defined performance criteria for flushing, drainage, and sensor response.
Test manual and automatic flush cycles for full, timely discharge; confirm no pooling or slow runoff; inspect trap seal integrity and venting.
Validate sensor activation range, debounce timing, and battery or wiring reliability.
Record results, note deviations, and initiate corrective actions where performance falls short.
Routine maintenance schedule and cleaning recommendations
With functional testing complete, a routine maintenance schedule and cleaning protocol should be established to preserve performance and hygiene over the life of the fixture.
Inspect weekly for leaks, mineral buildup, and odors. Clean surfaces and drains with nonabrasive, pH-neutral cleaners; descale monthly where hard water occurs.
Verify flush action and sensor cleanliness quarterly. Document actions and adjust frequency based on usage.
Replacing parts: cartridges, seals, valves, and sensors
Replace worn cartridges, seals, valves, and sensors promptly to maintain urinal performance and prevent water waste or unsanitary conditions.
Technicians should inspect components regularly, follow manufacturer procedures, isolate water supply, and use compatible replacements.
Test for leaks, proper flush volume, and sensor responsiveness after installation.
Record parts changed and dates for maintenance logs to anticipate future service and guarantee warranty compliance.
Cost Estimates and Timeframe
A comparison of typical DIY versus professional installation costs highlights parts, fixtures, and labor differences to help set realistic budgets.
Estimated timeframes for a DIY install versus hiring a plumber are presented separately, covering prep, installation, and testing phases.
This section will summarize expected expense ranges and hours required for each approach.
Typical DIY vs. professional installation cost breakdown
Cost comparisons between DIY and professional urinal installation hinge on parts, labor, and unexpected complications; homeowners can expect a DIY job to cost primarily for the fixture, basic plumbing supplies, and simple tools, while hiring a licensed plumber adds labor rates, permit fees, and potential inspection costs.
| Item | Typical Cost |
|---|---|
| Urinal fixture | $100–$400 |
| DIY supplies | $20–$150 |
| Tools | $0–$200 |
| Plumber labor | $150–$500 |
| Permits/inspections | $0–$200 |
Estimated time required for each installation type
Typical residential urinal installations vary by complexity: a straightforward wall-hung replacement with existing rough-in can be completed by a homeowner in 1–3 hours, while a first-time DIY install that requires cutting into drywall, adjusting supply lines, or installing a new drain can take 4–8 hours or more.
Commercial projects, complex relocations, or grade work may require a full day to multiple days; pros work faster.
When to Hire a Professional vs. DIY
The decision to hire a professional hinges on complexity and risk factors such as relocating drains, modifying venting, or working with pressurized supply lines that could cause water damage or code violations.
When a contractor is considered, concise questions should cover licensing, insurance, experience with urinal installations, warranty terms, and whether the quote includes permits and cleanup.
A clear expectation of line-item pricing and timelines helps compare bids and avoid hidden costs.
Complexity and risk factors that warrant a plumber
Evaluate project scope and risk before deciding to DIY: installing a urinal can range from a simple fixture swap to a complex plumbing and structural job.
Certain conditions—unfamiliar waste stack configurations, need to reroute supply lines, presence of concealed valves or corroded piping, nonstandard drain heights, or local code and permit requirements—significantly increase the chance of costly mistakes and justify hiring a licensed plumber.
Skilled assessment, permit navigation, and guaranteed repairs reduce liability.
Questions to ask a contractor and what to expect in a quote
When should a homeowner hire a contractor rather than attempt the installation alone? A contractor is preferred for plumbing modifications, relocations, code compliance, or uncertain drainage.
Ask about licensing, insurance, timeline, and warranty.
Expect a written quote breaking down:
- Labor
- Materials and fixtures
- Permits and inspections
- Contingency for unforeseen issues
Tips to Improve Longevity and Water Efficiency
Choosing low-flow fixtures and reliable flush valves can greatly reduce water use while maintaining performance.
Regular maintenance—such as installing strainers, inspecting traps, and flushing lines—helps prevent clogs and odors that shorten fixture life.
Considering waterless or high-efficiency models and checking for available rebates supports eco-friendly upgrades and offsets installation costs.
Best fixtures and flush valves for low water use
Several manufacturers now offer urinal fixtures and flush valves specifically engineered to minimize water use without sacrificing performance.
Waterless units, 0.5 gpf and dual-flush options, and electronic infrared valves reduce consumption.
Choose durable vitreous china or high-density plastic with anti-splash designs.
Prioritize certified low-flow models, reliable solenoid or diaphragm mechanisms, and accessible maintenance features to guarantee efficiency and long-term savings.
Preventive measures to avoid clogs and odors
Implement routine maintenance and simple habits to keep urinals flowing freely and odor-free:
- Regular flushing cycles or manual flushes after extended idle periods.
- Periodic inspection and cleaning of inlet screens and trapways.
- The use of enzyme-based cleaners or urinal cakes compatible with the fixture type.
Additionally, train users to avoid disposing of solids, schedule descaling for hard water, and replace worn seals and gaskets promptly.
Eco-friendly options and rebates availability
How can facility managers reduce water use and operating costs while extending fixture life? They can choose low-flow, waterless, or sensor-activated urinals, select durable vitreous china or stainless steel, and use water-saving cartridges.
Investigate municipal and utility rebates, tax incentives, and manufacturer promotions. Proper documentation and certified installers maximize eligibility and long-term savings through reduced maintenance and consumption.
Conclusion
After following every meticulous step, the homeowner will enjoy the urinal’s singular triumph: a porcelain sentinel that reliably rejects any semblance of DIY hubris. Codes were consulted, bolts tightened, and traps tested—because nothing says domestic serenity like proper drainage. Ironically, the quietest victory arrives not in heroic labor but in routine maintenance: a gentle flush, an occasional seal replaced, and the humble acknowledgement that longevity prefers patience over bravado.