How to Clear a Tub Drain Fast: 7 Simple DIY Methods That Actually Work
To quickly clear a tub drain, start by ensuring your safety and inspecting for visible hair or deeper clogs. Use a plunger for a tight seal, clean the stopper, or fish out debris with a hooked coat hanger. A wet/dry vacuum can effectively remove clogs, while a combination of baking soda and vinegar or an enzyme cleaner can tackle organic buildup. For tough blockages, consider removing the P-trap or using a motorized auger. Read on for detailed steps, tips, and safety precautions.
What to Do First Before Clearing a Tub Drain
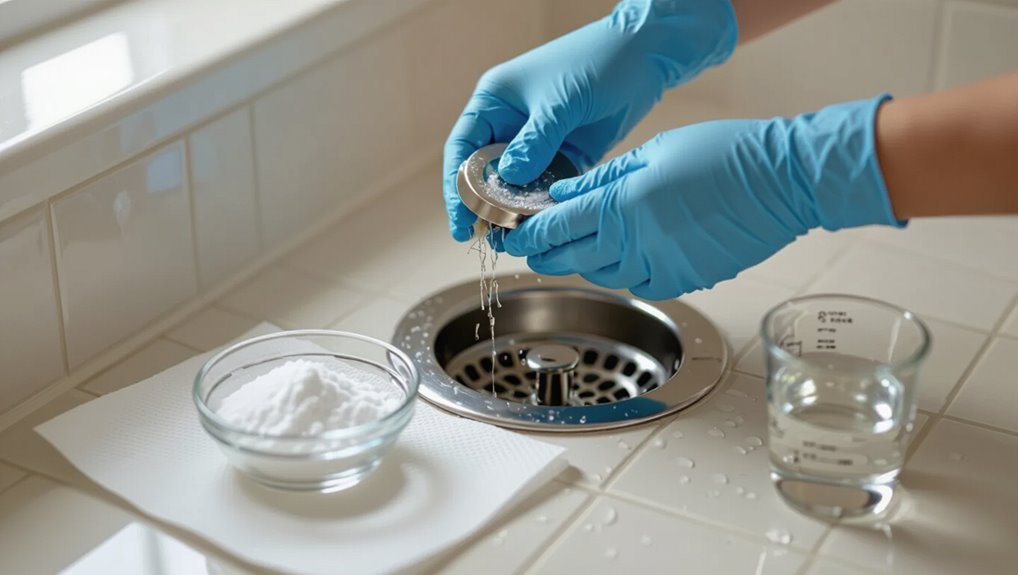
Before attempting to clear a tub drain, one should confirm basic safety precautions and assemble the necessary tools.
Next, identify the clog’s type and exact location to choose the appropriate method.
If the obstruction appears severe or involves plumbing beyond the trap, advise contacting a professional rather than proceeding with DIY fixes.
Safety precautions and tools checklist
A quick safety check and the right tools reduce injury and damage when clearing a tub drain.
Before beginning, the person confirms ventilation, power-off nearby appliances, and wears gloves and eye protection.
Essential items for how to clear tub drain include:
- Rubber gloves
- Safety goggles
- Plunger or drain snake
- Bucket and rags
- Flashlight and wrench
How to identify the type and location of the clog
How can one determine whether a tub clog is localized near the drain or lodged deeper in the pipes?
Inspect visible debris, remove the stopper, and use a flashlight to check for hair or soap buildup.
Run water and observe drainage speed and gurgling. Slow drainage with noises suggests deeper blockage; immediate visible obstruction indicates a surface clog suitable for basic removal.
When to call a professional vs. DIY
Noting whether the clog is surface-level or deeper helps determine the next steps: simple hair and soap blockages can often be handled with basic tools, while slow drainage and gurgling may signal a problem that needs professional attention.
DIY is appropriate for visible obstructions, minor backups, and basic plunging or snaking.
Call a plumber for recurrent clogs, foul odors, sewage backup, or suspected pipe damage.
Fast DIY Method 1 Use a Plunger
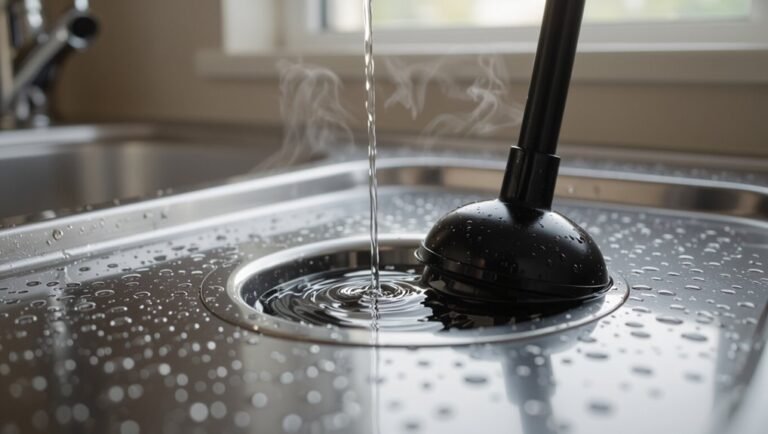
The plunger method is described with clear, step-by-step technique for creating a seal, applying controlled thrusts, and clearing residue from the drain.
Common mistakes to avoid—such as using the wrong plunger type, breaking the seal, or plunging too forcefully—are highlighted to prevent damage and wasted effort.
Estimated time and likely effectiveness are provided so readers can set expectations before beginning.
Step-by-step plunging technique for tub drains
For a quick, effective unclogging attempt, a plunger offers the simplest first step: seat a flange or cup-style plunger over the tub drain to form a tight seal, then deliver a series of firm, controlled plunges to dislodge the obstruction and restore flow.
- Confirm water covers the plunger cup
- Maintain a straight up-and-down motion
- Start with 10–15 plunges
- Check for improved drainage
- Repeat if needed
Common mistakes to avoid when plunging
After attempting several plunges, users should watch for common errors that can reduce effectiveness or cause messes.
Mistakes include using an ill-fitting plunger that leaks air, plunging too gently or wildly, neglecting to seal overflow openings, failing to remove visible debris first, and ignoring worn seals or cracked fixtures.
Proper technique and tool choice prevent damage and wasted effort.
Time estimate and effectiveness
A properly used plunger typically clears a tub drain within 5–15 minutes for minor clogs, though stubborn blockages may need repeated cycles or a different method.
Success depends on seal quality, force applied, and clog composition. Organic hair and soap scum respond well; dense mineral buildup or solid objects often resist.
If plunging fails after multiple attempts, escalate to a drain snake or enzymatic cleaner.
Fast DIY Method 2 Remove and Clean the Stopper
The next method explains accessing common stopper types—twist, pop-up, and lift-and-turn—to show where to grip and which screws or clips to release.
It then outlines a concise step-by-step removal and cleaning procedure, including clearing hair and mineral buildup and rinsing parts.
Finally, reassembly tips and a simple leak check are provided to guarantee a watertight fit before regular use.
How to access different stopper types (twist, pop-up, lift-and-turn)
Wondering how to reach and remove different tub stoppers? A brief overview differentiates access points and basic detachment cues for common types:
- Twist: grip and rotate counterclockwise; often unscrews from tailpiece.
- Pop-up: locate retaining clip under overflow plate.
- Lift-and-turn: pry cap to reveal screw beneath.
- Toe-touch: pull straight up.
- Hidden screws: check for set screws or retaining rings.
Step-by-step removal and cleaning procedure
Begin by gathering basic tools—screwdriver, pliers, bucket, old towel, and a small brush—then clear the area and place the bucket under the overflow to catch trapped water.
Remove stopper per type: unscrew, lift clip, or twist out.
Extract debris with brush and gloved hands, rinse parts, and clear visible drain obstruction.
Inspect for damage before proceeding.
Reassembly tips and leak check
After cleaning and inspecting all components, reassembly should proceed methodically to guarantee a watertight fit and smooth stopper operation.
Reinstall seals and gaskets dry-fit first, then apply plumber’s grease sparingly. Align linkage and test travel before tightening.
Tighten fasteners evenly to avoid distortion. Run a short fill and check for leaks around connections and the overflow; retighten or reseat as needed.
Fast DIY Method 3 Wire Coat Hanger or Drain Snake
A straightened wire coat hanger can be fashioned into a hooked probe for pulling out hair and gunk. Instructions include how to bend, cover sharp ends, and use it without scratching the tub.
A handheld auger or drain snake is described step-by-step — feed, rotate, hook debris, and withdraw — with tips to avoid forcing the tool.
If a snake fails to clear the blockage, the next steps cover enzymatic cleaners, removal of the P-trap, or calling a plumber.
How to create and use a straightened hanger hook safely
When a dedicated drain snake is unavailable, a straightened wire coat hanger can be fashioned into a simple hook to fish out hair and debris. The user should select a sturdy, rust-free hanger and work with steady, controlled movements to avoid scratching the tub or tearing drain components.
- Straighten hanger, retain 2–3 inch hooked tip
- Wear gloves and eye protection
- Insert gently, probe slowly
- Hook and withdraw debris
- Sanitize hanger after use
Using a handheld auger or drain snake: step-by-step
Begin by preparing the workspace: put on gloves and eye protection, remove standing water if possible, and lay a towel to catch drips.
Select either a commercial handheld auger or a straightened coat hanger formed into a narrow hook, confirming the tool is rust-free and sturdy before inserting it into the drain.
Feed the snake gently, rotate or push to snag debris, then withdraw slowly.
Repeat and flush.
When a snake won’t work and next steps
If a standard snake fails to clear the blockage, the next step is to try a makeshift tool like a three-pronged coat hanger or a manual drain snake designed for narrow tub drains.
One-prong hooks, gentle probing, and careful rotation can extract hair clumps.
If resistance persists, stop to avoid pipe damage and consider enzyme cleaners, wet/dry vacuuming, or calling a professional plumber for inspection and repair.
Fast DIY Method 4 Wet/Dry Vacuum Method
The wet/dry vacuum method begins with converting the unit for liquid pickup and fitting a hose or rubber adaptor to form a tight seal over the drain.
Proper technique involves using short bursts of suction and occasionally reversing to dislodge and extract hair and gunk.
The writer notes basic safety precautions—wearing gloves, keeping electrical parts dry—and outlines cleanup and disposal of captured debris.
Preparing the vacuum for liquid use and creating a seal
To prepare a wet/dry vacuum for clearing a tub drain, convert it to liquid-safe mode by attaching the correct filter or removing the dry filter and fitting the foam sleeve specified for wet pickup; confirm the collection tank is empty and the drain port is securely closed.
- Inspect hose and attachments for cracks
- Fit a narrow nozzle or adapter
- Use a rubber gasket or wet rag
- Position hose tip over drain opening
- Run a brief test suction on water
Vacuum technique to pull clogs out
Begin by placing the vacuum hose firmly over the drain, ensuring the gasket or rag creates an airtight seal so suction targets the clog rather than the tub surface.
Switch the vacuum to liquid mode, start on low, then increase power as needed.
Maintain steady pressure, pulse the hose to dislodge debris, and periodically check the collection container for extracted hair and gunk until water drains freely.
Safety tips and cleanup
Wear gloves and eye protection, and confirm the wet/dry vacuum is set to liquid mode with the power off before connecting the hose to prevent electrical hazards and accidental splashing.
After use, rinse the hose and filter with disinfectant, dry thoroughly, and store separately from household tools.
Ventilate the bathroom, wipe surfaces with a bleach solution, and wash hands and cloths used during cleanup.
Fast DIY Method 5 Baking Soda and Vinegar
The baking soda and vinegar method calls for precise proportions—typically 1/2 cup baking soda followed by 1 cup vinegar—and a waiting period of 15–30 minutes before flushing.
After the reaction, hot water should be used to flush the drain and visually or audibly confirm improved flow.
If clogging persists or the reaction produces little effect, mechanical removal or a professional service is recommended.
Exact measurements and timing for best results
For this fast DIY method, precise amounts and timing improve effectiveness:
- Pour 1 cup baking soda into the dry drain.
- Follow with 1 cup white vinegar immediately.
- Cover the drain to contain fizzing for 10 minutes.
- Wait an additional 20 minutes for reaction and loosening.
- Flush with 2–3 cups hot (not boiling) water to finish.
How to flush and confirm the drain is clear
Flush the drain with a steady stream of hot (not boiling) water, pouring 2–3 cups directly into the pipe to wash away loosened debris and remaining residue.
Run additional hot water for one to two minutes while observing flow speed and listening for gurgles.
If water clears quickly and drains smoothly, the job is successful; otherwise repeat the baking soda and vinegar cycle or use a mechanical tool.
When chemical reaction methods are ineffective
When chemical reactions fail to clear a tub drain, move on quickly to mechanical or enzyme-based options to avoid wasting time and materials.
Mechanical methods—plunging, drain snake, removing the stopper—offer immediate feedback.
Enzyme cleaners break down organic buildup safely but require hours.
If blockages persist after both approaches, inspect the P-trap or call a professional plumber to prevent damage or recurring clogs.
Fast DIY Method 6 Enzyme and Biological Drain Cleaners
Enzyme and biological drain cleaners are selected based on formulations targeting hair and soap scum, so users should pick products labeled for those residues.
Proper application requires following manufacturer instructions and allowing sufficient dwell time for enzymes to break down organic material.
Compared with harsh chemical alternatives, enzymatic cleaners are generally safer for pipes and skin but act more slowly and may be less effective on severe clogs.
Choosing the right enzyme cleaner for hair and soap scum
Although biological cleaners work differently than harsh chemicals, selecting the right enzyme-based product is essential for dissolving hair and soap scum without damaging pipes or finishes.
Choose formulas labeled for hair, protein, and grease breakdown; prefer liquid concentrates over powders for better penetration.
Verify compatibility with plumbing materials, check enzyme types (protease, lipase), and review user ratings for real-world effectiveness.
Proper application and dwell time
Apply enzyme cleaners precisely and allow adequate dwell time to let microbes and enzymes break down hair, soap scum, and organic buildup.
Instructions should be followed exactly; avoid rinsing too soon. Typical dwell ranges 30 minutes to overnight depending on label. Check and repeat if needed. Confirm drain is warm and undisturbed for best activity.
- Measure per label
- Keep water warm
- Seal drain lightly
- Wait recommended time
- Repeat if necessary
Pros and cons compared to chemical cleaners
While biological drain cleaners work more gently over time and pose less risk to pipes and septic systems, they trade off speed and immediate effectiveness compared with chemical cleaners.
They safely digest organic buildup, reducing corrosion and environmental harm, but require repeated applications and longer dwell times.
Chemical cleaners act fast on clogs yet can damage plumbing, harm septic systems, and pose health and disposal risks.
Fast DIY Method 7 Chemical Drain Cleaners (Use with Caution)
Chemical drain cleaners come in caustic (lye-based) and acidic (sulfuric-based) formulations, each suited to different clog types but posing serious hazards if misused.
Users should follow strict safety precautions—adequate ventilation, chemical-resistant gloves and eye protection, and never mixing products—to prevent burns, fumes, or reactions.
After use, residues must be neutralized per label instructions and disposed of according to local hazardous-waste guidelines to protect people and plumbing.
Types of chemical cleaners and appropriate uses
There are several categories of drain-clearing chemicals—alkaline lye-based, acidic cleaners, enzymatic/bacterial formulations, and oxidizing agents—each designed for specific clogs and pipe materials.
Choices depend on clog composition, pipe type, and required action:
- Lye-based: dissolves hair/grease
- Acidic: tackles mineral buildup
- Enzymatic: digests organic matter over time
- Oxidizers: burst organic clogs quickly
- Blended: combined actions for mixed clogs
Safety precautions, ventilation, and PPE
After selecting a chemical cleaner suited to the clog and pipe material, attention must turn to safety precautions, ventilation, and proper personal protective equipment when using fast-acting formulations.
Users should open windows, run exhaust fans, and avoid inhaling fumes. Wear chemical-resistant gloves, eye protection, and long sleeves.
Keep children and pets away, never mix products, and read label warnings before application.
How to neutralize and dispose of chemicals safely
Neutralize and dispose of drain-cleaning chemicals by following manufacturer instructions and local hazardous-waste rules to prevent reactions, environmental harm, or injury.
Wear chemical-resistant gloves and eye protection; avoid mixing products. Rinse small, allowed amounts with copious water only when instructions permit.
Store unused chemicals in original containers, sealed and labeled.
Take leftover or large volumes to a certified household hazardous-waste facility for proper disposal.
How to Confirm the Drain Is Fully Clear
A simple flow test followed by a soak test verifies that water moves quickly and drains completely.
If flow remains slow, inspecting the P-trap and accessible sections of the drainpipe can reveal trapped hair or buildup.
Clearing any visible debris and repeating the tests confirms the drain is fully clear.
Flow and soak test steps
Several simple flow and soak tests confirm whether the tub drain is fully clear: run a steady stream of water for one to two minutes to observe how quickly it empties.
Then fill the tub a few inches and let it sit for five to ten minutes to check for slow drainage or backing up.
- Time the flow rate
- Note surface ripple and noise
- Watch for slow drop
- Check for backup
- Repeat after adjustments
Inspecting the P-trap and drainpipe for residual debris
Inspecting the P-trap and drainpipe confirms whether visible clearing at the stopper translated into a truly unobstructed path.
The technician removes the trap, checks for hair, soap scum, and mineral buildup, and flushes the pipe with water or a garden hose.
Any residue is cleared with a plumber’s snake or brush.
Reassemble, test flow, and check for leaks.
Preventing Future Clogs
Preventing future clogs starts with simple daily habits like rinsing soap residue and removing hair after each use to reduce buildup.
Choosing an effective drain guard or a compatible stopper can block most debris before it enters the trap.
Regularly scheduled maintenance — including occasional use of enzyme cleaners when slow drainage appears — keeps lines clear and minimizes the need for emergency plunging.
Simple daily habits to reduce hair and soap buildup
A few small daily habits can greatly reduce hair and soap buildup in a tub drain.
Regular rinsing and quick wipe-downs remove residue. After-shower hair collection prevents accumulation.
Cold water flushes solidify soap scum for easier removal. Weekly vinegar rinse keeps pipes clearer.
- Rinse with warm water
- Wipe tub surfaces
- Collect shed hair
- Run cold water briefly
- Vinegar weekly rinse
Best drain guards and stopper choices
Which drain guard or stopper suits a bathroom best depends on hair volume, tub design, and user preference: fine-mesh strainers excel at catching strands before they enter the pipe.
Lift-and-turn or push-pop stoppers provide a watertight seal while limiting debris entry.
Silicone or flat-profile covers work well for low-clearance drains—selecting a durable, easy-to-clean material minimizes maintenance and reduces the likelihood of future clogs.
Replace damaged guards regularly.
Scheduled maintenance and when to use enzyme cleaners
Although routine checks may seem minor, a scheduled maintenance plan is the most reliable way to keep tub drains flowing: monthly removal of visible hair and debris, quarterly inspection of strainers and stoppers, and semiannual flushing with hot water will reduce buildup and catch problems early.
Enzyme cleaners suit organic clogs; apply monthly or after showers stop draining well. Avoid overuse with chemical treatments and follow product instructions.
Troubleshooting Common Problems
If a tub remains slow after common DIY fixes, the next steps include systematic inspection and knowing when to call a professional.
Unusual noises, persistent odors, or recurring blockages often point to hidden buildup, vent issues, or fixture problems that require targeted remedies.
Signs that the obstruction is in the main line or sewer—multiple drains backing up, sewage odors, or gurgling toilets—should prompt immediate professional assessment.
Persistent slow drain after DIY attempts and next actions
When a tub remains slow after basic DIY fixes, further diagnosis and more decisive measures are required to prevent recurring backups and water damage.
Inspect the overflow and accessible trap for obstructions, test flow with a hose, and use a motorized auger or call a professional plumber if resistance persists.
Document patterns, avoid chemical overuse, and schedule timely repairs to protect pipes and fixtures.
Strange noises, odors, or recurring clogs: root causes
After basic fixes fail and visible blockages are cleared, attention should turn to odd sounds, persistent smells, or repeated clogs, which often signal deeper issues.
These symptoms typically stem from trapped debris or degraded trap seals, venting problems causing gurgling, biofilm buildup producing odors, or failing fixtures allowing debris backflow.
Inspect traps, clean overflow channels, and test vents before calling a pro.
When the clog is in the main line or sewer (signs to watch for)
How can one tell the difference between a localized tub clog and a blockage in the main sewer line?
Signs include simultaneous backups in multiple fixtures, gurgling drains, slow drains throughout the house, sewage odors outside or in the yard, and toilets that bubble or overflow when the tub is used.
Persistent issues after plunging or snaking indicate a main-line problem requiring professional attention.
Comparison of Methods by Speed, Cost, and Safety
Although speed, cost, and safety often conflict, evaluating tub-drain clearing options requires weighing trade-offs among those three factors to choose the most appropriate method for a given situation. Simple methods are low-cost but slower; mechanical tools are fast but risk damage; chemicals act quickly yet pose hazards. Choose based on clog severity, tool availability, and safety precautions.
| Method | Speed | Safety |
|---|---|---|
| Plunger | Medium | High |
| Drain snake | Fast | Medium |
| Chemical cleaners | Fast | Low |
| Baking soda/vinegar | Slow | High |
| Professional service | Fast | High |
Conclusion
Before starting, the reader checks safety, gathers tools, and clears the area. They plunge to dislodge, remove stoppers to scrape away gunk, and fish obstructions with a hanger or snake. They vacuum stubborn debris, run water to confirm flow, and adopt habits to prevent buildup. When simple fixes fail, they troubleshoot or call a pro. By acting promptly, using the right method, and maintaining drains, blockages become manageable.