How Do I Know If My Shower Cartridge Is Bad? 7 Signs and Quick DIY Tests
If you suspect your shower cartridge is bad, look for these key signs: persistent dripping after turning off the water, fluctuating temperatures, a stiff or loose handle, reduced water pressure, unusual noises, or damp spots near the valve indicating leaks. To confirm the issue, conduct simple DIY checks such as a visual inspection, handle movement test, flow comparison, temperature balance, and a dye leak test. For detailed steps and advice on when to replace the cartridge or call a professional, read on.
What a Shower Cartridge Is and Why It Matters
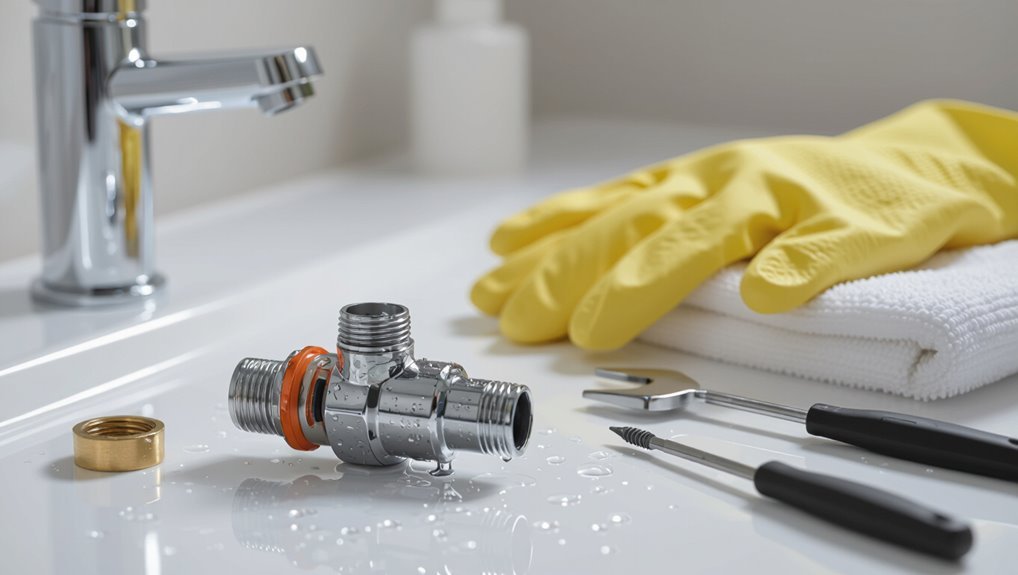
A shower cartridge is the internal component that controls water flow and temperature in single-handle and mixer valves, translating handle movement into precise pressure and temperature changes.
Cartridges come in several common types (ball, ceramic disc, and cartridge-style) and materials (brass, plastic, ceramic), each affecting performance and repairability.
Typical lifespans range from a few years to over a decade, with durability influenced by water quality, usage frequency, and installation quality.
Function of a shower cartridge in single-handle and mixer valves
One component inside single-handle and mixer valves controls water flow and temperature by directing hot and cold supplies through precision ports.
The cartridge balances pressures, seals channels, and translates handle movement into proportional mixing.
Observing uneven temperatures, leaks, or stiff operation prompts the question how do i know if my shower cartridge is bad, signaling inspection or replacement to restore proper valve function.
Common cartridge types and materials
When signs like uneven temperatures or stiffness point to cartridge trouble, identifying the specific cartridge type and material helps determine repair or replacement options.
- Ceramic disc: durable, smooth operation, common in modern faucets.
- Ball valve: metal, single-handle, prone to wear and leaks.
- Cartridge (plastic/metal): varied manufacturers, often replaceable.
- Compression: older style, rubber seals that degrade over time.
Typical lifespan and factors that affect durability
Longevity depends on materials, water quality, and usage patterns; most shower cartridges last between 5 and 15 years under typical residential conditions.
Ceramic disc cartridges generally endure longer than plastic or nylon ones.
Hard water, high mineral content, corrosive chemistry, heavy daily use, and poor maintenance shorten service life.
Proper filtration, periodic cleaning, and gentle operation extend reliability and delay replacement needs.
Quick Answer: How to Tell If Your Shower Cartridge Is Bad
The most reliable immediate signs of a failing shower cartridge are inconsistent water temperature, leaking around the handle, and reduced or uneven water flow.
These symptoms typically appear during normal use and signal mechanical wear or seal failure.
Checking for these issues first helps prioritize further inspection or replacement.
Most reliable immediate signs to watch for
Frequently, the most reliable immediate signs that a shower cartridge is failing are sudden temperature fluctuations, persistent leaks around the handle or spout, and stiff or erratic handle movement; these indicators point to worn seals, damaged stems, or internal corrosion that prevent proper flow control.
Additional signs include low water pressure, banging noises, uneven spray, or mineral buildup on components—each suggests internal obstruction or seal failure needing inspection.
Seven Clear Signs Your Shower Cartridge Is Failing
A failing shower cartridge often announces itself through a handful of clear, observable symptoms that warrant inspection or replacement.
Common indicators include:
- Dripping or constantly running shower after shut-off
- Inconsistent or fluctuating water temperature
- Stiff, hard-to-move or loose handle operation
- Low water pressure coming from the showerhead
Additional signs such as strange noises (whistling or banging) when the valve is on further confirm cartridge wear and should prompt action.
Dripping or constantly running shower after shut-off
Noticeable dripping or a trickle continuing after the handle is turned off often indicates a worn or damaged shower cartridge.
Persistent flow despite closed position signals failed seals, O-rings, or internal valve wear. Users may hear water running in pipes or notice higher water bills.
Replacement or rebuild of the cartridge typically stops the leak; testing involves isolating supply and inspecting cartridge components.
Inconsistent or fluctuating water temperature
Beyond persistent dripping, another common sign of cartridge failure is inconsistent or fluctuating water temperature.
Sudden shifts between hot and cold or inability to hold a set temperature often indicate worn seals, internal corrosion, or a damaged ceramic cartridge. These faults disrupt pressure balance or mixing function.
Quick tests include observing changes when other fixtures run and cycling the handle to detect irregular responses.
Stiff, hard-to-move or loose handle operation
Feel the handle bind, stick, or wobble, and the problem likely lies inside the cartridge. Reduced smoothness, sudden stiff spots, or excessive free play indicate worn seals, mineral buildup, or damaged splines.
Operation should be fluid with firm, predictable detents. If lubrication and tightening the trim don’t restore normal feel, cartridge inspection or replacement is warranted to prevent further wear and leaks.
Low water pressure coming from the showerhead
After handling a stiff or loose handle, reduced water flow at the showerhead is another common indicator that the problem sits in the cartridge.
Mineral buildup, worn seals, or a partially clogged cartridge restricts passageways, lowering pressure despite normal supply.
Simple tests: remove aerator/flow restrictor, operate other fixtures, then inspect cartridge for debris or damage and replace if cleaning doesn’t restore flow.
Strange noises (whistling, banging) when valve is on
Why is the shower suddenly singing or clanking when the valve is turned on?
Strange noises—whistling, knocking, or banging—often indicate internal cartridge wear, loose components, or turbulent flow through damaged seals.
Intermittent sounds that change with handle position point to cartridge faults rather than piping.
Inspecting and replacing the cartridge usually resolves vibration and flow disruption causing the noises.
Visible mineral buildup or corrosion at the valve area
Noises from a worn cartridge can be accompanied by more visible signs of deterioration: mineral buildup and corrosion around the valve area.
White, chalky deposits or greenish rust near the cartridge, escutcheon, or screws indicate hard water scaling or metal oxidation. Such deposits can impede cartridge movement, degrade seals, and signal the need for cleaning, descaling, or cartridge replacement to restore proper function.
Leaks behind the wall or wet spots near the valve
Leaks behind the wall or wet spots near the valve are a clear, often serious indicator that a shower cartridge is failing.
Persistent dampness, peeling paint, or soft drywall indicate internal leakage. Water stains may appear intermittently with use.
Ignoring these signs risks mold and structural damage. Immediate inspection and cartridge replacement or valve repair prevent escalation and higher repair costs.
Quick DIY Tests You Can Do Before Replacing the Cartridge
Before replacing the cartridge, a few quick DIY tests can clarify whether the cartridge is at fault or if the problem lies elsewhere. Suggested checks include a brief visual inspection with safe trim removal, handle movement testing, flow/pressure comparison with other fixtures, temperature balance checks, and a dye test for hidden leaks:
- Remove trim carefully and inspect for cracks, mineral buildup, or loose seals.
- Test handle movement to see if play or stiffness is from the cartridge or handle hardware.
- Compare flow and pressure at other fixtures and run a temperature balance test to rule out water heater or mixing issues.
Visual inspection: what to look for and how to remove the trim safely
When diagnosing a malfunctioning shower cartridge, a careful visual inspection of the trim and exposed valve body can reveal corrosion, mineral buildup, cracked plastic, or worn seals that indicate cartridge failure.
Turn off water, remove decorative caps with a flat tool, unscrew handles and escutcheon plate, then inspect the valve cavity.
Note debris, leaks, or distorted components before proceeding.
Handle movement test to distinguish cartridge vs. handle hardware issues
A simple handle movement test helps determine whether a problem stems from the cartridge or from loose, worn, or misaligned handle hardware.
With trim removed, observe handle travel: stiffness, wobble, or uneven resistance.
Rotate and lift slowly; if motion feels inconsistent but cartridge body remains fixed, hardware likely; if internal resistance or binding occurs at the cartridge interface, the cartridge is the culprit.
Flow and pressure check using other fixtures for comparison
If the handle movement test points away from loose trim or linkage, the next step is to check flow and pressure using other fixtures to determine whether the issue is localized to the cartridge or reflects a broader plumbing problem.
Run a nearby sink and another shower simultaneously, note flow strength and pressure drops, and compare.
Consistent low pressure indicates supply or valve issues; isolated low flow suggests a faulty cartridge.
Temperature balance test to rule out water heater or mixing issues
How can one verify that temperature problems stem from the cartridge rather than the water heater or mixing system?
Compare shower temperature to other hot fixtures: run a faucet and note stability and max temperature.
Inspect water heater settings and test hot and cold separately at the shower by turning off either supply briefly.
Consistent heater output but unstable shower indicates cartridge or valve mixing issue.
Dye test to detect slow leaks behind the wall
Several simple dye tests can reveal slow leaks behind the shower wall without immediately removing the cartridge.
A few drops of food coloring or dye placed in the tub or spout followed by drying surrounding drywall and a wait period can show seepage.
Inspect grout, baseboards, and nearby ceilings for color transfer. Document timing and repeat to confirm intermittent leaks.
Mineral-cleaning test to see if buildup is the only issue
Run a mineral-cleaning test to determine whether lime and hard-water deposits—not a failing cartridge—are causing poor water flow or sealing problems.
Remove the cartridge per manufacturer instructions, inspect for white or crusty buildup, and soak parts in vinegar or a descaler for 30–60 minutes.
Rinse, brush gently, reassemble, and retest. If issues persist, consider cartridge replacement.
Step-by-Step Guide to Inspecting and Removing a Shower Cartridge
This section outlines the practical steps and precautions for inspecting and removing a shower cartridge, including the tools required and basic safety measures.
It covers shutting off water, relieving pressure, and removing trim and escutcheon without causing damage. Then, it explains how to extract the cartridge while noting its orientation for reinstallation.
Finally, it explains how to examine the cartridge for wear, scoring, and damaged seals to determine if replacement is needed.
Tools and safety precautions needed
A compact set of basic tools and a few safety precautions guarantee the cartridge inspection and removal proceed efficiently and without injury.
Required tools: adjustable wrench, flathead and Phillips screwdrivers, cartridge puller or pliers with cloth, Allen key set, bucket, towels, and penetrating oil.
Safety: wear gloves and eye protection, use non-slip footwear, protect finished surfaces, and keep a phone nearby for emergencies.
How to shut off water and relieve pressure
With tools at hand and safety measures in place, attention turns to stopping the water and releasing built-up pressure before touching the cartridge.
Locate and close the fixture’s shutoff valves or the home main valve. Open the shower handle to drain remaining water.
Depress any nearby hose bibs or lowest faucets to fully relieve pressure. Confirm no flow before proceeding.
Trim and escutcheon removal without damage
Several simple steps protect the finish and surrounding tile during trim and escutcheon removal.
Begin by covering fixtures and tile with painter’s tape and a soft cloth.
Carefully remove handle trim screws, noting screw types and locations.
Gently pry escutcheon edges with a plastic pry tool to avoid scratching.
Keep removed screws and small parts organized in a labeled container for reassembly.
Extracting the cartridge and noting orientation for reinstallation
Once trim and escutcheon are protected and removed, the cartridge extraction begins by shutting off water and relieving remaining pressure at the shower valve.
The operator removes retaining clips or nuts, then uses pliers or a dedicated puller to extract the cartridge straight out.
The cartridge’s orientation—tabs, flat sides, alignment marks—is photographed or marked for accurate reinstallation.
Handle gently to avoid damage.
How to inspect the cartridge for wear, scoring, and seals
Begin by visually and tactilely examining the cartridge for obvious damage: look for deep grooves, scoring on the metal or plastic surface, deformed or missing O-rings and seals, and build-up of mineral deposits or corrosion around ports and spindles.
Check shaft straightness, test O-rings for elasticity, probe seals for cracks, and inspect valve faces for pitting.
Note wear patterns and replace compromised components.
How to Decide Between Cleaning, Repairing, or Replacing
Assessment should start with identifying simple fixes—worn seals or O-rings—that can be replaced quickly and inexpensively.
If visible mineral buildup is the issue, soaking and scrubbing the cartridge often restores function without further work.
When internal damage, persistent leaks, or repeated failures occur, a full cartridge replacement is usually the faster and more cost-effective option than ongoing repairs.
When a simple seal or O-ring replacement is sufficient
Several common shower cartridge issues can be resolved by replacing worn seals or O-rings rather than taking more invasive steps.
Leaking at the handle, minor drips, or stiffness from hardened rubber often indicate degraded seals. If the cartridge body shows no cracks and operation otherwise feels normal, swapping O-rings and lubing with plumber’s grease typically restores function without full replacement.
When cleaning mineral deposits can restore function
Determine whether mineral buildup is the likely cause by inspecting the cartridge for white or crusty deposits, reduced flow, or rough movement when the handle is operated;
if the body is intact and seals appear sound, soaking and gently scrubbing the cartridge often restores smooth operation and water flow without the need for replacement.
Use vinegar or a commercial descaler, brush crevices, rinse thoroughly, and test before reinstalling.
When full cartridge replacement is recommended
If cleaning and minor repairs fail to restore smooth operation or leak-free performance, a full cartridge replacement should be considered.
Replace when cracks, warped seals, irreparable corrosion, or persistent dripping remain after troubleshooting.
Also opt for replacement if the cartridge model is obsolete, internal components disintegrate during inspection, or water pressure and temperature control are unpredictably inconsistent despite valve and supply checks.
Cost and time comparison of repair vs. replacement
When weighing whether to clean, repair, or replace a shower cartridge, cost and time are the primary practical considerations guiding the decision. Simple cleaning: low cost, short time. Repair: moderate cost, moderate time. Replacement: higher cost, longer time but durable.
| Option | Cost | Time |
|---|---|---|
| Clean | Low | Short |
| Repair | Medium | Moderate |
| Replace | High | Long |
Choosing the Right Replacement Cartridge
Selecting the correct replacement cartridge begins with confirming the model number and critical measurements to guarantee a proper fit.
The choice between universal and OEM cartridges hinges on factors like cost, ease of installation, and long-term reliability, so readers should compare pros and cons.
A brief compatibility checklist for major brands (Moen, Delta, Kohler, American Standard) plus guidance on reputable retailers and review indicators will help finalize the purchase.
How to identify the correct model number and measurements
How can a homeowner be certain the replacement cartridge will fit? Measure cartridge length, diameter, spline count, and inlet/outlet spacing.
Note stamped model numbers on the old cartridge or valve body and photograph any markings.
Record handle type and mounting style.
Consult manufacturer parts lists or local plumbing supply with measurements and photos to match model-specific dimensions before purchasing.
Universal vs. OEM cartridges: pros and cons
Although both universal and OEM cartridges restore function, they differ in fit, longevity, and warranty support.
Universal cartridges offer broader compatibility and lower cost but may require adjustments, risk leaks, and have shorter lifespans.
OEM cartridges guarantee precise fit, manufacturer-tested performance, and fuller warranties, typically at higher price.
Choice balances budget, installation skill, and desired reliability.
Compatibility checklist for common brands (Moen, Delta, Kohler, American Standard)
Compatibility across brands hinges on a few clear factors: model number, cartridge type (ball, cartridge, ceramic disc), handle configuration, and valve dimensions.
- Verify OEM model stamp or stamped valve code.
- Match cartridge length, diameter, and spindle shape.
- Confirm handle/trim compatibility and rotation direction.
- Check cross-reference charts for Moen, Delta, Kohler, American Standard before ordering.
Where to buy and what to look for in reviews
After confirming the correct cartridge type and dimensions, the next step is selecting a reliable source and using reviews to verify quality and fit.
Purchase from manufacturer websites, authorized dealers, or reputable retailers with clear return policies.
In reviews, prioritize comments about fit, durability, and genuine OEM labeling; watch for consistent complaints, photos of installations, and seller responsiveness before buying.
DIY Cartridge Replacement: Step-by-Step
The following steps outline a concise DIY cartridge replacement process, starting with preparing the workspace and confirming all required parts and tools are on hand.
They cover removing the old cartridge, installing the new one, testing for leaks, and reassembling trim while calibrating handle movement.
Final checks include verifying proper temperature range and water pressure before finishing the job.
Preparing the workspace and parts checklist
Start by clearing and organizing a dry, well-lit area near the shower to keep removed parts and tools visible and accessible.
Gather replacement cartridge, O-rings, plumber’s grease, cartridge puller or pliers, adjustable wrench, screwdrivers, Allen keys, rags, bucket, and tape.
Shut off water and note handle orientation.
Lay parts in order of removal and photograph assemblies for reference.
Installing the new cartridge and testing for leaks
Fit the new cartridge into the valve body, aligning any tabs or orientation marks to match the removed unit, and seat it fully so it sits flush against the stop and guides.
Replace retaining clip or nut per manufacturer torque guidance.
Reinstall trim temporarily if needed, turn water on slowly, inspect for leaks at cartridge seam, supply lines and bonnet.
Operate handle through range; recheck.
Reassembling trim and calibrating handle movement
Once the cartridge has been inspected for leaks and the handle cycled to confirm proper operation, attention returns to reinstalling the trim and setting handle travel.
Secure the escutcheon and trim screws without over-tightening.
Refit the handle, align any index markers, and adjust travel stops or limit screws so rotation and tilt match desired flow and temperature ranges.
Test movement for smooth, full range.
Post-installation checks for temperature and pressure
How should the finished installation be verified for safe, reliable performance?
The installer tests temperature limits by running hot and cold separately, confirming expected extremes and a smooth changeover at mixed settings.
Pressure is checked for steady flow, no pulsation, and equal supply balance.
Inspect for leaks, adjust stops or limit screws, then recheck temps and pressure under normal user conditions.
When to Call a Professional Plumber
If persistent dripping, unexplained water stains, or moisture behind walls appears, a professional should assess the possibility of hidden leaks or valve body damage.
Complex plumbing setups, manufacturer warranty rules, or unfamiliar mixed-valve systems also warrant expert intervention rather than DIY fixes.
The technician’s visit typically includes inspection, diagnostic testing, repair or replacement recommendations, and an upfront cost estimate reflecting parts and labor.
Warning signs that indicate hidden leaks or valve body damage
When should a homeowner suspect that a simple cartridge problem has escalated into a hidden leak or valve body damage?
Persistent damp spots, staining or mold on walls/ceilings near the shower, unexplained water bills, or soft/warped flooring suggest hidden leaks.
Difficulty securing the handle, metal corrosion, or visible cracks in the valve body indicate structural damage.
These signs warrant calling a professional plumber promptly.
Complex systems and warranty considerations
Although many cartridge issues are straightforward, complex valve assemblies, multi-function shower systems, and manufacturer warranty terms often require professional assessment.
A licensed plumber can evaluate intricate plumbing configurations, document damage for warranty claims, and perform repairs without voiding coverage.
Homeowners should call a professional when systems are unfamiliar, warranties restrict DIY work, leaks are hidden, or electronic/thermostatic controls are involved to avoid further damage.
What to expect from a professional service visit and typical costs
After recognizing situations that merit professional involvement—complex valve setups, warranty constraints, hidden leaks, or electronic/thermostatic controls—homeowners can expect a structured service visit: a licensed plumber will begin with a visual inspection of the trim and access points, shut off water to isolate the valve, remove and assess the cartridge or internal components, test related supply lines and pressure, and provide a diagnosis with repair or replacement options and a written estimate.
Typical costs range from modest diagnostic fees to higher labor and parts charges depending on complexity, usually $75–$250 for diagnosis and minor repairs, $200–$600+ for cartridge replacement or complex valve work.
Prevention and Maintenance to Extend Cartridge Life
Preventive care can greatly extend a shower cartridge’s service life by addressing mineral buildup, water quality, and routine inspections.
Recommended actions include:
- Regular cleaning and descaling.
- Installing and maintaining filters or water softeners.
- Following manufacturer maintenance intervals.
- Performing seasonal checks and gentle handle care.
Regular cleaning and descaling recommendations
Regular cleaning and periodic descaling greatly reduce mineral buildup and extend a shower cartridge’s service life.
Owners should remove trim, inspect seals, and soak cartridge components in a vinegar solution or manufacturer-approved descaler to dissolve deposits.
Rinse thoroughly, replace damaged O-rings, and reassemble.
Perform light cleaning every few months and deeper descaling annually or when flow and temperature responsiveness decline.
Water quality solutions: filters, softeners, and maintenance intervals
Beyond cleaning and descaling, controlling incoming water quality further protects cartridges by reducing the minerals and particulates that cause wear and clogs.
Installing a sediment filter and a point-of-use carbon filter removes debris and chlorine; a water softener mitigates hard-water scaling.
Recommended maintenance: replace sediment/carbon cartridges every 6–12 months and service softeners annually, or sooner if flow or pressure declines.
Seasonal checks and handle care tips
Seasonally inspecting the shower assembly helps catch wear before it becomes a failure: check for drips, mineral buildup around the trim, and smooth operation of the handle each change of season.
Lubricate moving parts with plumber-approved grease, tighten loose screws, and replace worn trim seals.
Note stiffness, sticking, or play in the handle—address promptly to prevent cartridge stress and premature failure.
Troubleshooting Quick Reference Chart
A concise quick-reference chart helps identify common cartridge problems, their likely causes, a simple DIY test, and the recommended action. The table below summarizes four typical symptoms with clear next steps. Users can match what they observe to the chart to determine whether a repair or replacement is needed.
| Symptom | Probable Cause | Recommended Action |
|---|---|---|
| No water or weak flow | Mineral clog or debris in cartridge | Inspect and run a flow test; clean or replace cartridge |
| Water drips when off | Worn seals or valve seat | Perform shut-off and leak test; replace cartridge/seals |
| Temperature fluctuates | Faulty thermostatic element or mixing valve | Test with separate hot/cold supply; replace cartridge |
Symptom, probable cause, DIY test, and recommended action
Consult the troubleshooting quick reference chart to match common shower symptoms with likely cartridge causes, simple DIY tests, and recommended actions. The chart summarizes concise checks and next steps so users can diagnose leaks, temperature issues, or stiffness quickly and decide repair or replacement.
| Symptom | Action |
|---|---|
| Leak | Inspect O-rings, replace |
| No hot | Test valve, clean or replace |
| Stiff handle | Lubricate or replace cartridge |
| Fluctuating temp | Check cartridge, adjust/replace |
Conclusion
A faint drip becomes a whisper, then a rush—there is a moment when a failing cartridge reveals itself. Homeowners might delay, imagining a simple fix, yet the signs—temperature swings, stiffness, leaks—demand attention. Before reaching for a wrench, one last careful inspection can decide whether repair will suffice or replacement is inevitable. Act before that quiet drip becomes an unmistakable failure; the longer it waits, the costlier the outcome.